5.6.1.7.1 Designating a Trusted Pair

You designate a Trusted Pair on the Event Details page.

Note:

The Designate Trusted Pairs icon in the Event List grid will only display for users with a Designate Trusted Pairs permission.

To designate a Trusted Pair, follow these steps:
  1. Navigate to Case Search and List page.
  2. Click the Case ID link.
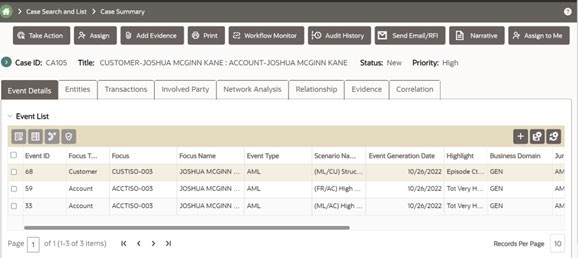
    The Case Summary page is displayed.
  3. Select one or more Event IDs.

    Figure 5-19 Event Details


    Event Details

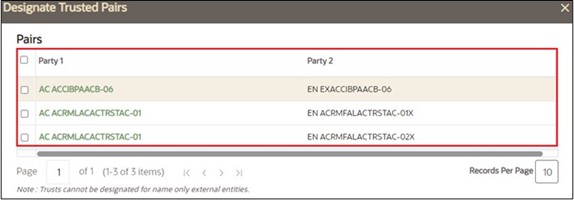
  4. Click Designated Trusted Pairs. The Designate Trusted Pairs window displays the parties found on each transactions related to the events on the case.

    Note:

    • Trusts cannot be designated for cash transactions.
    • Trusts cannot be designated for external entities which only contain a name.

    Figure 5-20 Designate Trusted Pairs page


    Designate Trusted Pairs page

  5. Select the parties you want to include in this trust. You can select one or more records to establish a trust

    Figure 5-21 Designate Trusted Pairs page


    Designate Trusted Pairs page

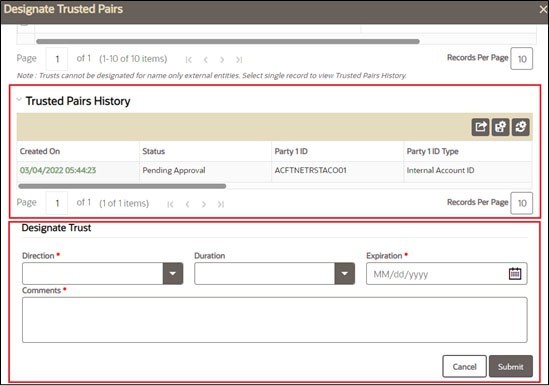
    The Trusted Pairs History and Designate Trust sections are displayed.

    Figure 5-22 Trusted Pairs History and Designate Trust page


    Trusted Pairs History and Designate Trust page

    • Trusted Pair History grid: This grid displays any trusts made for the selected pairs, actions taken by Admin users on the selected pairs, and any changes made during the duration of the requested trust.

    Note:

    Select a single record to view the Trusted Pairs History.
  6. Designate Trust grid: Select the Direction from the drop-down list (Send/Receive/Both).
    • Send > Party 1 sending money to Party 2
    • Receive > Party 1 receiving money from Party 2
    • Both > Exchanging Money from Party 1 to Party 2 OR Party 2 to Party 1.
  7. Select 3, 6, 9 or 12 months from the Duration from the drop-down list. Administrator can configure additional Durations to display in this list. For more information, see the Administration and Configuration Guide.
  8. Select the Expiration Date. If both the duration and the expiration are selected, the expiration overrides the duration.
  9. Enter any Comments if needed.
  10. Click Submit.
    On Submit, the trust is sent for approval. All trusted pairs must be reviewed and approved or rejected. For more information on how that is done, see Taking Action on Trusted Pair Requests.