3.19.4 Standard Process with only Rate Propagation
This preference will help you with a guided path to propagate Prior Period Transfer/Add-On Rates to Current Period as per the defined propagation Pattern.
If you have already loaded Rates for few of the Accounts, you also have an option to skip those Accounts and keep loaded Rates intact.
After you select Do you only want to Propagate Rates and Charges? and click Let’s Start, a Guided process set up will get initiated and the Process Details Screen will be displayed.
- Enter the relevant details. For more information, see the Process Details Section.
- Click Apply to display the Calculation Selection Screen.
- Select the relevant options out of following for Rate propagation from last
period:
- Transfer Rate Propagation: Select Transfer Rate
Propagation and click the Settings icon to
select the Rate need to be propagated.
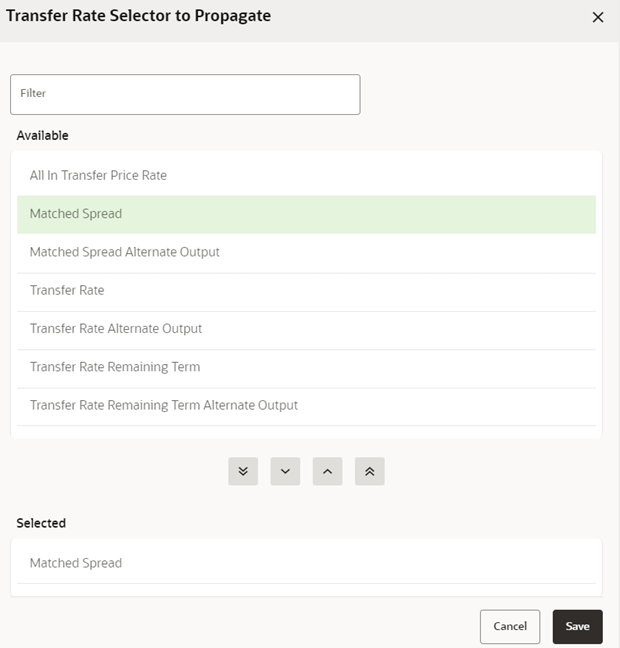
Figure 3-101 Transfer Rate Selector to Propagate

- Select the relevant option for the Transfer Rates that you want to propagate from the Available block and use the Move buttons to move them to the Selected block.
- Click Save.
- Skip Non-Zero Transfer Rate Records: This field is enabled when you select Transfer Rate Propagation. Select this option (optional) if you have already populated Transfer Rates through a separate process and would like to keep the accounts with valid rate intact.
- Add-On Rate Propagation: Select this option (optional) to pull the Add-On Rates from a prior period based on the Propagation Pattern definition. Alternatively, you can click the icon to select the Add-On Rate need to be propagated.
- Skip Non-Zero Add-On Rate Records: This field is enabled when you select Add-On Rate Propagation. Select this option (optional) if you have already populated Add-On Rates through a separate process and would like to keep the accounts with valid rate intact.
- Click Switch to custom path will help you
if you realize given calculation options in the selected scenario, does not
have all the required calculation options and you would like to customize
the selection.
- When you enable the custom flow, a confirmation message is displayed to confirm the re-routing to custom flow. Click Confirm.
- Click Apply to display the Product Selection screen.
- Enter the relevant details. For more information, see the Product Selection section.
- Transfer Rate Propagation: Select Transfer Rate
Propagation and click the Settings icon to
select the Rate need to be propagated.
- Click Apply to display the Finalize Process Screen. For more information about Finalize Process Screen, see the Finalize Process section.
- After reviewing or editing the selected tile, click Freeze Process to finalize the selections made in the Process Definition Flow.