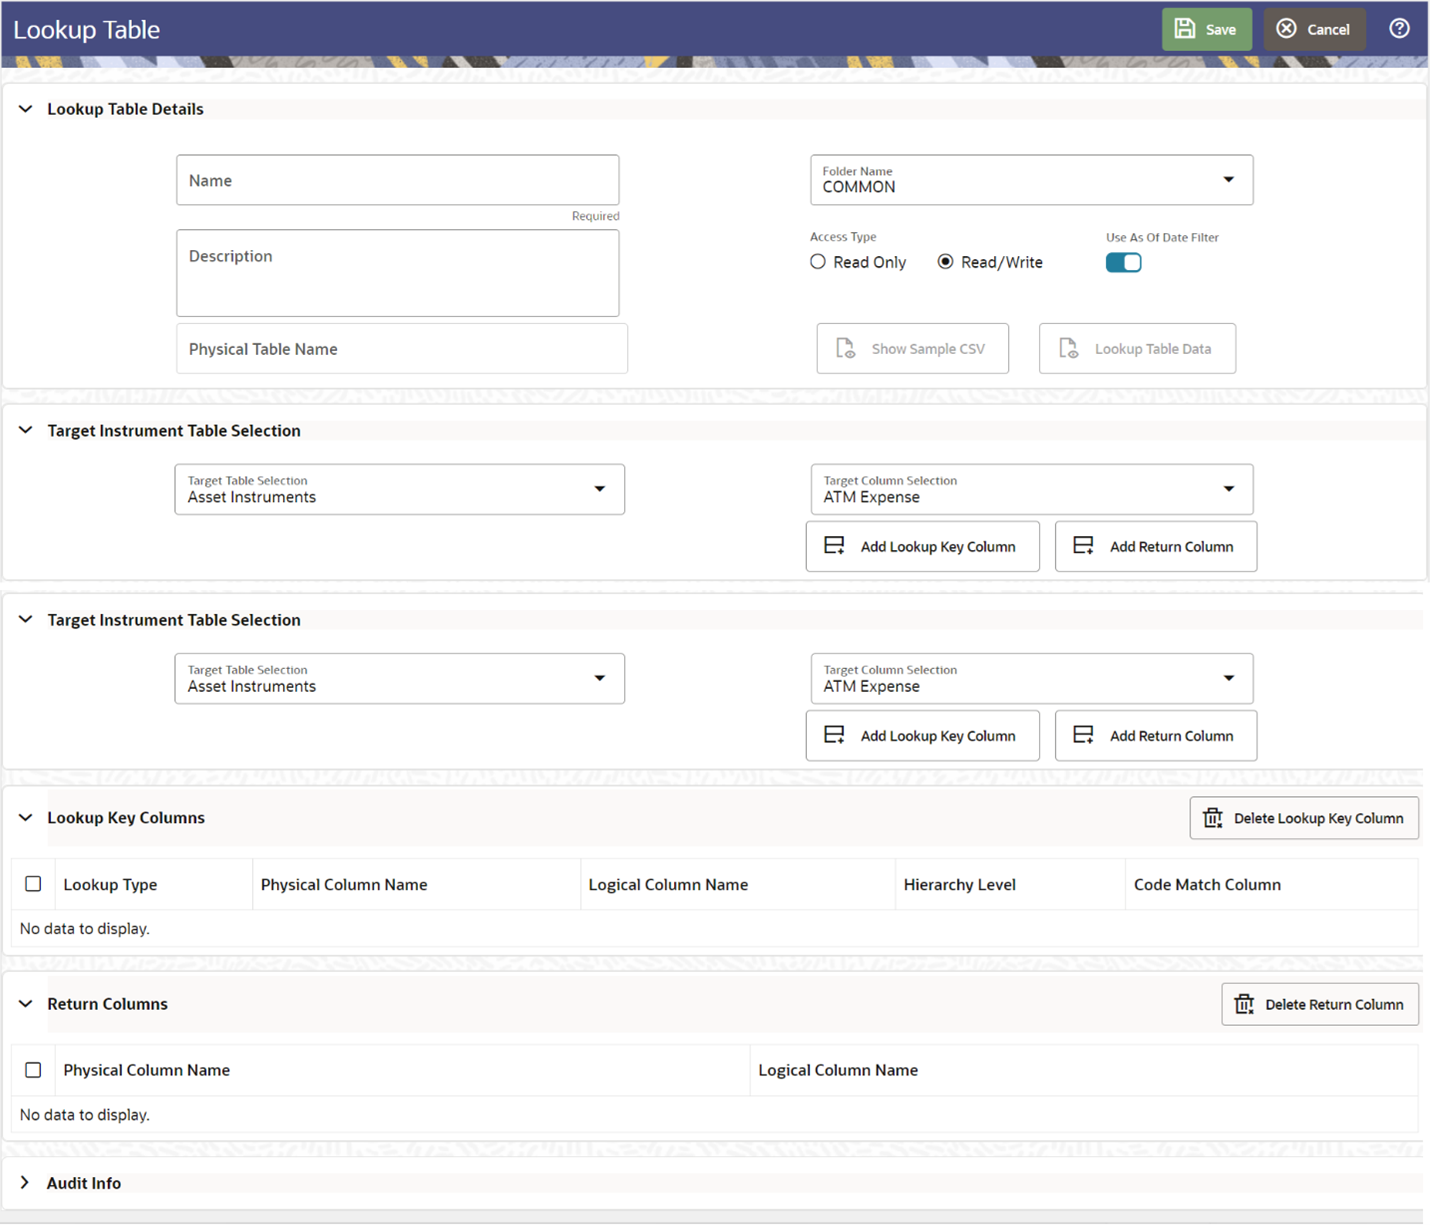
6.3.1 Adding a Lookup Table
To add a Lookup Table:
- Click Add on the title bar.
Figure 6-3 Adding a Lookup Table

- Enter the following details under Lookup Table Details:
- Name
- Folder Name
- Description
- Access Type: Read Only or Read/Write
- Use As Of Date Filter toggle switch: As applicable.
- Enter the following details under Target Instrument Table Selection section:
- Target Table Selection: Select the relevant table that you want to change/update the data.
- Target Column Selection: Seelct the relevant column that you want to set the condition on the selected Target Table.
- Add Lookup Key Column: Select the following options as applicable:
- Exact Match o Range Lookup
- Code Match
- Code Pattern Match
- Hierarchy Match. In this case, you must select the Hierarchy of the
selected Dimension. Only Single node level is allowed in selected
hierarchy.
or
- Add Return Column.
- Enter the following details under Lookup Key Columns section:
- Lookup Type:
- Exact Match
- Range Lookup
The Audit Info part of the screen displays the following details:- Created By
- Created Date
- Modified By
- Modified Date
- Authorized By
- Authorized Date
- Lookup Type:
- Click Save. The newly added Lookup Table definition is added
to the summary screen and displayed.
After the definition is saved, you can select the definition from the summary screen and clickView from Action menu.
You can see the Show Sample CSV and Lookup Table Data buttons are enabled.
When you click the Show Sample CSV button, the system downloads a CSV file. You can feed the details in this sheet.
When you click the Lookup Table Data button, the system displays the Lookup Table Data in edit mode.
From this screen, you can manually Add or Delete a row, export or import a CSV file. Click Import, navigate to the location where you have your XLS file, select and import.