9.1 Data Modeling
Data Modeling refers to the process of replicating database objects from a source schema to a target schema. During this process, the structural definitions and metadata of the database objects are transferred to the target environment. This replication ensures that the logical design and structural components of the database are accurately maintained across schemas, supporting development activities for modelers. Database Objects are tables, views, functions, triggers, synonyms, Materialized views, procedures, packages, Sequences, and types.
Figure 9-1 Data Modelling tab
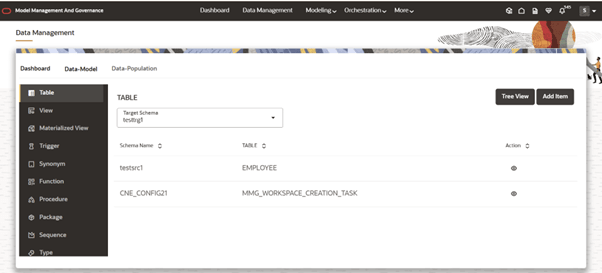
- Database Objects List menu
- The interface displays a list of database object types. Users can select any object type to view the corresponding objects available within the schema.
- Target Schemas Dropdown
- The user can select the target schema from a dropdown menu. Based on the selected target schema, the system will display the corresponding list of database objects—filtered by the selected object type—in the left panel.
- Database Objects List
- A table displays the list of database objects based on the selected
object type and schema. This table includes the source schema name,
object name, and a View option.
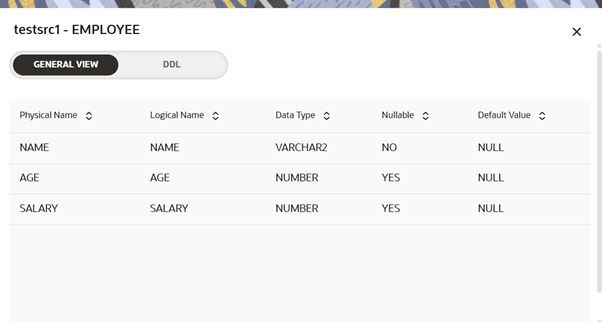
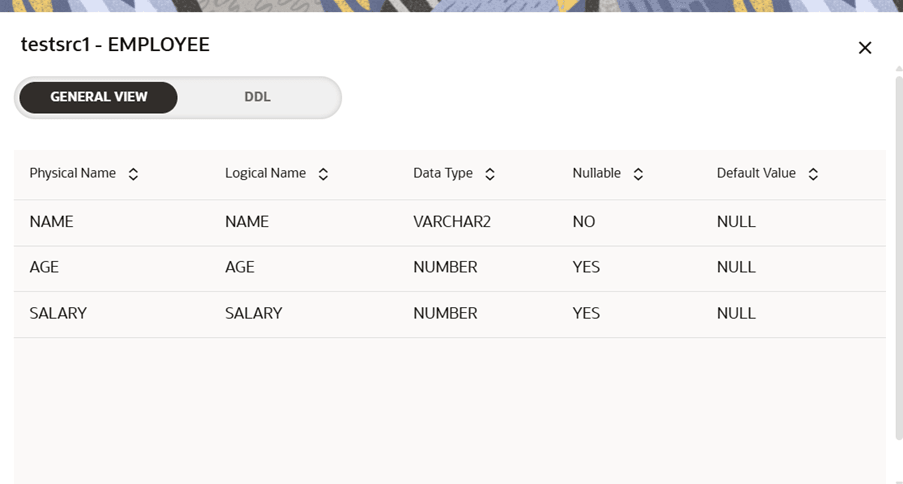
- The View option allows users to view the DDL (Data Definition Language) of the selected database object, along with a Generic View (applicable only for tables and views).
Note:
The Generic View presents a simplified tabular representation containing details such as column name, data type, nullability, and default value. -
Figure 9-2 Data Definition Language View
-
Figure 9-3 Generic View
- A table displays the list of database objects based on the selected
object type and schema. This table includes the source schema name,
object name, and a View option.
- Tree View and Add Item buttons
- Tree View:
- Clicking this option opens a new tab within the Data Management UI, titled [TargetSchemaName] - Modeling.
- This view provides a hierarchical structure to assist users in creating and organizing new data models.
- Add Item:
- This button opens a pop-up window that facilitates data modeling for the selected database object type (as chosen from the left panel).
- Tree View:
- Steps/Process of Data Modeling
- Launch any workspace where you wanted to do Data
Modeling and go to Data
Management tab from main menu.
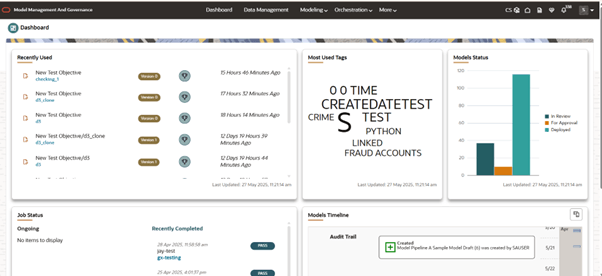
Figure 9-4 Data Management tab from main menu
- Click on Data Model sub-tab.
Figure 9-5 Data Model sub-tab
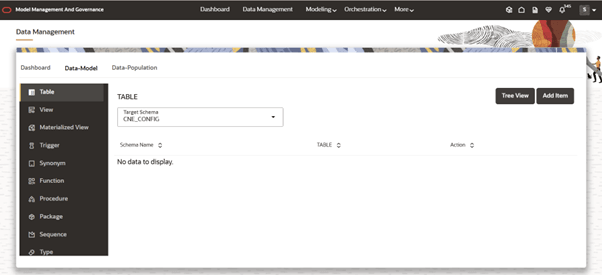
- Now user can see the list of Database objects on left panel, Tree View and Add Item options and a table (Refer to content on Data Modeling tab).
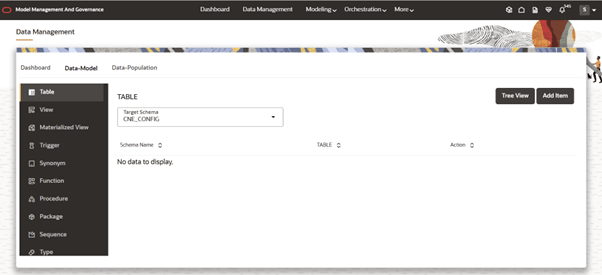
- Click on Tree View button which will open a new
tab within MMG- Data Management UI.
Figure 9-6 Tree View button
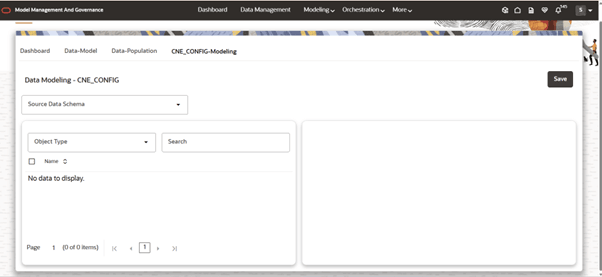
- When a new tab opens, it includes the following components:
- Source Schema Drop down:
- Allows the user to select the desired source schema for Data Modeling. Users can switch between multiple Source Schemas and select the required database objects from each—all in a single Modeling session.
- Left panel:
- Contains an object type drop down and a search bar for filtering.
- Displays a table listing the available database objects based on the selected type and schema.
- Right panel:
- If the user is initiating Data Modeling for the first time, this panel will be empty.
- As the user selects database objects from the Left panel, they will be added to and displayed in the Right panel for further configuration.
Figure 9-7 Left panel and Right panel
- Source Schema Drop down:
- Now the user can choose source schema from where user wants to bring in the database objects.
- After selecting the Source Schema, the user can choose the desired
database object type from the left panel. The table in the left panel
will then display all available database objects that match the selected
type and schema.
Note:
Each database object listed in the table includes an eye icon. Clicking this icon opens a pop-up that provides both the DDL View and the Generic View of the selected object.Figure 9-8 DDL and Generic View of the selected object
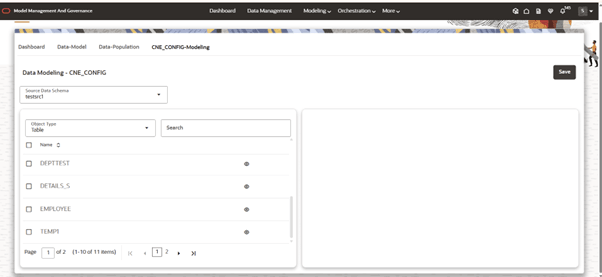
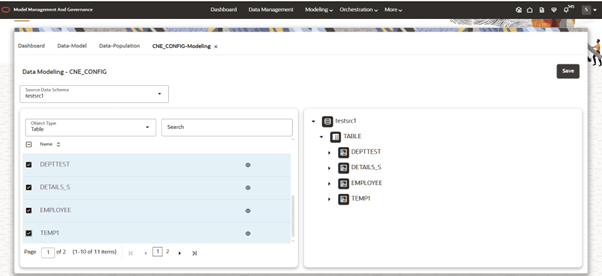
- User can choose the required and the selected ones automatically comes
into the right panel in following structure.
- Source Schema-Name1: DB object type 1, DB Object 1 2, DB Object 2.
- Source Schema-Name2: DB object type 1, DB Object 1 2, DB Object 2.
Figure 9-9 Source Schema Name
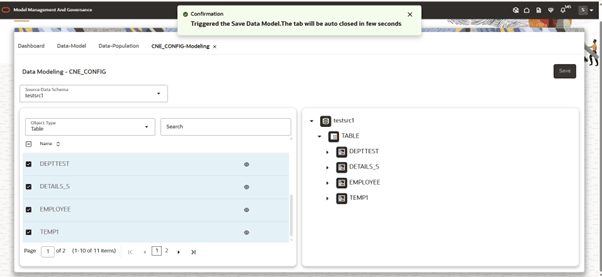
- Once all the required database objects are selected, the user can click
the Save button to initiate the Data Modeling
process. On triggering, a confirmation pop-up will be displayed,
indicating that the Data Modeling process has started. This tab will
automatically close after a few seconds.
Figure 9-10 Save button

Figure 9-11 Confirmation message
Note:
The user can choose database objects from multiple Source Schemas at a time. The user can also choose multiple database object types at a single time.Note:
For a selected Target Schema, if any previous Data Modeling is in progress, the user is not allowed to do another Data Modeling.
- Launch any workspace where you wanted to do Data
Modeling and go to Data
Management tab from main menu.
Purpose of Add Item button
The Add Item button enables users to quickly perform data sourcing for the selected Target Schema and Database Object type. By automating the selection process, it minimizes manual effort and enhances the user experience, making Data Modeling more efficient and user-friendly.
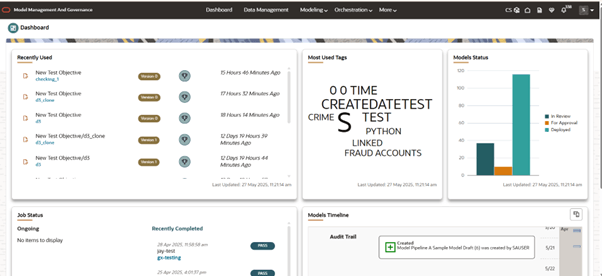
- Launch any workspace where you wanted to do Data Modeling
and go to Data Management tab from main menu.
Figure 9-12 Data Management tab
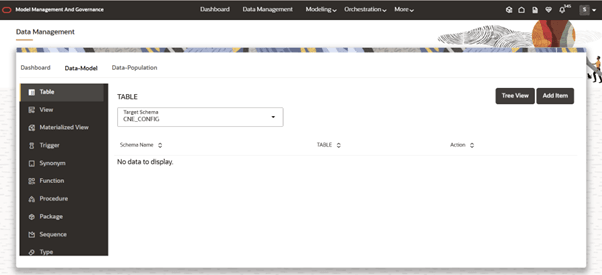
- Click on Data Model sub-tab.
Figure 9-13 Data Model sub-tab

- Now user can see the list of Database Objects on Left panel, Tree View and Add Item options and a table (Refer content on Data Modeling tab).
- Click on Add Item button which will open a pop-up.
A pop-up opens, which contains:
- Source Schema Dropdown
- Database Objects List
Figure 9-14 Add Item button
- In the pop-up, the Database Object Type and
Target Schema fields are preselected by default.
These values correspond to the Object Type and
Target Schema, currently selected in the Left panel
of the Data Modeling screen, ensuring consistency and reducing manual input.
Figure 9-15 Source Schema dropdown

- The user can select the Source Schema and choose the required database objects from the table displayed below.
- Once the selection is complete, clicking the Save button will initiate the Data Modeling process.