Access Model Pipelines
- Navigate to Workspace Summarypage.The page displays workspace records in a table.
- Click Launch next to corresponding Workspace to Launch
Workspace.The Dashboard window is displayed with application configuration and model creation menu.
- In the LHS menu, click Model Pipelines to display the
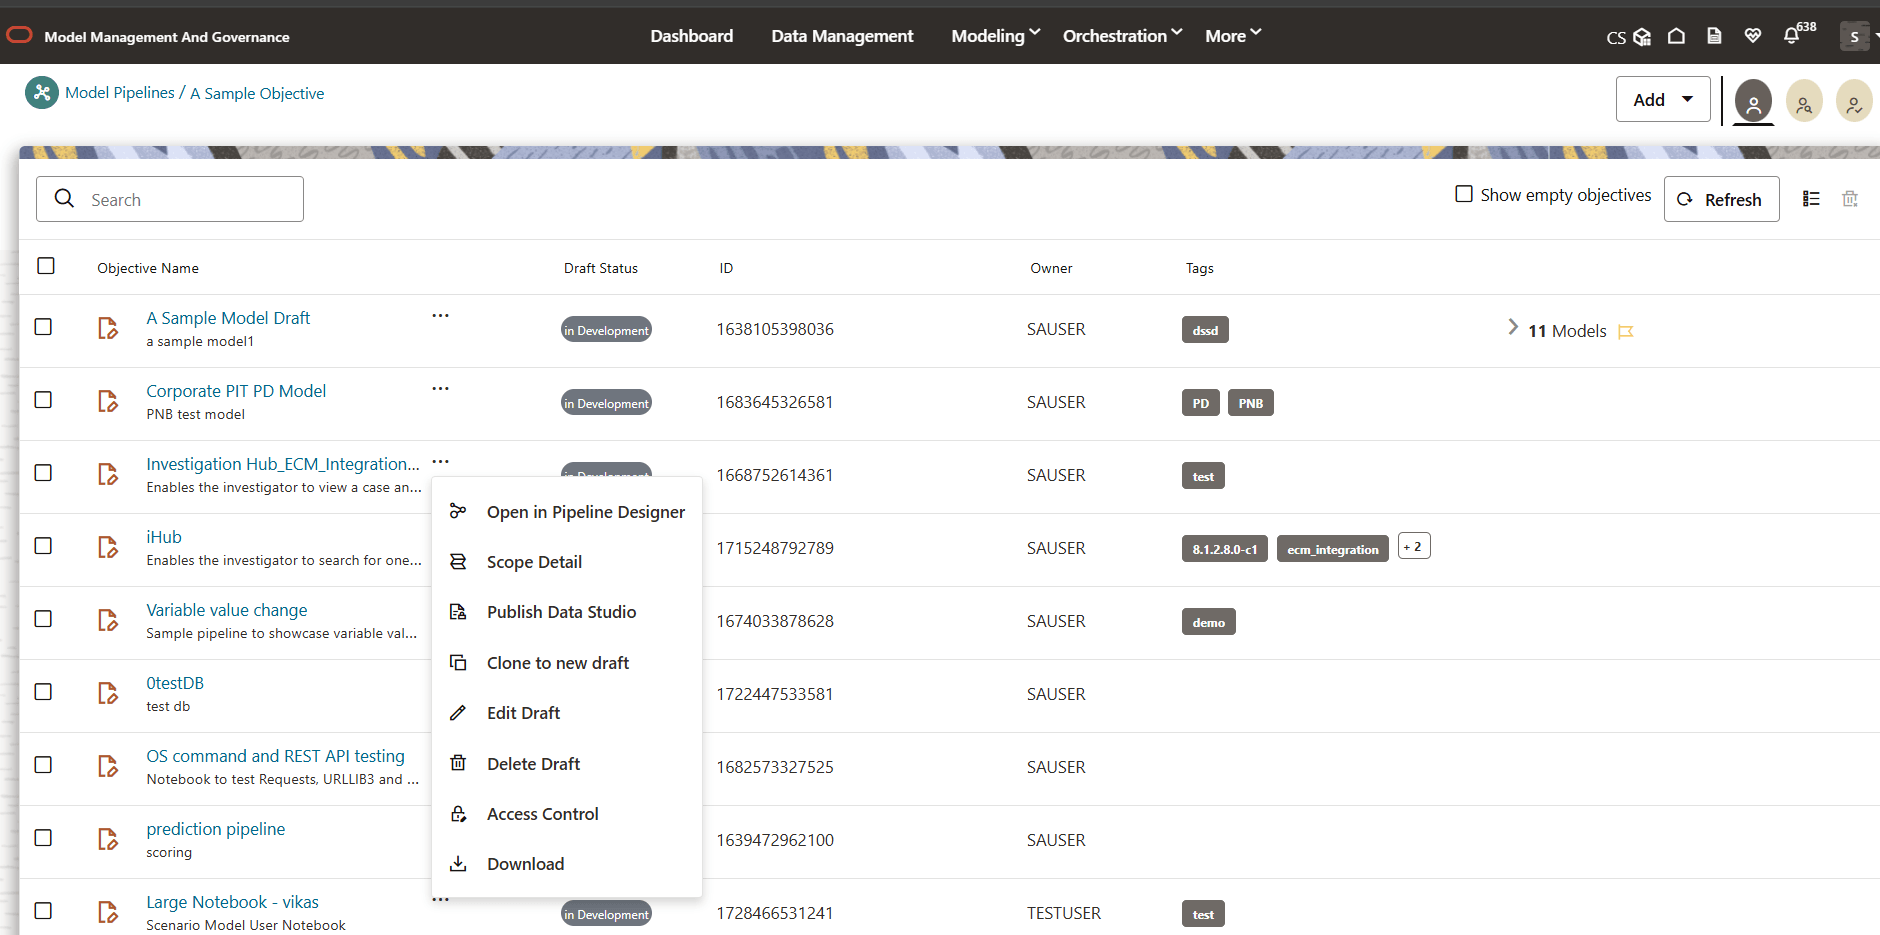
Model Pipelines page. The window displays objectives that contain drafts and models. When you hover on the count that are next to the ID column, it displays the count of sub objectives, Drafts, Models, and Champion if available.
Figure 11-61 Model Pipelines page

Figure 11-62 Dropdown under Hierarchical View

You can switch the Model Summary page view from Flat to Hierarchical and vice-versa. Flat list is the default view in Production workspace while Hierarchical list is the default in Sandboxes.
- Hierarchical option: The Model Management window shows the hierarchical list of the Objectives using the Hierarchical option. In the Hierarchy view, you can see the following details of the Objectives such as Objective Name, and ID.
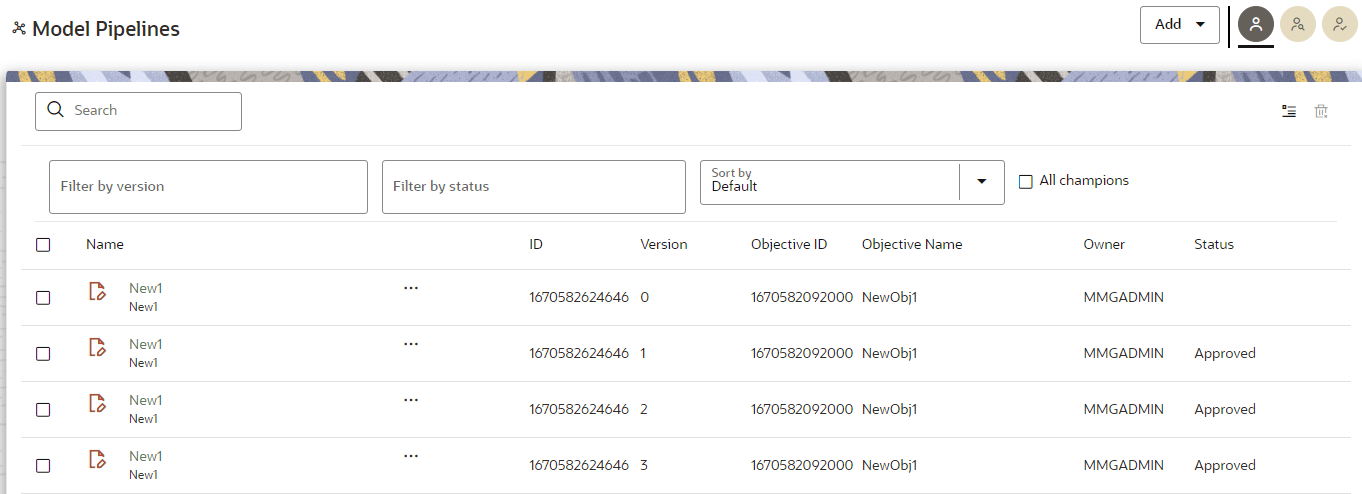
- Flat option: The Model Pipeline
window shows the flat list of all the models (published and drafts)
using the Flat option. Flat list is not
objective-specific. It shows the models across all the objectives. You
can search the models using the Filter by Version, Filter by Status, and
All champions. You can also sort the drafts and models by Default or
Latest first options.
- In the Flat list of models, you can see the
following details of the models such as Name, ID, Version,
Objective ID, Objective Name, Owner, and Status.
Figure 11-63 Model Pipelines

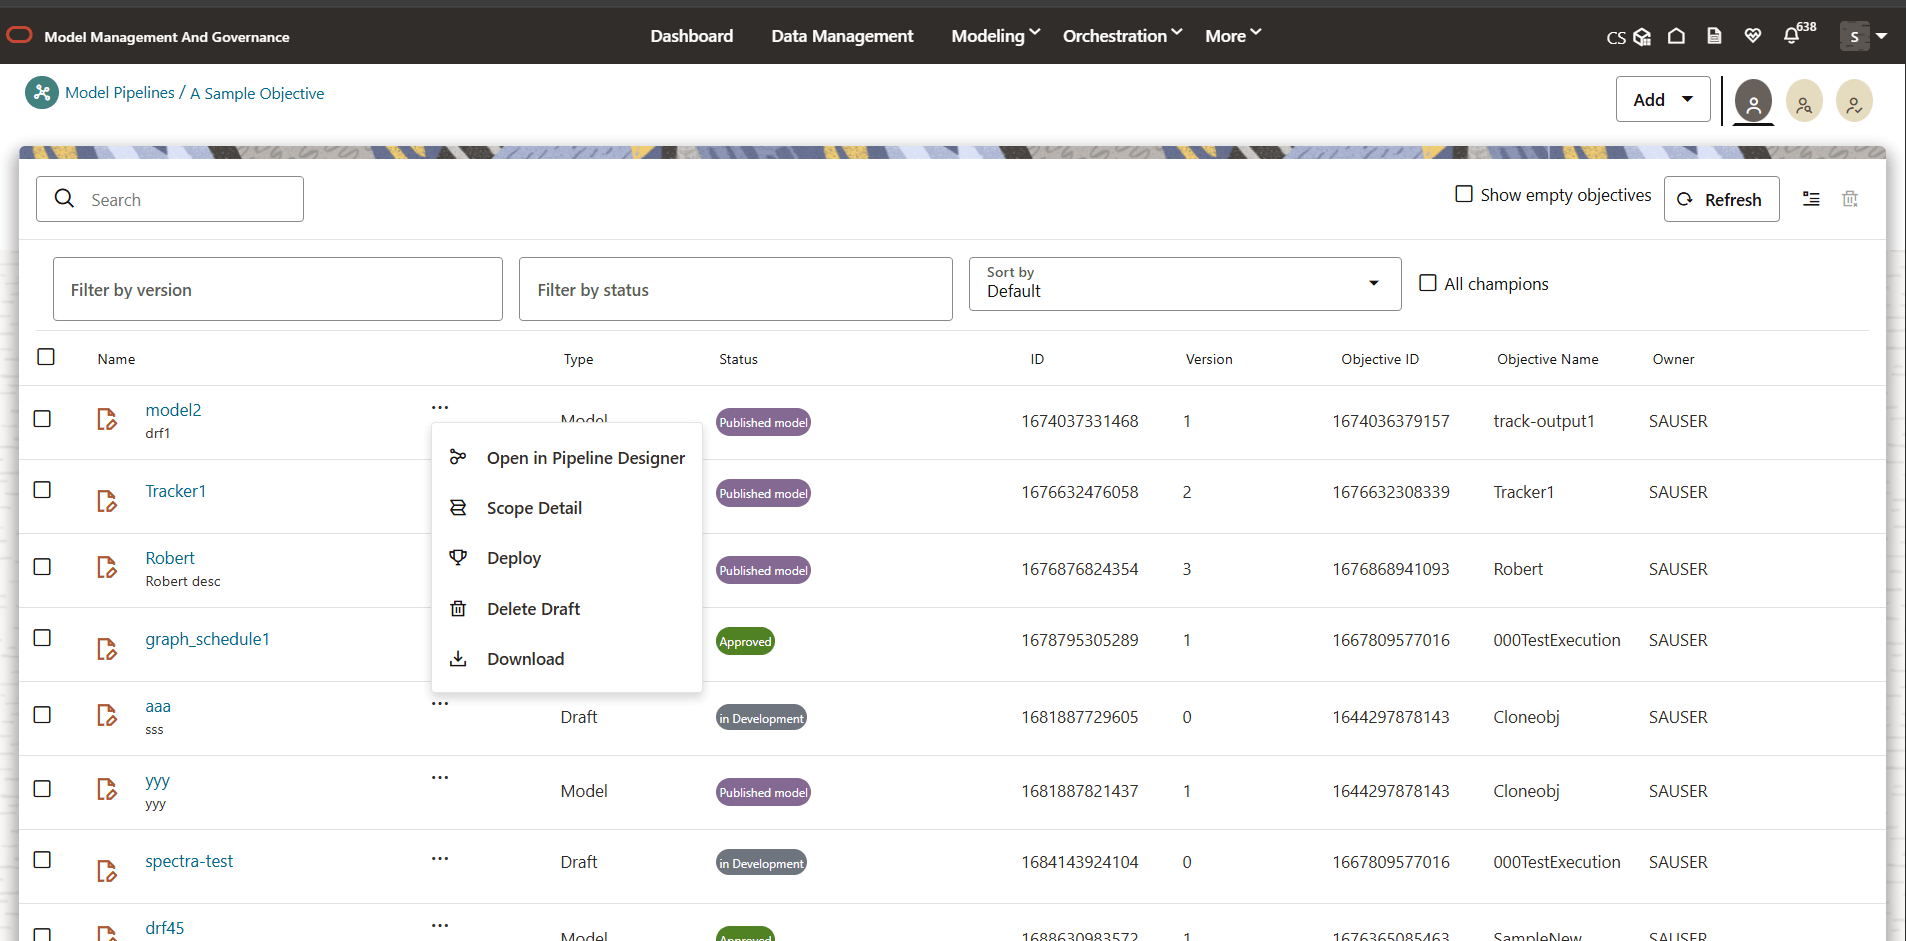
Figure 11-64 Dropdown under Flat List

- In the Flat list of models, you can see the
following details of the models such as Name, ID, Version,
Objective ID, Objective Name, Owner, and Status.
The following table provides descriptions for the fields and icons on the Model Pipeline page.Table 11-15 Fields and icons on the Model Pipeline page
Field or Icon Description Model Pipeline Page Header The header that follows the global header in the application. Breadcrumbs Indicates the position of the current page in the Model Management hierarchy. Use breadcrumbs locator links to navigate back to higher levels in the hierarchy after you have drilled down through levels of functions. Click to navigate to Model Summary page.
Click or to navigate back to Workspace Summary page.
Create Objectives and Models Select Add to display a list with the following options: - Draft
- Objective
- Seeded Models
However, if you want to know about the cycle of model creation, see the Create, Review, Approve, and Deploy a Model Section.
Requester Displays that the logged-in user has the Requester privileges when the status is green. You can create a model. However, to approve and publish, the model must be reviewed by a user with reviewer privileges and approved by a user with approver privileges.
Reviewer Displays that the logged-in user has the Reviewer privileges when the status is green. You can review models. However, to approve and publish, the model must be approved by a user with approver privileges.
Approver Displays that the logged-in user has the Approver privileges when the status is green. You can approve models that are created and reviewed.
Model Pipeline Page Table The table displays the objective and model records on the page. Objective Name Displays the name and description of the Objective ID Displays the ID of the objective. Owner Displays the owner who created the Drafts. This information does not display for an Objective.
Tags Displays the tags associated with the Models or Drafts. This information does not display for an Objective.
Delete Objective Select to delete the model from the Confirmation dialog box. Click Delete to process or click Cancel to cancel. This information does not display for an Objective.
Edit Objective Select to edit the models in Data Studio. See the Edit Models section for more information. This information does not display for an Objective.
Note:
When executing PGX, the user is unable to access the interpreter 'PGX-Java' for the Notebook type 'Jupyter'. The allowed interpreters are: Python and MD.However, when the user changes the Notebook type from Notebook Interface, the user is able to access the PGX-Java.
Figure 11-65 Access Control Menu option
 Access Control Pop has two Access Level Radio button: Restricted Mode and Public Mode.
Figure 11-66 Restricted Mode

Figure 11-67 Public Mode
 The Access Control pop-up have the below details:
- Model Name
- Created By
- Info
- Select Access level with two radio button options: Public and Restricted
- User Access and User Group Access should list all the users present.
- Cancel button
- Save button
Figure 11-68 Access Control User Dropdown
 The Access Control User dropdown fetches all the Users present in the Identity Management.
Figure 11-69 Access Control User Groups dropdown
 The Access Control User Groups dropdown fetches all the User Groups present in the Identity Management.
Note:
New stage selector in execution drawer is added for execution from pipeline canvas with auto populated selected stage in canvas. User can now run independent stages from pipeline canvas and even from the scheduler. The idea of stage remains same as before, since the stages are dynamic in nature. The stage executed is not shown in the execution history, instead we follow filtering of nodes to execute or nodes that have been executed at runtime.