Data Population
Data Population is about getting the data of tables from Source Schemas to Target Schema by applying the filters at table level and global level. Data is very important aspect of Modeling and we need data to be up to date, so keeping this point we have came up with scheduling idea for Data Population which periodically refreshes the data in the tables.
Data Population tab
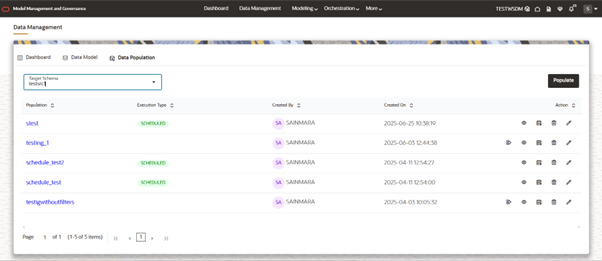
Figure 10-12 Target Schema selection and populate button
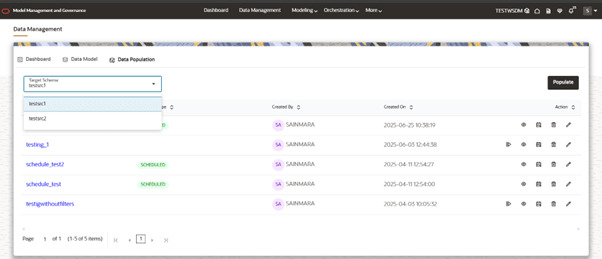
- It will show list of Target Schemas mapped to current workspace.
- We can select any Target Schema, by default 1st one is selected (The one which is selected firstly in workspace creation step 2).
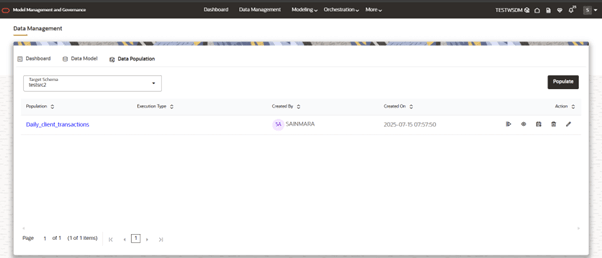
- By choosing one schema, it will show the list of data populations that are created as a table.
- This button helps to create a new Data Population.
- By clicking on this, user will be taken through few steps for creating a Data Population.
- This will show the list of populations that created for the selected Target Schema (From dropdown).
Figure 10-13 Data Population List
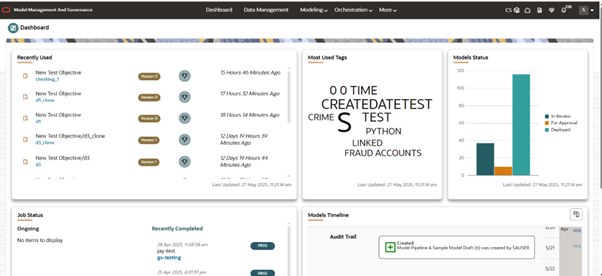
- Launch any workspace where you wanted to do Data Population and go to Data
Management tab from main menu.
Figure 10-14 Data Population Dashboard
- Click on Data Population sub-tab.
Figure 10-15 Data Population Sub-tab
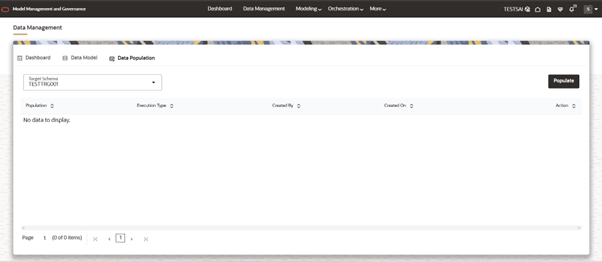
- Now the user can see the list of Data Population which are created. When we launch for first time, it will be empty.
- Click on Populate button, which will take you through the
step-by-step process to create a new Data Population.
Figure 10-16 New Data Population
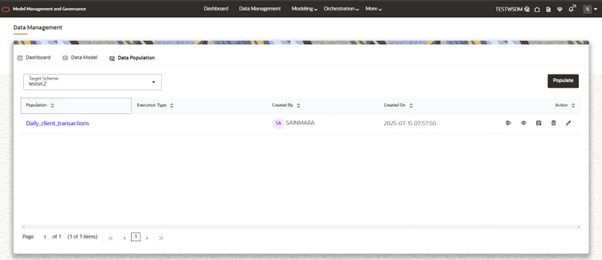
- Now a drawer will open on the right side where it consists of the following
stages:
- Basic Information
- Table Selection
- Fetch Configuration
- Schedule
- Basic Information
- Here user need to provide the basic information about Data Population
Name and can choose the Target Schema for which user wants to create
Data Population.
For example: Data Population Name –> Daily_client_transactions, Target Schema –> Testtrg3
Figure 10-17 Basic Information
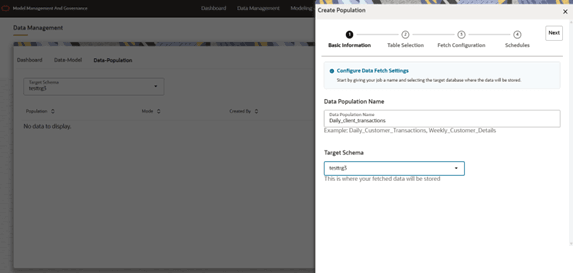
- Here user need to provide the basic information about Data Population
Name and can choose the Target Schema for which user wants to create
Data Population.
- Table Selection
- This step includes tables selection mode and table filters to be seeded.
- Table Selection
- Table selection mode is about to refresh All tables data or Selected tables data.
- We have two modes in this: All tables and Selected tables, where
All tables fetches data for all the tables from Source Schema to
Target Schema, by applying the filters. Selected tables are the
ones that have been selected as part of Table Filter
Configuration, for fetching data.
Note:
All tables mean the tables that are created by using MMG in Target Schema.Figure 10-18 Table selection and global filter

- Table Filters
- Table filters are applied to the tables when fetching the data
from Source table.
We have Global Filters and Table level Filters:
- Global Filter: This filter will be applied to all the tables that are part of data population. If the individual table have any table level filters then this is not applied to the specific table.
- Table Level Filters: This filter can be
applied to individual table level. Click on Add item. This will
add an empty row in the table where we need to fill the details
of Source schema, table name, SQL Filter, Source Hint, Target
hint.
- Source Schema: This is dropdown where it lists the Source Schemas, which are already mapped to this Target Schema.
- Tables: This is dropdown, where we select a table from list of tables, this list of tables is the tables list that are selected when doing data modeling or workspace creation step.
- We can select more than one table.
- SQL Filter: This is the filter that will be applied to the tables that are selected and used while fetching the data.
- Source Hint: You can provide database Hints at table-level, Source hint is applied in the source schema while fetching the Data from Source.
- Target Hint: You can provide
database hints at table-level, Target hint is applied in
the Target Schema while doing the inserting Data to Target.
Figure 10-19 Table Level Filters

- Table filters are applied to the tables when fetching the data
from Source table.
- Fetch Configurations
- This has mainly three configurations:
Figure 10-20 General Configuraitons and Error Handling
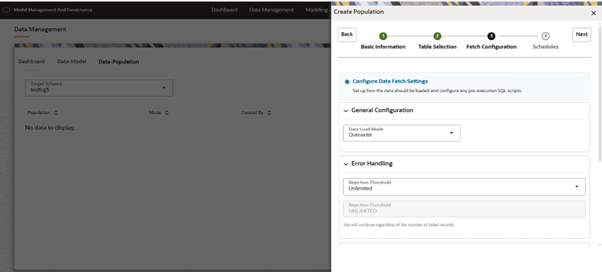
- General Configurations
- It has data load mode dropdown, where we have two options: Overwrite and Append.
- Overwrite mode: In this mode, the underlying tables are truncated (overwritten on existing data) followed by an insert operation.
- Append mode: In this mode, the underlying tables will be populated (added to the existing data) in the append mode.
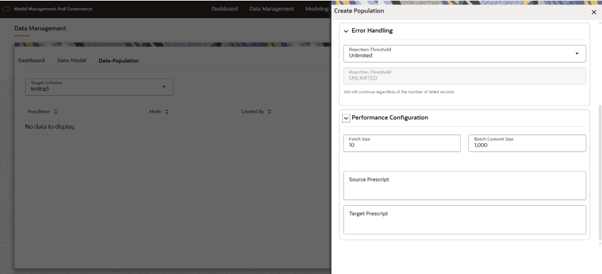
- Error Handling
- It has Rejection Threshold configuration, whereby default it is set to Unlimited. So Here, all the errors will be ignored during the data population.
- We can also set a custom rejection threshold, for this we need to change the dropdown value to Custom Rejection Threshold, which in turns enables the input box for giving custom value. You can provide the maximum number of inserts that can fail while loading data to a given table. In case of threshold breach, all the inserts into the table will be rolled back. However, it will continue populating to the next table.
- Performance Configuration
- This consists of Fetch Size, Batch Commit Size, Source prescript, Target prescript.
- Fetch Size: Enter the Fetch size of JDBC properties for data upload. By default it is set to 10. Therefore, every time it fetches 10 records from the available records.
- Batch Commit Size: Enter the Batch Commit size of JDBC properties for data upload. By default it is set to 1000.
- Source Prescript: Enter the source prescript of JDBC properties for data upload.
- Target Prescript: Enter the
target prescript of JDBC properties for data upload.
Figure 10-21 Performance Configuration
- General Configurations
- This has mainly three configurations:
- Schedules
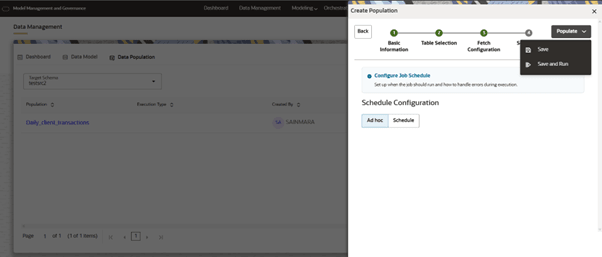
- We have two options Ad hoc and Schedule, when Ad hoc is selected Populate button at the right acts as drop down and gives two options SAVE and SAVEANDRUN.
- Save Mode: In this mode, after filling all the details we will save this configuration. This population can be run manually from the data population lists screen.
- Save And Run Mode: In this mode,
after filling all the details we will save this configuration and run
the population once. This population can be run manually from the data
population lists screen.
Figure 10-22 Save and Run option
- If the selected mode is SCHEDULE, then we need to choose whether we need
to bring data Daily/Weekly/Monthly/CRON.
- Based on mode we need to fill in few details.
- DAILY: We need to configure Start Date, End Date and Time when schedule should run daily.
- WEEKLY: We need to configure Start Date, End Date, Time and Days of week when schedule should run.
- MONTHLY: We need to configure Start Date, End Date, Time and Months of year and day of the month when schedule should run.
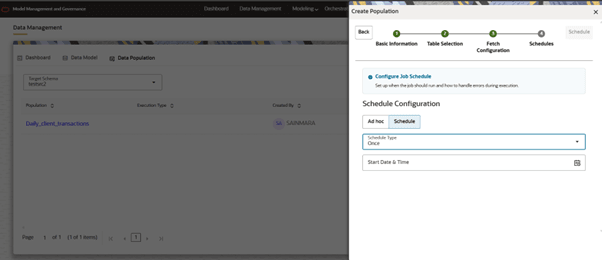
- ONCE: We need to configure Start Date and time when schedule should run.
- CRON: We need to give a CRON Expression.
- Once after giving the information then we need to click on
populate.
Figure 10-23 Schedule Type options

Figure 10-24 Schedule Daily options
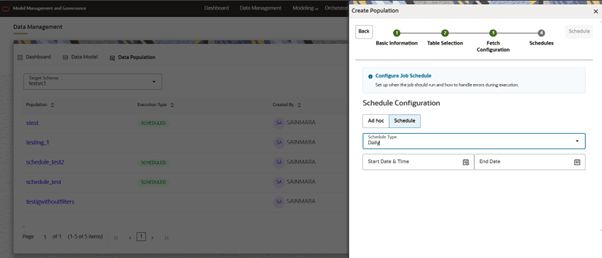
Figure 10-25 Schedule Weekly options
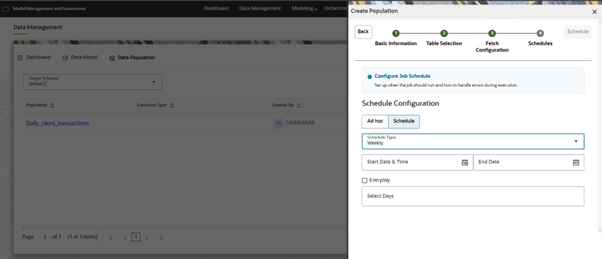
Figure 10-26 Schedule Monthly options
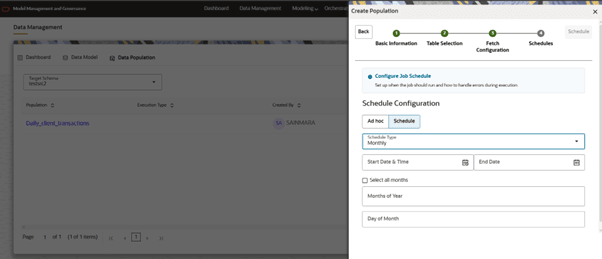
Figure 10-27 Schedule Cron Expression
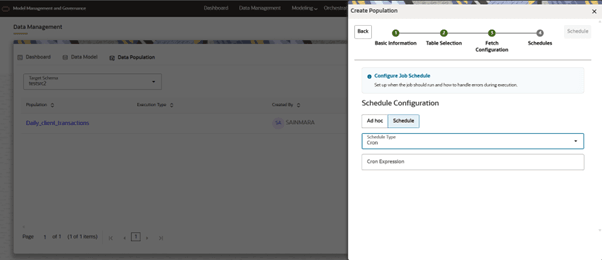
Figure 10-28 Schedule Once options
Data Populations List Action buttons
There are Actions associated to every Data Population based on mode (SCHEDULE, SAVE OR SAVEANDRUN).
- DELETE: When user click on this, it deletes the Data Population.
- EDIT: This option will open a drawer and enables users to edit the data population information which consists of Table level filters, Global filters, Table selection mode, General configuration, Error Handling, Performance Configuration.
- VIEW: When the user clicks on this, it opens a new tab and show the information related to the population.
- RUN: We can Run the data population which is already configured. When we click on this the data population is triggered.
- SCHEDULE: We can schedule a data population which is created in this mode. We convert the manually triggered data population to Scheduled one.
- RESCHEDULE: This option enables the user to
re-schedule already existing scheduled data population.
Figure 10-29 Data Population List Actions
