6.6 Geography Mapping
The Geography Mapping UI allows you to render the Org Unit, Branch, Relationship Manager and corresponding Geographic Locations onto the OOTB Business Analytics and account entries.
The Geography information is seeded for your consumption. You can select a geographic location and map it to the key dimensions of the Profitability Analytics Cloud Service.
This section describes the procedure to map the Geographies to key dimensions mentioned above.
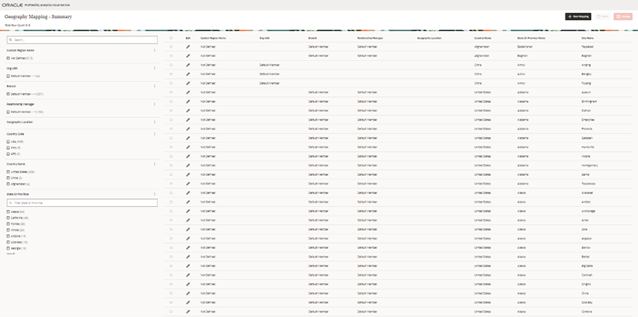
To navigate to the Geography Mapping – Summary screen, from the LHS Menu, select Setup Configurations, and then select Geography Mapping.
Figure 6-27 Geography Mapping - Summary screen

The LHS of the summary screen displays the following elements to be used as selection filters to navigate end user-defined mappings:
- Customer Region Name
- Org Unit
- Branch
- Relationship Manager
- Geographic Location
- Country Code
- State or Province
Creating a New Mapping
To create a new mapping:
- Click New Mapping on the Summary screen.
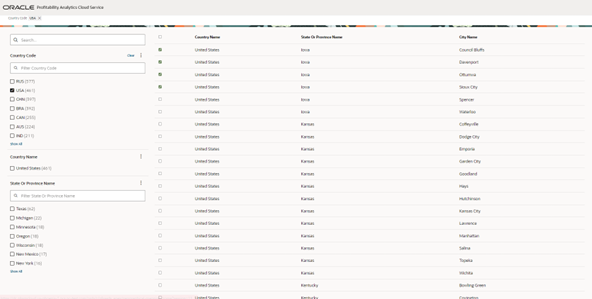
The World Region – New Mapping screen is displayed.
Figure 6-28 World Region - New Mapping

- Select the relevant Country Code.
The summary screen area displays all the cities with the Province and City Names.
- Select the relevant County Names and for
mapping.
Note:
You can select few or all the County Names for mapping. - Click the Map button.
The Mapping pop-up window is displayed.
Figure 6-29 Mapping

- Select any one or all of the following details:
- Org Unit
- Branch
- Relationship Manager
- Geographic Location
- Select the Customer Region Name. You can select from the options in the available values or enter a custom Region Name.
- Click Map.
The newly create mapping details are displayed in the Summary page.
Unmapping a Geography Mapping
To unmap a previous mapped Geography:
- Navigate to the Geography Mapping – Summary screen.
- Select any of the following:
- Custom Region Name
- Org Unit
- Branch
- Relationship Manager
- Geographic Location
- Country Code
- State of Province
The available mappings are displayed in the screen.
- Select the mapping that you want to unmap. You can select one or multiple or all the mappings.
- Click the Unmap button.
After confirming, the selected mapping will be unmapped and removed from the Summary screen.