6.5 Line Item Display Order
The Line Item Display Order UI allows the user to customize the display order of the Income Statement line items. This helps users to maintain the display order on the Financial Element hierarchies for both out-of-the-box hieracrchies and custom hierarchies at the BI layer required by Profitability Analytics. This display order holds good for both top-down and bottom-up reporting and enforces a a particular display order for the Income Statement and Balance sheet hierarchies.
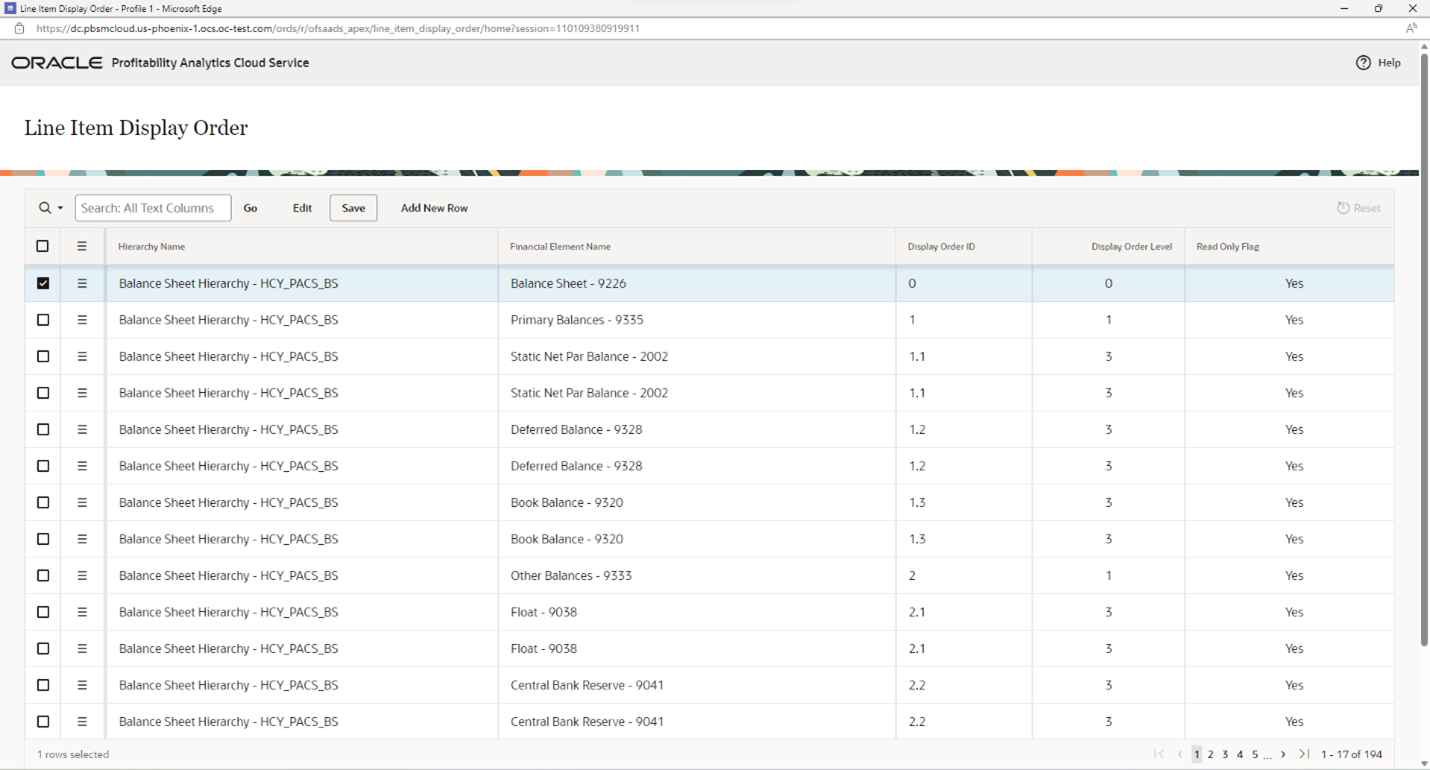
Figure 6-22 Line Item Display Order

The summary screen displays a list and order of parameters that are already available out of the box. You can search an edit the the Line Items with Hierarchy Name, Financial Element Name, Display Order ID, Display Order Level, and Read Only Flag.
You can click on each header to filter the line items and display the items based on a choise.
Figure 6-23 Header Options
For example, you can click Hierarchy Name to open a filter where you can select the available options. Then click any or all of the other header names, define the search criteria and then click Go to display the lines items.
You can add a new row to the summary list by clicking Add New Row. This inserts a new row in the summary table and allows you to select the Hierarchy Name, Financial Element Name, Display Order ID, Display Order Level, and/or Read Only Flag.
Row Actions
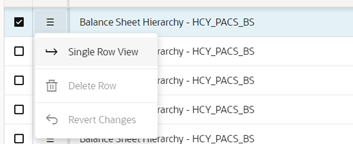
The summary page allows to change the view. You can select a row and click the Row Actions that are:
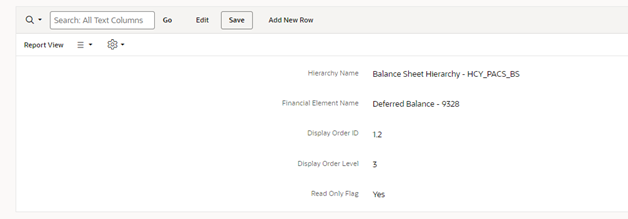
- Single Row View: For the rows where Read Only
Flag is set to Yes, you cannot edit or revert the changes. However, you view
them in Single Row View.
Figure 6-24 Single Row View

Figure 6-25 Single Row View Details

- Delete Row: Is possible only for user-defined line items.
- Revert Changes: Is possible only for user-define line items.
Report View – Change Menu
From the Report View – Change Menu, you can add a new row, create a duplicate of an exiting line item, delete a line item, refresh the view, and revert the changes of an existing line item.
Report View – Settings Menu
The Settings Menu allows you to:
- Exclude the null values from the summary page.
- Displayed Columns
Adding a New Row
To add a new row:
- Click Add a New Row in the summary page.
Figure 6-26 Add a New Row

- Select of enter the following:
- Hierarchy Name (mandatory): Select a Balance Sheet Hierarchy or Income Statement Hierarchy driver. You can create a Hierarchy and will be able to see on that selection.
- Financial Element Name (mandatory): Enter the name for the Financial Element. You must select only a single value.
- Display Order ID: Enter the Order ID for the Financial Element which you want the Balance Sheet Hierarchy or Income Statement or any other custom hierarchy to be displayed on the Summary screen. For example, refer to the Display Order ID of the seeded hierarchies.
- Display Order Level: Enter the Level for the Financial Element that you want to place in the Balance Sheet and/or Income Statement or any other custom hierarchy. For example, refer to the Display Order Level of the seeded hierarchies.
- Read Only Flag: This is by default Yes for all the seeded hierarchy displayed line item values. For custom line item display orders the default value is always set to No, so that you can always change the custom line items display entries at later stage.
- Click Save to display the new Hierarchy Name in the Summary screen.