Securing the Workstation 625/655 to the Wall Mount
The Workstation 625/655 can be mounted on a wall using an optional wall mount bracket.**
- Install the wall mount:
- Secure the metal bracket to the wall with four screws.
The mounting screws are not provided. Ensure you are using the correct
screws that meet the needs of the installation, such as wood screws,
dry wall screws, concrete screws, or masonry screws.
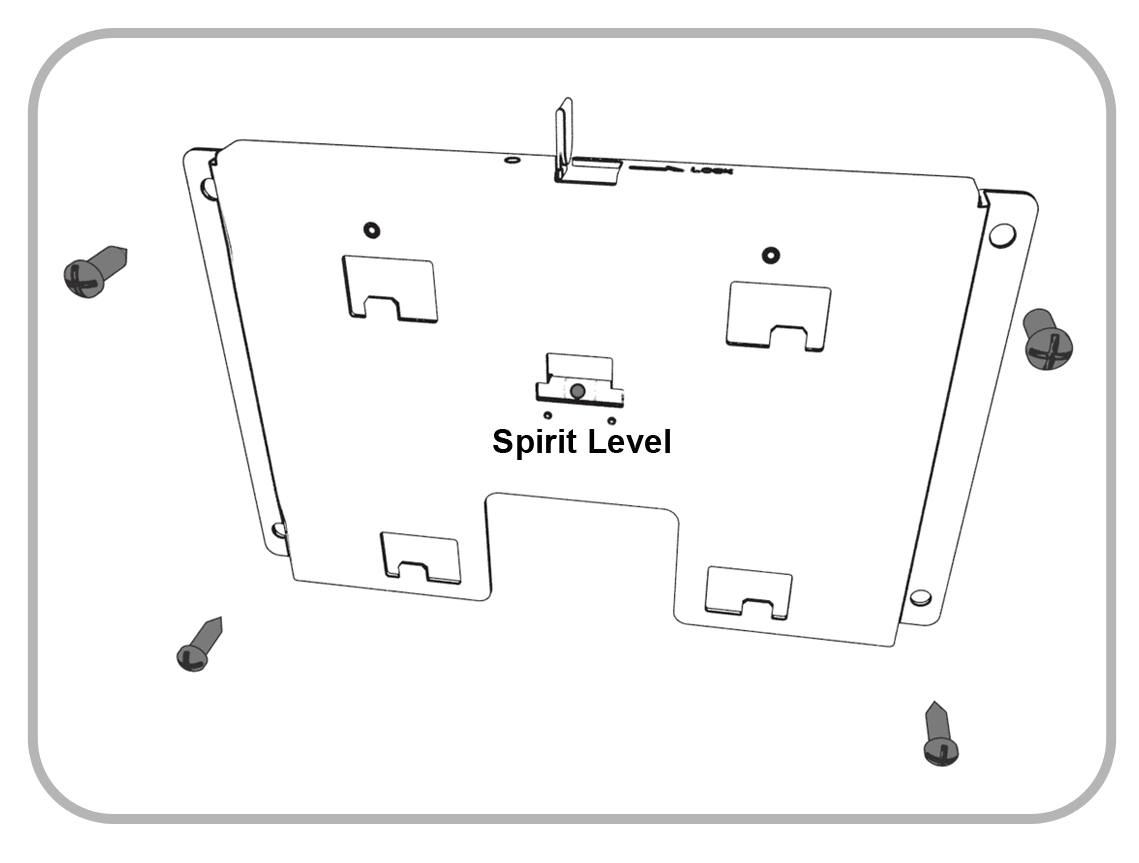
- Secure the metal bracket to the wall with four screws.
The mounting screws are not provided. Ensure you are using the correct
screws that meet the needs of the installation, such as wood screws,
dry wall screws, concrete screws, or masonry screws.
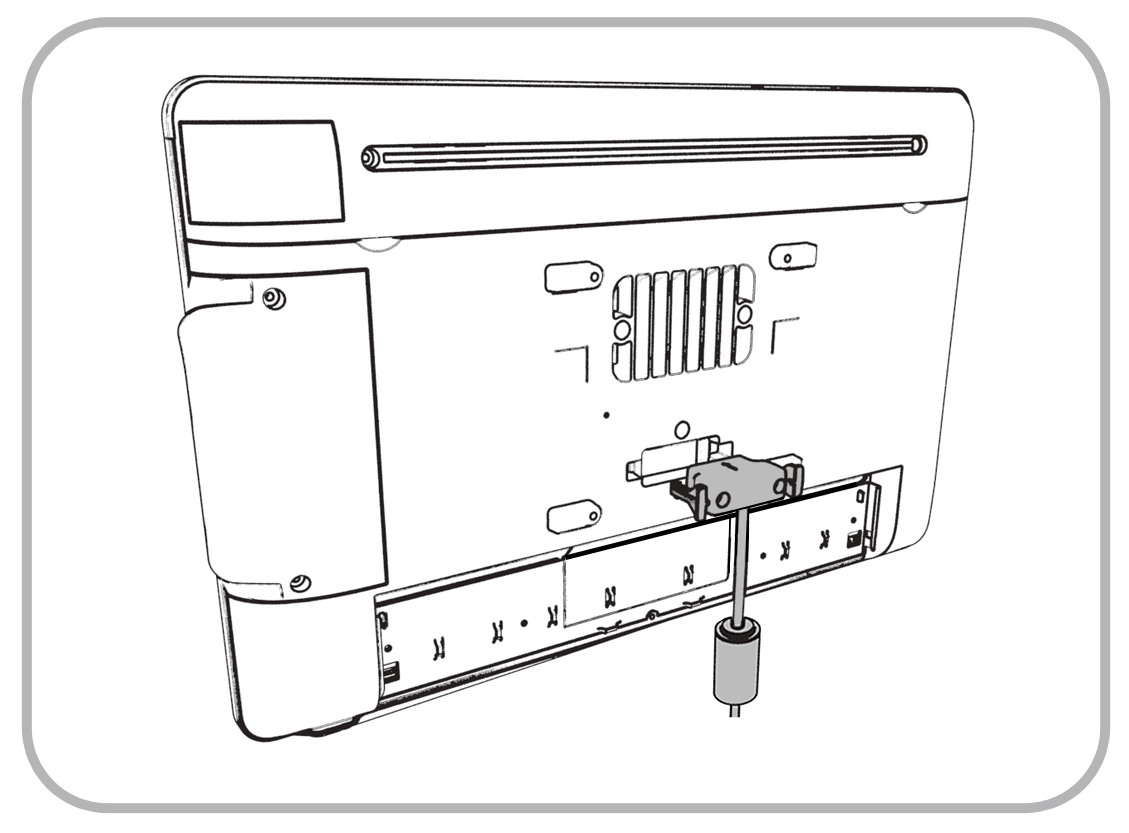
- Insert the power connector in the back of the workstation.
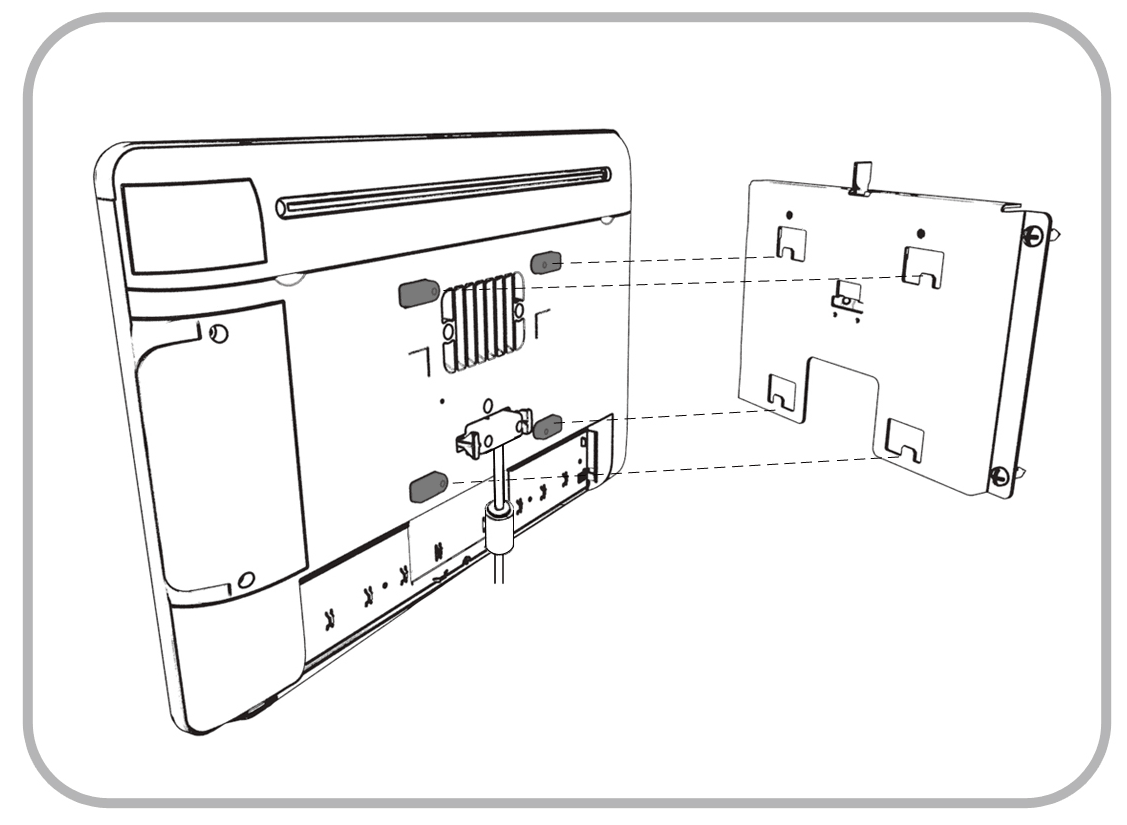
- Align the back of the workstation to the metal bracket,
and then slide it down until it stops.
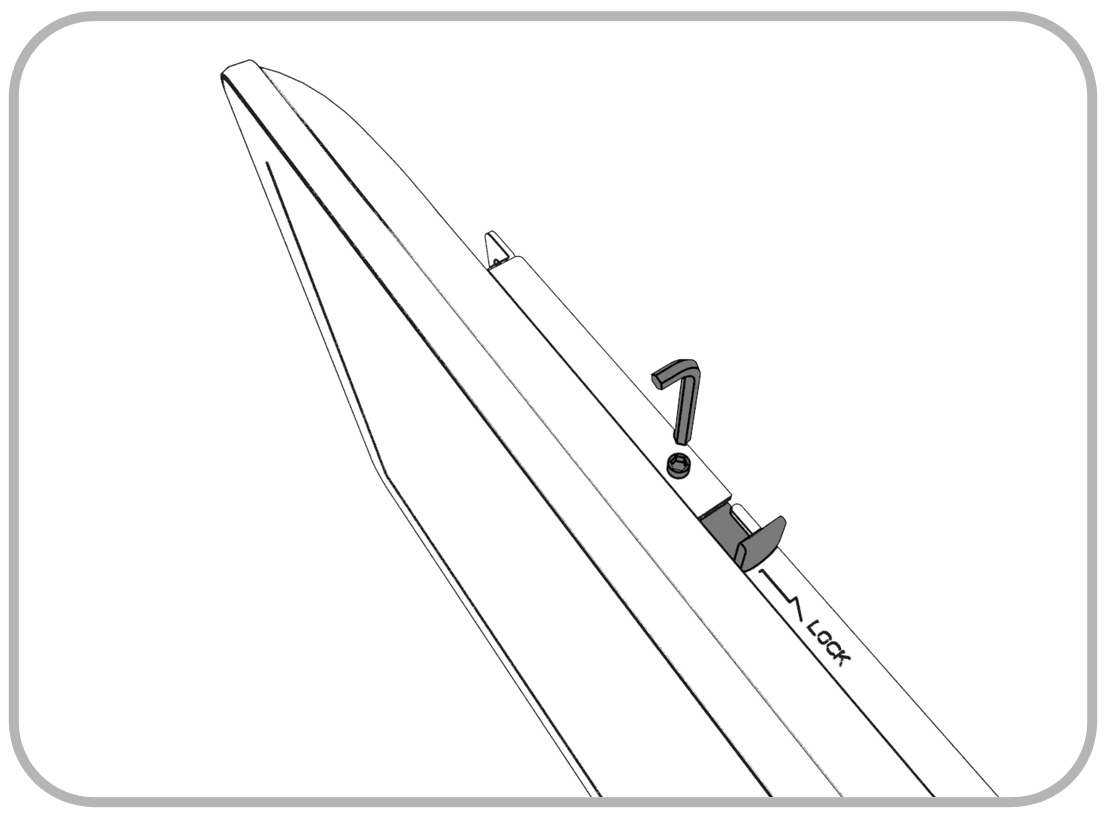
- Slide the locking slide bar to the right and tighten the
hex screw with a hex wrench.
- Conceal the cables with the workstation IO panel cover.
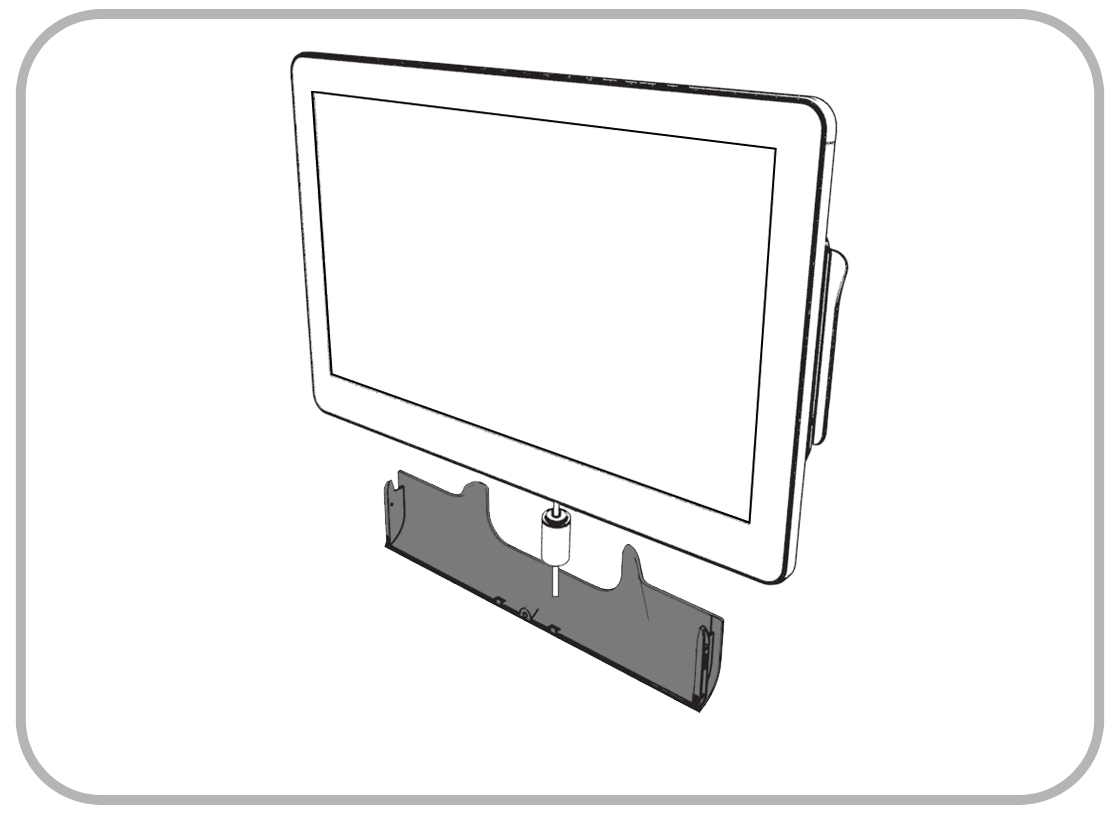
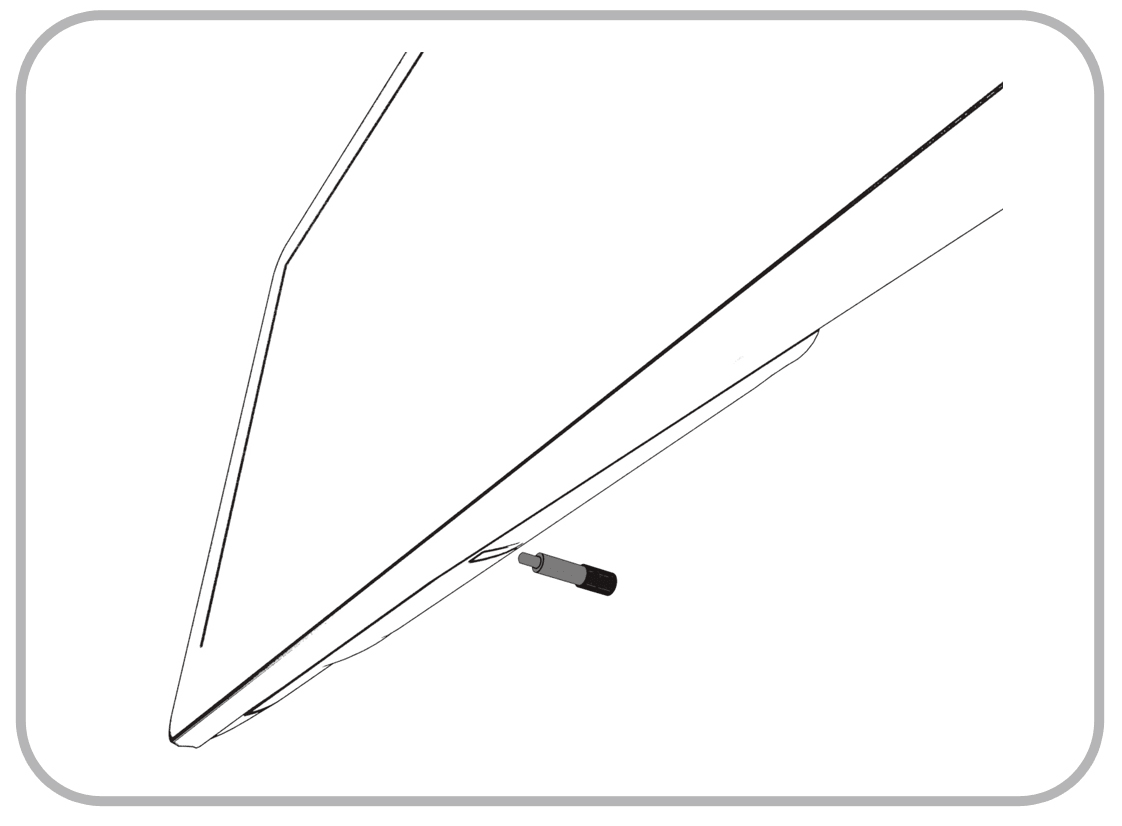
- Secure the workstation IO panel cover with the provided
thumb screw.
 **Wall mount installation methods include:
-
Basic Wall Mounting (shown in steps 1–7): The wall mount bracket is attached to the surface of the wall. Cables and power supplies are exposed and can be organized using cable ties and cable casing.
-
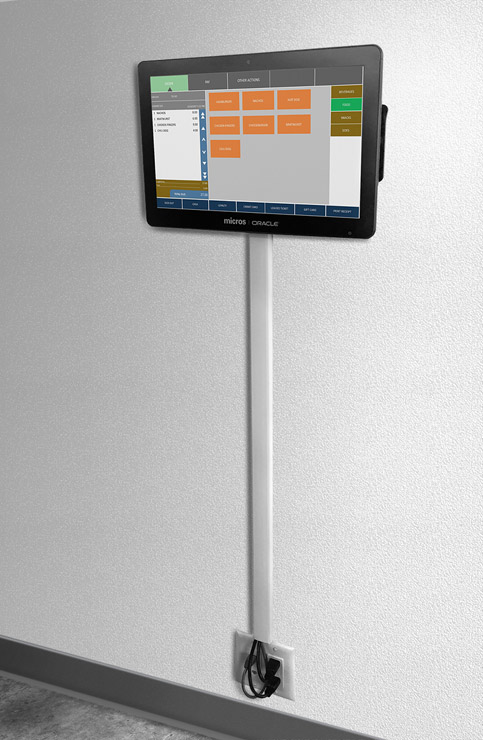
Recessed/In-Wall Cage with Cable Management and Concealed Power Supply Storage: A portion of the wall is cut away and a recessed support cage provides a hidden area for cable organization and power supply storage. The wall mount bracket is then attached to the wall over the recessed area. Exposed cables can be organized using cable casing.
Figure 4-3 Example Wall-Mounted Workstation (Recessed/In-Wall Cage)
-