Installing the USB Fingerprint Reader with Mounting Brackets
Note:
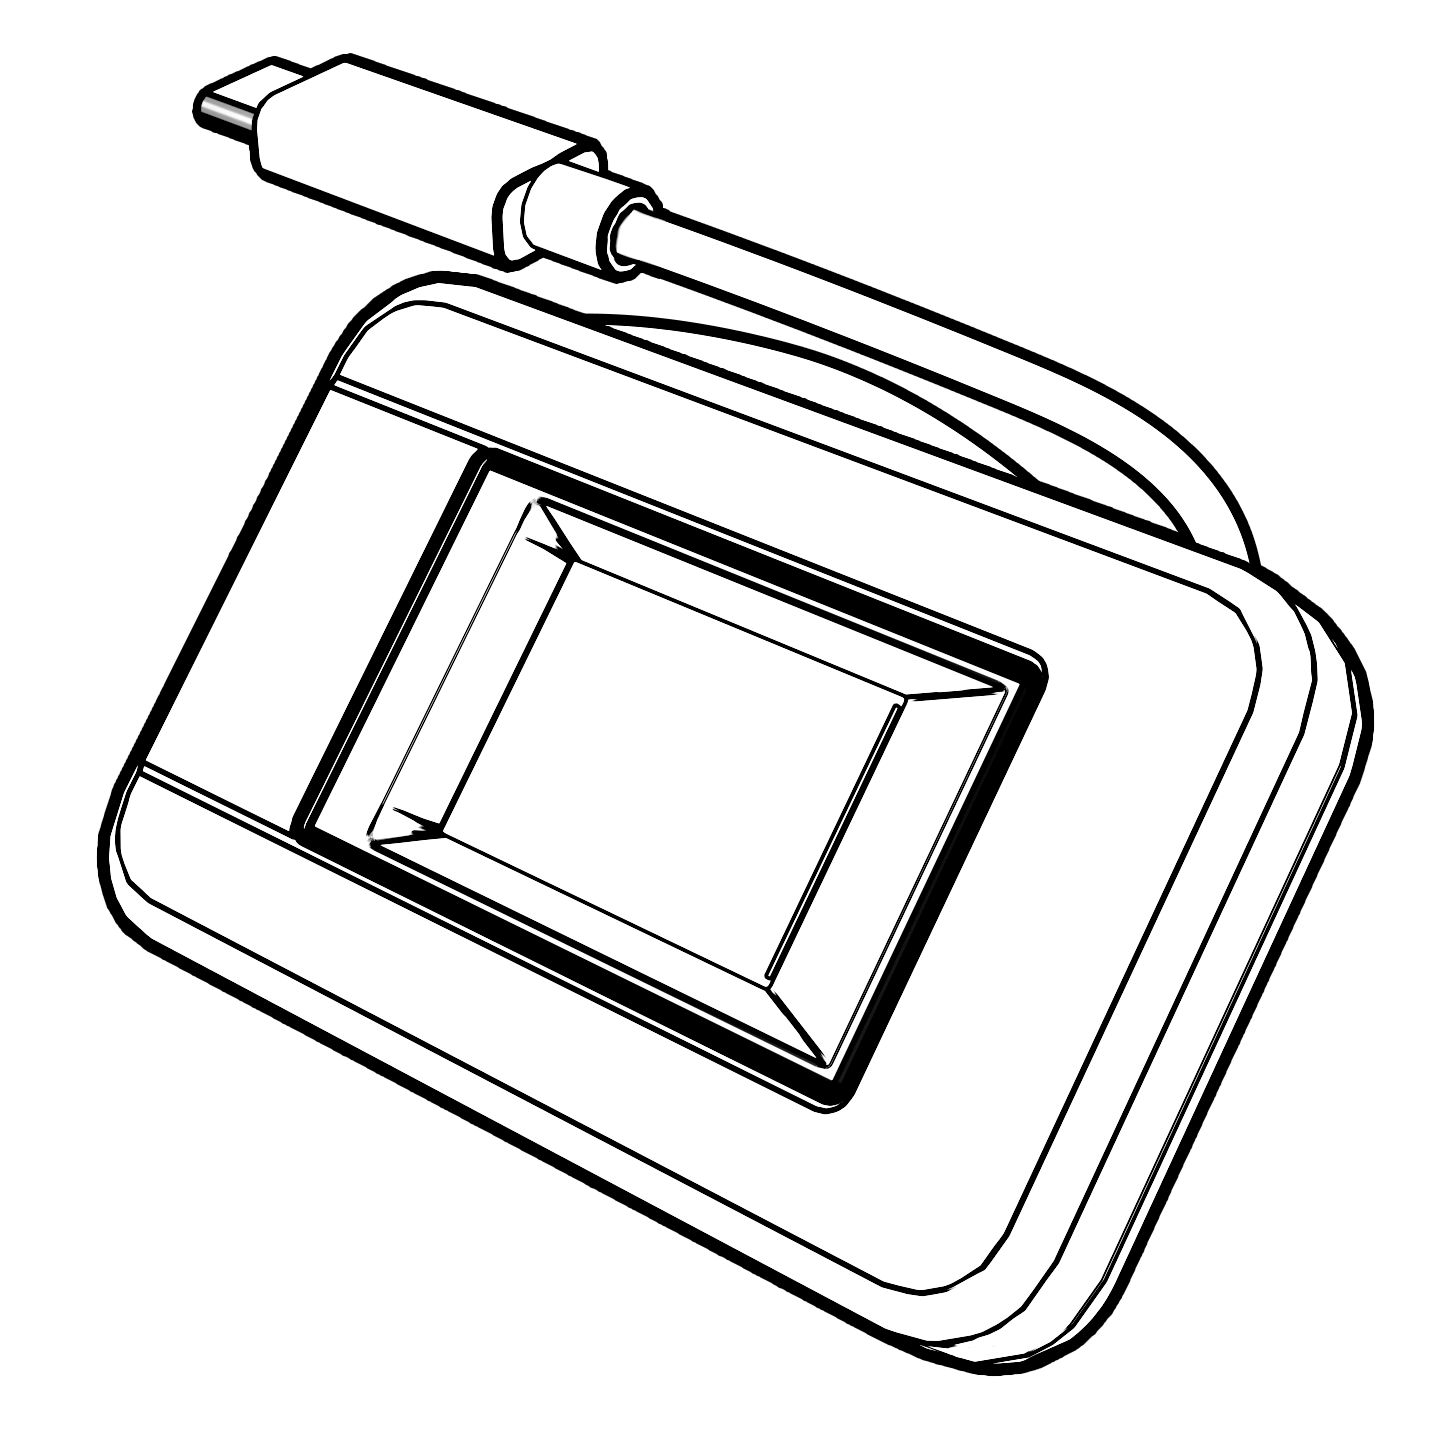
The fingerprint reader ships with the stand mount preattached. To install the fingerprint reader on a Workstation 8 you must remove the stand mount and attach the included workstation mount.Note:
Before installing workstation accessories, routing cables, or other maintenance, place a cloth or cardboard on your work surface to avoid damaging the Workstation 8.-
Place the Vertical Stand on its side.
-
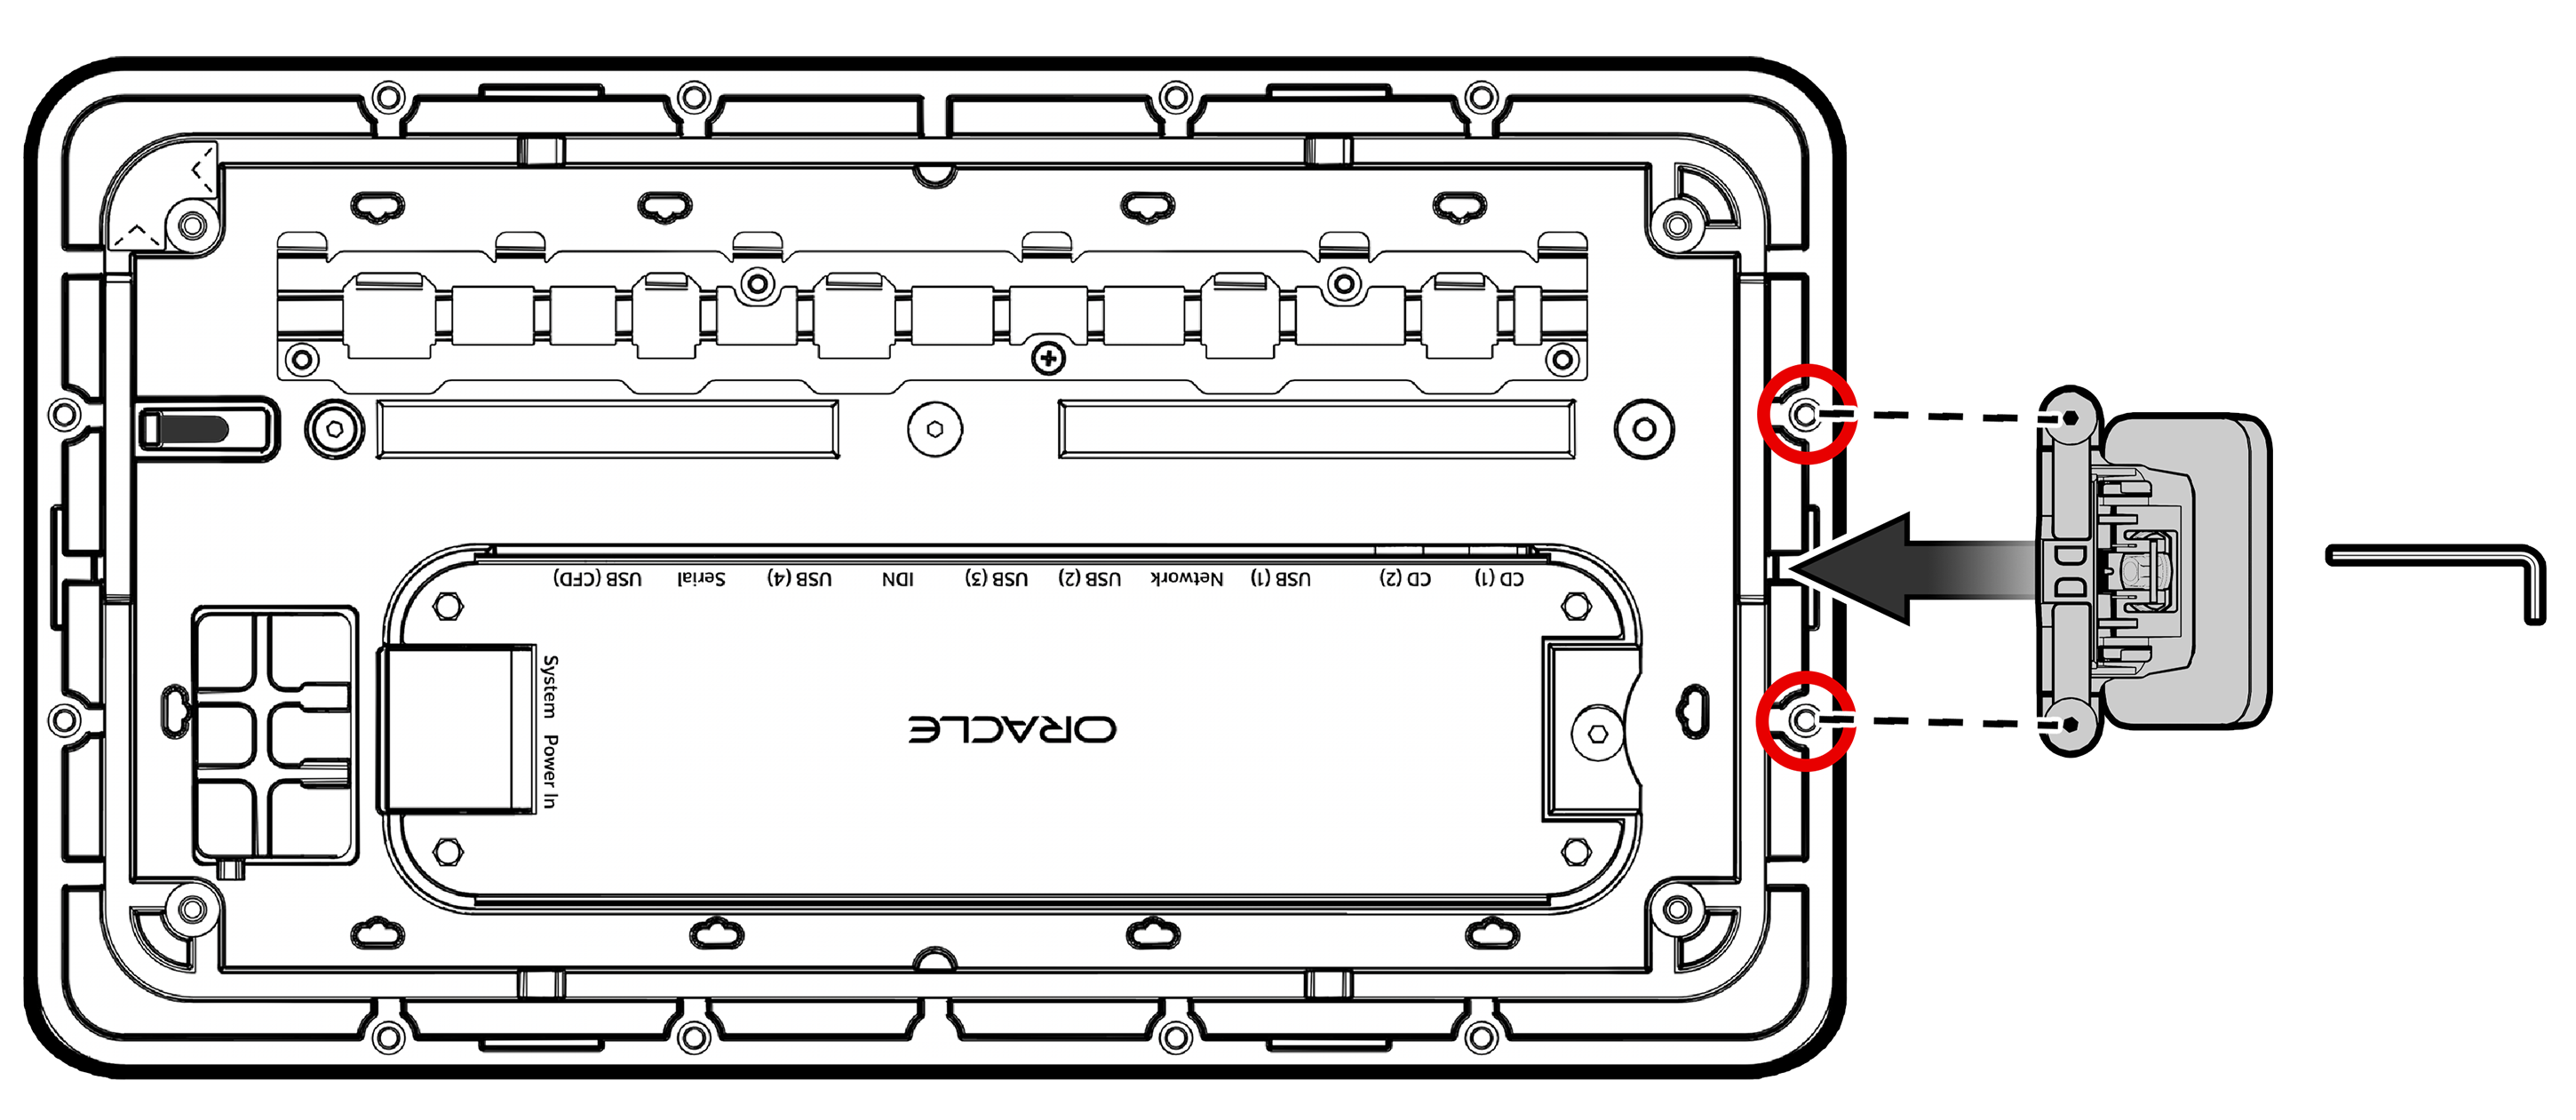
Position the fingerprint reader on an available accessory mounting point along the edge of the Vertical Stand base. Each accessory mounting point has two holes for attaching devices.
-
Align the captive screws with the two accessory mounting point screw holes, and then secure the fingerprint reader to the Vertical Stand base using an Oracle 2.5mm hex key.
Figure 5-12 Positioning the Fingerprint Reader on the Vertical Stand
-
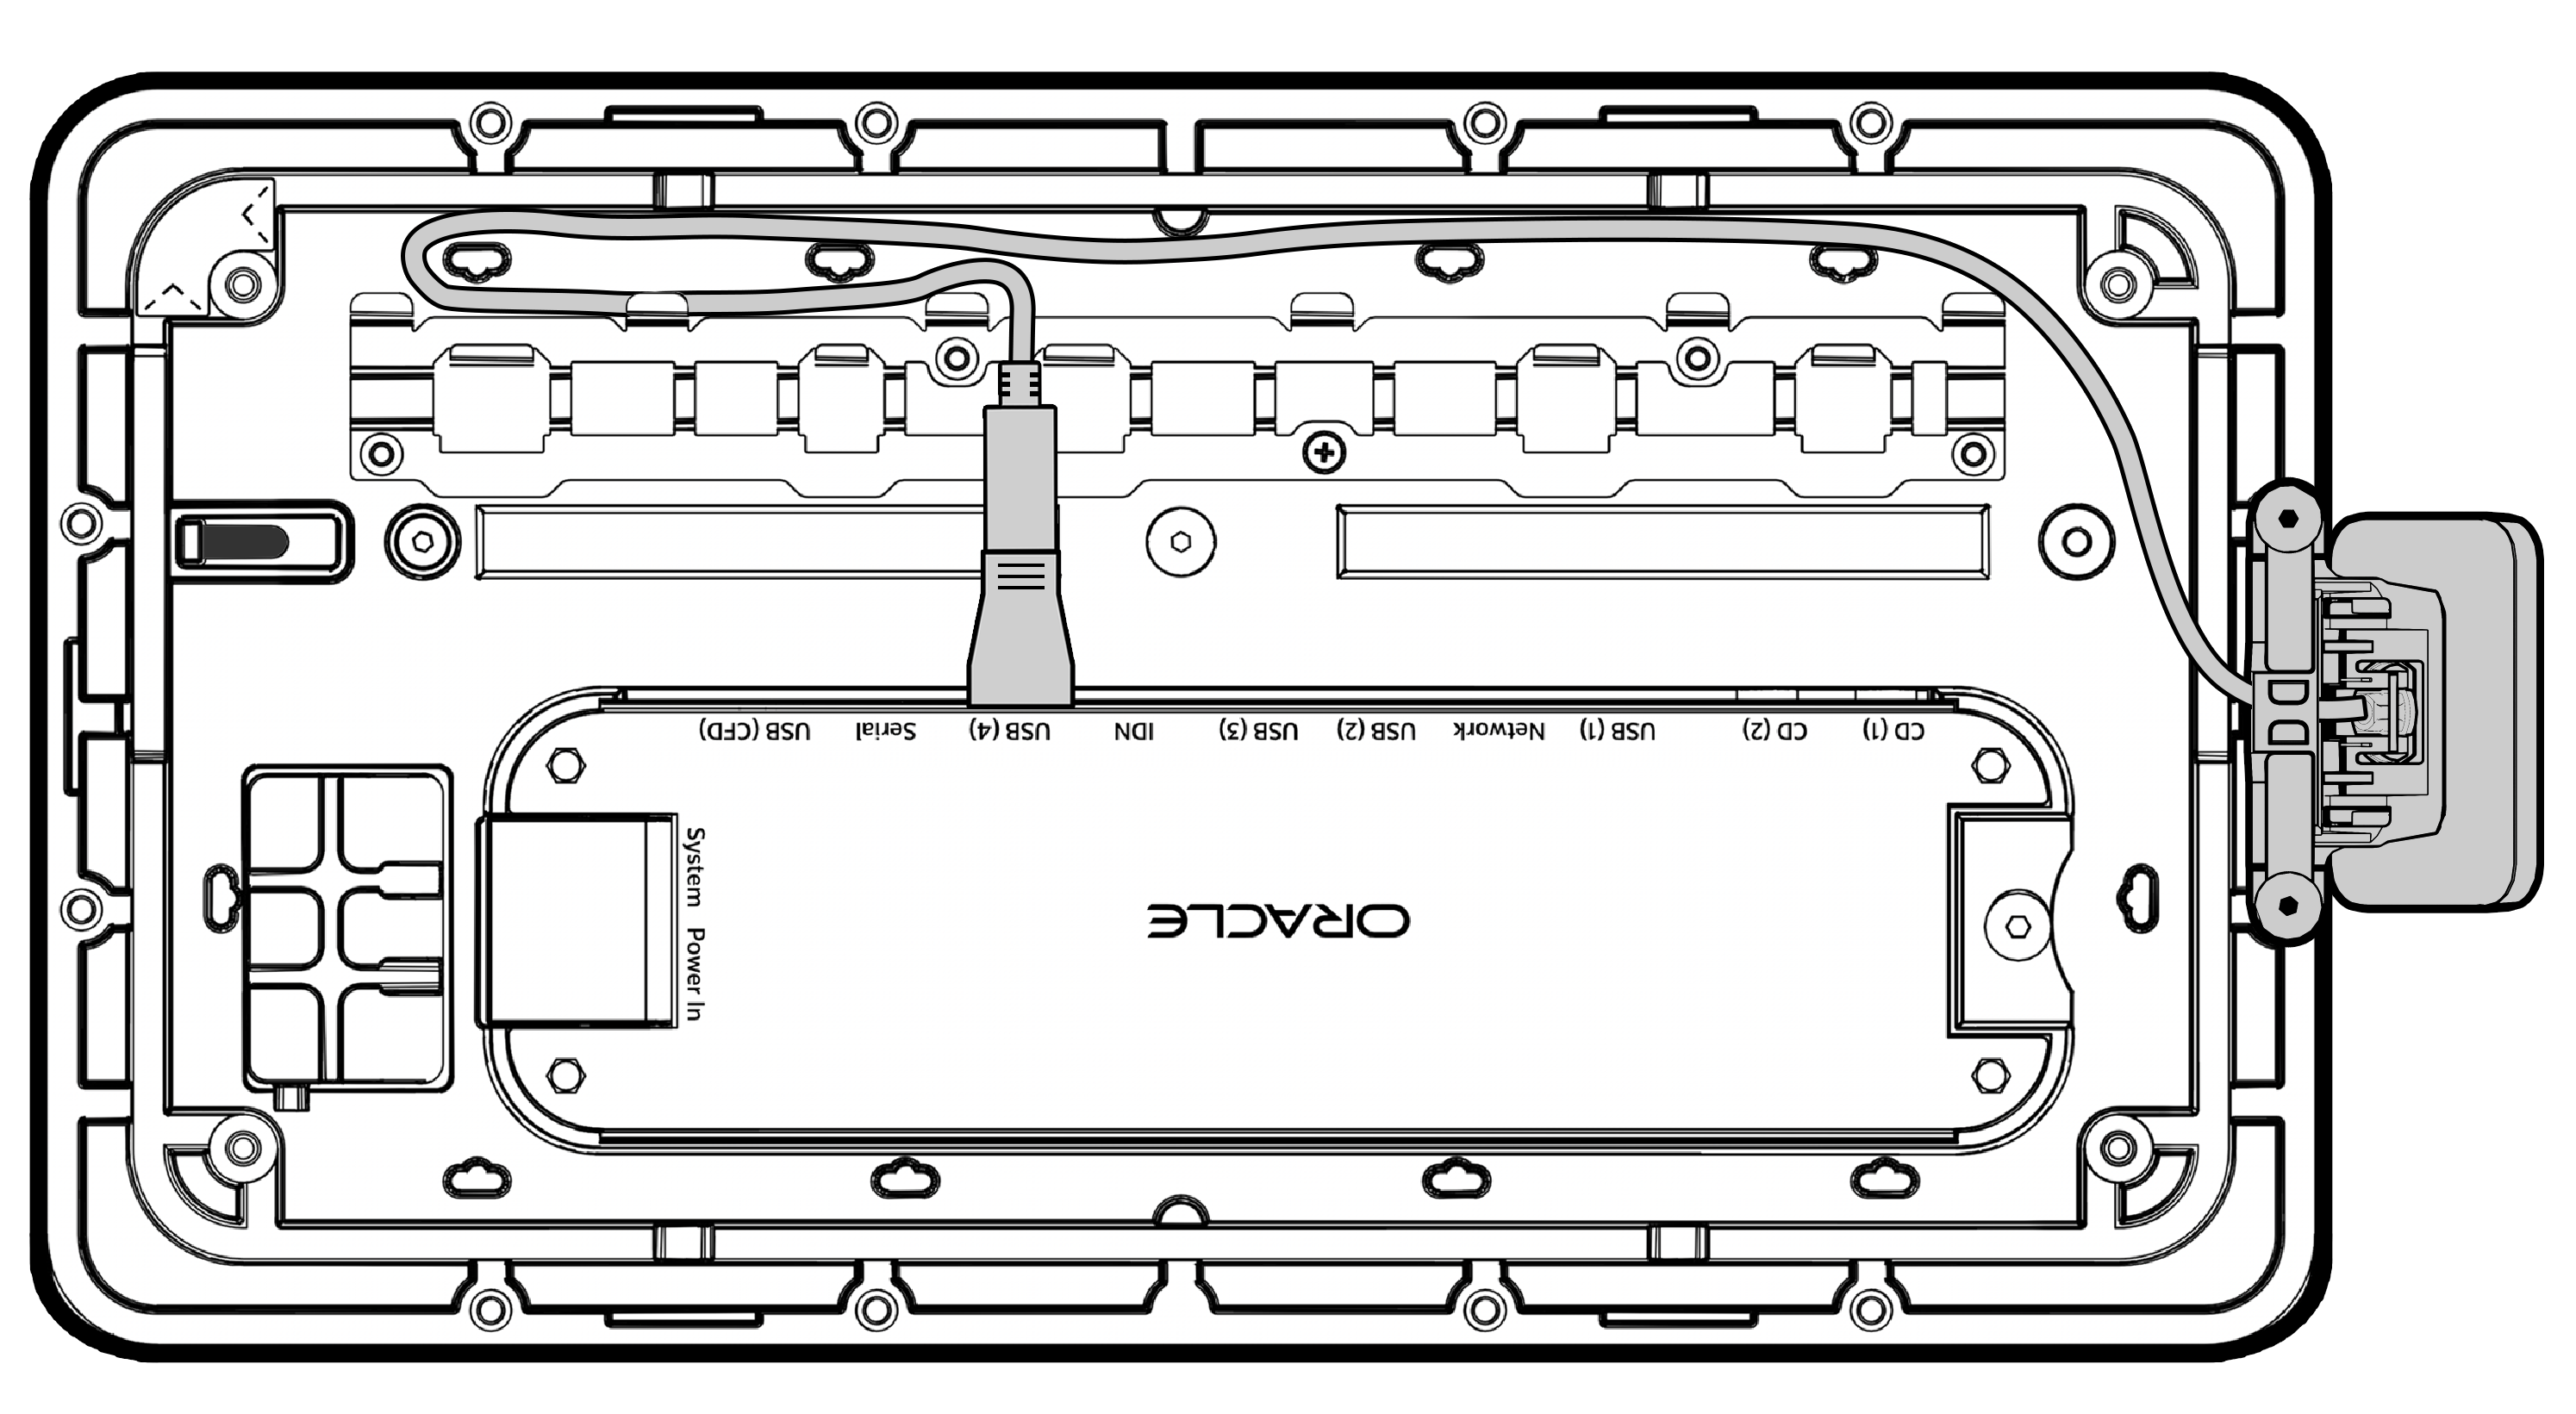
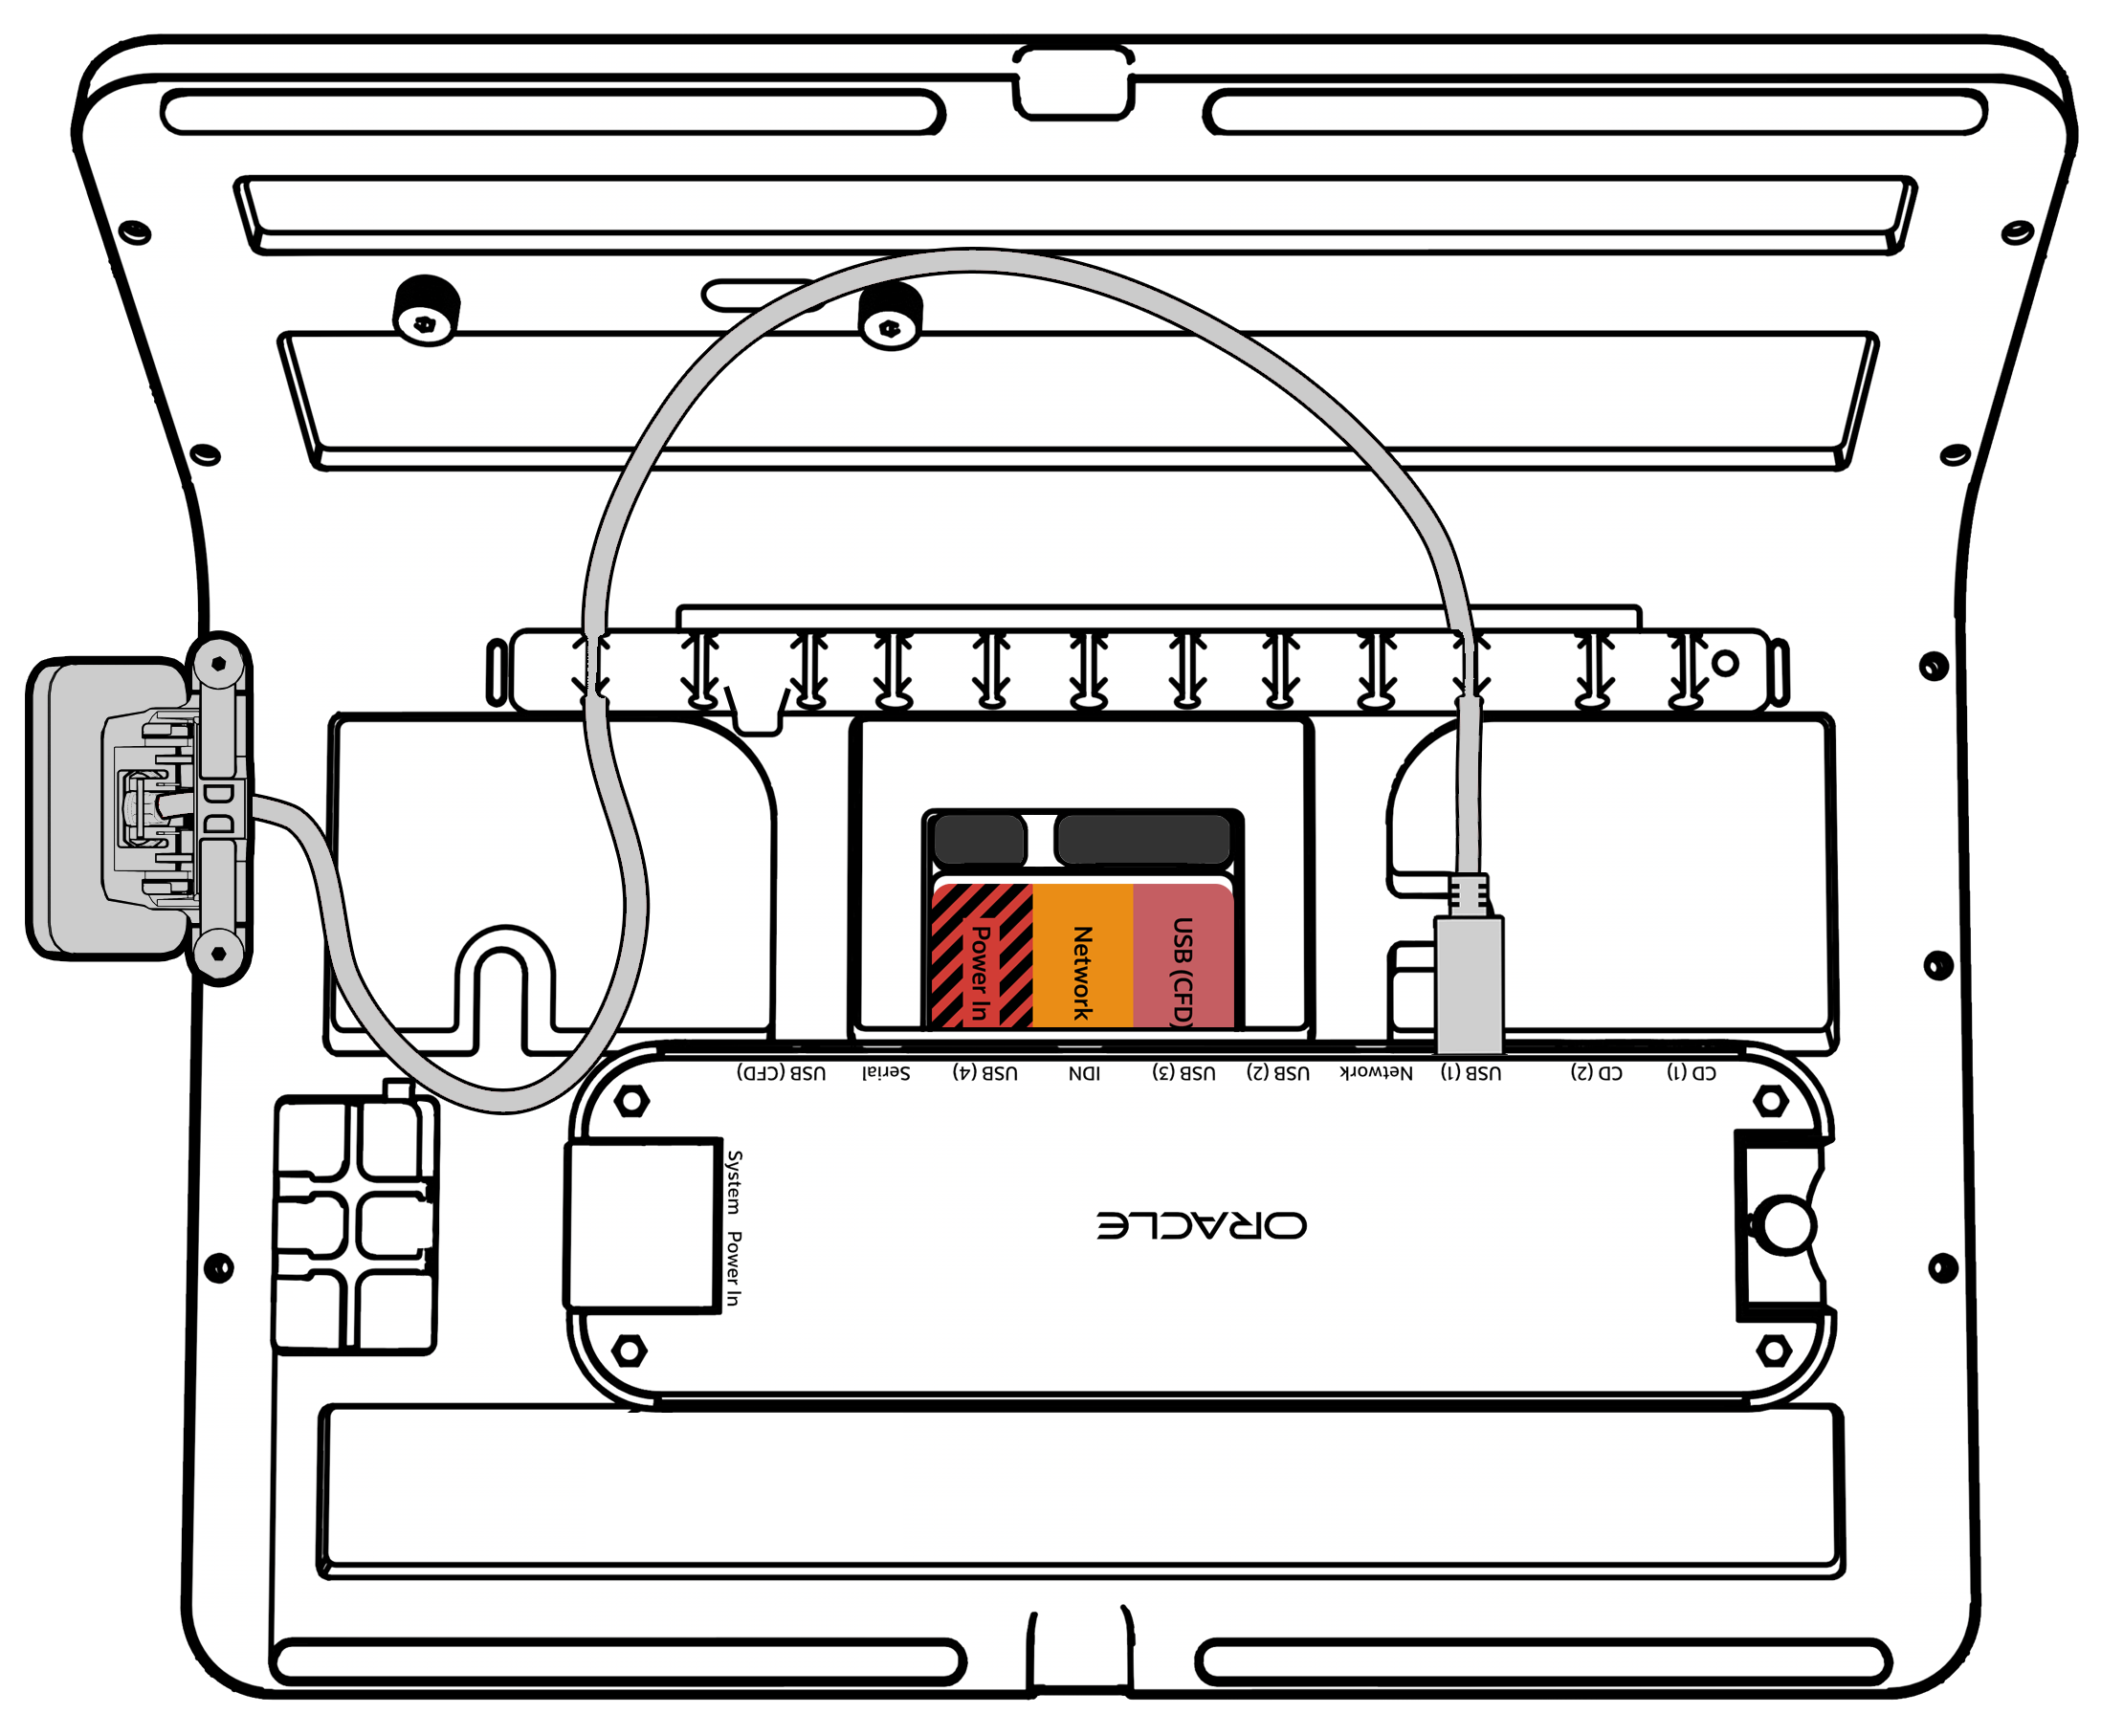
Route the fingerprint reader cable through the cable guides in the stand base, and then connect it to an available USB port on the Oracle Peripheral Expansion Module. Note that the cable shown in the following image follows the suggested routing path, but you may choose a different routing path depending on your configuration.
Figure 5-13 Routing and Connecting the Fingerprint Reader Cable
Mount the fingerprint reader on the Low Profile Stand
Note:
Before installing workstation accessories, routing cables, or other maintenance, place a cloth or cardboard on your work surface to avoid damaging the Workstation 8.-
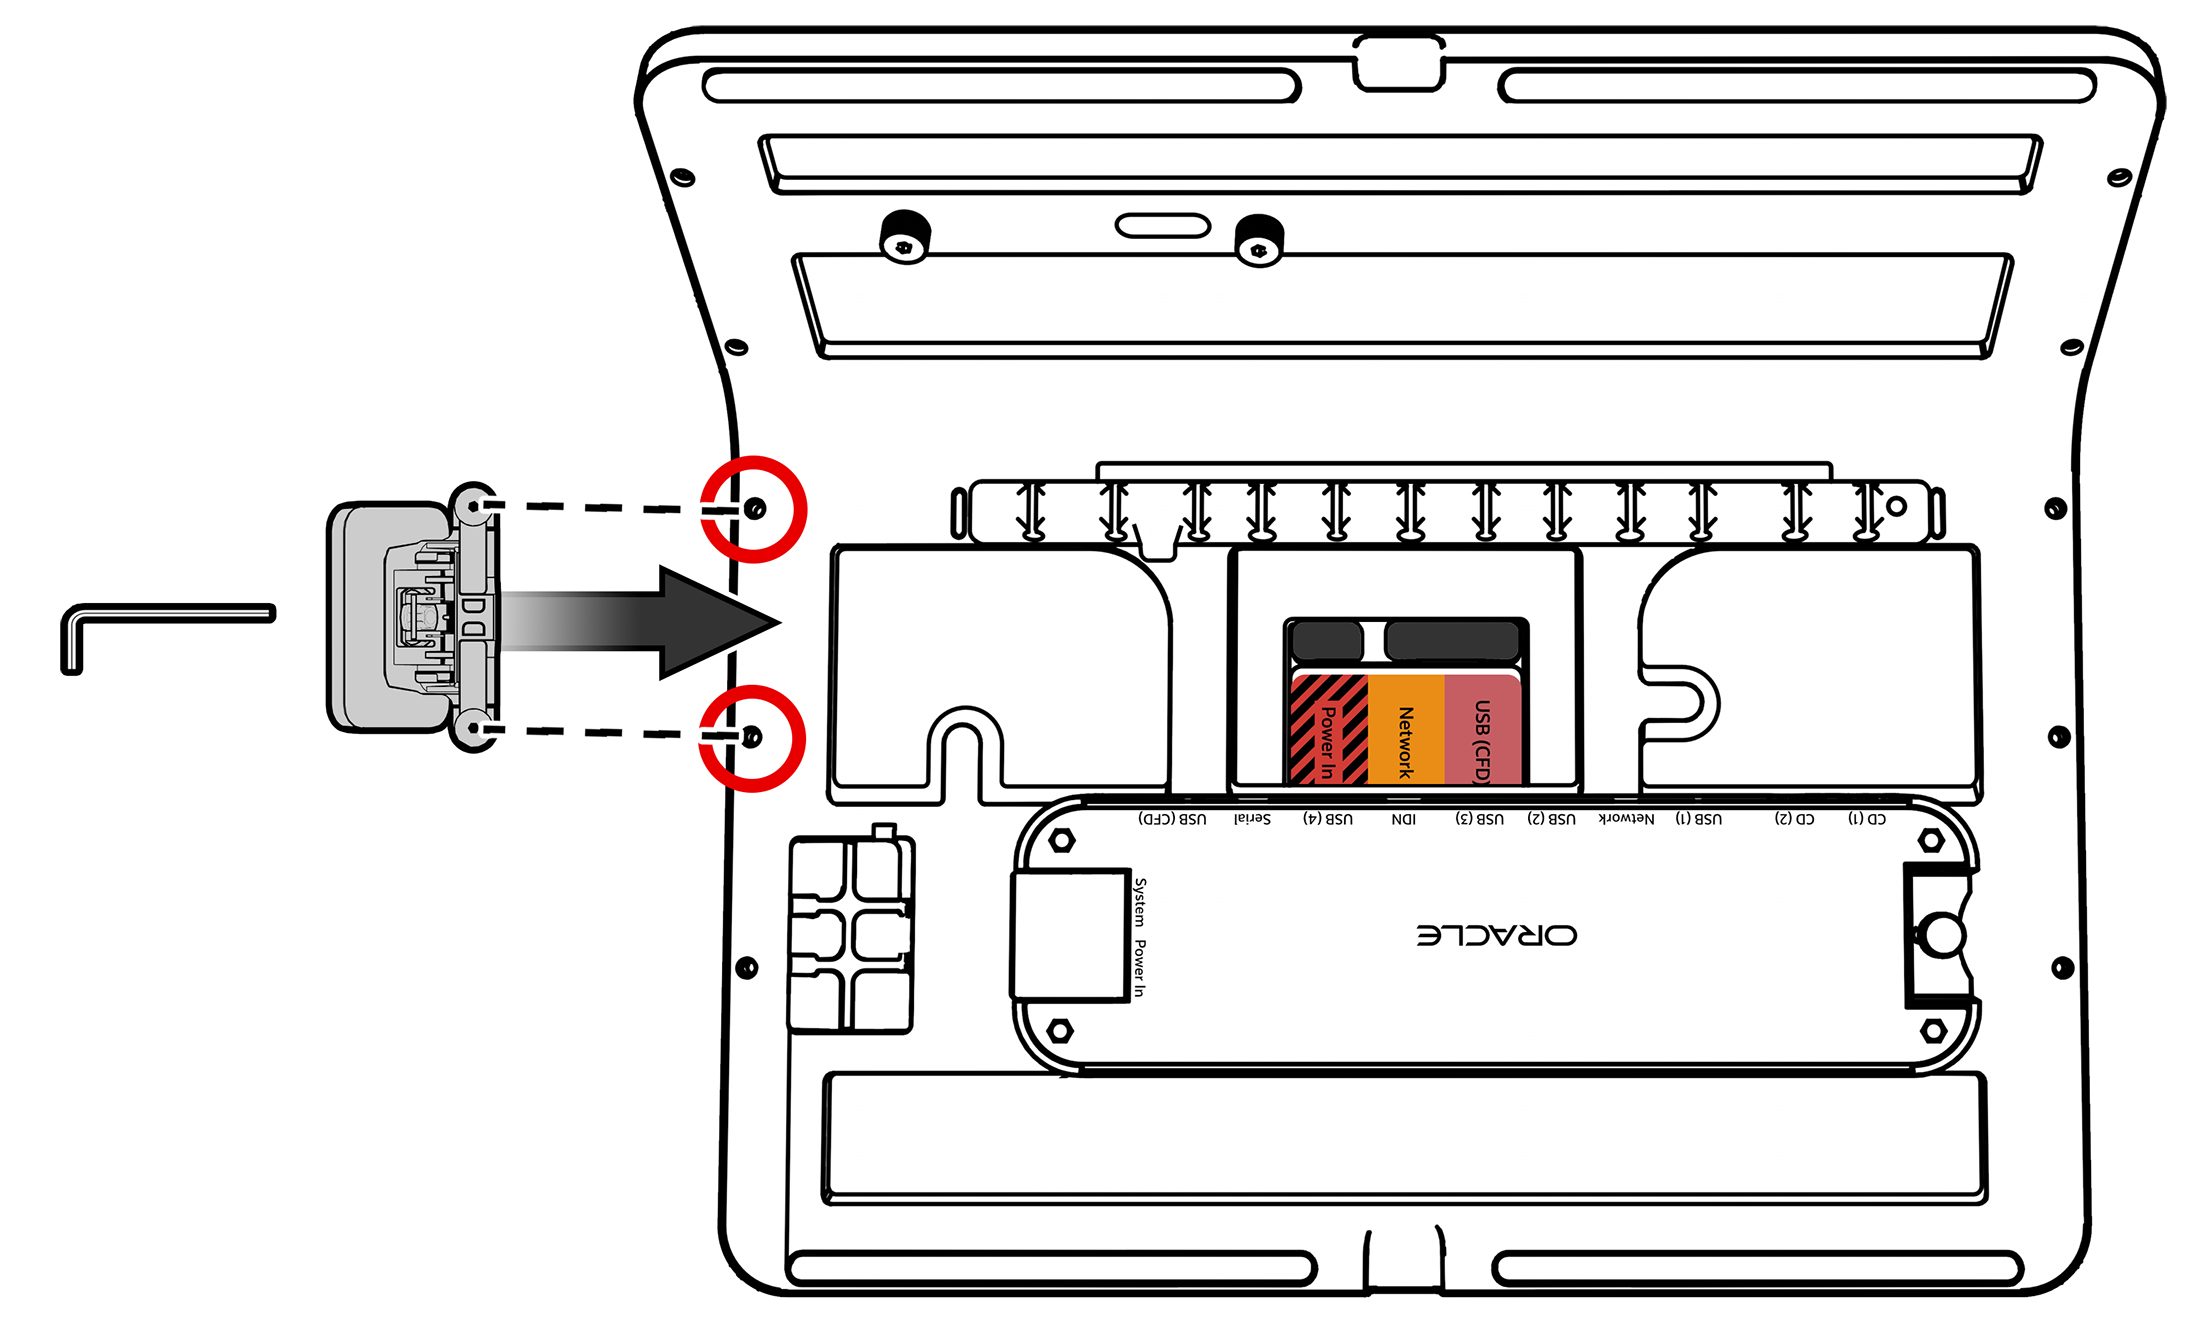
Position the fingerprint reader on an available accessory mounting point along the edge of the Low Profile Stand. Each accessory mounting point has two holes for attaching devices.
-
Align the captive screws with the two accessory mounting point screw holes, and then secure the fingerprint reader to the Low Profile Stand using an Oracle 2.5mm hex key.
Figure 5-14 Positioning the Fingerprint Reader on the Low Profile Stand
-
Route the fingerprint reader cable through the cable guides in the stand base, and then connect it to an available USB port on the Oracle Peripheral Expansion Module. Note that the cable shown in the following image follows the suggested routing path, but you may choose a different routing path depending on your configuration.
Figure 5-15 Routing and Connecting the Fingerprint Reader Cable
Mount the fingerprint reader on the Workstation 8
Note:
By default, the fingerprint reader ships with the stand mount preattached. To mount the fingerprint reader on the Workstation 8, you must remove the stand mount and replace it with the workstation mount.Uninstall the stand mount from the fingerprint reader
-
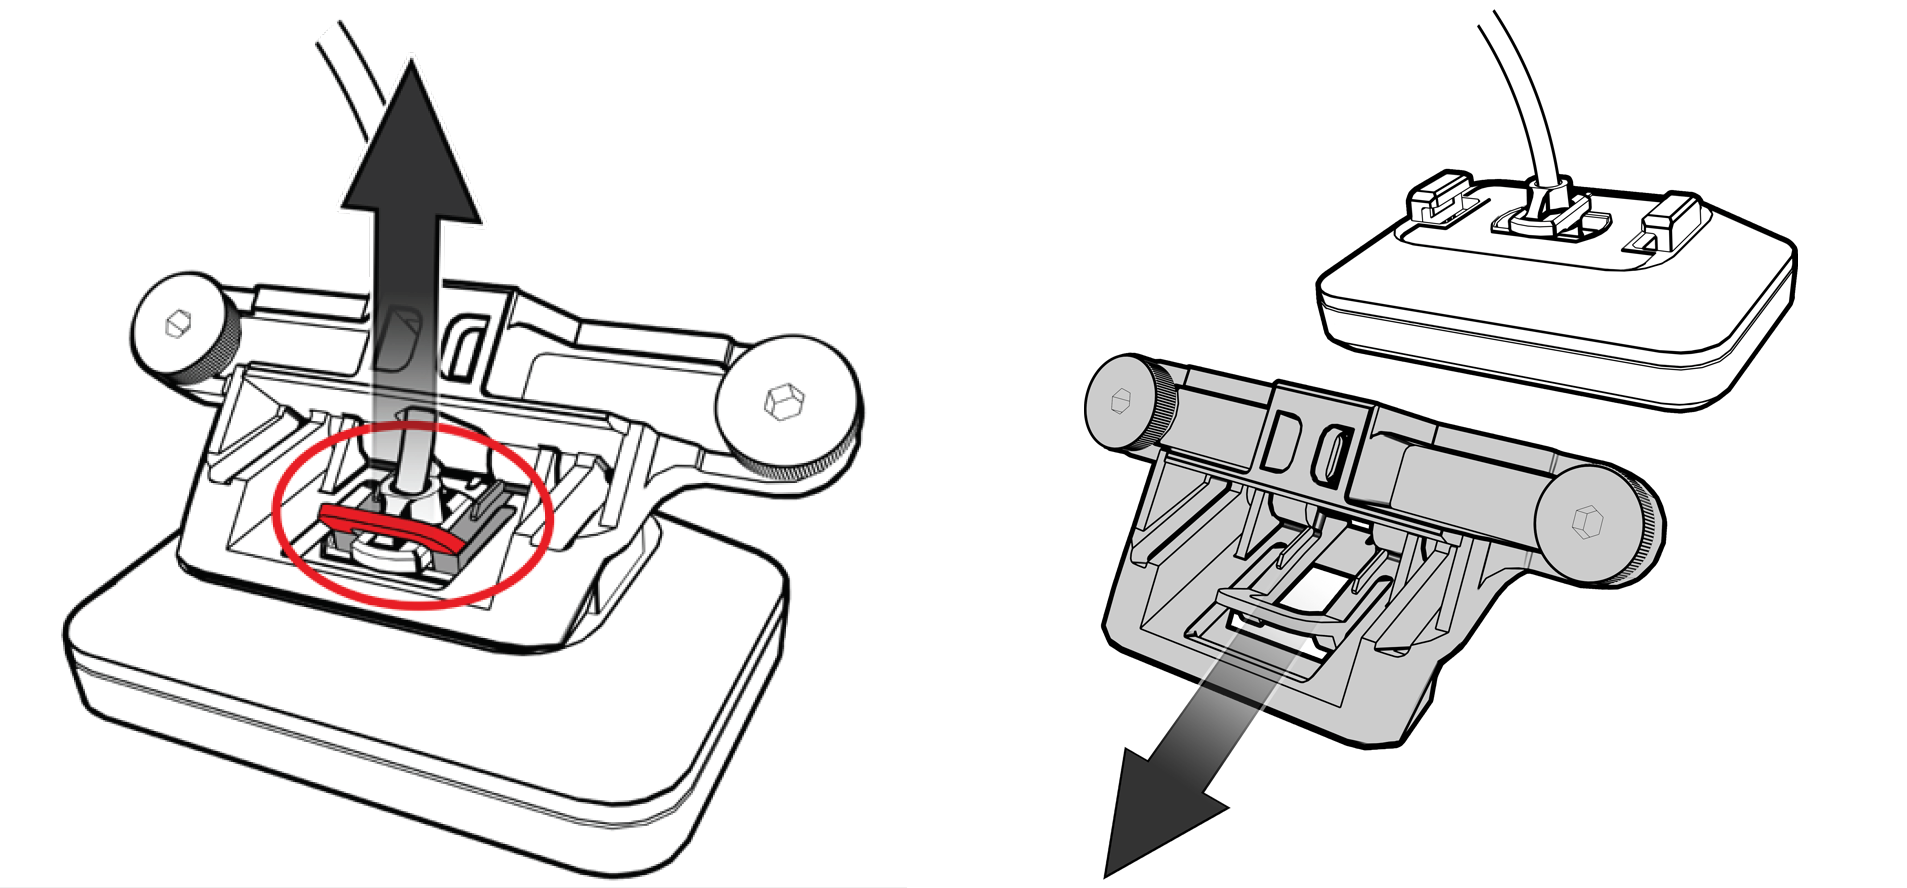
Gently lift the horizontal plastic bar near the fingerprint reader attachment point, and then slide the stand mount away from the fingerprint reader.
Figure 5-16 Uninstalling the Stand Mount from the Fingerprint Reader
Install the workstation mount on the fingerprint reader
-
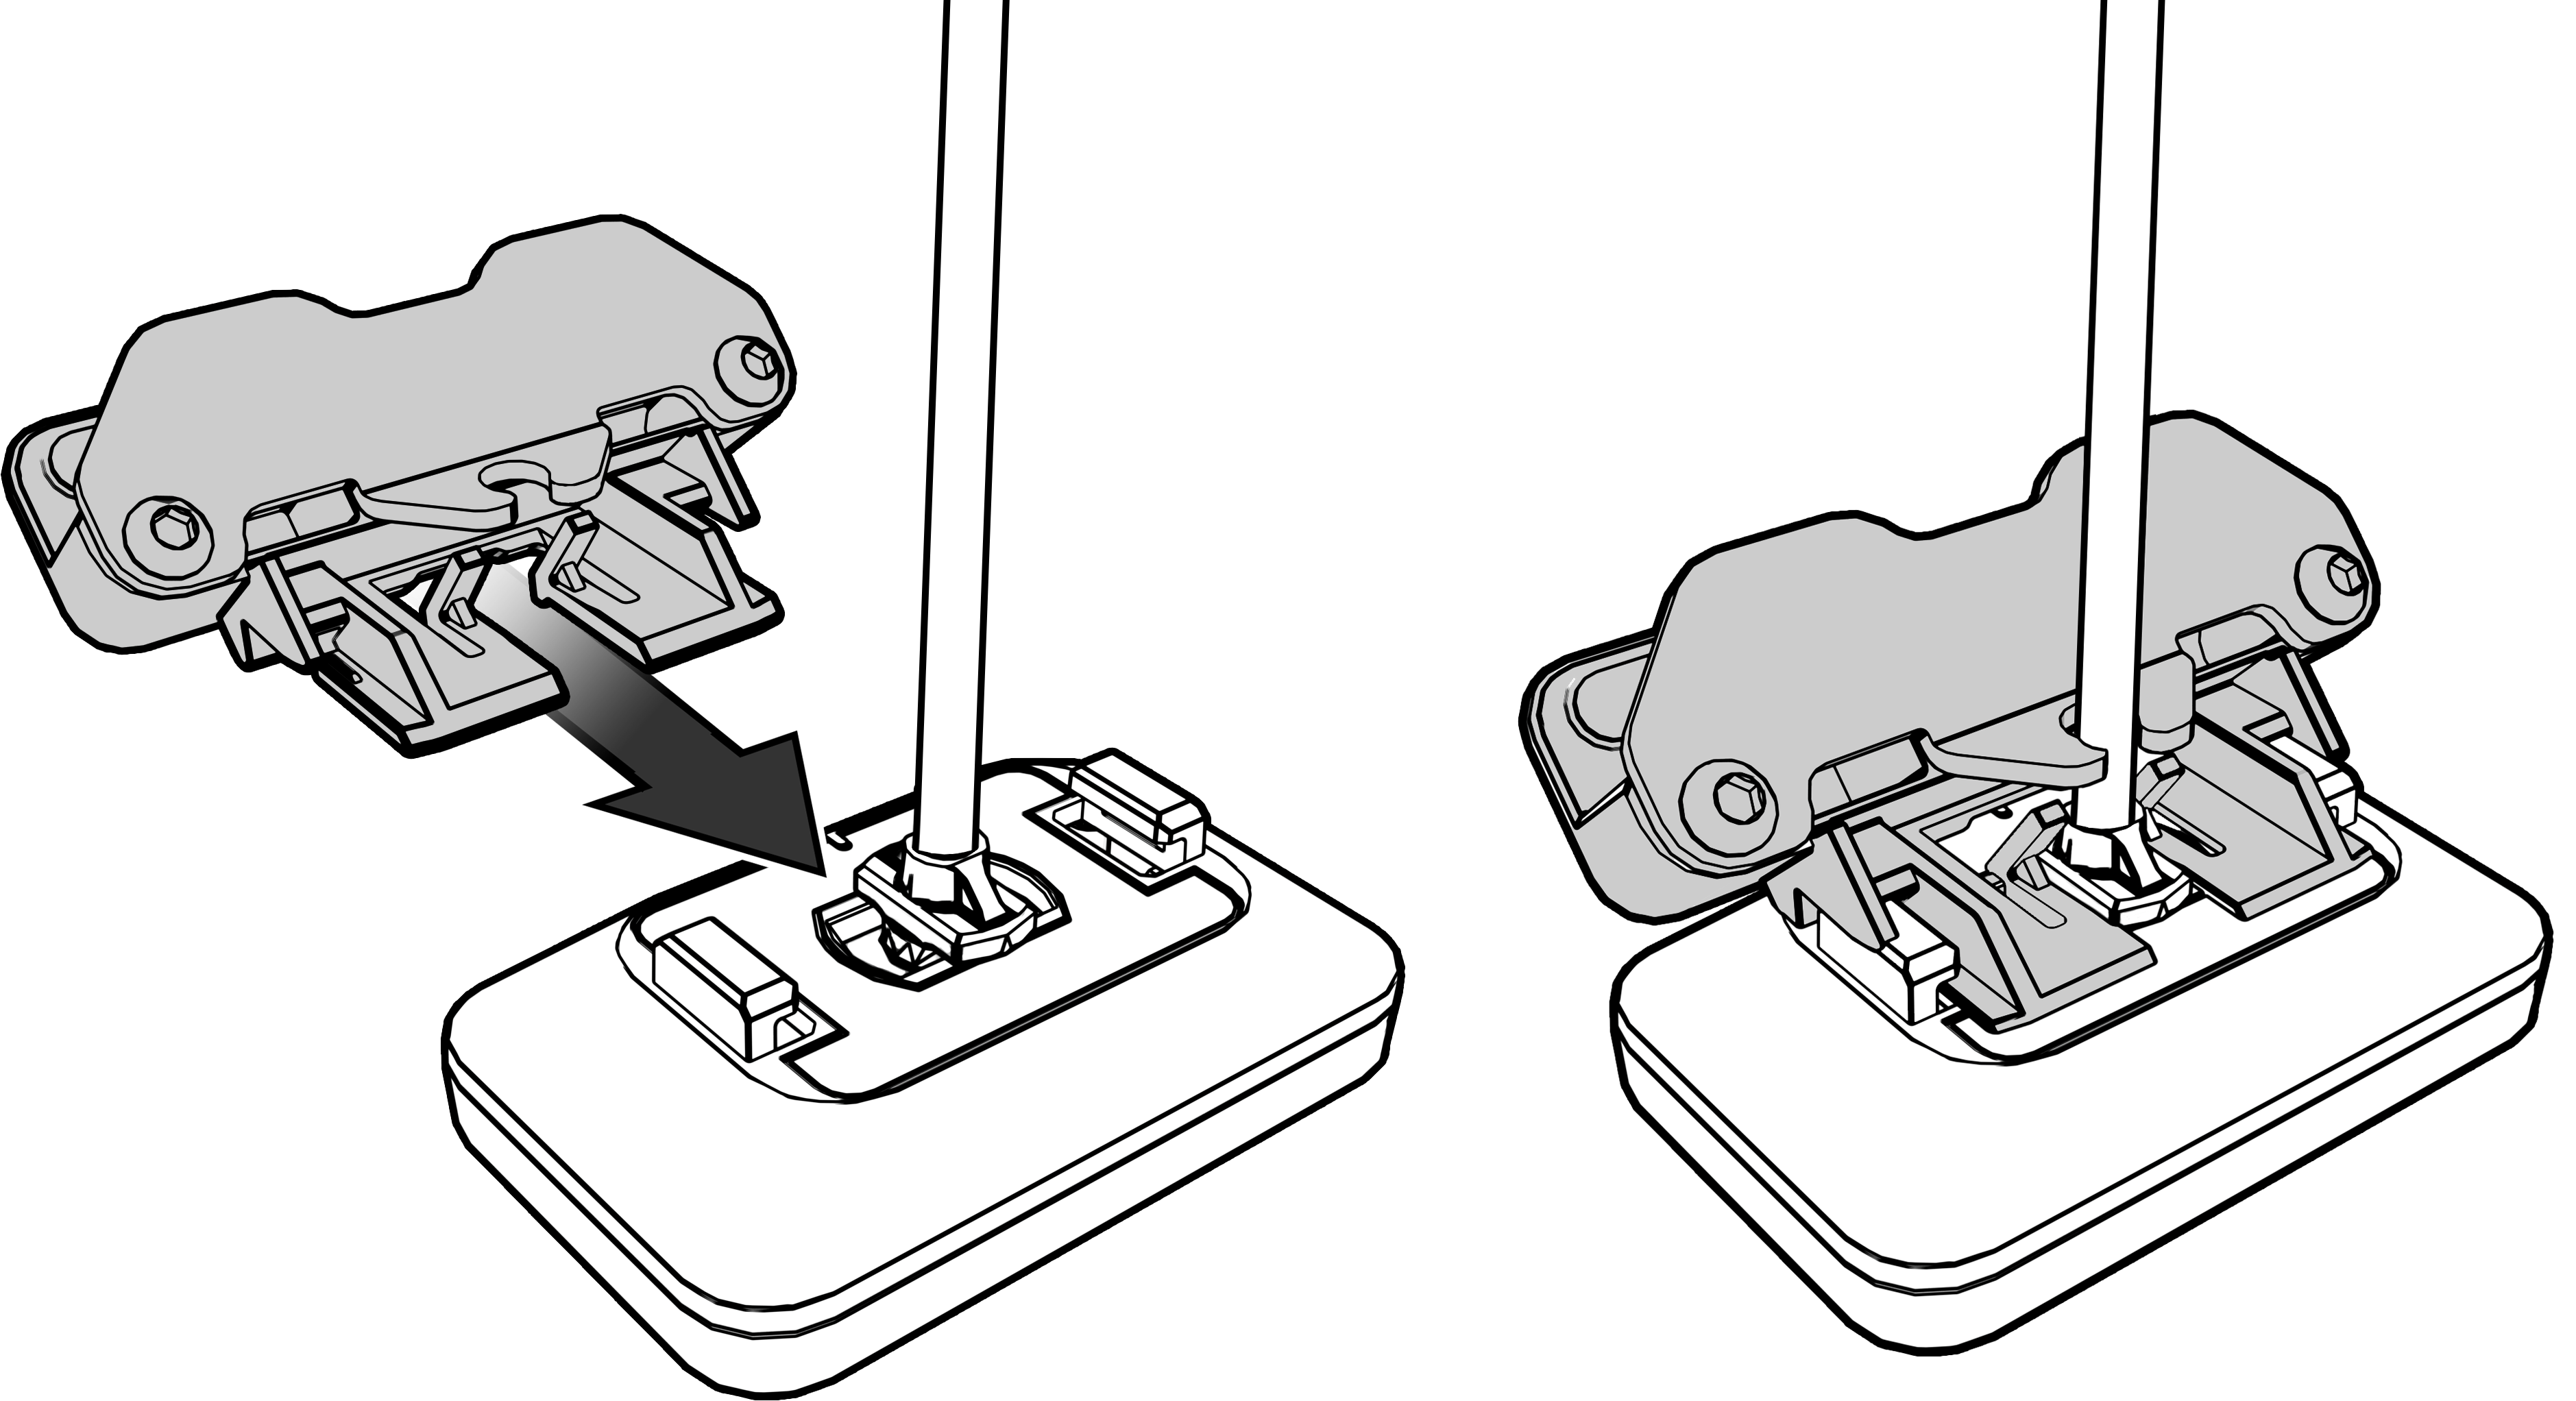
Slide the workstation mount into the slot on the rear of the fingerprint reader.
Figure 5-17 Installing the Workstation Mount on the Fingerprint Reader
-
Peel away the adhesive strip backing on the workstation mount.
Install the Fingerprint Reader with Workstation Mount on the Workstation 8
-
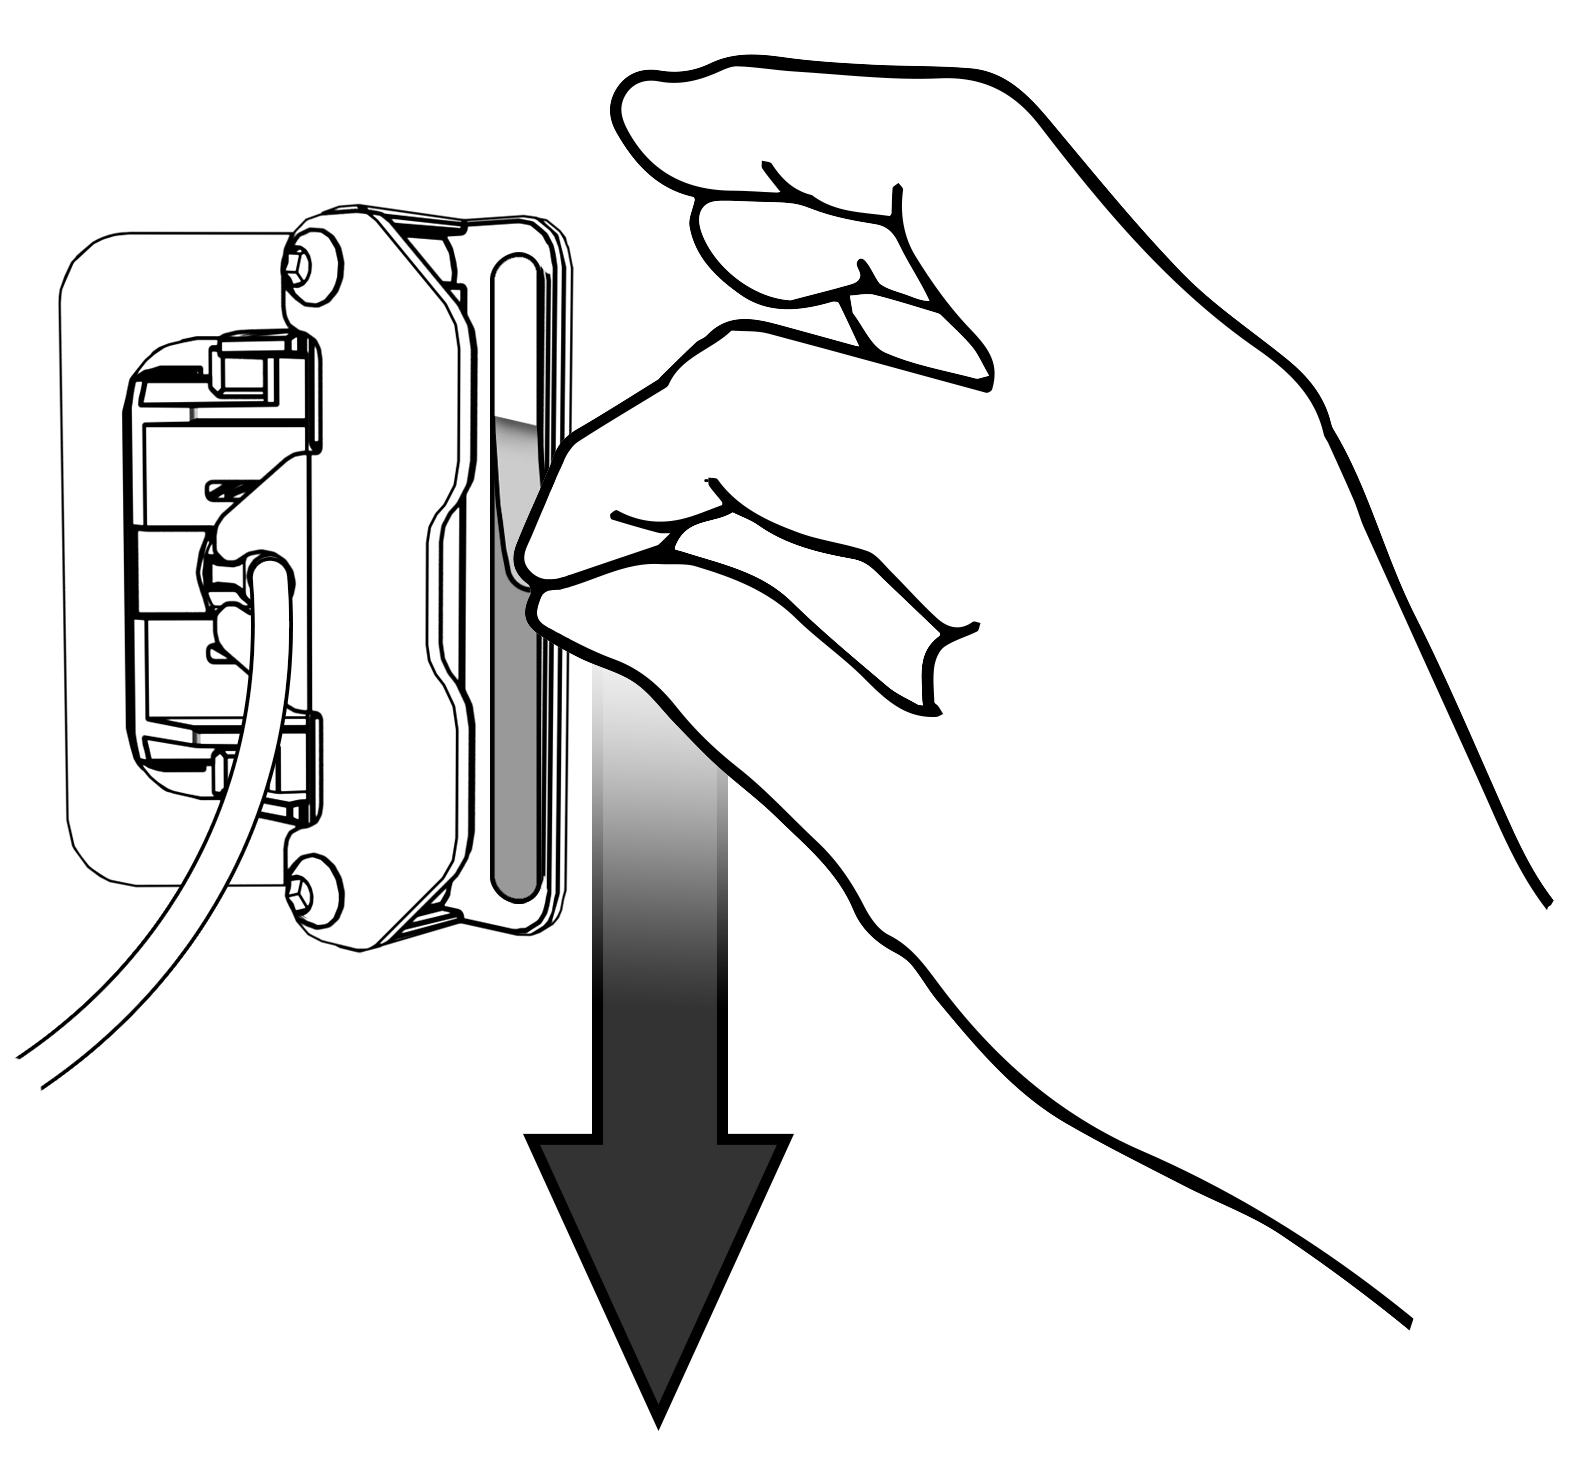
Peel away the adhesive strip backing on the workstation mount.
Figure 5-18 Peeling Away the Adhesive Strip Backing on the Workstation Mount
-
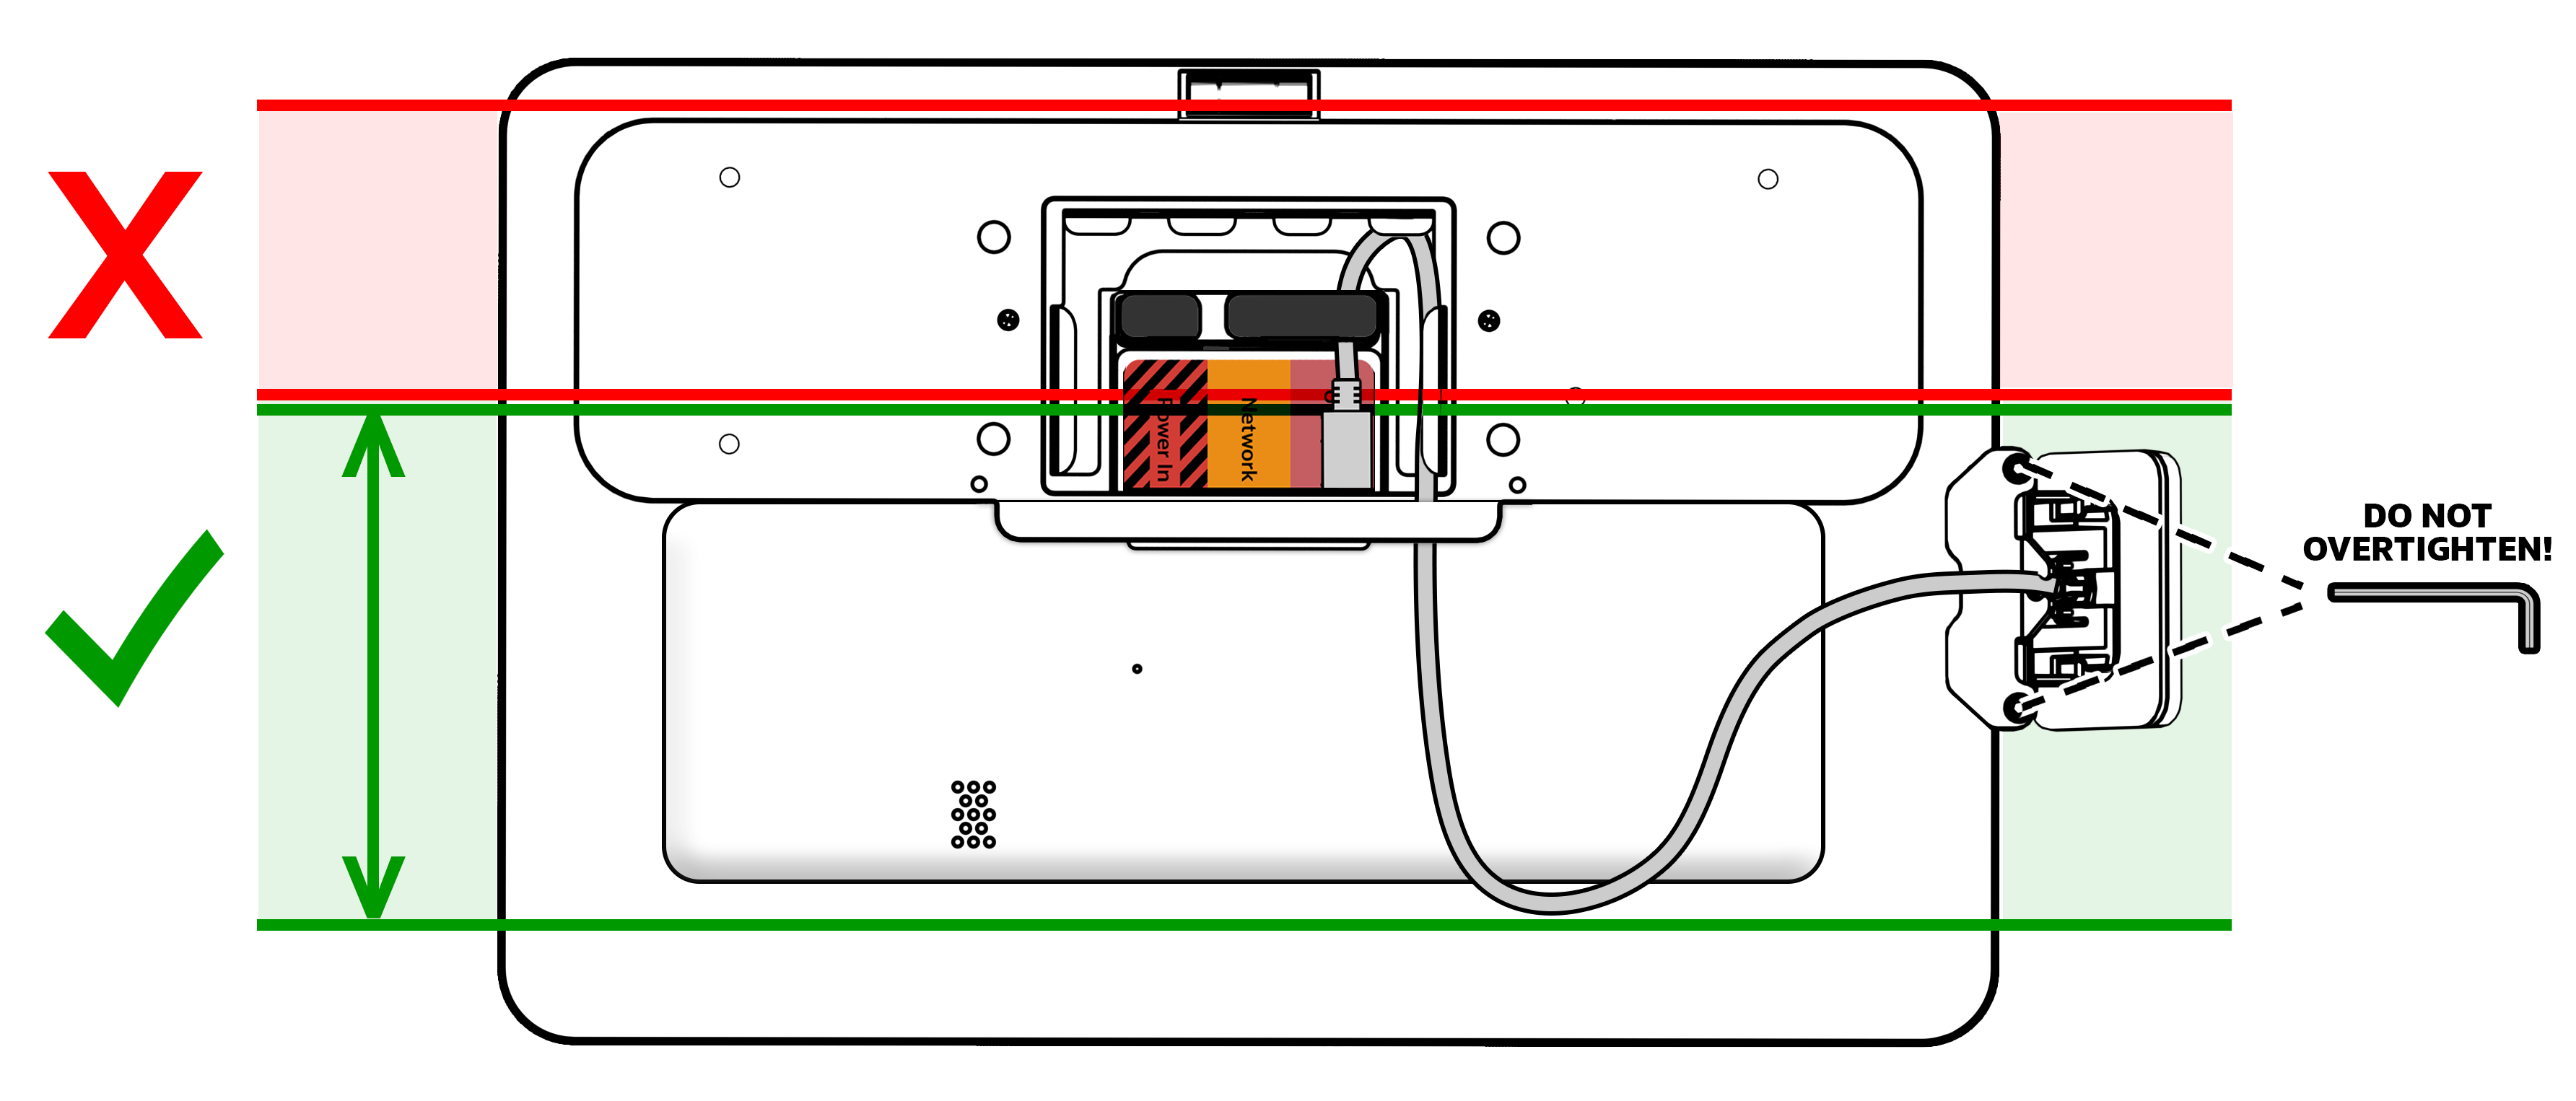
IMPORTANT!: If you mount the fingerprint reader too high on the workstation, you will block access to certain features. Refer to the following illustration to ensure you mount the fingerprint reader in a safe mounting zone.
Figure 5-19 Installing the Fingerprint Reader in the Safe Zone on a Workstation 8
-
-
Attach the fingerprint reader to an area in the safe zone on side of the workstation.
-
Lightly tighten the fingerprint reader workstation mount with the included hex wrench. Do not over tighten! Overtightening may cause screen damage or distortion.
-
Connect the fingerprint reader cable to the Workstation 8.