5 Condiment Orderer
Some menu items are configured with groups of condiments. For example, a steak can be configured with a choice of cooking methods (rare, medium, or well done) and a choice of potato types (skinny chips, mashed, or wedges) and a choice of extras (onion rings or mushrooms). These items are all condiments, and the steak is called the parent menu item. Condiments can be required, which means that you are forced to choose one of the selections, or allowed, which means that you do not have to select one.
If a parent menu item has required condiments, or allowed and required condiments, the Condiment Orderer appears to guide you through the selections.
If a parent menu item has only allowed condiments, the Condiment Orderer is not automatically displayed. In this case, when the parent item is sold, it is added to the check. To view or add allowed condiments, click the menu item on the check detail, and the Condiment Orderer appears.
-
Start with the first tab and move automatically to the next tab when the required condiments have been fulfilled.
-
Jump ahead to any tab and move around the Condiment Orderer independently, rather than being guided through from start to finish.
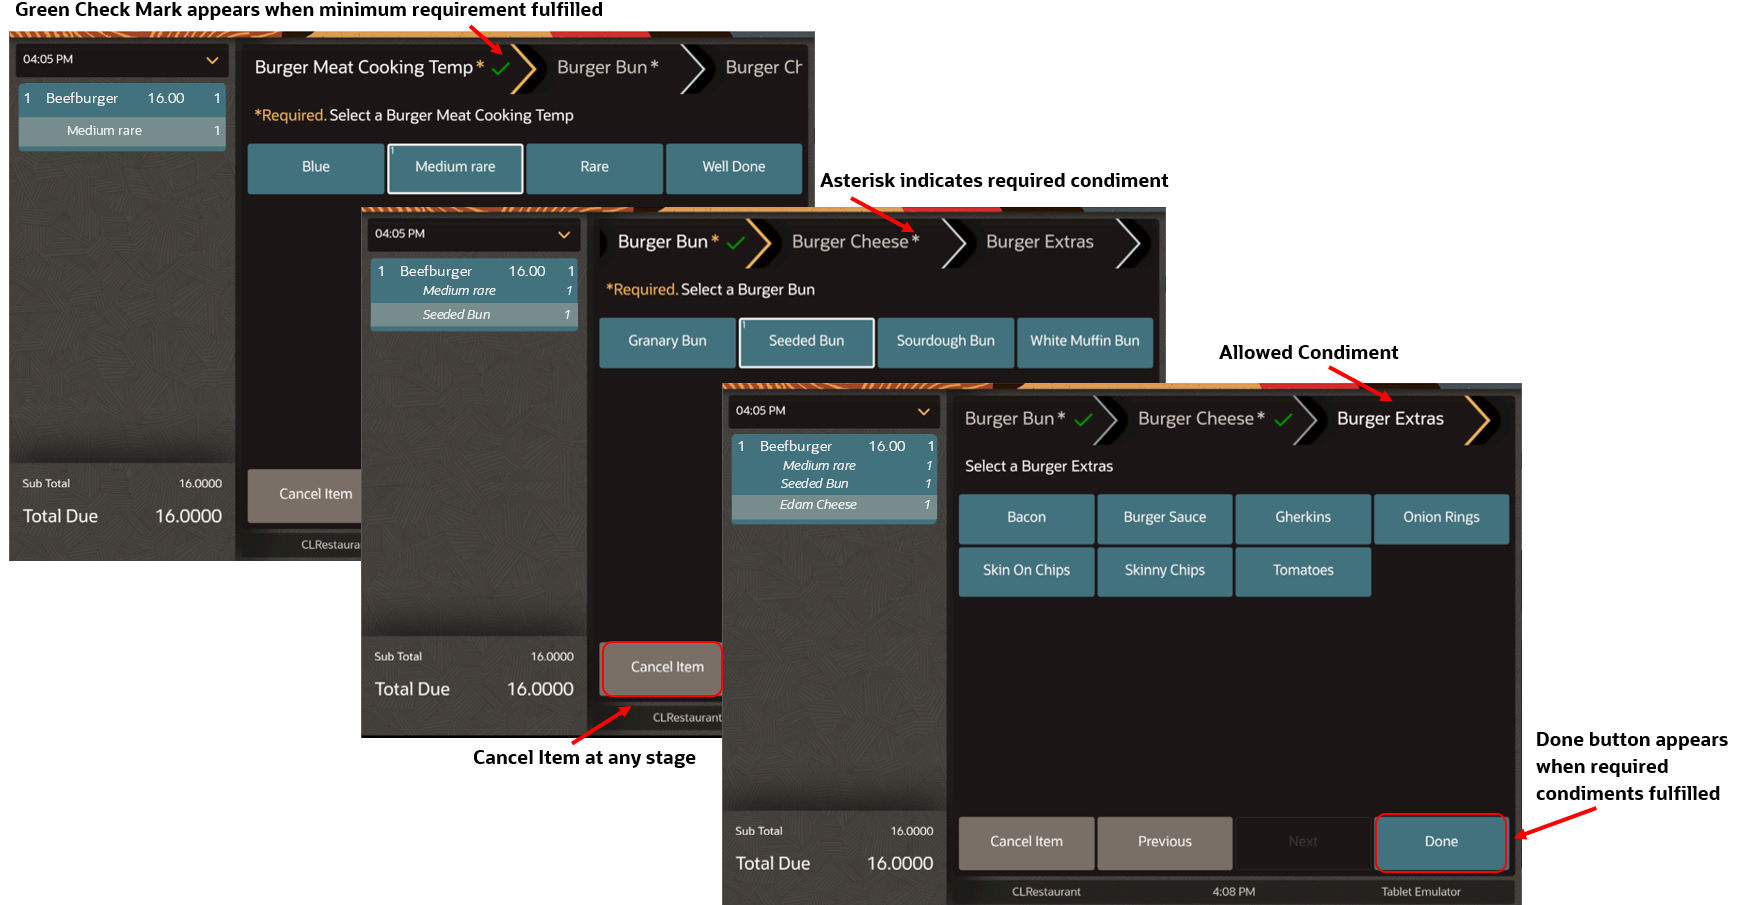
Figure 5-1 Condiment Workflow on Workstations and Tablets

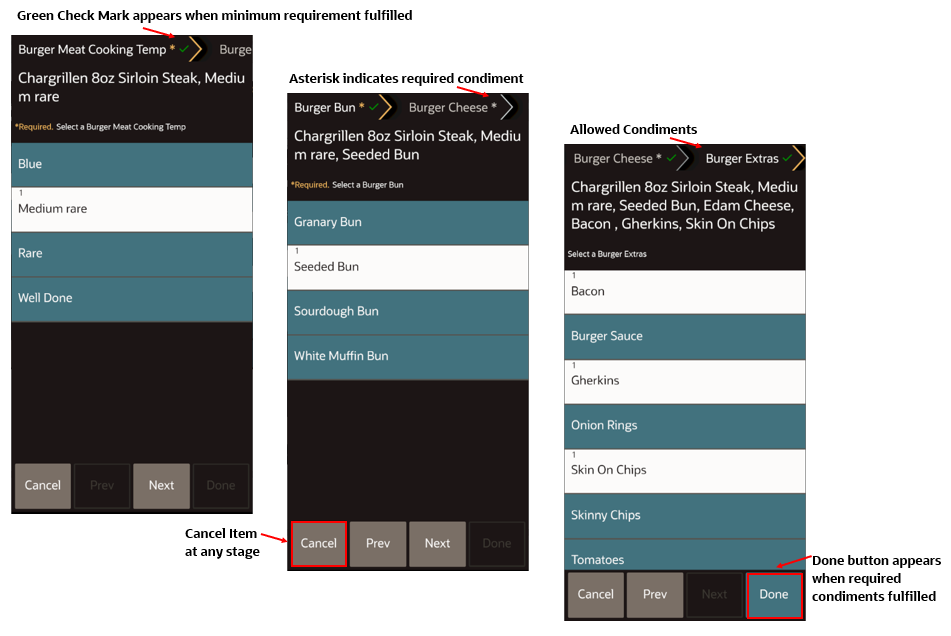
Figure 5-2 Condiment Workflow on Mobile Phones and Handheld Devices

An asterisk indicates the required condiment tabs, and the word Required appears before the selection instructions.
Click Previous and Next to navigate through the Condiment Orderer. Click the tab header to jump from one tab to another.
The Cancel Item button appears throughout, and cancels the menu item and all condiments. If you click Cancel Item when changing an existing item with condiments, a message appears warning that the item and condiments will be voided from the check. This is to prevent users from accidentally voiding items and their condiments. No warning message appears for menu items with condiments that have not already been saved to the check.
The Done button appears only after the required condiments have been entered. You can either click Done, or enter allowed condiments (for example, Burger Extras).
Tabs are marked with a green check mark if a selection has been made from the tab.
The Condiment Orderer is not displayed for menu items that only have allowed condiments. The menu item is added to the check, and you can add other items without using the Condiment Orderer. To view or add the allowed condiments, click the menu item on the check detail, and the Condiment Orderer appears.