- Point-of-Sale User Guide
- Condiment Orderer
- Use the Condiment Orderer
Use the Condiment Orderer
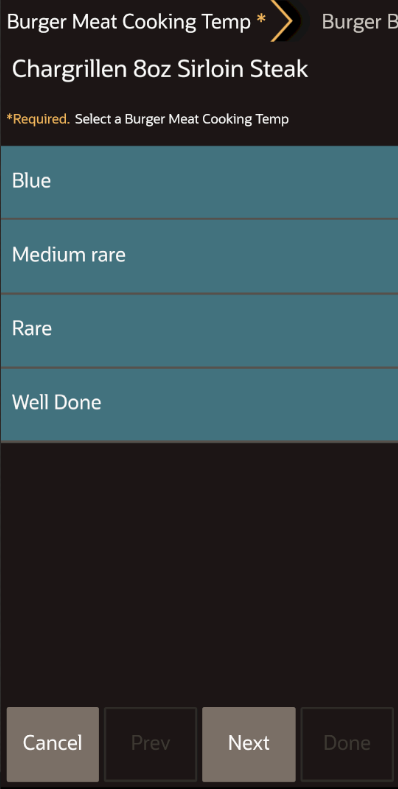
- Select a parent menu item that has required condiment groups
(for example, Beef Burger). The Condiment Orderer tabs appear.
Figure 5-3 Condiment Orderer Tabs After Selecting Parent Menu Item with Required Condiments on Workstations and Tablets
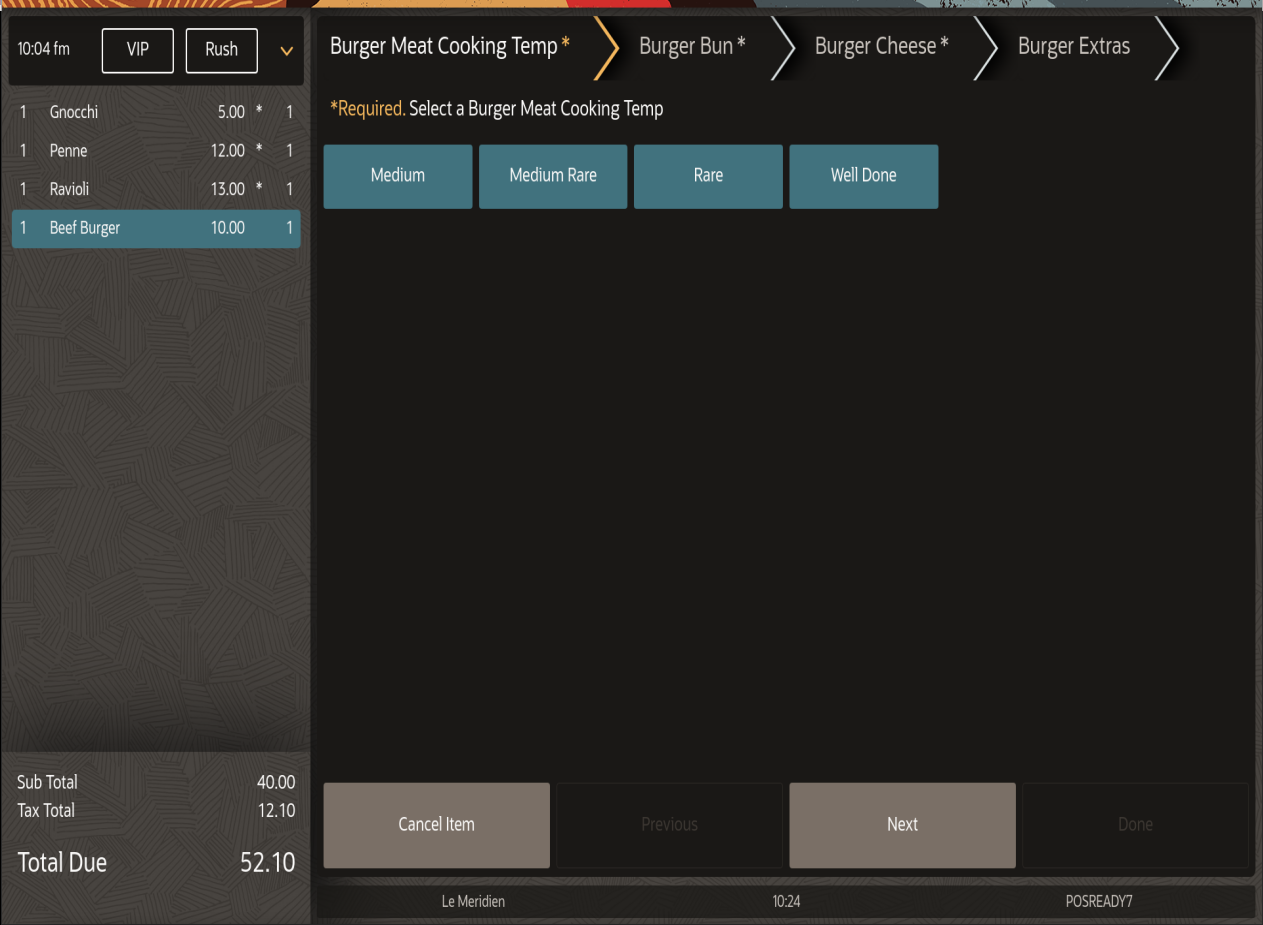
Figure 5-4 Condiment Orderer Options After Selecting Parent Menu Item with Required Condiments on Mobile Phones and Handheld Devices
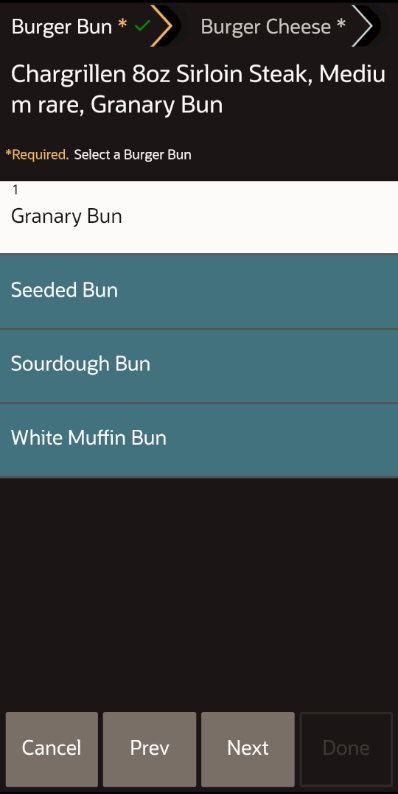
- Select a required condiment. When the group is fulfilled,
a green check appears and the Condiment Orderer automatically advances
to the second tab, and so on until you have selected the required
number of condiments from all tabs.
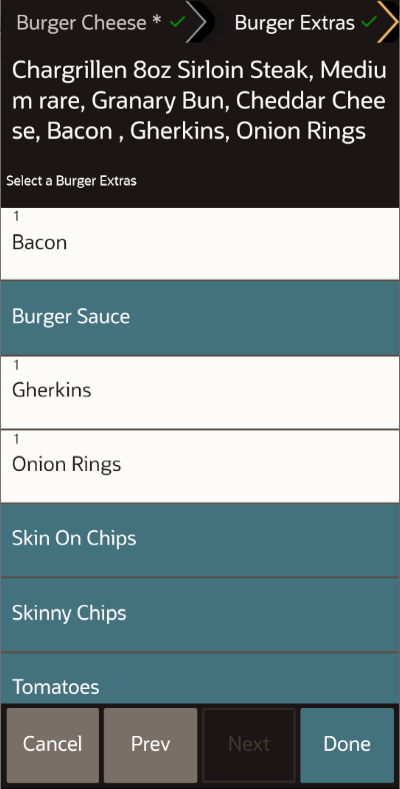
You can also manually select the tabs; this stops the Condiment Orderer from automatically advancing through the tabs. The Previous and Next buttons help with navigation. While in the Condiment Orderer, the selected condiments appear in the check detail area on workstations and tablets. On mobile phone and handheld devices, the condiments appear at the top due to limited space.
Figure 5-5 Select Required Condiments on Workstations and Tablets
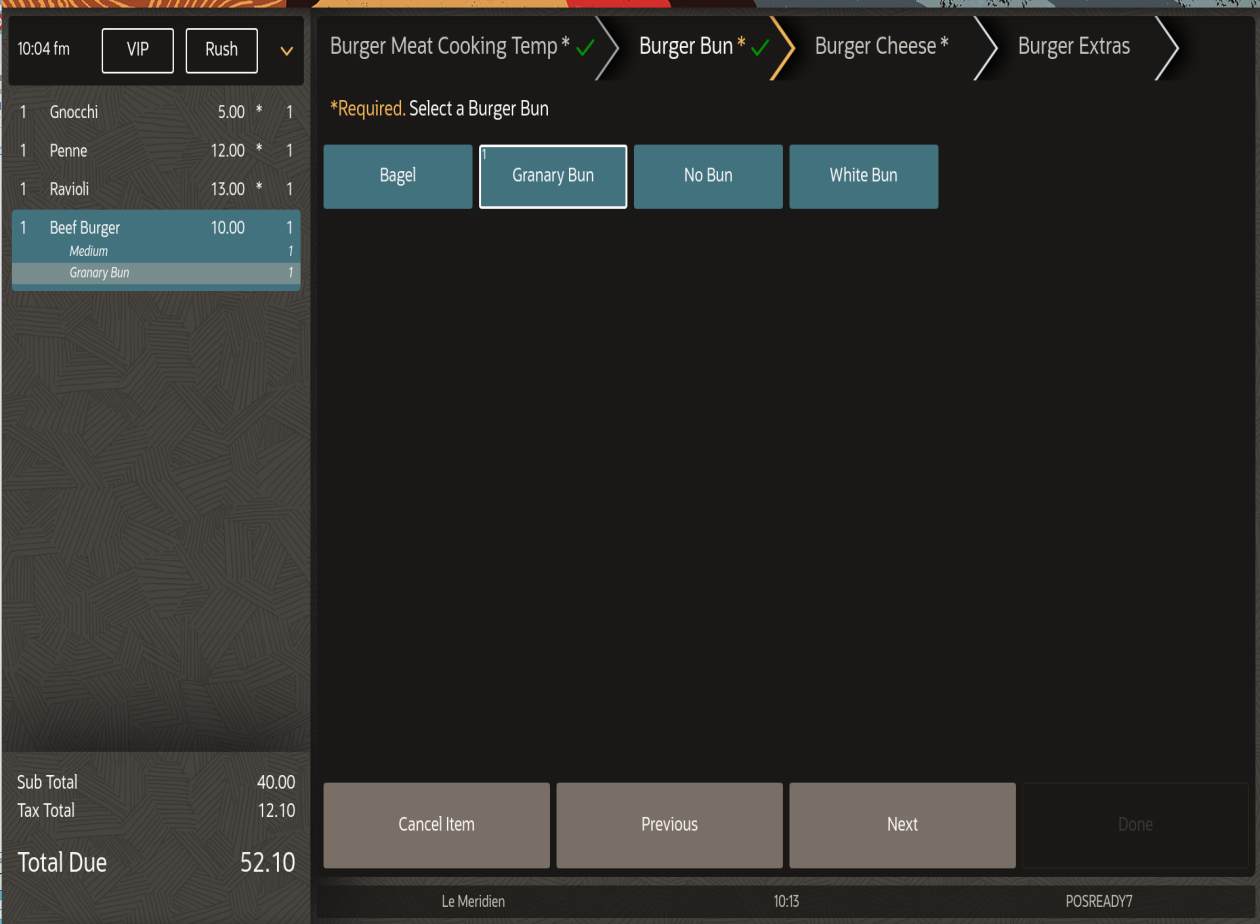
Figure 5-6 Select Required Condiments on Mobile Phones and Handheld Devices
- After you fulfill the required condiments, the Done button is active. Enter the allowed condiments or
click Done to save the item and close the Condiment
Orderer.
Figure 5-7 Condiment Orderer Done on Workstations and Tablets
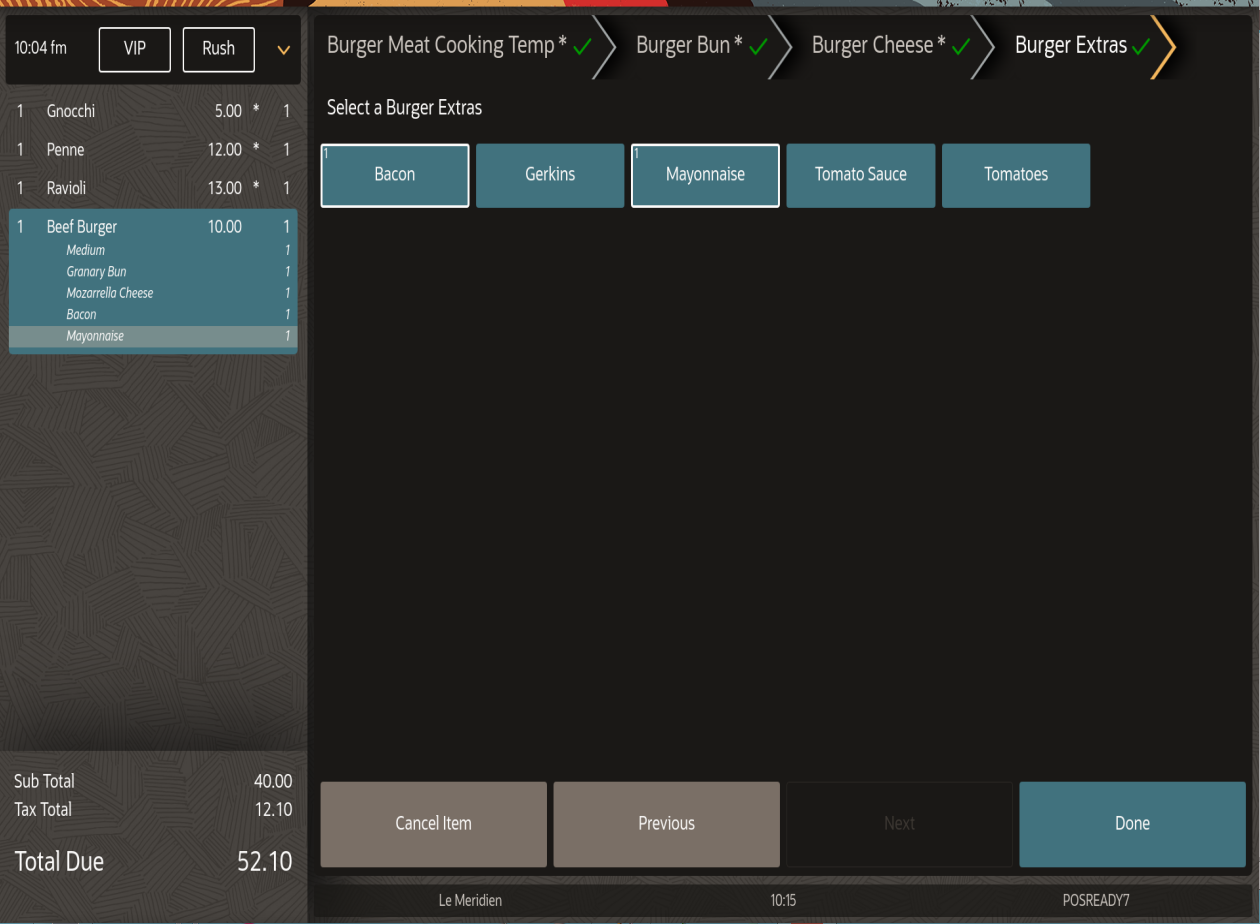
Figure 5-8 Condiment Orderer Done on Mobile Phones and Handheld Devices
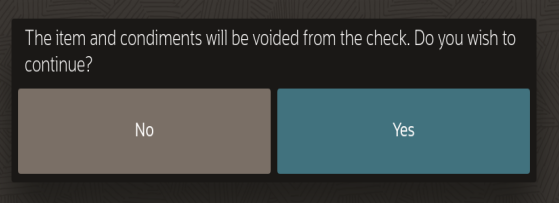
- To cancel the item and condiments from the check, click Cancel or Cancel Item. This removes the item from the check. The following message appears if Cancel is selected when changing a condiment item that has already been added to the check.
Figure 5-9 Cancel Item and Condiments
Parent topic: Condiment Orderer