Split Check

In TSR and Bar operations you can use the Split Check function after sending a check to separate the check by menu item so that customers can pay for the items they consumed. The splits are not equal. You can transfer portions of a guest check detail to a new check, which is then assigned its own check number. The new check can be modified independently from the original check.

  1. For workstations and tablets
    1. Click Check Functions (TSR) or Transaction Functions (Bar).
    2. Click Split Check.
    3. Select one or more menu items.
    4. Click the check to move the item or items to.

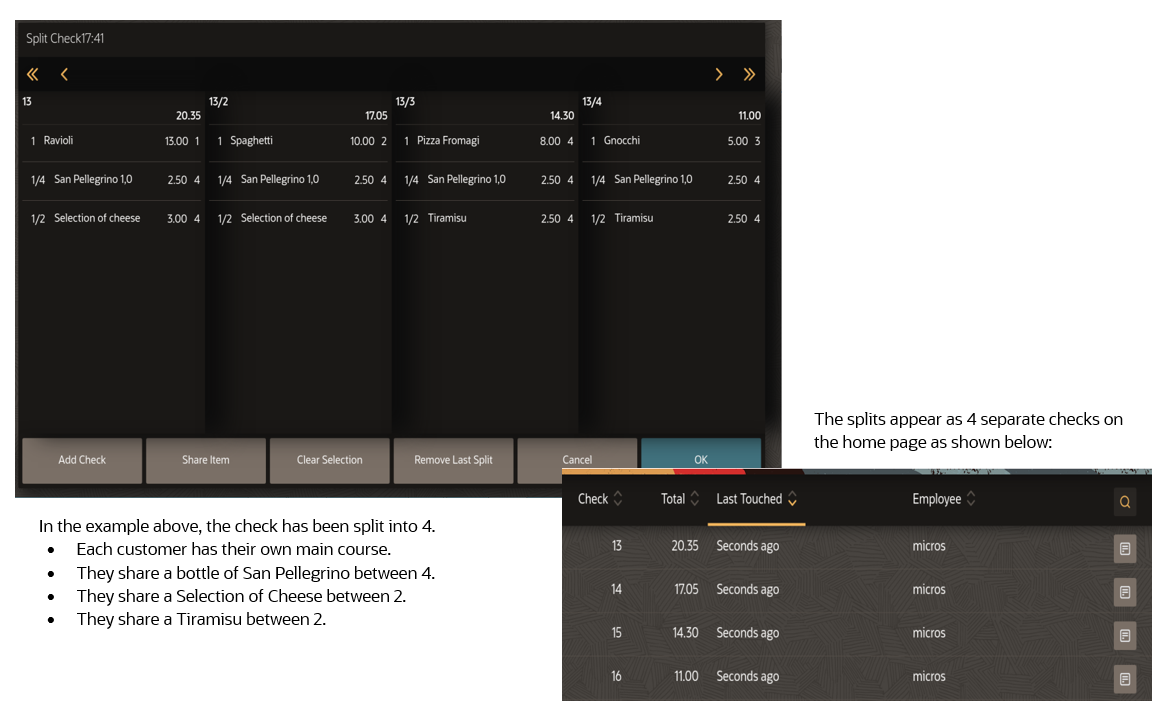
      Figure 4-23 Example of Split Check Function on Workstations and Tablets


      This figure shows an example of a check split into 4 checks on the POS client for the workstation or tablet UI.
    5. To add more checks, click Add Check.
    6. To share a menu item click Share Item.
    7. To deselect multiple menu items, click Clear Selection.
    8. To remove the last menu item split, click Remove Last Split.
  2. For mobile phones and handheld devices:
    1. Click Functions.
    2. Click Split Check.
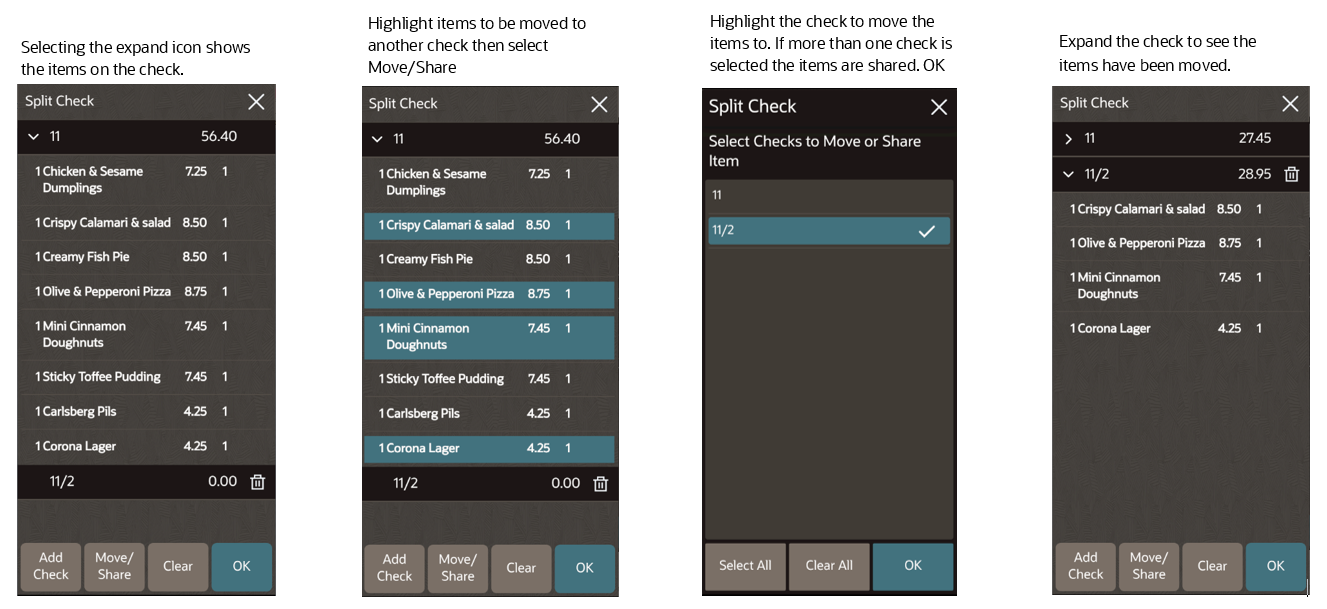
    3. Expand the check to show the item details.
    4. Select one or more menu items.
    5. Click Move/Share.
    6. Click the check to move the item or items to or to share items with.

      If one check is selected, the items are moved. If multiple checks are selected, the items are shared.

      Figure 4-24 Example of Split Check Function on Mobile Phones and Handheld Devices


      This figure shows the Split Check function and examples of how to move items from one check to another, how to add a check, and share an item on the POS client for the mobile phone and handheld device UI.
    7. To add more checks, click Add Check.
    8. To remove the split check and return the items to the original check, click the trash icon.
    9. Once saved, the split checks will appear as different checks on the home page.