- Configuration Guide
- Payments
- Create Payment Buttons
Create Payment Buttons
You need to configure the payment buttons that will appear on the workstation. You can also configure the Send and Print buttons, and the bar Begin Check button.
- Select the Enterprise, click Setup, and then click Tender Parameters.
Payments use tender records set up in the Tender/Media module (for example, cash) and you can modify them in the Tender Parameters module using arguments to enable different payment functionality (for example, Exact Cash or Round Up).
- Click the Simphony Essentials tab.
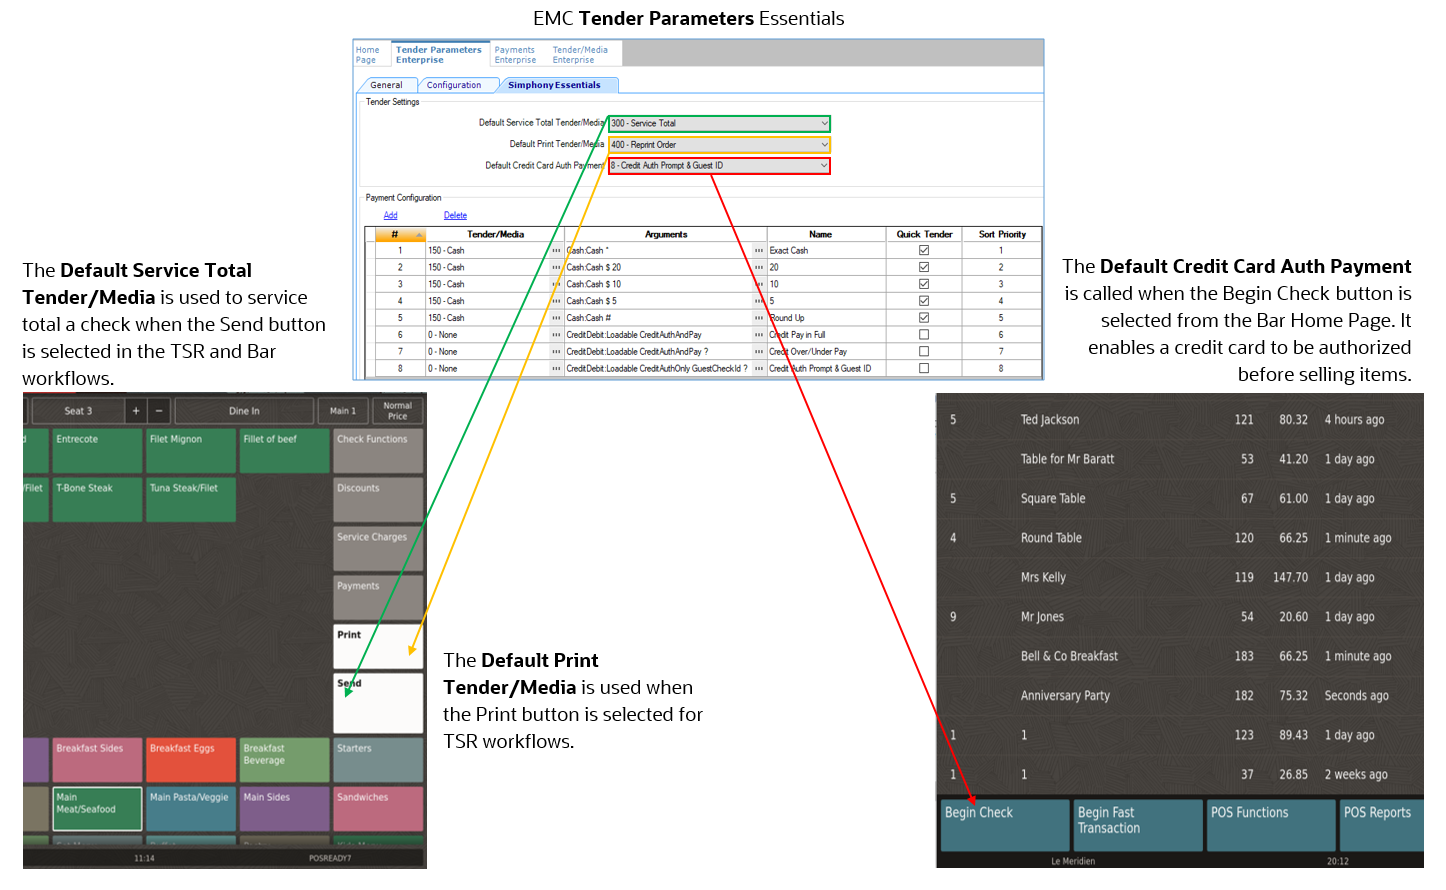
- Select the Default Service Total Tender/Media that is used with the Send function on the workstation.
- Select the Default Print Tender/Media that is used with the Print function on the workstation.
- Select the Default Credit Card Auth Payment that is used for the Begin Check function
in the bar workflow.
This can only be done after adding a Credit Card Auth Payment record in the Payment Configuration section (step 6).
To authorize a credit card and prompt for a check name in bar transactions, select 8 - Credit Auth Prompt & Guest ID.
Figure 6-1 Example of Default Tender/Media Functions

- To add a payment that will appear in the Payment page on
the workstation:
- Click Add.
- In the Tender/Media column, click the ellipsis button, select the type of tender (for example, Cash), and then click OK.
- In the Arguments column, click
the ellipsis button, select the Payment Type (for example, Cash:Cash). Select the appropriate function key from
the Functions drop-down list, and then click OK.
To authorize a credit card and prompt for a check name in bar transactions, select CreditDebit Loadable CreditAuthOnly GuestCheckId ? in the Arguments Payment Type field.
- In the Name column, enter the name of the payment button that appears on the workstation.
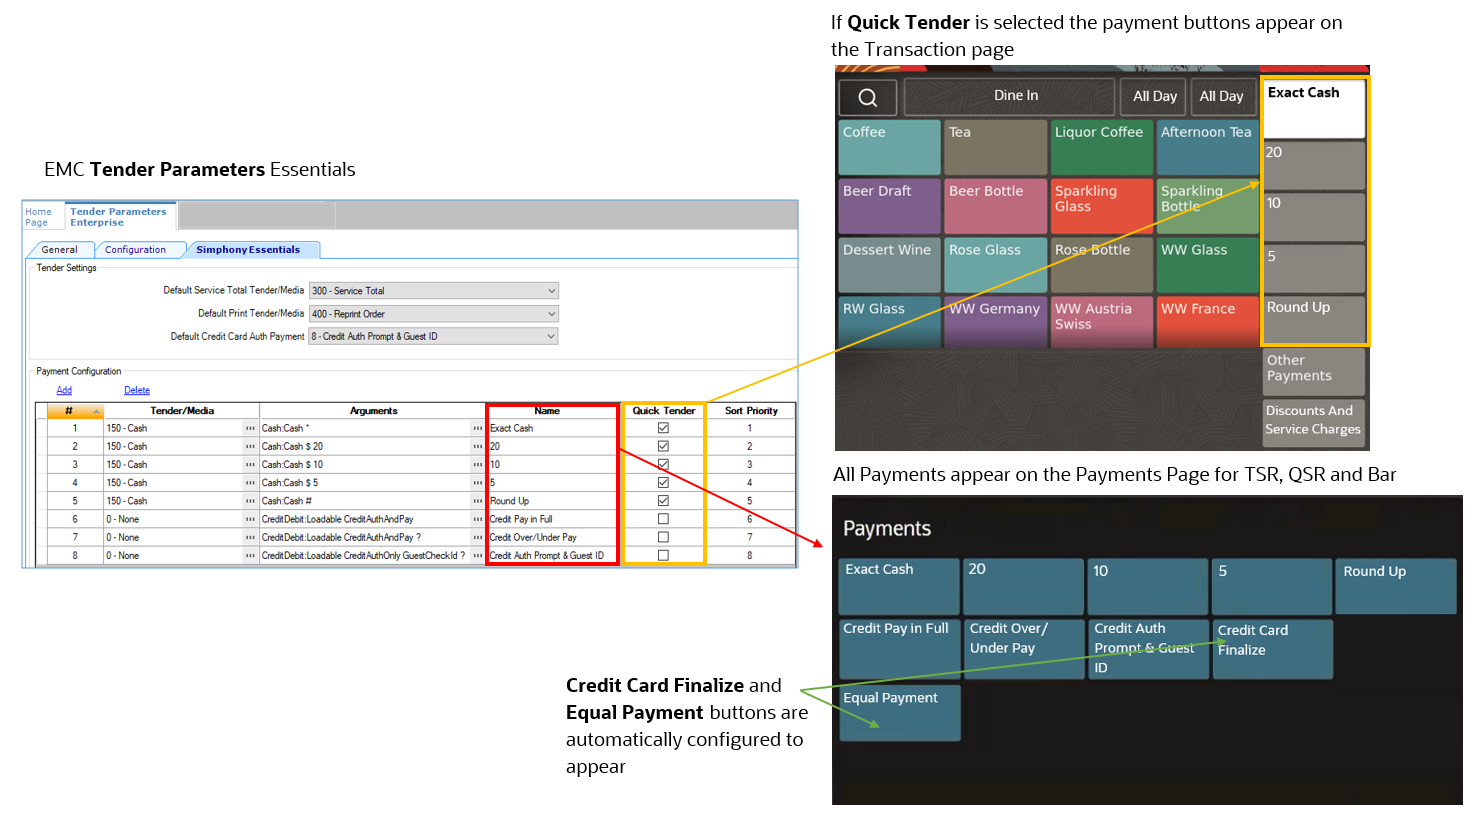
- Select Quick Tender if this payment
is a button on the QSR and Bar Transaction pages, in addition to the
Payments page.You can select a maximum of five payments as quick tenders. The following quick tender cash payments are already configured:
-
Exact Cash
-
Payment with 20 note
-
Payment with 10 note
-
Payment with 5 note
-
Round Up
Figure 6-2 Example of Payment Button Name and Quick Tender Configuration

-
- Enter the Sort Priority. Payment 1 appears first in the Transactions page for QSR and Bar. Payment 1 appears first in the Other Payments page for all service types.
- Repeat Steps 6a through 6f to add records for credit
cards and other payments required for the restaurant.
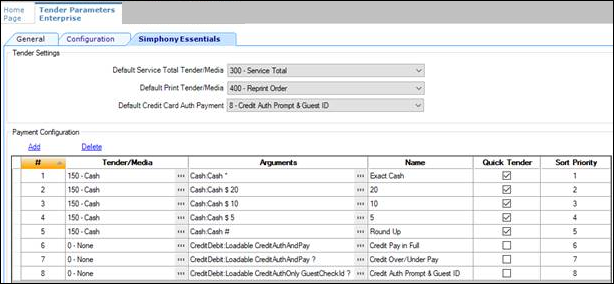
The following figure shows the Tender Parameters module Simphony Essentials tab with three sample credit card payments included in the Arguments column. Note that the Tender/Media records show 0 - None; this means that these tender records default to the value set in the Configuration tab, Payment Card Tender field.
Figure 6-3 Example Credit Card Tender/Media and Arguments

Record 6 shows a credit card button configured to pay off a check in full without numerical entry.
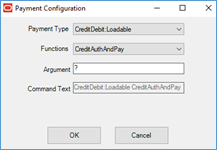
To display a number pad in the credit card workflow to be used for under and over payments, enter ? in the Argument field. Records 7 and 8 in the previous figure and the following figure show examples of this configuration. Record 7 is a credit card payment with an argument to show the number pad. Record 8 is a payment with multiple arguments: one to show the number pad, and one to add the guest name to the check. It allows a credit card to be authorized before adding items to the check (CreditAuthOnly has been entered in the Argument), so it can be used as the Default Credit Card Auth Payment (in the Tender Settings section).
Figure 6-4 Credit Card Allow Under/Over Payments Number Pad

- Click Save.
Parent topic: Payments