- Configuration Guide
- Personnel
- People Management
- Add a Person
Add a Person
To create POS and EMC employees:
- Sign in to Simphony Home with your credentials.
- Click the application navigation icon
 at the top left of
the page to view the side panel menu.
 - Click People, and then click Add Person.
- Specify basic information to uniquely identify the person
in the system, such as name, user name, and email address.
Fields with an asterisk are required.
Figure 5-8 New Person Page

- Select the Enterprise Role and Enterprise Level from the drop-down lists.
-
Enterprise Role: If the employee is an EMC user, select System Administrator and enter an email address. If the employee is a POS user, select Only POS access.
-
Enterprise Level: If the employee is an EMC user, select Corporate. If the employee is a POS user, select their location or revenue center.
-
- Click Save and Continue. If System Administrator was selected in Step 5, the user will have access to Simphony Home and an email will be sent to the email address with instructions on how to set a password.
- On the Employment tab, click Add Employment Information.
- On the General tab, select the Home Store if not already selected.
- Enter the employee’s Date of Birth and Language. You can enter other information,
but it is not required.
Figure 5-9 Employee Date of Birth and Language
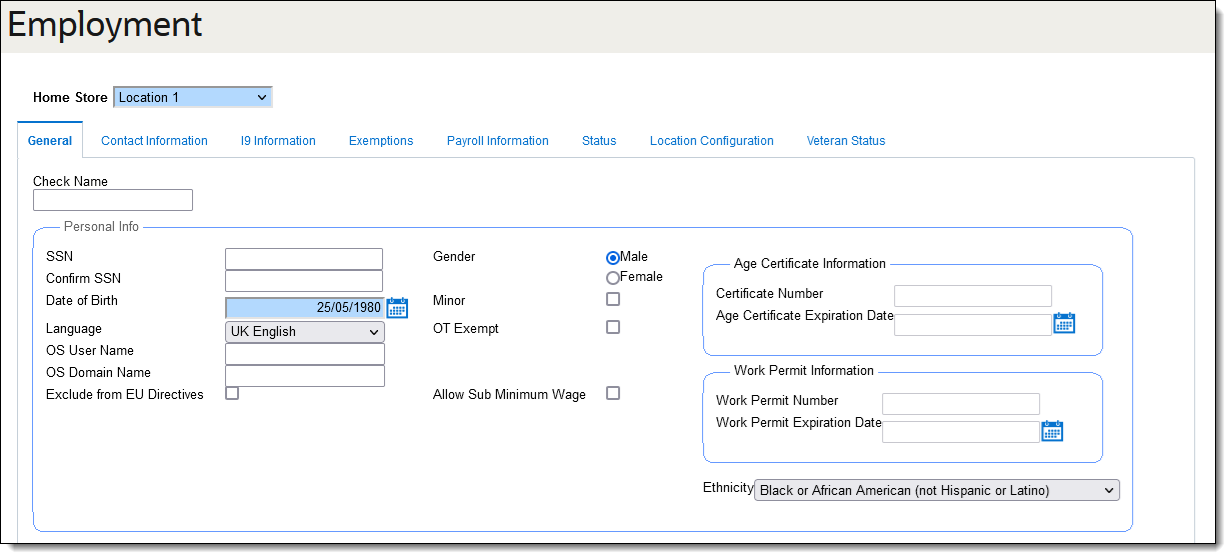 The following tabs are used for Payroll and are not required for Simphony Essentials:
-
Contact Information: Enter contact details, such as the employee address.
-
I9 Information: Enter employment eligibility verification information, such as the passport number.
-
Exemptions: Enter tax exemption information.
-
Payroll Information: Enter direct deposit information.
-
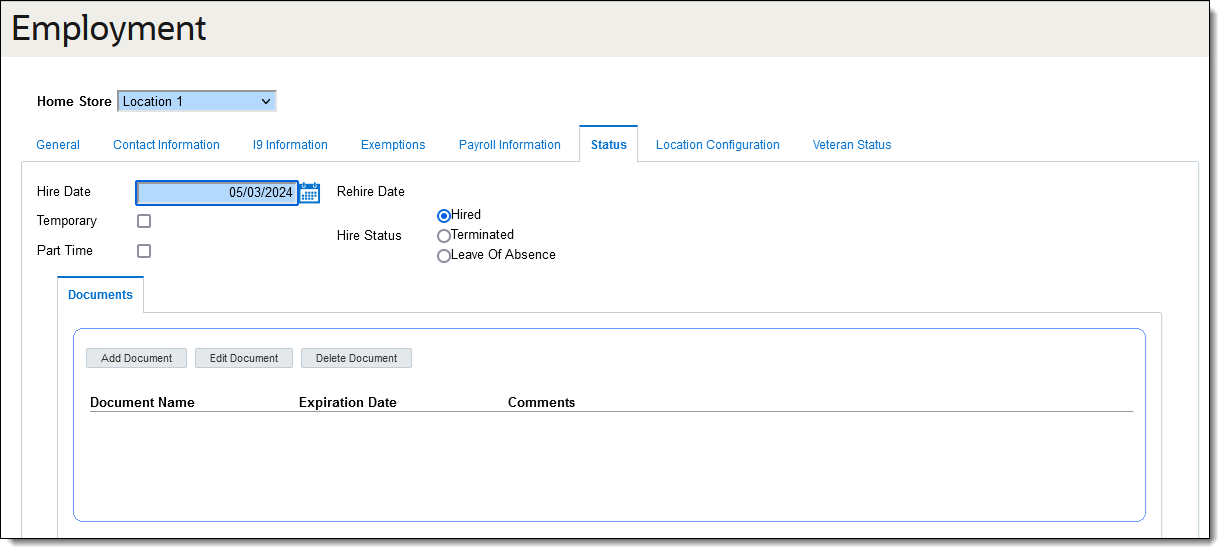
- On the Status tab, enter the employee’s
hiring information.
-
Hire Date: Select when the employee is starting work.
-
Hire Status: Select Hired.
Figure 5-10 Hiring Information
-
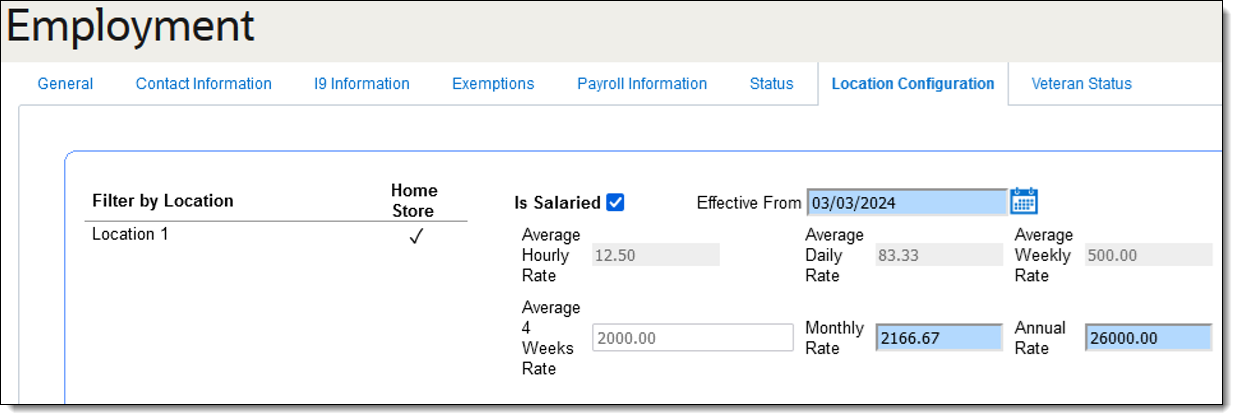
- On the Location Configuration tab,
set the following options:
- Disable Is Salaried for an hourly paid employee.
- Enable Is Salaried for a salaried
employee, and then complete the following:
-
Effective From: Select today’s date.
-
Monthly Rate: Enter the monthly salary amount.
-
The Annual Rate field is automatically calculated.
Figure 5-11 Location Configuration Information
-
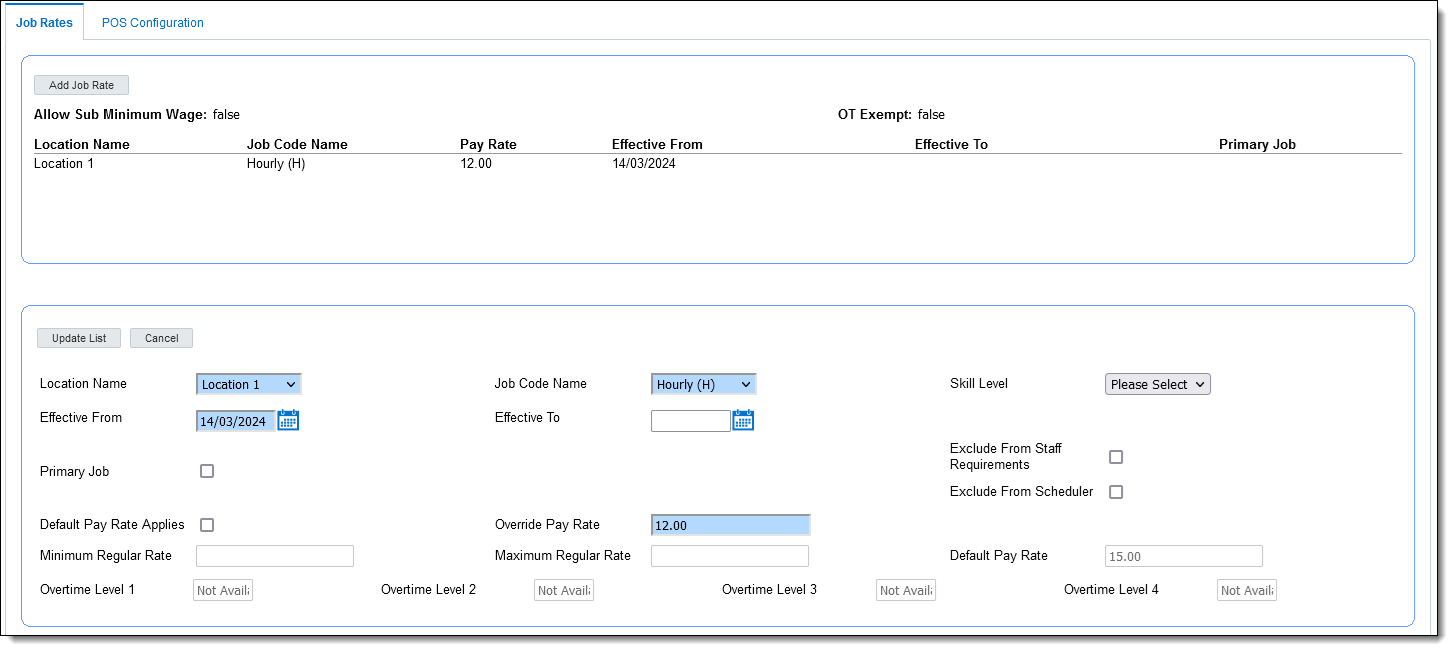
- On the Job Rates tab, set the following
information, and then click Update List.
-
Location Name: Select your restaurant.
-
Job Code Name: Select the relevant job code.
-
Effective From: Select tomorrow’s date.
-
Override Pay Rate: Enter an hourly pay rate for hourly paid employees.
Figure 5-12 Job Rates Information
-
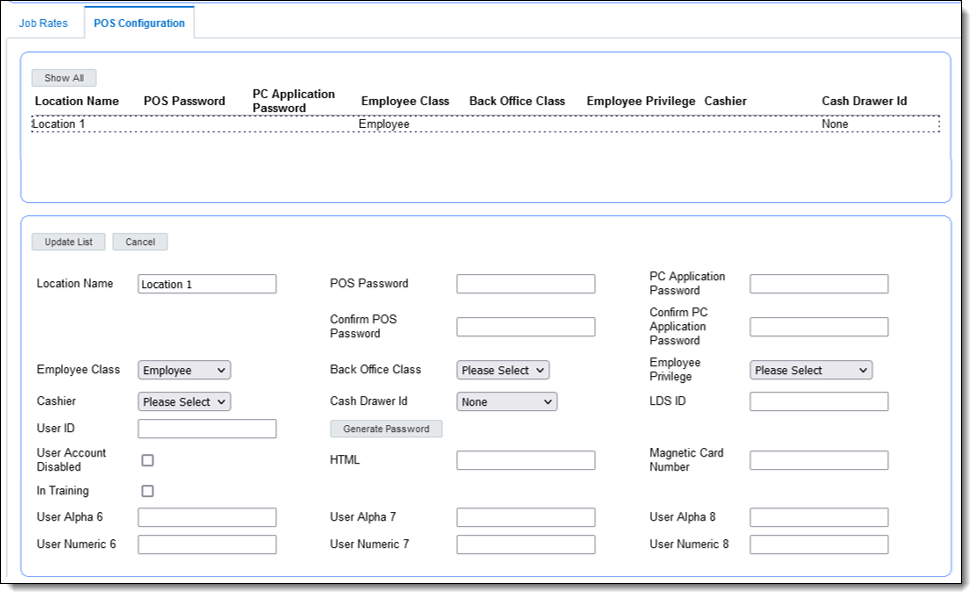
- On the POS Configuration tab, set
the following information for POS users only (not EMC users), and
then click Update List.
-
Select your restaurant in the location list.
-
Employee Class: Select Employee.
-
Magnetic Card Number: Enter the code to access the Simphony Essentials POS. This can be a magnetic card number or a manual code.
Figure 5-13 POS Configuration Information
-
- Click Save, and then click OK.
Parent topic: People Management