Changing the CAL URL

In some cases, it may be necessary to reconfigure the CAL client to use the new secure URL of the application server. To reconfigure the CAL URL without changing the workstation identity:

  1. Close the ServiceHost application to access the Microsoft Windows desktop on the workstation.
  2. Use the Start Menu to launch the McrsCAL Config application found in the MICROS Client Application Loader folder.
  3. Enter the validation code to access the CAL application, and then click Next.
    • The six-digit challenge number changes with every attempt and is solved with the formula: Digit 1 x Digit 2 + Digit 4 + Digit 6.

    • Using the challenge number 391229 as an example, the solution is 3 x 9 + 2 + 9 = 38.

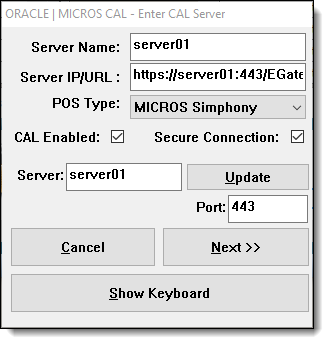
  4. Make the following updates for the Enter CAL Server configuration:
    1. Select the Secure Connection option.
    2. Enter 443 as the Port.
    3. Click Update, and then click Next.

      The POS Type varies and is unique based on your installation and the Simphony release.

      Prior to Simphony release 2.9.1:

      • MICROS Simphony is used as the POS Type with Simphony Premium.

      • Simphony Multi-Te is used as the POS Type for Simphony Standard.

      For Simphony release 2.9.1 or later, use MICROS Simphony for both Simphony Standard and Simphony Premium.

      Figure 12-1 Enter CAL Server Configuration


      This figure shows the Enter CAL Server Configuration screen.
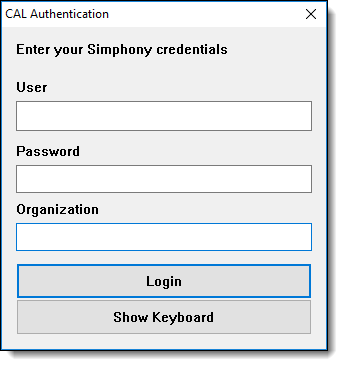
  5. For CAL Authentication, enter the EMC credentials that have the required role privileges enabled, and then click Login.

    Figure 12-2 CAL Authentication


    The figure shows the CAL Authentication logon screen.
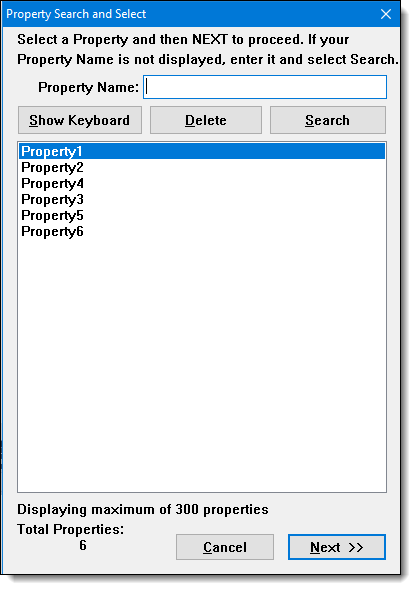
  6. If the Enterprise has multiple properties, select the property from the Property Search and Select window, and then click Next.

    If the property does not appear in the list, enter the property name in the Property Name field, and then press Search.

    If only one property is configured, or if there are multiple properties but only one property is using Microsoft Windows devices, you do not see a property list and you can skip this step.

    Figure 12-3 Property Search and Select


    This figure shows the Property Search and Select screen.
  7. Do not make changes on the Select WS Identity window, and then click Save.