Add XProcessor Payment DLL to the Payments Module

The setup steps provided here also apply to remote EMC users. All required installation files are available in the [Drive Letter]:\MICROS\Simphony2\EMCClient folder on the Simphony application server.

These steps are the same for each available XProcessor plug-in. To set up the EMC Payments module for the XProcessor framework:

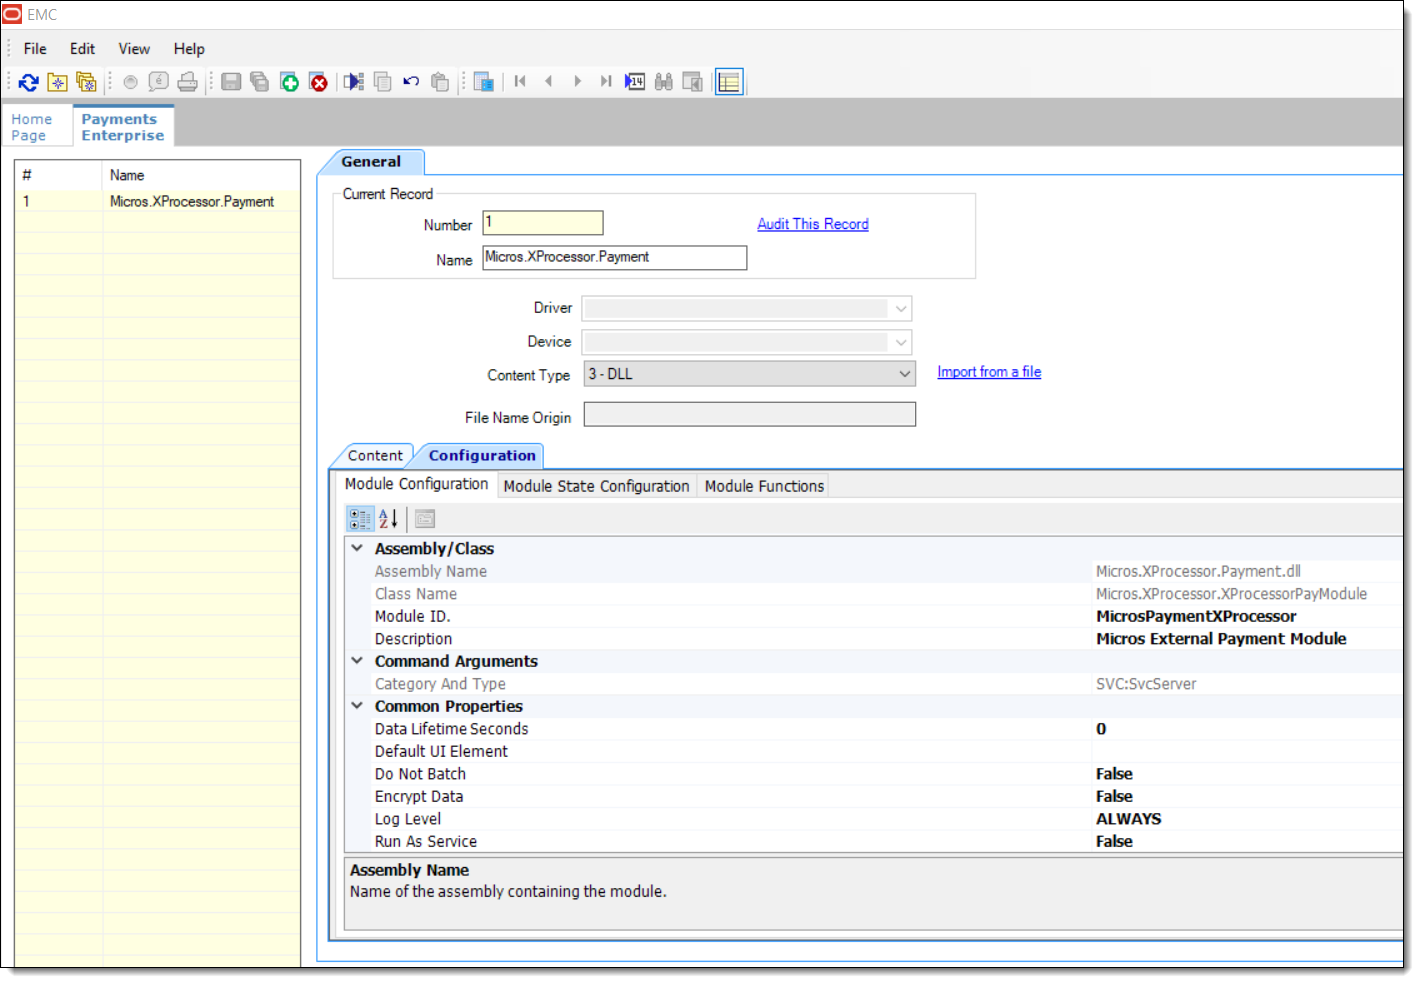
  1. Select the Enterprise level, click Setup, and then click Payments.
  2. Insert a new record, and then double-click the new record to open it in form view.
  3. In the Name field, enter Micros.XProcessor.Payment.

    When configuring all XProcessor files in the EMC, the naming conventions for the *.DLL and *.XML files must match the actual file name that is imported into the module, but is not to include the file’s extension, for example *.dll or *.xml.

  4. In the Content Type field, select 3 - DLL from the drop-down list.
  5. Click the Import from a file link.
  6. From the EMCClient folder, select the Micros.XProcessor.Payment.dll file.

    Figure 49-2 EMC Payments Module


    This figure shows the Simphony EMC Payments module setup for the Payments .DLL file.
  7. Click Save.
  8. Continue to Add XProcessor Configuration File to the Content Module.