2 Scope Selector
The Scope Selector allows you to quickly change the view of your organization’s hierarchy (that is, enterprise, locations, revenue centers, and zones). By selecting a scope, you are limiting the configuration changes you can make in each FLM module. For example, menu item price changes made at a location are inherited by the revenue centers associated with it.
-
Recent: The Recent view contains a list showing the hierarchy level and module's name (for example, Location 1 - Menu) where you recently saved a change in FLM.
-
System View: The System View is the default view when you open the scope selector, and it shows the Enterprise name and associated locations.
-
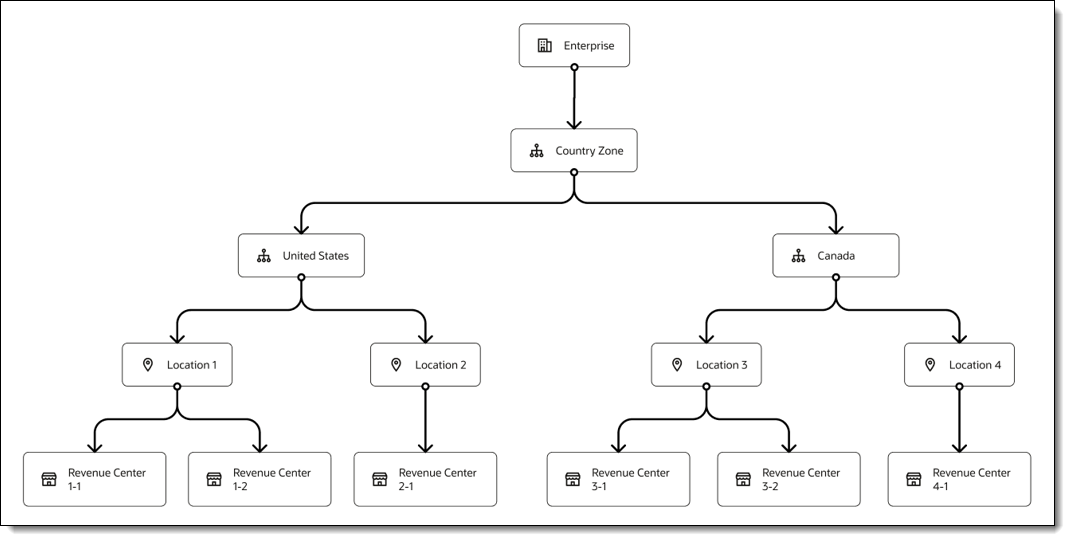
Zones: Zones are custom hierarchies used to manage groups of locations and revenue centers within an organization. Zones may contain sub-zones and a single revenue center or a location can belong to multiple zones.
-
Enterprise: The top administrative level of your organization.
-
Location: Identifies the physical property where restaurants within your organization are assigned and listed within an Enterprise. Typically a manager only has access to one location, while a regional manager may have multiple locations in their system view.
-
Revenue Center: Revenue centers are defined within an organization for sales tracking and accounting. Typically a revenue center matches an outlet within the location, such as a restaurant, bar, or retail outlet.
Figure 2-1 Organization Hierarchy
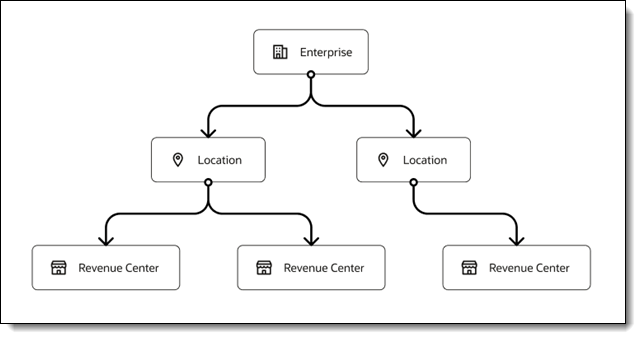
Figure 2-2 Example Hierarchy with Zones
After signing in to Frontline Manager (FLM), you can switch the view by clicking on the Scope Selector’s drop-down arrow icon as shown in the following figure.
Figure 2-3 Scope Selector on FLM Home Page

When the Show object number checkbox is disabled, the Select Scope dialog lists the names of the enterprise, locations, zones, and revenue centers.
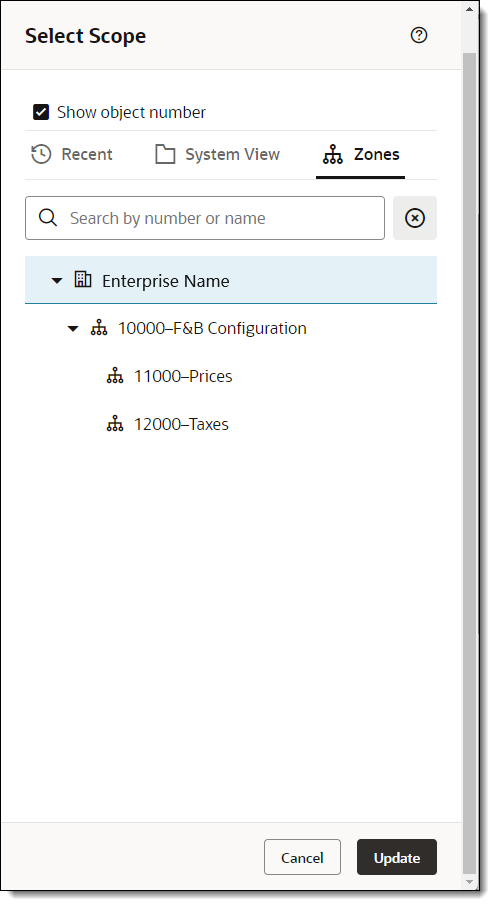
When the Show object number checkbox is enabled, locations are listed in alphabetical order beneath the enterprise along with drop-down arrows so you can navigate to each assigned revenue center. The Search field is active and you can enter the name of a location or revenue center.
Figure 2-4 Scope Selector - Default System View
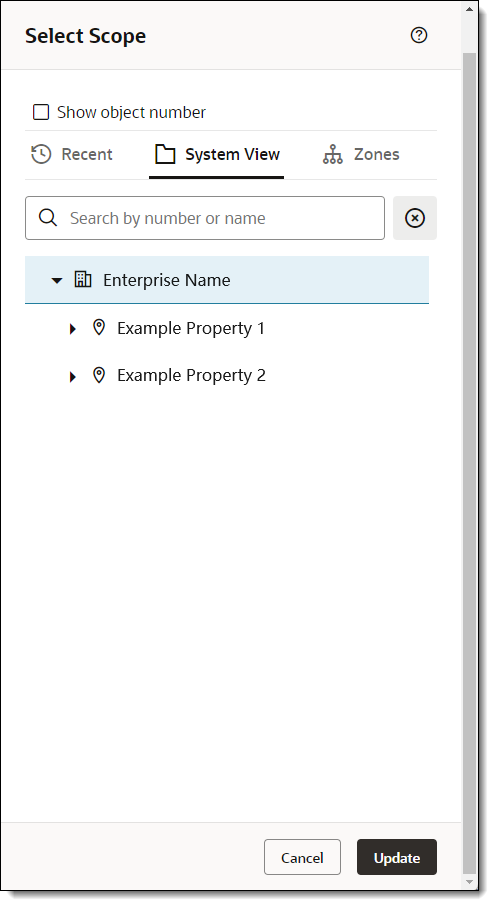
Figure 2-5 Scope Selector - Expanded System View
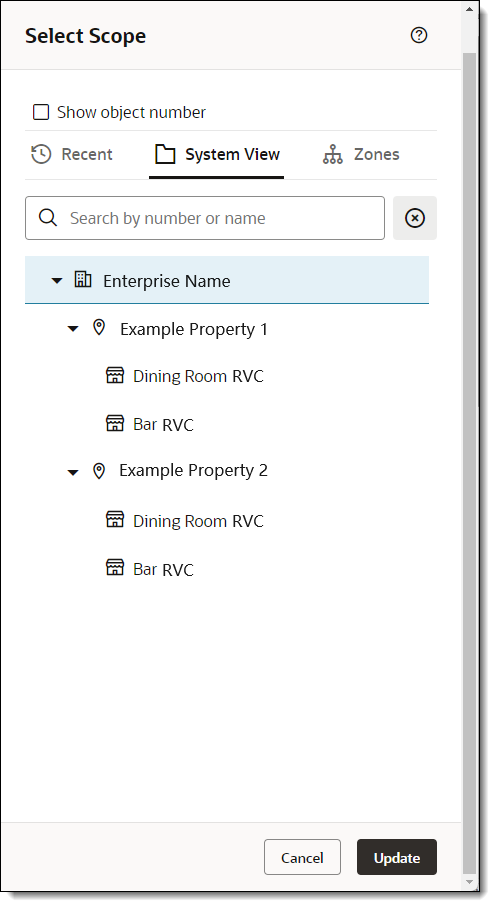
Figure 2-6 Scope Selector - Zones View
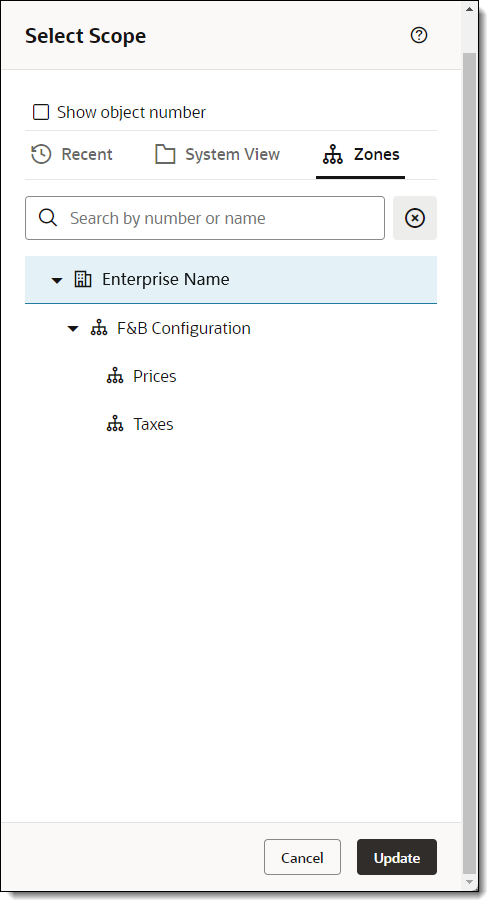
Figure 2-7 Scope Selector - Zones View with Show Object Names Enabled
After selecting a location, click Update. The name of the location appears on the FLM Home page adjacent to the Scope Selector drop-down arrow.