Configuring Headers and Trailers for Printed Workstation Ad-hoc and Custom Reports

You can configure the printing of report header and trailers for workstation ad-hoc or custom reports containing site specific information. Audit procedures in certain countries require that reports have specific information. This information can be defined in report headers and trailers. Printing information, such as the site’s business address or tax identifier, on report headers (or trailers) helps identify the source (or location name) of the data to which the report pertains.

This is a different configuration than Configuring Default Headers and Trailers.

To configure headers and trailers for printed workstation ad-hoc and custom Reports:

  1. You must have access privileges assigned in the Roles module. In the EMC Modules tab, set the user’s role settings to View and Edit the Report Headers and Report Trailers modules located under the Descriptors module heading. Once set, click Save.

    See People and Privileges for more information about configuring roles and access privileges.

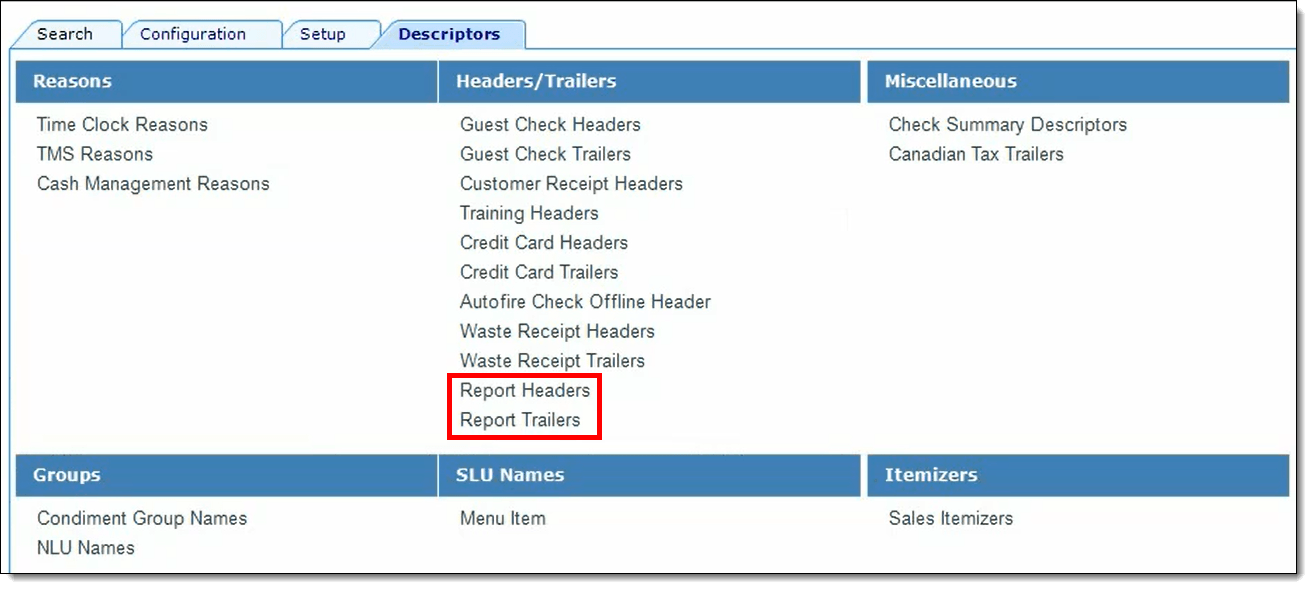
  2. Select the Enterprise, property, or revenue center, click Descriptors, and then click Report Headers.

    Figure 34-1 Simphony EMC Report Headers and Trailers Modules


    This figure shows the Descriptors module in the EMC, which contains the Report Headers and Report Trailers modules.

    Note:

    It is possible to configure differing report headers and trailers based on the scope your reports are generated from, such as the Enterprise, property, or revenue center level. For example, a property level report might contain different report headers/trailers than a revenue center level report. If this is desired behavior for your system, you need to switch to each specific EMC level and configure the report headers/trailers for each level.

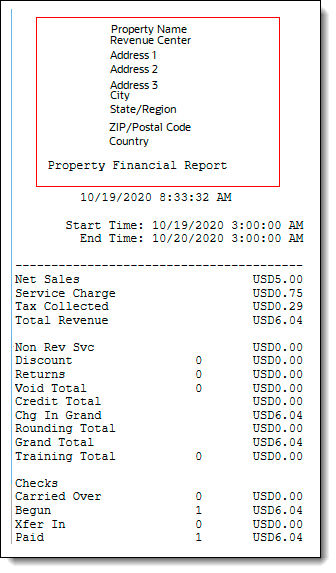
    Figure 34-2 Printed Financial Report Header Example


    This figure shows an example of a printed Property Financial Report which includes a report header displaying the property’s address and revenue center’s name.
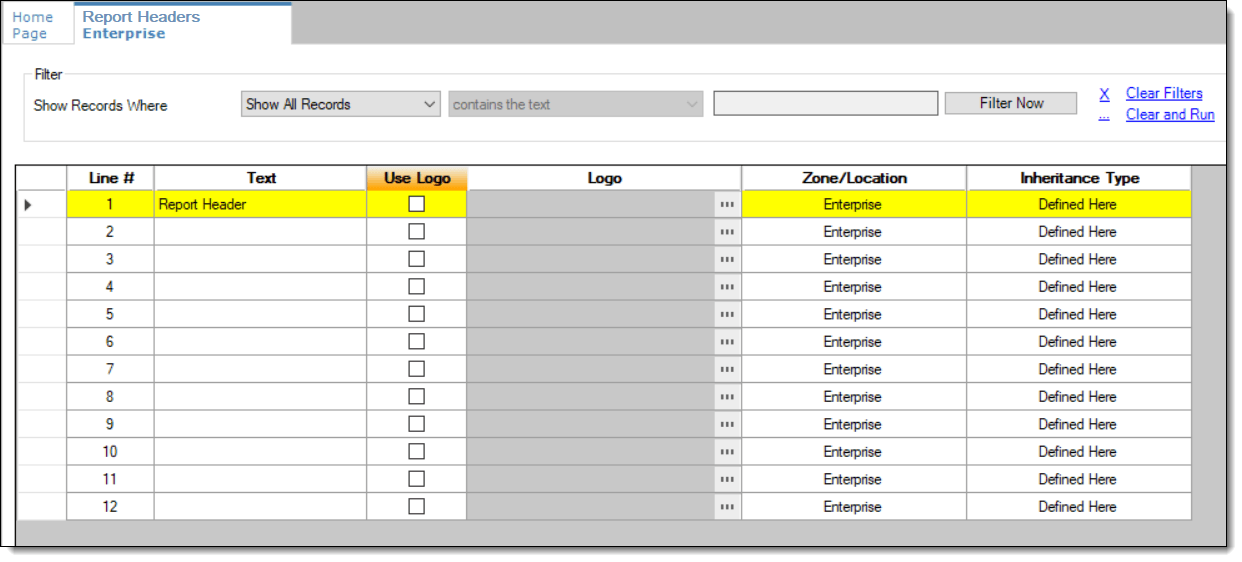
  3. From top to bottom, in descending order, enter information in the Text column as you want the header to print on the report.

    The Report Headers and Report Trailers modules each contain a total of 12 lines which can be configured. You cannot insert new lines.

    Figure 34-3 EMC Descriptors Report Headers Module


    This figure shows the Report Headers module.
  4. From any line, if you want to print your company’s logo, select Use Logo.
  5. From the Logo column, click the ellipsis symbol (...), and then select the available logo (which must be configured prior to this configuration).

    This configuration supports logo printing using the same functionality/limitations as existing header and trailer lines. See Logo Printing for more information.

  6. To create a space or blank line between other lines, such lines only print when populated lines are defined on a higher line-number.
  7. Repeat Steps 2 through 6 to configure the Report Trailers module. The report trailer appears near the bottom of the printed report.
  8. Click Save.