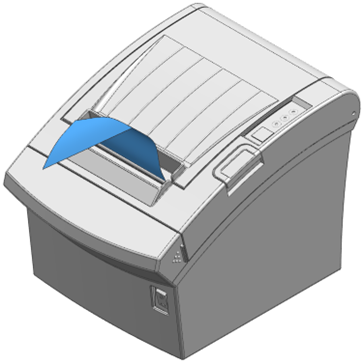
4 Printer Installation
Power Connection
-
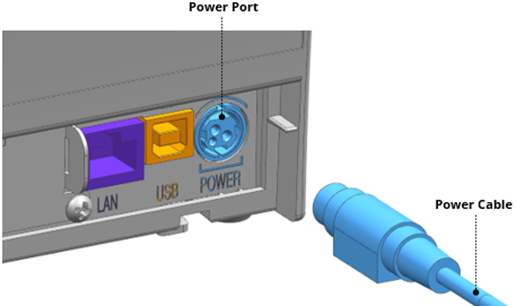
Face the flat side of the power jack to the bottom of the printer and connect the power jack to the power port.
![]() CAUTION!
CAUTION!
-
Only use the power supply provided with the printer. Oracle shall bear no responsibility for damage caused by using a third-party power supply.
-
When removing the power supply, make sure you have a firm grasp of the plug terminal of the power cable and the printer and pull horizontally.
-
When connecting or disconnecting power, make sure to remove the power supply from the power outlet before removing.
Ethernet Interface Connection
-
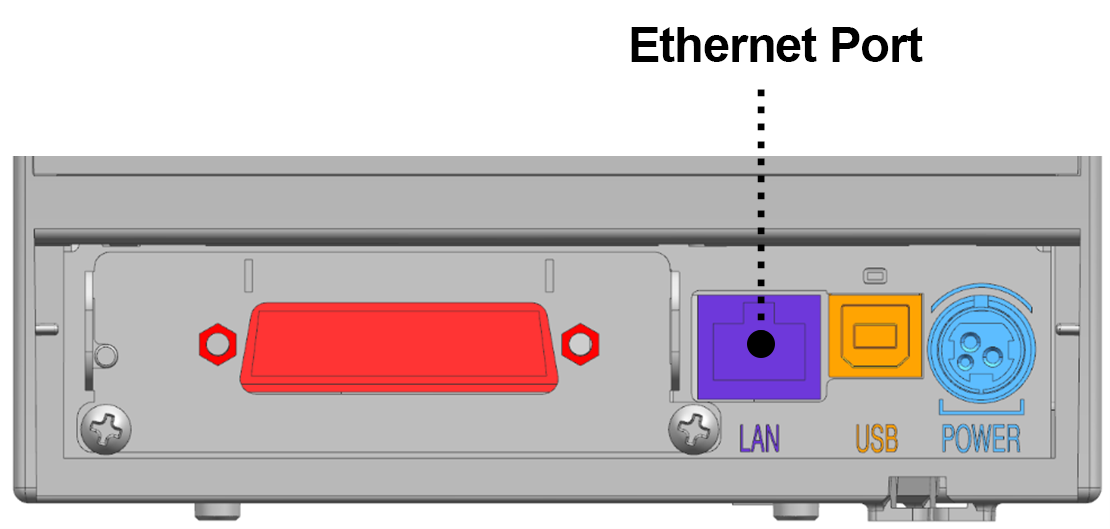
Connect the printer to the local LAN port using the supplied Ethernet cable.
Setting up for TCP/IP Address Assignment
-
On a Windows PC, download and install the latest Software_NetConfiguration_Tool from Bixolon (https://www.bixolon.com/download_view.php?idx=42)
-
Double-click Net Configuration Setup_Vx.x.x.exe and follow the instructions to complete the installation process. There is a manual included that covers additional details associated with all Ethernet printers that can also be referenced.
-
Net Configuration Tool Basic Configuration
The LAN/WLAN tab allows you to search printers connected to the same network and configure the printer’s network settings required to enable communication between the printer and host. You can also configure the printer’s network settings using a web browser by entering the printers I/P address as the URL if known.
The following settings can be configured using the Net Configuration Tool:
| Settings | Description |
|---|---|
|
IP Address Assignment Method |
Assign IP address manually or automatically through DHCP. If the network does not support DHCP, you must assign the IP address manually. |
|
IP Address Subnet Mask Gateway Port Number |
This information is required for LAN/WLAN communication, and a unique IP address must be entered. The communication port is set to 9100 by default. Ports 80, 3337, and 9000 accept functions other than printing. Refer to the following list of ports and their intended use.
|
|
Inactivity Time |
If there is no communication between the host and printer during the set period of time, the connection will be closed automatically. The value can be set between 0 and 3600 seconds (1 hour). If set to 0, this function is disabled. |
|
System Name |
A string that indicates the WLAN printer. A maximum of 64 characters can be entered. This string does not display on certain printers. |
-
Ensure the printer is powered on.
-
Open the Net Configuration Tool, and then click Search to search for printers on the network.
-
If the Security Alert message pops up, click either Unblock or Allow access.
-
From the search results, click the IP or MAC address of the printer you want to configure. You can use the filter option to narrow the search results.
-
Click Configuration or double-click the IP address you want to configure.
-
Configure the network settings of the printer, and then click Save.
-
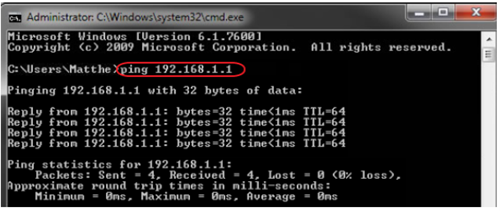
Launch a Command Prompt (cmd.exe) from the host workstation and use a ping test to check the connection to the printer using the I/P address configured for the printer. Below is an example with a feedback reply.
-
If you receive a reply, the I/P address has been verified. If not, check to make sure that the I/P address is compatible with the network address schema, (same subnet).
Serial Interface Connection
-
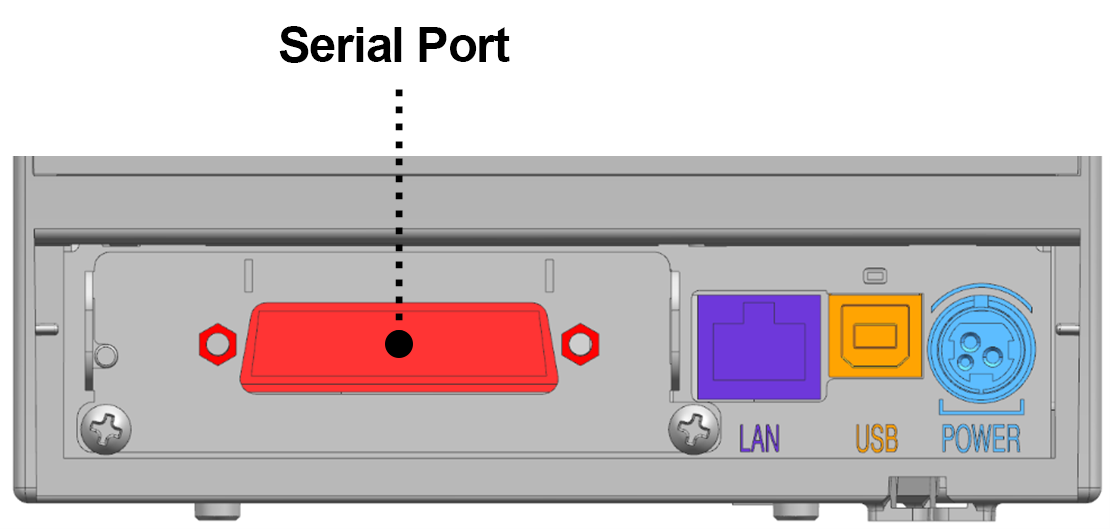
Using a RJ45 to DB25 serial cable, Oracle P/N 300319-108-PT, connect the RJ45 end to the workstation serial port and the other end to the serial port on the printer.
-
Configure the printer in Simphony EMC. See the Oracle MICROS Simphony Configuration Guide for your Simphony release for more information.
Paper Roll Operations
Note:
Use paper roll that complies with the specifications.-
When opening or closing the cover, be careful not to pinch your fingers.
-
Do not open the print head levers while the printer is printing. Doing so may damage the printer.
-
Change the paper when the printer is not receiving data, or data may be lost.
-
If the printer has been under constant use the print head gets very hot, so turn off the power and let it cool down completely.
-
The hot printer head can cause serious burns.
-
This printer should be used in Front Exit orientation only.
Installing the Paper Roll
-
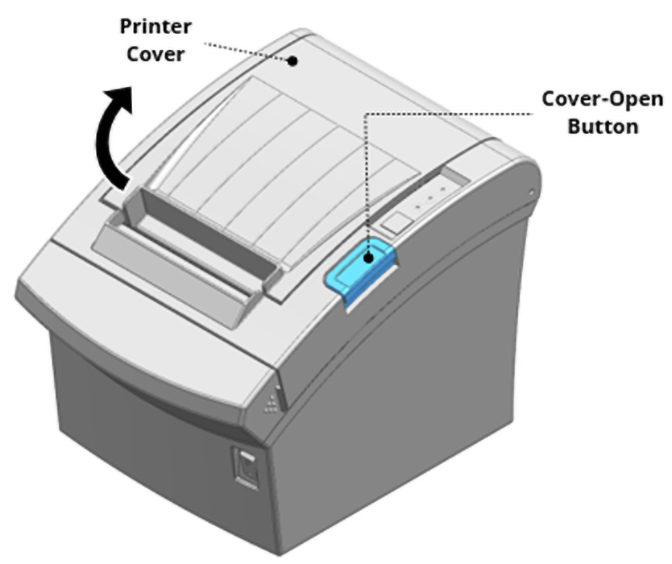
Open the printer cover by pushing the Cover-Open Button.
-
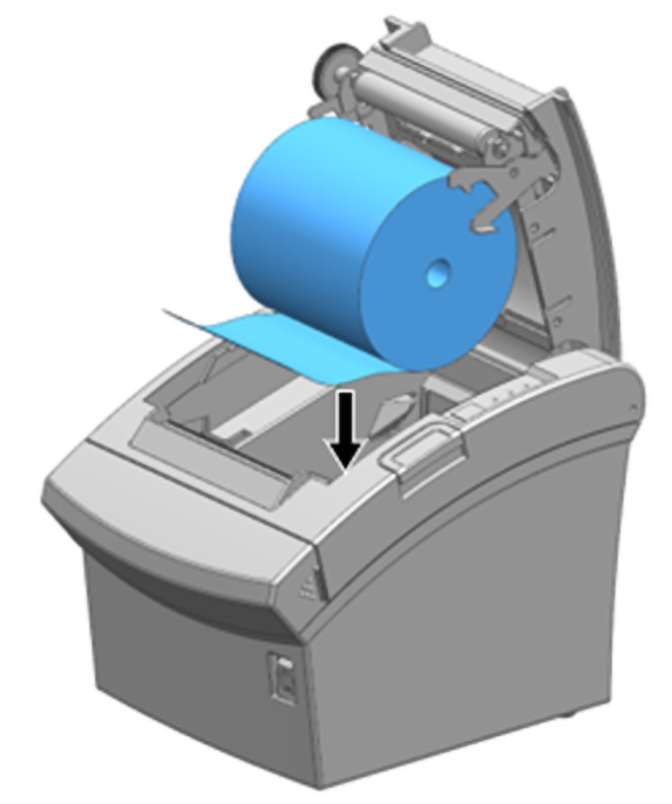
Remove the empty paper roll and replace with a new one as shown in the following image.
-
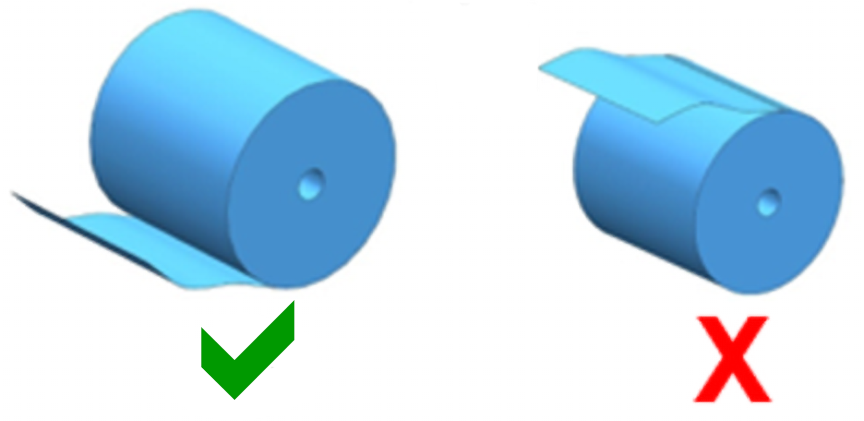
Check the orientation of the paper roll when inserting it into the printer.
-
Pull out a small amount of paper, and then close the cover.
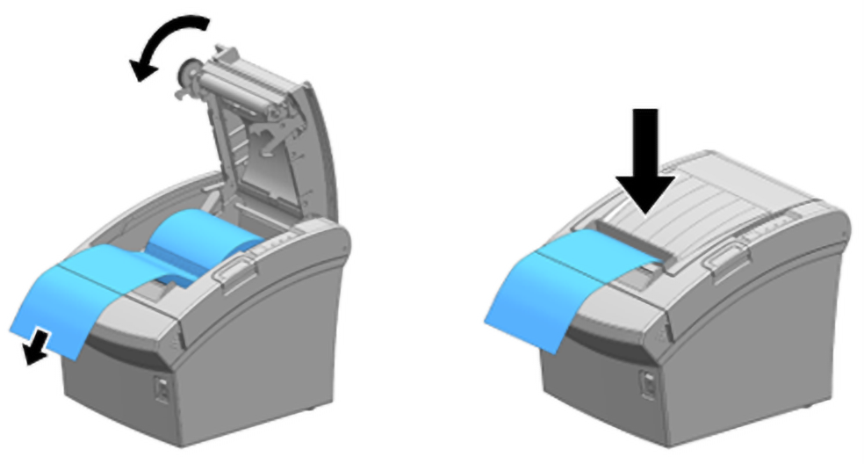
-
Cut the paper as shown in the following image.
