Create Roles, Add Data Sources, and Assign Roles

In addition to creating users and assigning them the required roles, you also need to create certain roles, add data sources, and assign them the required roles.

  1. Log on to Oracle Business Intelligence Publisher using the administrator credentials.

    The Oracle Business Intelligence Publisher home page appears.

  2. From the top-menu, click Administration.

    Refer to Section 6.2 > Step 2.

  3. In the Security Center section, click Roles and Permissions.

    The Roles and Permissions screen appears.

  4. Click Create Role.

    The Create Role screen appears.

  5. Enter the Name and Description of the role, and click Apply.

    The new role is created and appears in the list of existing roles in the Roles and Permissions screen.

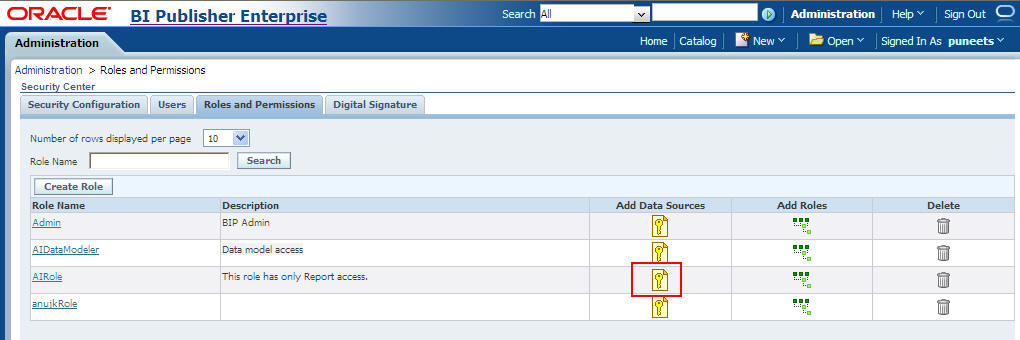
  6. Click Add Data Sources icon, corresponding to the role which you have just created.
    The Add Data Sources icon.

    The Add Data Sources screen appears.

  7. Form Available Data Sources section, select PRMART, and click Move(>) to move it to the Allowed Data Sources section.
  8. Click Apply to save the changes.

    The Roles and Permissions screen appears.

    See Create PRMART JDBC Connection for the steps to create the JDBC connection.

  9. Click the Add Roles icon, corresponding to the role which you have just created to add the required roles.

    The Add Roles screen appears.

  10. From the Available Roles section, select the roles that you want to include, and click Move(>) to move the selected roles to the Included Roles section.
  11. Click Apply to save the changes.

For more information, refer to the Configuring Users, Roles, and Data Access section in the Oracle BIP Administrator's Guide.

For the list of roles that you need to configure using Oracle Business Intelligence Publisher, refer to Configure Oracle Business Intelligence Publisher Users and Roles: Oracle Fusion Middleware Security Model.