Dragging a rule onto a form
The simplest way to create a context is to drag the rule onto the appropriate location in the form window. To attach a rule to items on multiple different forms, perform the following steps for each applicable form and item:
- Open the window for the form containing the item or itemset to which you are attaching the rule.
Note: You can attach a rule to an item or to an itemset. However, you cannot attach a rule to an item within an itemset.
- Expand the section node so that the item to which you want to attach the rule is visible.
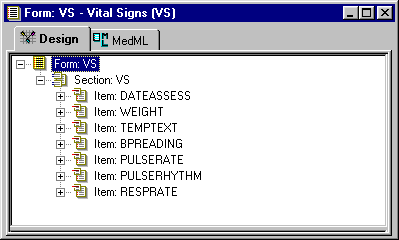
- In the Trial Objects window, expand the Rules node so that the rule you are attaching is visible.
- Drag the rule into the Form window and place it on the item or itemset.
The New Rule Context dialog box opens, enabling you to specify the RefName of the context and the type of context with which you want to associate the rule.
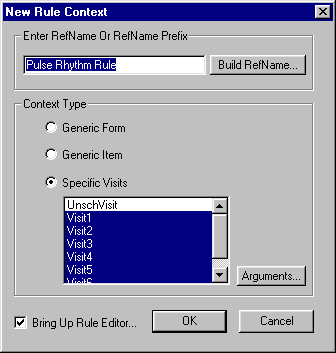
- Verify the RefName or RefName prefix. By default, the InForm Architect application creates a Context RefName by appending one of the following to the RefName of the rule:
- Generic Form context—0, to indicate all visits. For example, the default Context RefName when the PulseRhythmRule rule is attached as a Generic Form context is PulseRhythmRule_0.
- Generic Item context—0, to indicate all visits, and a sequential number to indicate the order in which contexts are attached. For example, the default Context RefName when the PulseRhythmRule is attached as Generic Item context is PulseRhythmRule_0_1. If the same rule is attached as a Generic Item context to another item, the Context RefName for the second attachment is PulseRhythmRule_0_2.
- Specific Visit context—Visit name. For example, the default Context RefName when the PulseRhythmRule is attached as a Specific Visit context to an item in Visit1 is PulseRhythmRule_Visit1.
To change the context RefName to a RefName path:
- Click the Build RefName button.
The Build RefName dialog box appears.
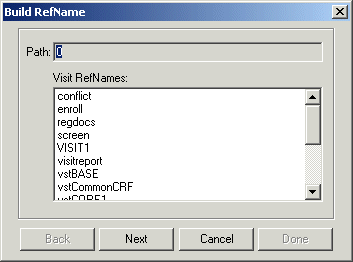
- For each component of the RefName path, select the component from the list in the dialog box.
- Specify whether you want to identify components of the RefName path with underscores or initial capital letters by selecting the Underscored or Capitalized option.
- Click Next, or, to backtrack to a previous component, click Back.
The InForm Architect application builds the path from your selections and displays it in the Path field at the top of the dialog box.
- When the RefName path is complete, click Done.
The InForm Architect application redisplays the RefName and Arguments dialog box.
- Select the context type with which you want to associate this rule. For more information on Context types, see About rule contexts.
If you select Specific Visits, you need to select the visits on which you want to run the rule. Use the Ctrl key to select or unselect multiple visits.
- To define arguments for the rule:
- Click the Arguments button. The RefName and Arguments dialog box opens, enabling you to specify the values of the context-specific arguments.
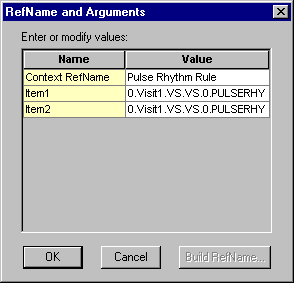
- If you want the arguments to have context-specific values, specify those values.
If the Argument Type is String, you can specify a RefName path as the value of an argument:
- Select the Value cell of the argument.
- Click the Build RefName button.
- In the Build RefName dialog box, create a RefName path as described in Using the Build RefName tool.
- In the Build RefName dialog box, click Done to return to the RefName and Arguments dialog box.
Note: If you do not change the default value of an argument, the InForm Architect application does not add a new argument to the context, and the rule uses the default argument values when it runs in this context.
- In the RefName and Arguments dialog box, click OK to return to the New Rule Context window.
- Optionally, to display the Rule window when the attachment is created, select the Bring Up Rule Editor check box.
- Click OK.
The Form window shows the attachment of the rule to the visit where you dragged it, and the Rule window, if you selected the Bring Up Rule Editor check box, shows the addition of the new context.
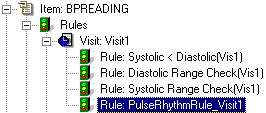
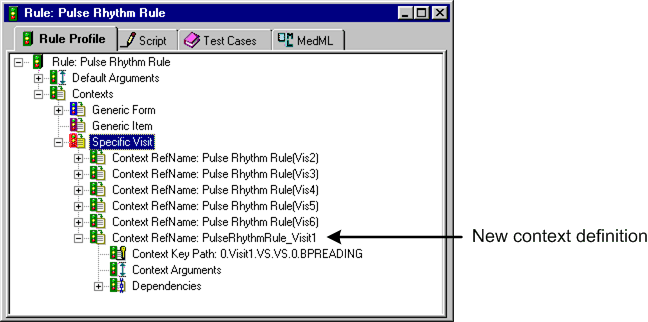
- Define the remaining properties of the context by selecting the Context RefName node and editing its properties in the Properties window. The following table describes all of the properties that make up a context definition.
Property
Description
Context RefName
RefName of the component.
REQUIRED.
For rules about the use of RefNames, see RefNames
Context Help Text
Description of the edit check being performed in this context. This text is displayed along with CRF Help for the item against which the rule runs. If you define context-specific help text, it overrides the default text specified in the Help Text property for the rule.
OPTIONAL.
Context Event
RefName of the event that is triggered when the rule runs in this context. Select one event from the list of defined events. The event determines the default text of a query generated if the rule fails. An event defined for a context overrides the event specified as the default for the rule.
OPTIONAL.


