12 Check-In

The Check-In page is the last step of the check-in process, if there are no traveling companions linked to the guest. See topic Travel With on how to check in a companion.

The page displays the details of the guest you are checking in and provides an option to print or renew a board card before completing the check-in.

After successfully checking-in the guest, and if the parameter is set to allow manual selection of the person’s onboard or shore status, a confirmation message appears, prompting you to choose the status - Onboard or Ashore.

Figure 12-1 Check In Confirmation Page
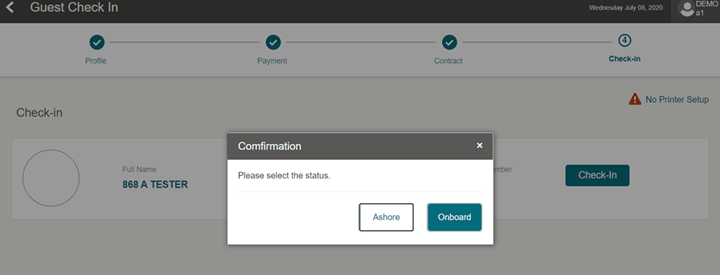

This figure shows the Mobile Check-In Confirmation page.

Printing Board Card

To print a board card and complete the check-in:
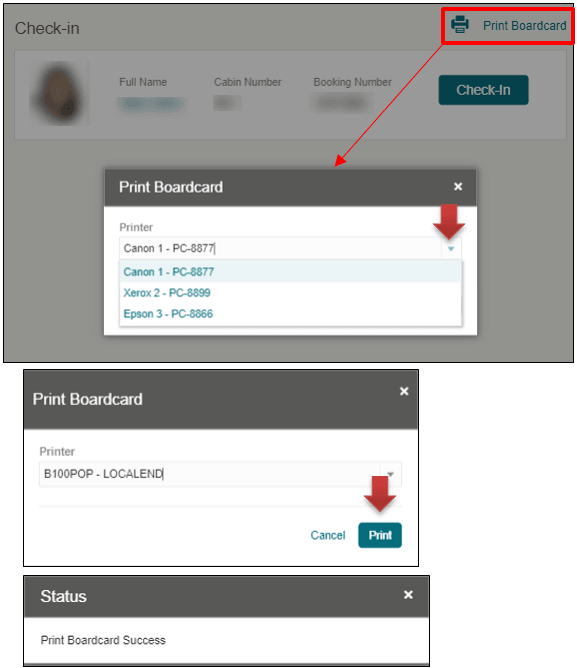
  1. Click Print Board card button. The No Printer Setup appears if you have not set up a printer.
  2. On the Print Board card page, select the printer from the list of values.
  3. Click Print button.
  4. Once the print job is successful, click the X to close the alert message box.

    Figure 12-2 Print Board Card Function


    This figure shows the Print Board Card function.
  5. Click the Check-In button to complete the check-in whilst the status is being updated.
  6. When the status is changed to Checked-In, click the Complete button. Information on all pages will be re-validated. If the validation passes, the application returns to the Search Guest page or Travel With page, allowing you to check-in the travel companion(s).

    Note:

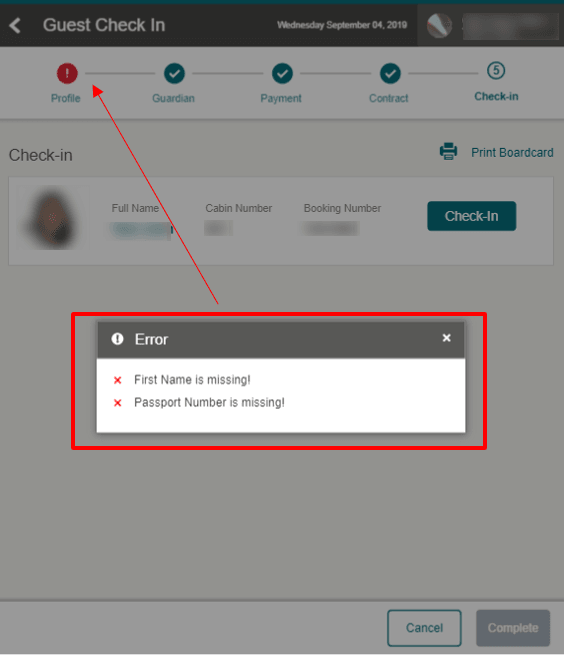
    If there is missing or incorrect information when you click the Check-In button, an error prompt will appear.

    Figure 12-3 Check-In Validation


    This figure shows the Check-In Validation.
  7. The Train Navigation will have a red exclamation (!) sign if the field(s) has an error. Select the marked page and rectify the error before continuing to the next page.