10 Payment
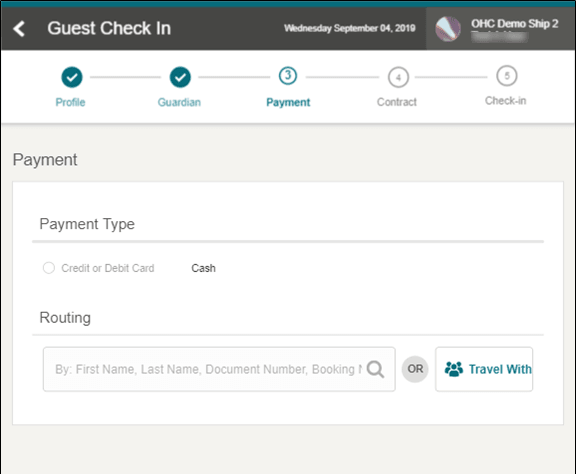
The Payment page enables you to select a payment type that guests will use to settle their account. You can also set up the routing instruction on this page.
Payment Type
In the Payment Type section, there are two options to select from: Credit / Debit Card or Cash. The default is the Credit or Debit Card, with the credit card information obtain while making the reservation.
To change from the default Credit or Debit Card payment type to Cash, select the Cash option.
Figure 10-1 Payment Page
Adding Credit Card Terminal for Credit/Debit Card Option
Figure 10-2 Credit Card Payment Type for Credit/Debit Card Option
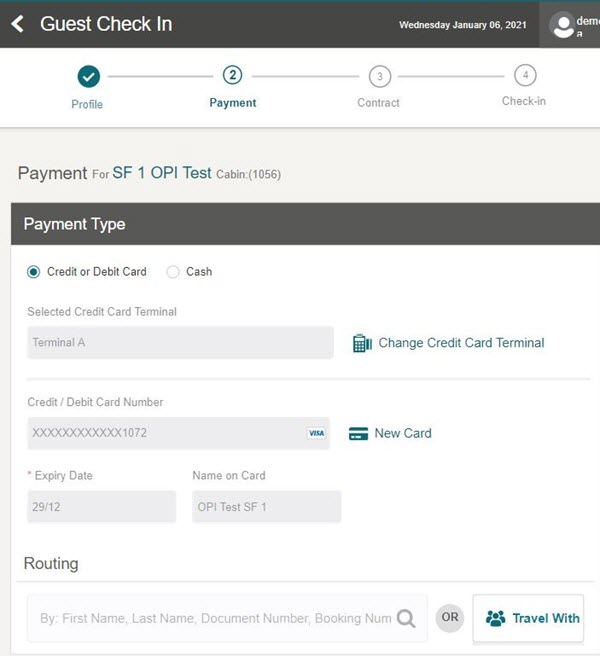
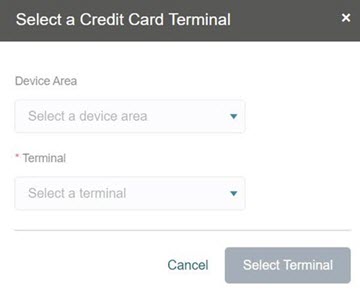
Figure 10-3 Credit Card Terminal Selection
-
Select the Credit/Debit Card option.
-
Click the Change Credit Card Terminal button to select a credit card terminal.
-
At the Select a Credit Card Terminal page, select a Device Area and Terminal from the drop-down list.
-
Click Select Terminal button. The Credit Card Terminal chosen will appear on screen.
-
To continue adding the new credit or debit card, click the New Card button.
Note:
The information is sent to OPI WebAPI to initiate the credit card registration process when you register the new credit card. -
A “Registered Credit Card successfully” message appears, showing the credit or debit card number, card type, expiry date, and name on card.
Note:
If the registration fails, the system prompts ‘New credit card registration is failed’ or any error based on the response from OPI WebAPI. -
Select the Save & Continue button to proceed to the next step.
Changing Credit Card Terminal with registered Credit/Debit Card.
-
On the Payment screen, select the Change Credit Card Terminal.
-
When the Credit Card Terminal page with existing selections appears, select a Device Area and Terminal from the drop-down list.
-
Click Select Terminal button to refresh the Credit Card Terminal information.
-
A system message “Credit card terminal changed successfully” appears, showing the refreshed Credit or Debit Card details on screen.
-
Click Save & Continue to proceed to the next step.
