Adding New Event
Before an event can be added successfully, these fields must be filled - Event ID, Event Code, Event Name, Category and Priced By.
-
Select the Types of View from the ribbon bar, for instance, Timeline View and place the mouse on the start time of the required location.
-
At the time grid, drag your mouse over the time period and click Add. The system auto-populates the Location, Date, Start Date, End Time and Duration in the booking calendar based on the selection and launches the Event Details tab.
-
Insert all the required information. If the mandatory field is empty, the system prompts an error with fields marked with a red X.
Additional Details
The Additional Details tab stores the itinerary information and event notes, if any.
Table 3-4 Field Definition of Additional Tab
| Field Name | Description |
|---|---|
|
Print Time |
The print time for the client itinerary if the event time is to be shown differently. For example, if a sail away party is scheduled for 5pm for 60 minutes, a print time can be after the boat drill. |
|
Print Location |
A location description that overrides the default printer location. |
|
Print Provider |
You can be use this for events that does not have items included, but you need to show a provider. In this case, the Print Provider field as an indicator. |
Event Attendees
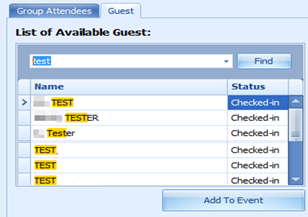
The Event Attendees tab allows you to add Group Attendees and Guest for the event. In Event Booking, members of attendees are based on Group Attendees set up in Profiles. For example, group “861B TESTER” has a total of five (5) attendees’ setup in a Profile. When you select the group “861B TESTER”, these five names appears in the List of Available Guest in Event Attendees tab.
Figure 3-13 Event Attendees List

-
To add an attendee, navigate to the Event Attendees tab of the selected group.
-
In the Attendees selection window, select the guest to add from the Group Attendees or Guest tab, and then click Add to Event.
-
To remove the attendee, select the attendee from the existing list and click Remove From Event.
Event Items
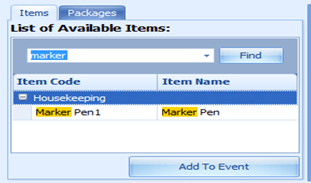
The Event Items allows you to choose and add items or packages used in the event from items setup in Items Setup.
Figure 3-14 Event Items

-
From the Event Booking window, navigate to the Event Items tab and select one of the tabs.
-
Available Items or Packages are listed below the tab. Select the item listed in the List of Available Items or Package, then click Add to Event.
Note:
Some of the items may increase the setup/breakdown time of the event. -
By default, the quantity of the selected item is one. To increase the quantity, navigate to Items Use for this event section and use the arrow up/down to increase/decrease the quantity and the Total Item Price.
-
Depending on how the Item is set up and provided a warning message prompt is pre-configured, an ‘Out of Stock’ warning prompts when the item is fully utilized. Click OK to close the prompt and add the item to the event.
-
If the item is set as
Privatein Item in Setup, and when adding an item to the event, a confirmation message appears. Clicking Yes on the confirmation prompt adds the item to the event and sets the event as Private. Click No to exit without making any changes. -
To remove the item/packages, select the item from the Items use for the event and click the Remove from Event button