Check-In Services
Check-In Services provides features such as Check-In, Template Overview, Statistic Overview, and Group Information.
Check-In
You can search for guest reservations, update guest information, take a guest photo, and check in the guest by using the Check-In Services features.
-
On the Home screen, press the Check-in Services button.
-
In the Check-in Services, Mobile Check-In section, select Check-in.
-
Select the check in status to display. For example, Embark Today or Expected.
-
Insert a name into the search bar and press the Search button on the keyboard, or use the Advanced button to search using the Embarkation Date, Cabin Category, Nationality, VIP Status, or Loyalty Status.
-
Press the Start Wizard to check in using the wizard mode. To use the wizard mode, you must select a guest or multiple guests before proceeding.
-
In the Wizard Step 1 - Immigration screen, press the +Scan Document to scan travel document. This starts the camera function for scanning.
Figure 31-12 Wizard Step 1
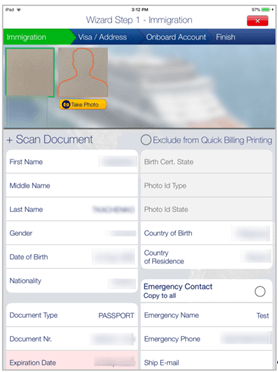
Figure 31-13 Wizard Step 2
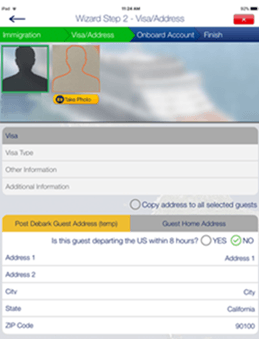
Figure 31-14 Wizard Step 3
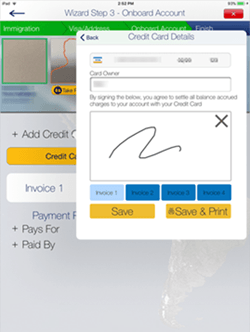
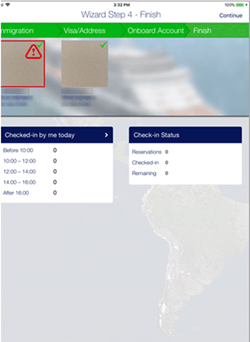
Figure 31-15 Wizard Step 4
-
Before navigating to the next screen, ensure the mandatory fields highlighted in pink contain valid information.
-
Press the Visa/Address tab to go to the next screen and enter the necessary information.
-
Press Onboard Account to add the payment information by pressing the +Add Credit Card, enter the credit card details, and press Save.
-
Press +Pays For or +Paid By to add a routing instruction. Select the guest and press Save.
-
Press the Take Photo button to take a new photo.
-
Press the Finish button to complete the registration, and press the Continue button to exit the wizard.
Mobile Template Overview
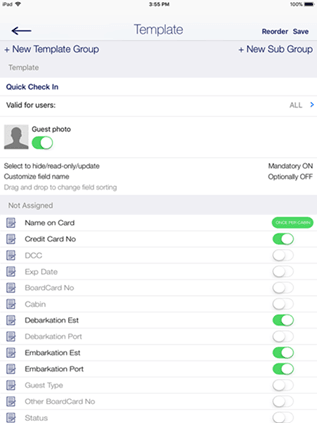
The Mobile Template Overview enables you to add a new template and defines the mandatory fields used in each form.
Figure 31-16 Mobile Template
-
On the Home screen, press the Check-in Services button.
-
In the Check-in Services, Mobile Check-In section, select Mobile template overview.
-
On the Template Overview screen, press the “+” to add a new template.
-
Insert a template name under Template.
-
On the field name, slide to enable the field as mandatory.
-
Press the Reorder to navigate to the Reorder screen, which allows you to arrange the fields shown in the Wizard screen.
-
Press Save.