Generating GL EOM file
The GL EOM file is generated through the OHC Payroll GL interface.
To generate the file:
-
Log in to the OHC Payroll GL interface.
-
On the GL Transfer menu, select Generate File.
Figure 26-85 GL EOM Transaction Listing

-
Select the pay period from the drop-down list.
-
Click the Generate File button to generate the output file. Location of the output file is defined in the Transfer Folder parameter.
-
If you have generated the file for the selected period, the system will prompt you to rename the existing file before you are allowed to proceed.
-
Multiple records per position will be listed in the output, depending on the number of pay codes associated to each crew member.
Note:
Content of the files generated are retained in the History folder for backup and the days to keep in history is based on the value entered in the parameter Number of Day History Backup.GL EOM Output File format
There are three output formats that you can generate from the interface:
-
Payroll GL Extract – Summary
-
Payroll GL Extract – with Position
-
Payroll GL Extract – with Position and Vacation Pay Detail
Although the output file is saved in text format, you can convert the information to an Excel spreadsheet by opening the file with Microsoft Excel and using the default Text Import Wizard setting.
Example of Payroll GL Extract — Summary
Figure 26-86 Sample GL Extract File — Summary

The summary output file contains:
-
Company code.
-
Salary group ID – Mapping ID defined Department Mapping menu.
-
GL Number – Map with shore side general account ledger.
-
Pay Code Number.
-
EOM Date – The date format is set in the parameter Date Format.
-
Amount.
-
PU-MM/DD/YY – The date prefix is set in parameter Date Prefix where the date is set according to Date Format.
-
Pay Type Classification.
Example of Payroll GL Extract – with Position
Figure 26-87 Sample GL Extract File — with Position

Apart from the fields listed in the Summary output file, it includes a Crew Position at the end of the string.
Example of Payroll GL Extract – with Position and Vacation Pay Detail
Figure 26-88 Sample GL Extract File — with Vacation Pay Detail

The output string includes the Crew Position, First Name, Last Name and Paid Through Validity, in addition to the Payroll GL Extract – Summary.
Regenerating the GL file
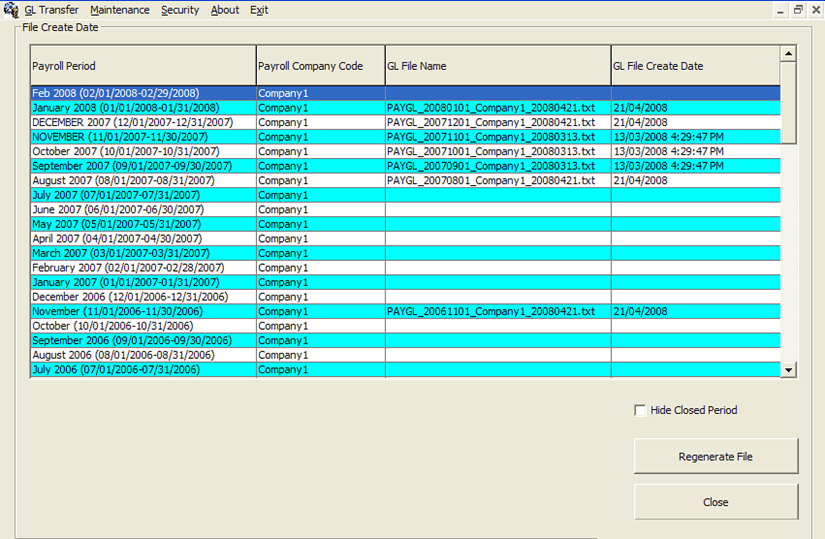
The system permits you to re-generate past GL files using the Reprocessing option from the GL Menu.
Figure 26-89 Regenerate GL File

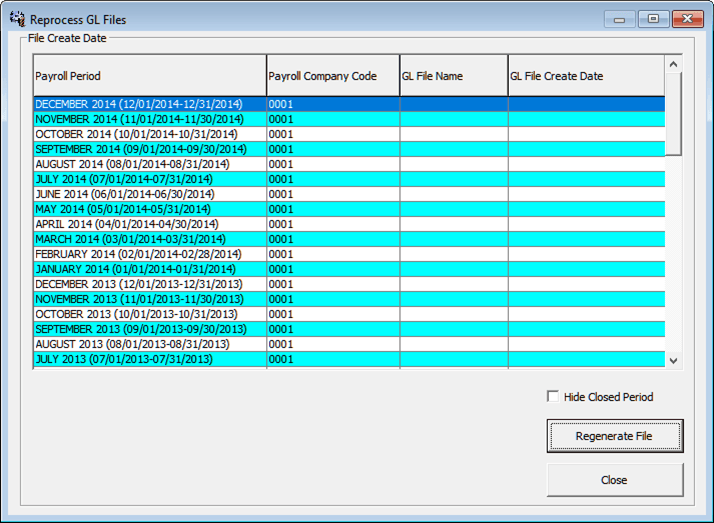
Figure 26-90 Reprocess GL File

Click the Reprocessing option:
-
Opens the Reprocess GL Files window.
-
Select the file from the grid and then click the Regenerate File button.
Note:
This replaces the previously generated files stored in the Transfer Folder.Department Mapping
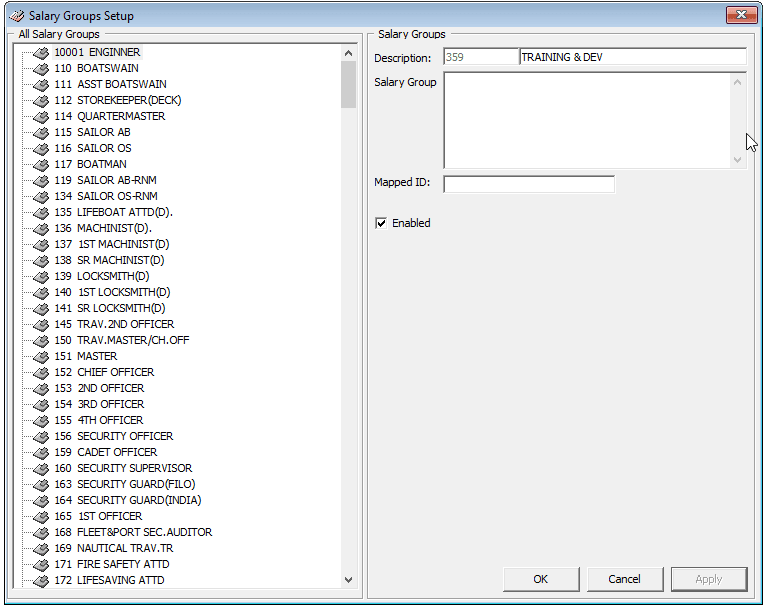
You can map a shore side general ledger ID to the department code by selecting Department Mapping from the Maintenance menu to view the salary group.
Figure 26-91 Salary Group Setup

-
The mapped ID of Salary Group is equivalent to the shore side General Ledger account ID.
-
If there is no mapping ID defined, the output file will have a blank space at the 2nd column (salary group ID column).