Run the Agent as a Service
You can now run the agent as a service. This is the preferable way of running the agent because if you run it as a normal process, every time the environment is restarted, the command prompt window is closed or the process is terminated. If this occurs, you must repeat steps 4 and 5 of the Installation Steps.
Linux Installation
-
After you followed successfully the Installation steps, make sure you stop the running agent by pressing Ctrl+C in the command line. Consider that the agent root folder is named <AGENT_ROOT>.
-
Create a Linux script named agentstartup.sh that triggers the agent startup (see script below). Place this script in <AGENT_ROOT>.
#!/bin/bash java -version cd <AGENT_ROOT> java -jar connectivityagent.jar -
Replace <AGENT_ROOT> with your path. For example, /home/myuser/connectivity_agent.
-
After saving the above script, make sure to add the execution permission:
sudo chmod +x agentstartup.sh -
Create a new .service file (connectivity_agent.service) under /etc/systemd/system/ to associate the script created with the Linux startup daemon process. You must have root access to create this file
[Unit] Description=Connectivity Agent After=network.target [Service] Type=simple ExecStart=<AGENT_ROOT>/agentstartup.sh User=<myUser> Group=<myGroup> [Install] WantedBy=multi-user.target -
Replace <AGENT_ROOT> with your path (for example, /home/myuser/connectivity_agent), <myUser> and <myGroup> with your user and user group.
-
Execute the below commands to enable/start the connectivity_agent.service process:
sudo systemctl daemon-reload sudo systemctl enable connectivity_agent.service sudo systemctl start connectivity_agent.service -
To check the status of execution for the connectivity_agent.service, execute the below command. Make sure the status is active (running), and the last msg log is "Agent started successfully... Now available for new messages..."
sudo systemctl status connectivity_agent.service
Microsoft Windows Installation
-
Download Procrun
-
Go to the download page for Microsoft Windows at https://downloads.apache.org/commons/daemon/binaries/windows/.
Download the latest version of the zip file. For example: commons-daemon-1.3.4-bin-windows.zip.
-
Unzip the zip content into a dedicated folder, such as "C:\Apache Commons Daemon."
-
-
Install the service.
-
Open a command prompt in the C:\Apache Commons Daemon folder with Administrator privileges. You can do that by opening the "Command Prompt" and then typing the following:
cd "C:\Apache Commons Daemon" -
To make it easier later, create a local variable named ‘AGENT_ROOT’ with the folder path where you installed your OIC Agent. This is the folder containing the file "connectivityagent.jar." For example: C:\oic_agent. Note that this is set without quotation marks.
set AGENT_ROOT=C:\oic_agent -
Create the folder ‘serviceLogFiles’ under AGENT_ROOT.
mkdir "%AGENT_ROOT%\serviceLogs" -
Make sure that you have the Java executable in the correct place by querying its version.
"C:\Progra~1\Common Files\Oracle\Java\javapath\java.exe" --versionThis should return something like the following:C:\Apache Commons Daemon>"C:\Progra~1\Common Files\Oracle\Java\javapath\java.exe" --version java 17.0.9 2023-10-17 LTS Java(TM) SE Runtime Environment (build 17.0.9+11-LTS-201) Java HotSpot(TM) 64-Bit Server VM (build 17.0.9+11-LTS-201, mixed mode, sharing) -
Run the command to install the service.
prunsrv.exe //IS//oic_agent --DisplayName "Oracle OIC Agent" --Startup "auto" ^
 --StartMode "exe" --StartImage "C:\Progra~1\Common Files\Oracle\Java\javapath\java.exe" --StartPath "%AGENT_ROOT%" --StartParams "-jar#%AGENT_ROOT%\connectivityagent.jar" ^
 --StopMode "exe" --StopImage "cmd.exe" --StopParams "/c#FOR /F %A IN ('type "%AGENT_ROOT%\pid"') DO (taskkill /F /PID %~A && del "%AGENT_ROOT%\pid")" --StopTimeout 10 ^
 --LogPath "%AGENT_ROOT%\serviceLogs" --LogPrefix "commons-daemon" --LogLevel "Info" --StdError "auto" --StdOutput "auto"
This should return something like the following:
C:\Apache Commons Daemon>prunsrv.exe //IS//oic_agent --DisplayName "Oracle OIC Agent" ^
More?  --StartMode "exe" --StartImage "C:\Progra~1\Common Files\Oracle\Java\javapath\java.exe" --StartPath "%AGENT_ROOT%" --StartParams "-jar#%AGENT_ROOT%\connectivityagent.jar" ^
More?  --StopMode "exe" --StopImage "cmd.exe" --StopParams "/c#FOR /F %A IN ('type "%AGENT_ROOT%\pid"') DO (taskkill /F /PID %~A && del "%AGENT_ROOT%\pid")" --StopTimeout 10 ^
More?  --LogPath "%AGENT_ROOT%\serviceLogs" --LogPrefix "commons-daemon" --LogLevel "Info" --StdError "auto" --StdOutput "auto"
[2023-12-22 01:53:14] [info]  [ 9080] Apache Commons Daemon procrun (1.3.4.0 32-bit) started.
[2023-12-22 01:53:14] [info]  [ 9080] Installing service 'oic_agent_qa' name 'Oracle OIC Agent QA'.
[2023-12-22 01:53:14] [info]  [ 9080] Service 'oic_agent_qa' installed.
[2023-12-22 01:53:14] [info]  [ 9080] Apache Commons Daemon procrun finished.
-
-
Start the service.
-
Open the command prompt where the connectivity agent is being run and stop it by pressing Ctrl+C. If you cannot find that command prompt, run the command where <agentPid> is the agent process ID. You can find that in the %AGENT_ROOT%\pid file.
-
Delete all the content under %AGENT_ROOT%\agenthome\logs. Since the service will run as LocalService and the log files were created by another user, you will see "access denied" errors and the agent og will not be properly produced.
The same will also happen with the PID file, so also remove this file to avoid issues.del "%AGENT_ROOT%\agenthome\logs\*" del "%AGENT_ROOT%\pid" -
Run the following command to run the service:
prunmgr //MR//oic_agent -
Open the latest file %AGENT_ROOT%\serviceLogs\oic_agent-stdout.YYYY-MM-dd.log and make sure you have the last log "Agent started successfully... Now available for new messages...". It should look like the following:
2023-12-22 02:17:23 Apache Commons Daemon procrun stdout initialized. Existing Agent installation found... Starting Agent for message processing. Checking for already running instances of this agent. This might take up to 15 seconds ... Initializing the credential store ... Agent started successfully...Now available for new messages... -
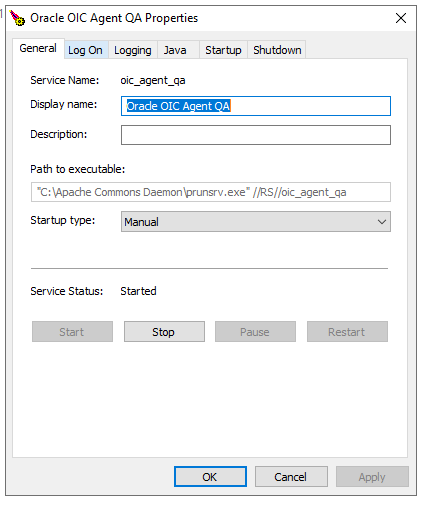
You will also find it on the system tray with this
 icon. There you can manage
the service (that is, start, stop, and configure the service).
-
In the service logs folder %AGENT_ROOT%\serviceLogs, you will find these files.

-
commons-daemon.YYYY-MM-dd.log - The Procrun logs.
-
oic_agent_qa-stderr.YYYY-MM-dd.log - The standard error of the java connectivity agent.
-
oic_agent_qa-stdout.YYYY-MM-dd.log - The standard out of the java connectivity agent.
-
-
Troubleshooting Tips
This section provides some tips on how to troubleshoot the common problems you might find when using an agent such as a Microsoft Windows service.
-
Go to %AGENT_ROOT%\serviceLogs where you will see several files. Take the most recent ones:
-
oic_agent_dev-stdout.*.log - The standard out of the agent. You will find the generic progression of the status of the agent.
-
commons-daemon.2024-01-23.log - The logs of the agent service. You will find the start/stop commands.
-
oic_agent_dev-stderr.2024-01-23.log - The standard error of the agent. You will find exceptions trace logs and specific information about any issue about the agent.
-
-
Before solving this issue, you may want to stop the service and agent (see the next tip on how to do this). Some common issues can be wrong/experienced credentials or locked/access denied on log files (see below).
-
Open the file %AGENT_ROOT%\pid and make note of the PID number.
-
Run the command as "Run as administrator" on a command line console. This terminates the Java process running the agent.
taskkill /F /PID <agentPid> -
Run the Task Manager app as "Run as administrator":
-
Open the Services tab.
-
Select the service of your agent.
-
Right click and select Stop.
-
-
Stop the service and agent as before.
-
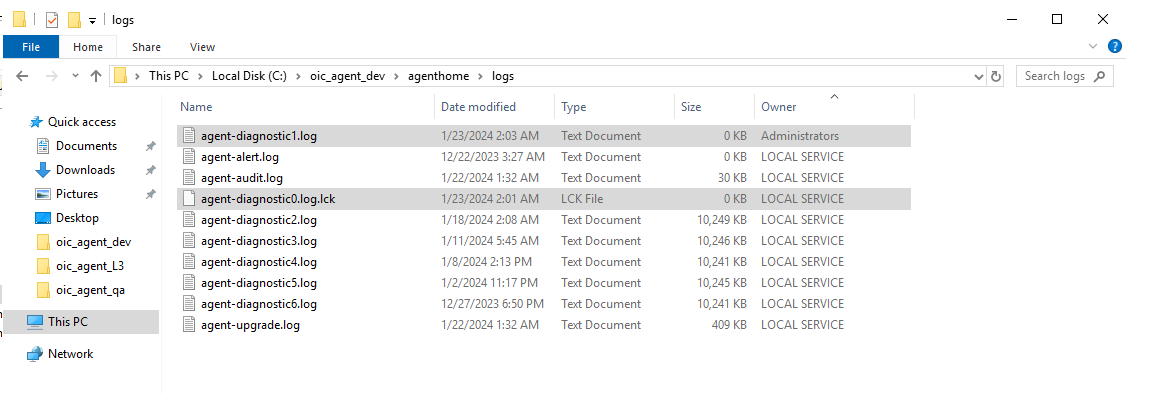
Open Microsoft Windows File Explorer on the folder %AGENT_ROOT%\agenthome\logs.
-
Delete all files that end in .lck and that are not owned by LOCAL SERVICE. For example, see the files in the below image:

-
Run the Task Manager app as "Run as administrator":
-
Open the Services tab.
-
Select the service of your agent.
-
Right click and select Start.
-
Parent topic: OPERA Cloud Connectivity Agent