OPERA Cloud Outbound Configuration for Light & Wonder
A new outbound system configuration is required for OPERA Cloud to connect to Light & Wonder.
For additional details on creating an outbound configuration, refer to Configuring Outbound Systems in the OPERA Cloud Services documentation.
-
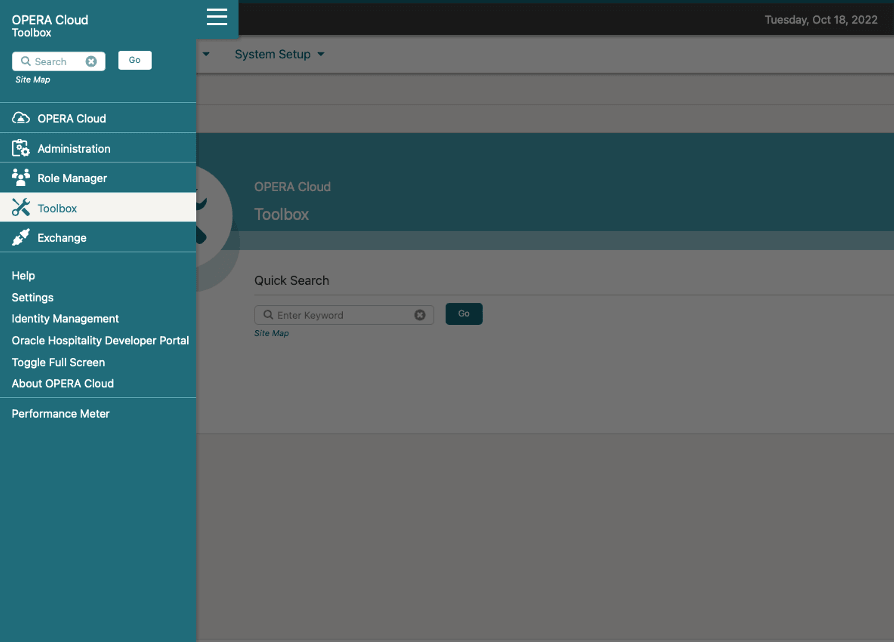
Log in to OPERA Cloud and click the vertical ellipsis and select Toolbox.
-
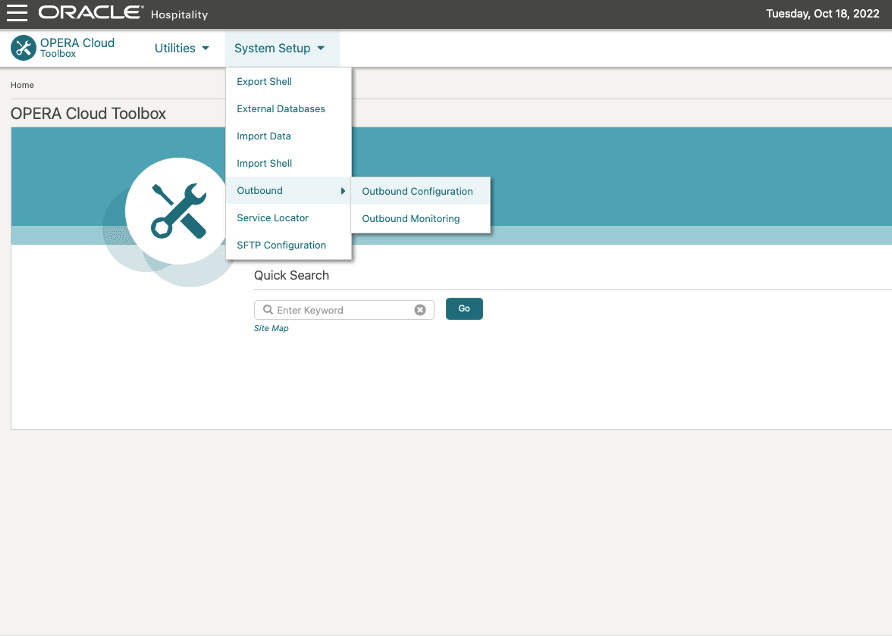
Select System Setup, select Outbound, and then select Outbound Configuration.
-
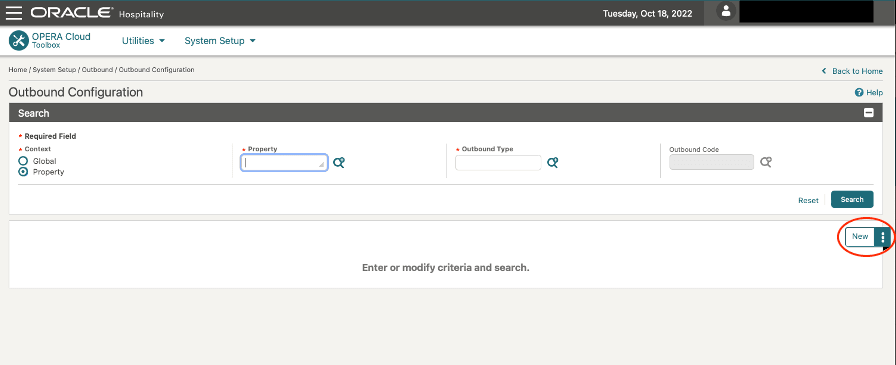
Select the Property and then click New to set up the new Outbound Configuration.
-
Complete the following fields and click Save. For the specific details on each field and how to create an Outbound Configuration, see Managing Outbound System Configuration in the OPERA Cloud Services documentation.
-
Context: Select the Property option.
-
Property: Select the property for which this configuration is being set up.
-
Outbound Type: Select GAMING_CUSTOM from the list of options.
-
Outbound Code: Provide the unique identifier (for example: LWCMP_{Property_Name}).
-
Outbound Description: Provide the description (optional).
-
Authorization Type: Select NONE from the list of options.
-
Application Key: Leave this field blank.
-
Enable External System: Select this option.
-
Enable Conversions: Select this option.
-
External Property: Enter the Site Id or Hotel Id provided by Light & Wonder.
-
Bypass Proxy: Select this option.
-
RESTAPIBaseURL: Type the webservice url of the Light & Wonder. [ex: http://{hostname}:{port}]
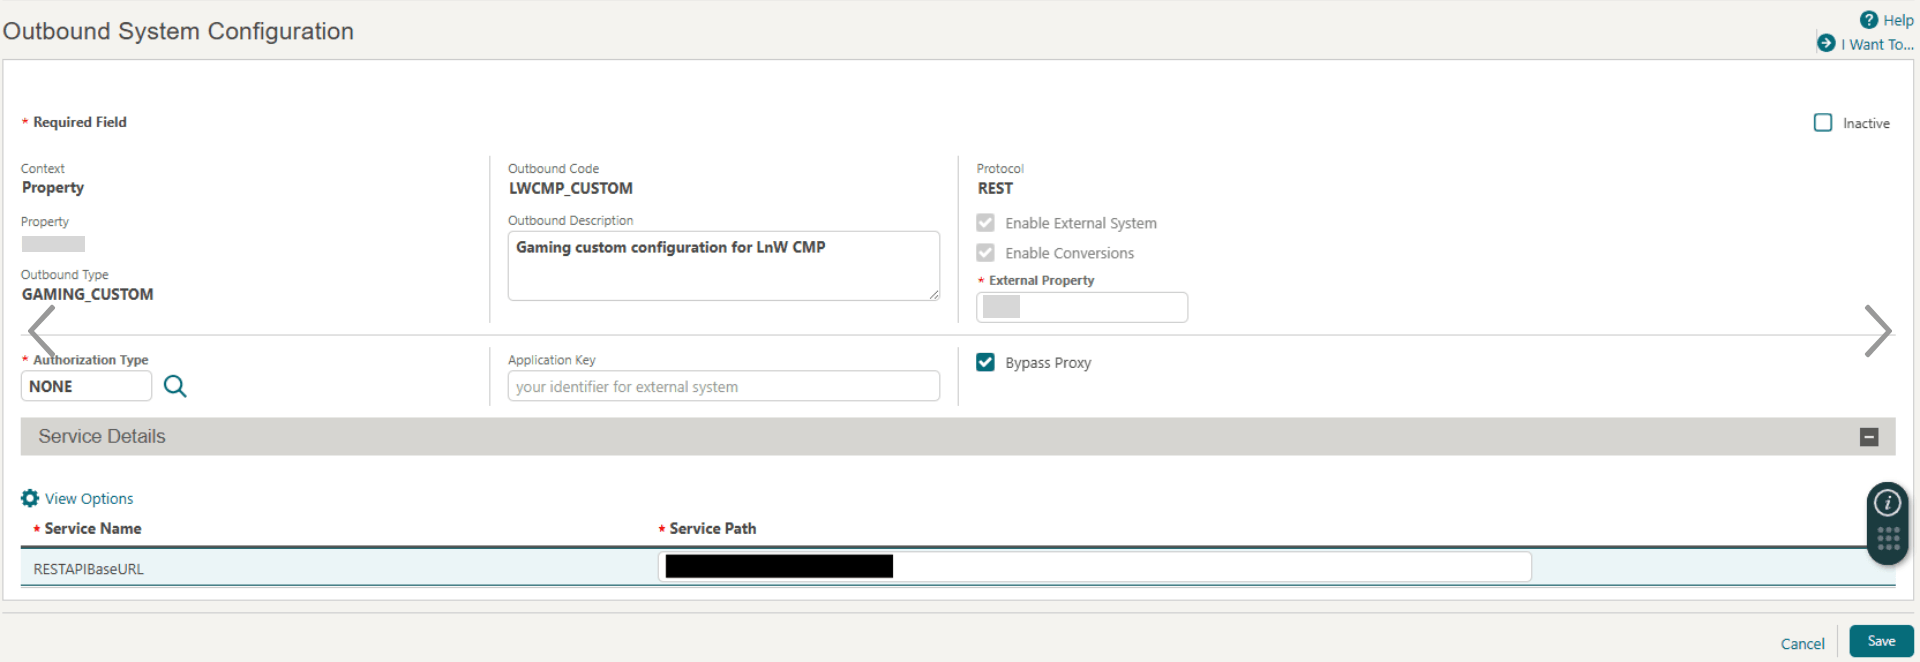
Once the configuration is saved, proceed to Custom Headers and DVM configurations.
-
-
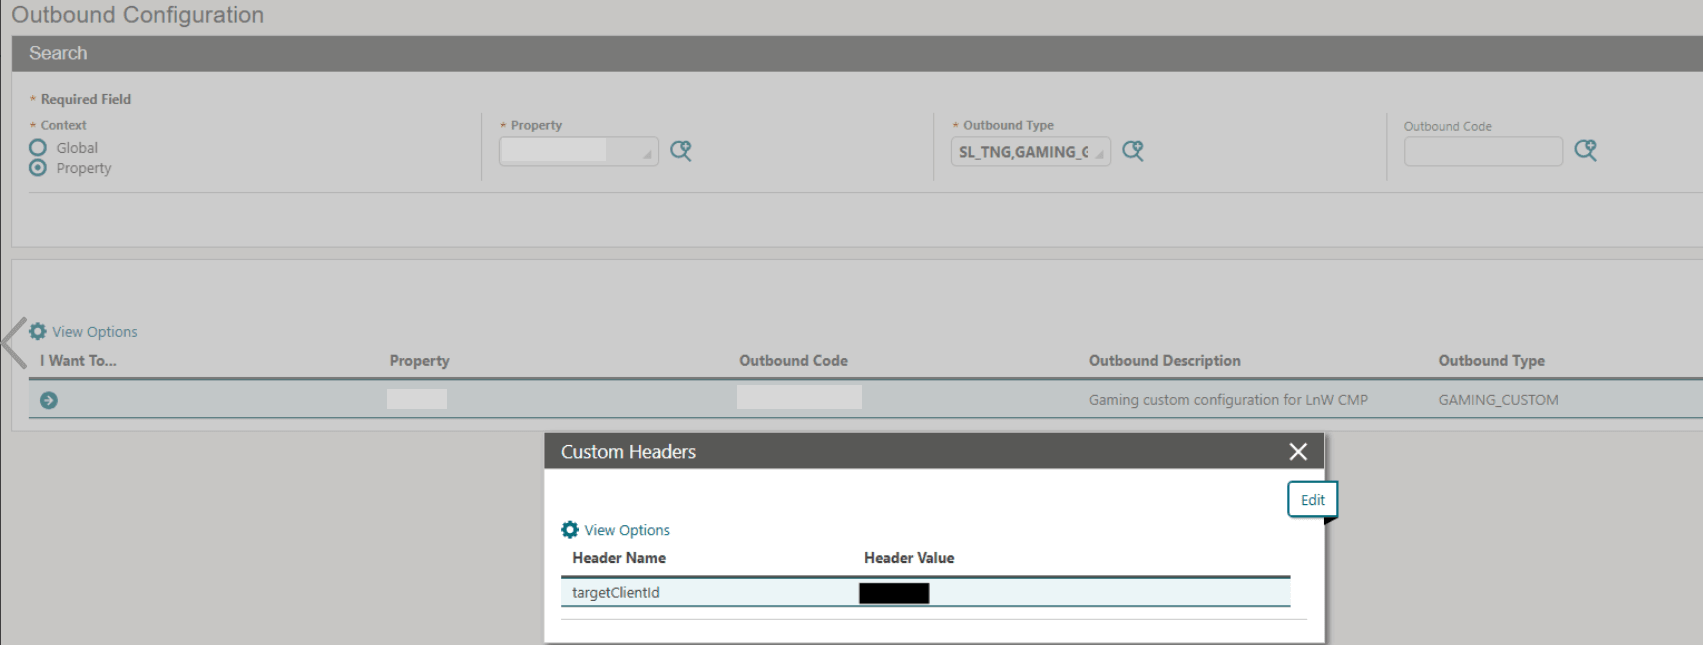
Add the following Custom Headers for this outbound configuration. Click the I Want To... from the search results row where you want to define Custom Headers.
Once the configuration is saved, the final configuration is shown below:

Header Name Header Value targetClientId
client-id parameter to call Light & Wonder services
Once the above fields are completed, save the outbound configuration and proceed to Data Value Mappings (DVM).
Parent topic: Light & Wonder CMP