Configuring a Mobile ID Document Scanner
Adding a Mobile ID Document Scanner
-
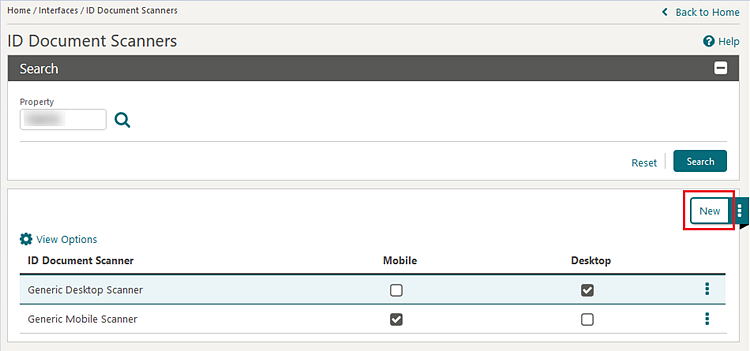
From the Administration menu, select Interfaces, and select ID Document Scanner.
-
Click New.

-
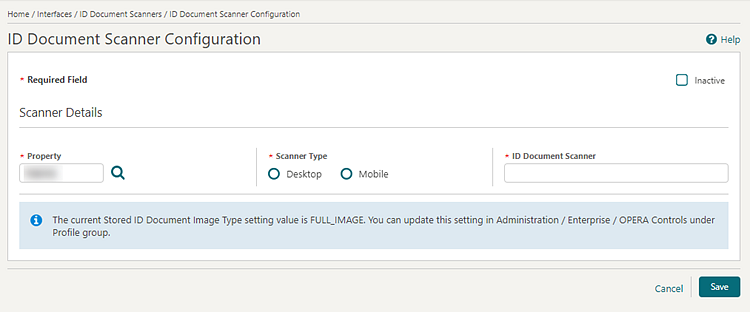
Select the Property if signed in at Hub level. If signed in at property level, the Property field is populated by default.

-
Select the Scanner Type – Mobile radio button. If ID Document scanning for Desktop configuration already exists for the selected property, you are presented with the following warning message: Mobile scanner configuration for [Property Code] already exists. If you continue and save this new configuration it will overwrite the existing record.

-
Enter the name of the partner into the ID Document Scanner field. This is a free text field.
-
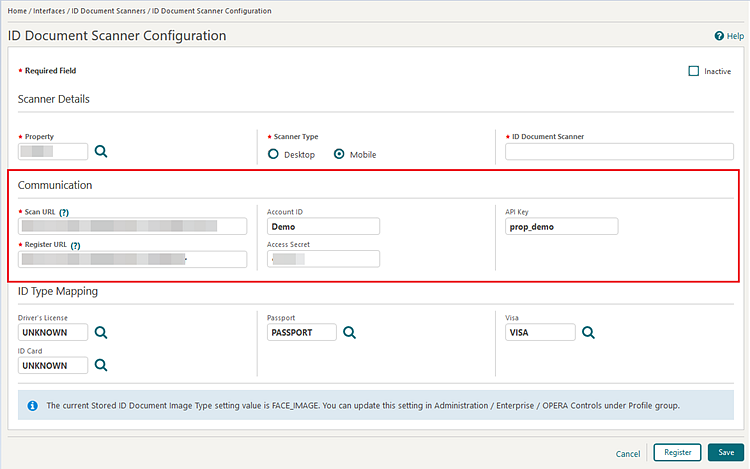
In the Communication section enter details provided by vendor:
-
Scan URL – enter the full Scan API URL, including domain, port, and resource location. Example: https://domain.com:443/scan.
-
Register URL – enter the full Register API URL, including domain, port, and resource location. Example: https://domain.com:443/client-register.
-
Account ID– value provided by vendor if required for their service.
-
Access Secret – value provided by vendor if required for their service.
-
API Key – value provided by vendor if required for their service.

-
-
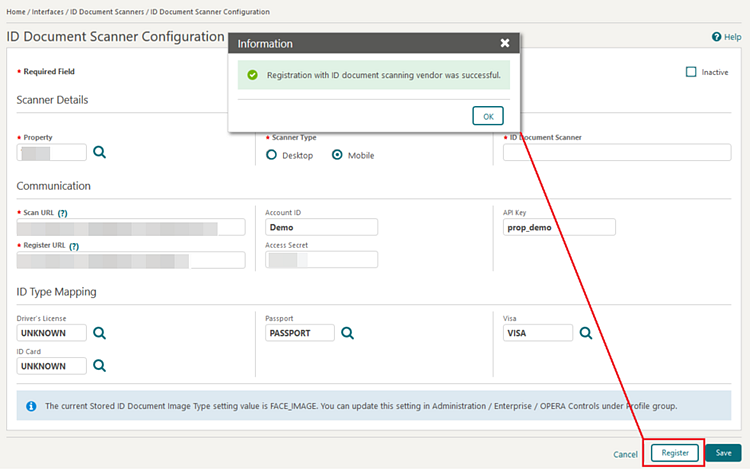
After entering all values provided by vendor in the Communication section. click Register to identify the property to the vendor and generate a security token if entered details are valid.

-
In the ID Type Mapping section, select the Identification Types configured in Administration > Client Relations > Geographic Management > Identification Types for the supportable ID Document Types displayed.
-
Click Save.
Editing a Mobile ID Document Scanner
-
From the Administration menu, select Interfaces, and select ID Document Scanner.
-
Select the ID Document Scanner configuration entry that has the Mobile column checked.
-
Click the vertical ellipsis and select Edit.
-
The following fields are read only:
-
Property
-
Scanner Type
-
-
You can modify the following fields:
-
Inactive check box
-
ID Document Scanner
-
Scan URL
-
ID Type Mappings
-
Register URL
-
Account ID
-
Access Secret
-
API Key
-
-
If any of the Communication fields related to scan registration (including Register URL, Account ID, Access Secret, and API Key) have been updated, click Register to update the vendor registration and token.
-
Click Save.
Deleting a Mobile ID Document Scanner
-
From the Administration menu, select Interfaces, and select ID Document Scanner.
-
Select the ID Document Scanner configuration entry that has the Mobile column checked.
-
Click the vertical ellipsis and select Delete.
-
Click Delete to confirm.
Inactivating a Mobile ID Document Scanner
-
From the Administration menu, select Interfaces, and select ID Document Scanner.
-
Select the ID Document Scanner configuration entry that has the Mobile column checked.
-
Click the vertical ellipsis and select Edit.
-
Select the Inactive check box in the upper right corner.
-
Click Save.
Parent topic: Mobile ID Document Scanning