Install Application
This section lists the steps that are required to deploy the Oracle Health Insurance application on the Oracle Fusion Middleware WebLogic Server (WebLogic).
Creating WebLogic Work Managers
By default, WebLogic Server uses the default work manager to handle thread management and perform self-tuning. This default Work Manager is used by an application when no other Work Managers are specified in the application’s deployment descriptors. For more information, check the WebLogic documentation on Work Managers.
For example, the following application-specific work managers can be configured for more fine-grained control and work load monitoring of the system:
-
a work manager to control UI requests, named "wm/ui-work-manager"
-
a work manager to control Web Services requests, named "wm/ws-work-manager"
-
and a work manager to control task or activity processing, named "wm/core-work-manager"
If these work managers are not configured, the system issues warnings at startup like the following example and will use the WebLogic default work manager instead:
<Warning> <WorkManager> <BEA-002919> <Unable to find a WorkManager with name wm/core-work-manager. Dispatch policy wm/core-work-manager will map to the default WorkManager for the application OHI-Claims-2.x.x.x.x>
Refer WebLogic documentation on Work Managers to override the behavior of the default work manager.
Create global work managers through the Administration Console using the steps that are listed in the following table in the given order. Make sure to associate the work managers with the managed servers.
| Step | Configuration | Value |
|---|---|---|
1 |
Minimum Threads Constraint |
|
Name |
core-work-manager-min-threads-constraint |
|
Count |
16 |
|
2 |
Maximum Threads Constraint |
|
Name |
core-work-manager-max-threads-constraint |
|
Count |
16 |
|
3 |
Fair Share Request Class |
|
Name |
core-work-manager-fair-share-req-class |
|
Fair Share |
40 |
|
4 |
Work Manager |
|
Name |
wm/core-work-manager |
|
Request Class |
core-work-manager-fair-share-req-class |
|
Minimum Threads Constraint |
core-work-manager-min-threads-constraint |
|
Maximum Threads Constraint |
core-work-manager-max-threads-constraint |
|
Capacity Constraint |
None Configured |
|
Stuck Thread Action |
Ignore stuck threads |
|
5 |
Minimum Threads Constraint |
|
Name |
ws-work-manager-min-threads-constraint |
|
Count |
10 |
|
6 |
Maximum Threads Constraint |
|
Name |
ws-work-manager-max-threads-constraint |
|
Count |
100 |
|
7 |
Fair Share Request Class |
|
Name |
ws-work-manager-fair-share-req-class |
|
Fair Share |
60 |
|
8 |
Work Manager |
|
Name |
wm/ws-work-manager |
|
Request Class |
ws-work-manager-fair-share-req-class |
|
Minimum Threads Constraint |
ws-work-manager-min-threads-constraint |
|
Maximum Threads Constraint |
ws-work-manager-max-threads-constraint |
|
Capacity Constraint |
None Configured |
|
Stuck Thread Action |
Ignore stuck threads |
|
9 |
Minimum Threads Constraint |
|
Name |
ui-work-manager-min-threads-constraint |
|
Count |
5 |
|
10 |
Maximum Threads Constraint |
|
Name |
ui-work-manager-max-threads-constraint |
|
Count |
100 |
|
11 |
Fair Share Request Class |
|
Name |
ui-work-manager-fair-share-req-class |
|
Fair Share |
50 |
|
12 |
Work Manager |
|
Name |
wm/ui-work-manager |
|
Request Class |
ui-work-manager-fair-share-req-class |
|
Minimum Threads Constraint |
ui-work-manager-min-threads-constraint |
|
Maximum Threads Constraint |
ui-work-manager-max-threads-constraint |
|
Capacity Constraint |
None Configured |
|
Stuck Thread Action |
Ignore stuck threads |
After configuring work managers, managed servers need to be restarted.
The work manager configuration, like the minimum and maximum threads constraints and the fair share request factors, can be modified at any time in WebLogic Admin Console as is required, for example to increase the number of threads used for task processing.
| This largely depends on hardware capacity, system configuration and the load characteristics and typically requires a thorough understanding of the system’s performance. |
Configuring Authentication Providers
Oracle Health Insurance applications use WebLogic Authentication Providers to connect to a user store for authenticating users. Examples of user identity stores for which authentication providers are available include:
-
Oracle Internet Directory (OID)
-
Third party LDAP server
-
An RDBMS like an Oracle database or MySQL database
In addition, it is possible to create custom authentication providers for types of authentication technologies for which WebLogic does not offer out of the box authentication providers.
This section describes an example configuration for OID or a third party LDAP Authentication Provider. See the WebLogic documentation for additional information and for configuration options of other authentication providers.
-
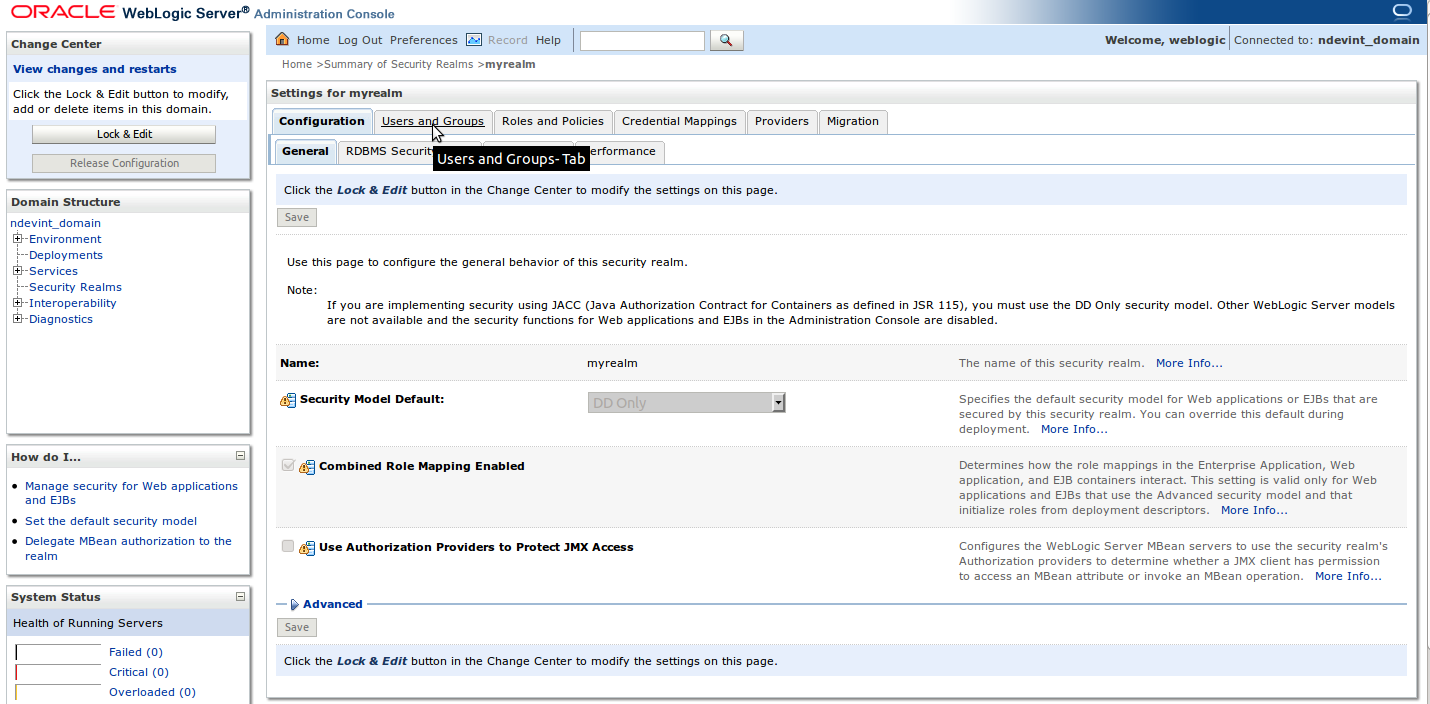
Login to the WebLogic admin console and click the Security Realms link.
-
Click the myrealm link.
-
Click the *Providers *tab.
-
Click the New *button in order to create a New Authentication Provider
NOTE: In WebLogic Production-mode use the *Lock & Edit button before clicking on the *New *button. -
Change Name and Type to OHIAuthenticationProvider and OracleInternetDirectoryAuthenticator (or to LDAPAuthenticator in case a third party LDAP server is used) respectively in Create a new Authentication Provider page and click the OK button.
-
Click the OHIAuthenticationProvider link.
-
Change the Control Flag to SUFFICIENT and click the Save button.
-
Click the Provider Specific tab.
-
Enter/change the values for various fields as shown below and select the option Propagate Cause For Login Exception.
Field Value Host
LDAP hostname or IP address
Port
LDAP Port or SSL Port if the LDAP is SSL enabled. E.g.: 3060. In case LDAPS is used, make sure to check the SSLEnabled flag as well.
Principal
LDAP admin principal: E.g.: cn=orcladmin
Credential
LDAP admin password
Confirm Credential
LDAP admin password
User Base DN
User Base distinguished name. E.g.: ou=Users,dc=healthinsurance,dc=oracle,dc=com
All Users Filter
E.g.: (&(uid=*)(objectclass=person))
User From Name Filter
E.g.: (&(uid=%u)(objectclass=person))
User Name Attribute
E.g.: uid
Group Base DN
If there are no groups in the LDAP, leave this field empty.
There are a few more properties (or fields in the page) which are not mentioned in the table above. Change the values of those fields to suit your LDAP settings. -
Click the *Save *button.
-
Click the myrealm link and then DefaultAuthenticator *link. Change the *Control Flag to SUFFICIENT and click the Save button.
-
Restart the WebLogic Server.
Optionally, verify that the authentication provider is configured successfully (after the WebLogic Server is restarted) by following the steps mentioned below:
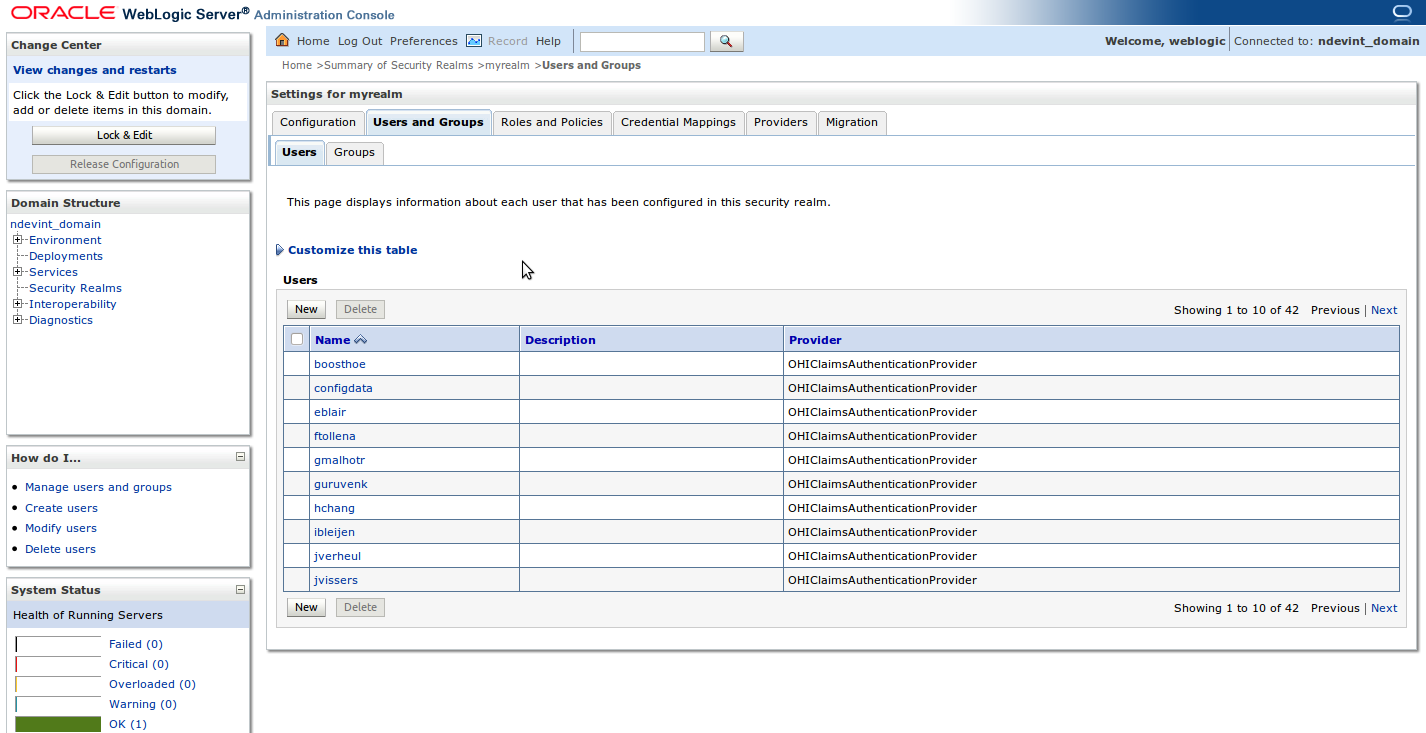
Step 1: Login to WLS Admin Console and click on Security Realms
Step 2: Click on myrealm
Step 3: Click on Users and Groups tab
Step 4: You should be able to see the list of users from OHIAuthenticationProvider (in addition to the default users from DefaultAuthenticator).
Set up JDBC Data Sources
The application connects to the Oracle database through a Data Source that need to be specified in the WLS Server.
| For security reasons, the database connections used by the application connect to database schemas that do not own database objects. These schemas are only granted the required privileges to use the objects. |
The following sections describe setting up data sources for connecting to:
-
an Oracle database that is running on a single machine
-
a RAC-enabled Oracle database that is running on multiple machines
Data Source for connecting to an Oracle database that is running on a single machine
The following table lists details for the Data Source that must be configured in WLS before installing the application for use with an Oracle database that is executed on a single machine (not clustered):
| Data Source Parameters | Non-clustered database | Explanation |
|---|---|---|
Data Source Type |
Generic Data Source |
|
Data Source Name |
ohi-application-datasource |
Logical name |
JNDI Name |
jdbc/claimsUserOhiApplicationDS |
Used by the application to resolve the Data Source |
Database Type |
Oracle |
|
Database Driver |
Oracle’s Driver (Thin) for Instance connections; Versions:9.0.1,9.2.0,10,11 or Oracle’s Driver (Thin) for Service connections; Versions:9.0.1,9.2.0,10,11 |
|
Database Name |
SID or service name of the database If the name of the Oracle driver that was selected contains the words "for Instance connections" enter the SID. If the name of the Oracle driver contains the words "for Service connections" enter the service name. |
|
Host Name |
Name or IP address of the machine where the database is running |
|
Port |
Port on which the database is running |
|
Database User Name |
ohi_claims_user |
Fixed value, do not change |
Password and Confirm Password |
Password of "ohi_claims_user" |
The schema password as selected during the installation |
Service Name |
Service name of the database |
SID or service name |
Data Source for connecting to an Oracle RAC database that is running on multiple machines
To support Oracle RAC features within Oracle WebLogic Server, Oracle recommends using Oracle WebLogic Server GridLink Data Source. A single GridLink data source provides connectivity between WebLogic Server and an Oracle Database service targeted to an Oracle RAC cluster. It uses the Oracle Notification Service (ONS) to adaptively respond to state changes in an Oracle RAC instance. An Oracle Database service represents a workload with common attributes that enables administrators to manage the workload as a single entity.
To configure this, the following steps need to be performed. For more details about GridLink Data Source configuration, see the Oracle WebLogic Server documentation in https://docs.oracle.com/middleware/1213/wls/JDBCA/gridlink_datasources.htm#JDBCA373.
Configuring GridLink Data Source
Step 1: Login to the WebLogic admin server console and click the *Services/Data Sources *link.
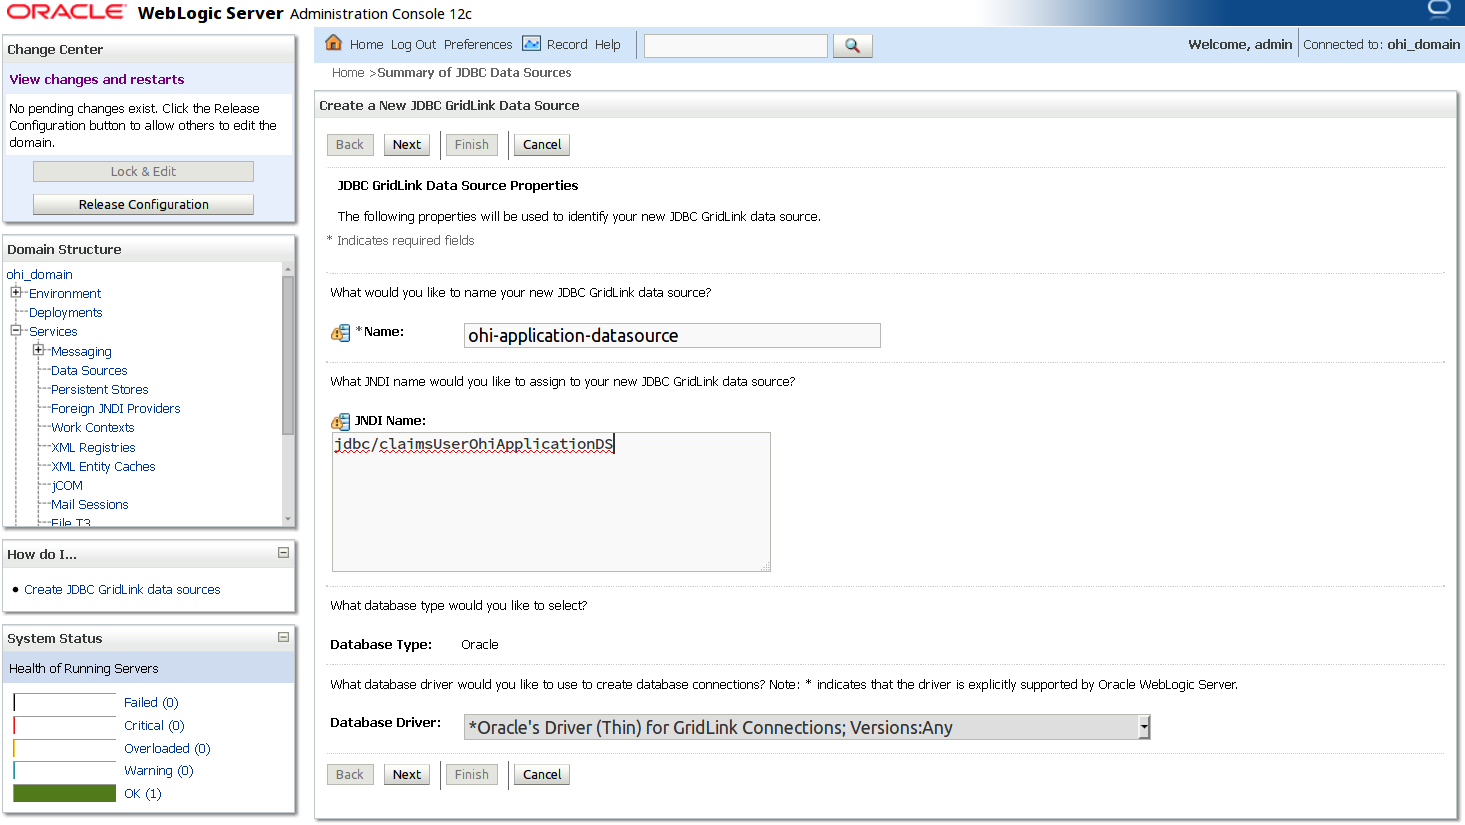
Step 2: Click on New button and select the option GridLink Data Source
image::create-new-gridLink-data-source.png[]
| In WLS Production-mode use the Lock & Edit button before clicking on the New button. |
Step 3: Change the value of Name to ohi-application-datasource and enter jdbc/claimsUserOhiApplicationDS in JNDI Name. Click the Next button.
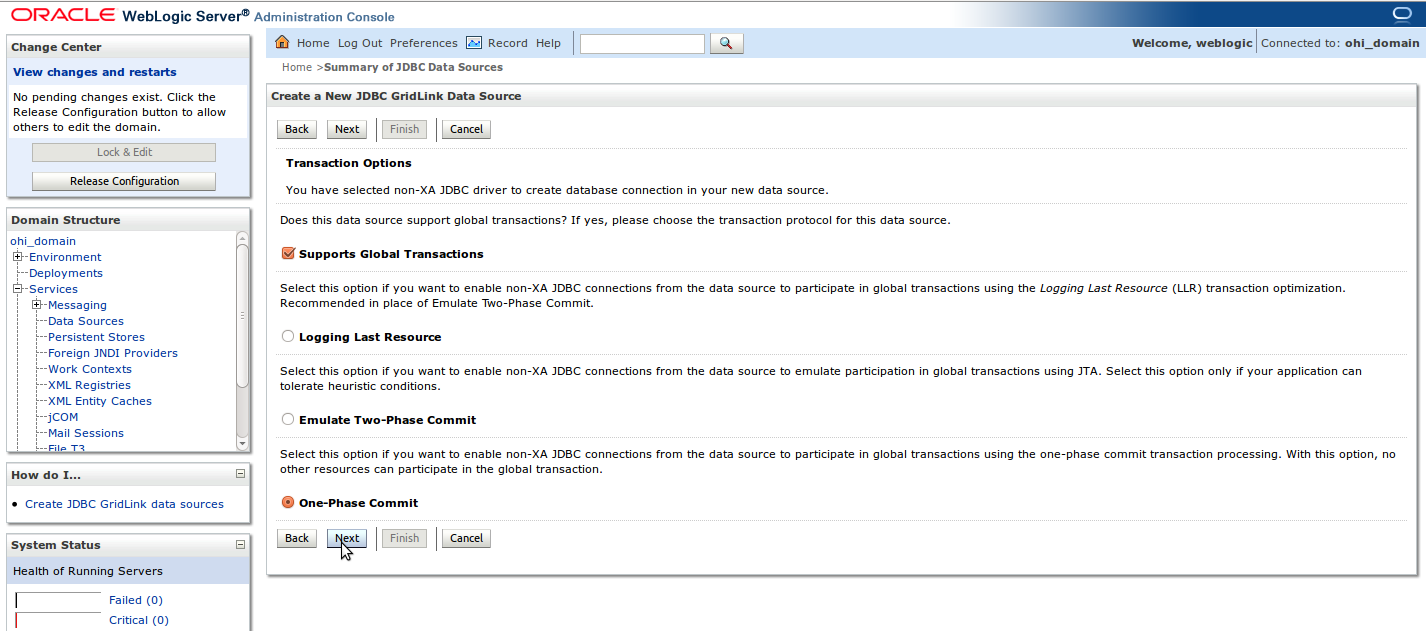
Step 4: In Transaction Options page, accept the default settings (Supports Global Transactions and One-Phase Commit) and click the Next button.
Step 5: If SCAN (Single Client Access Name) is used for the Oracle RAC database, select the option Enter complete JDBC URL. Else, select the option Enter individual listener information.
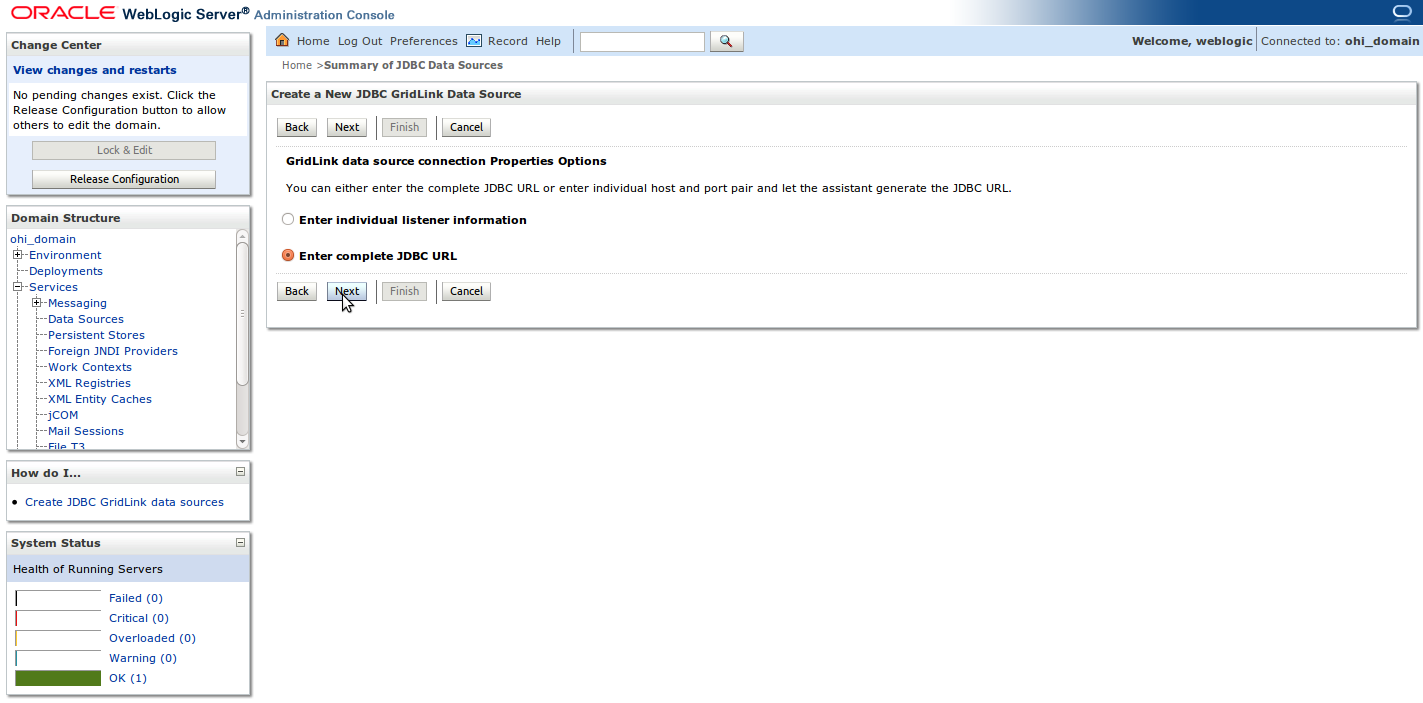
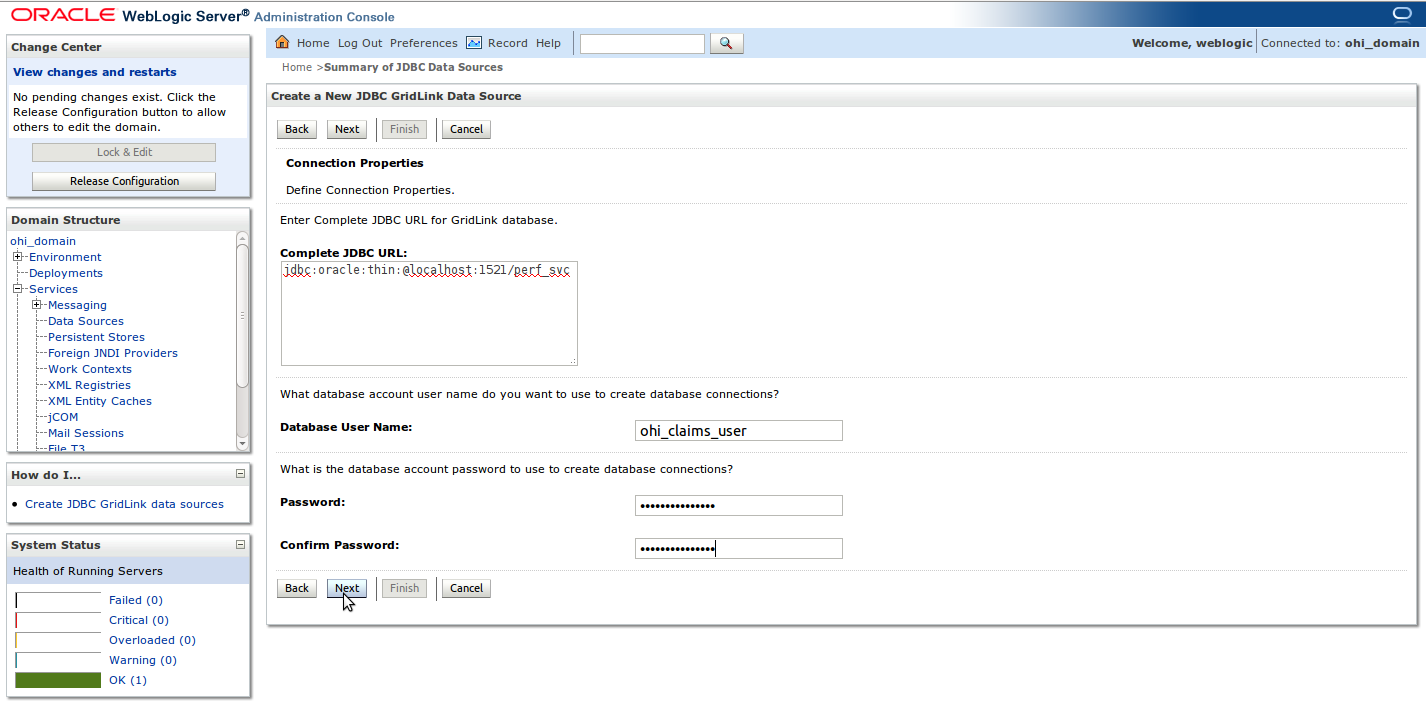
Step 6: In Connection Properties page either
-
enter the values of various fields as outlined in the table below if option *Enter complete JDBC URL *is selected:
| Parameters | Value | Explanation |
|---|---|---|
Complete JDBC URL |
jdbc:oracle:thin:@\{scan-listener-host}:\{scan-listener-port}/\{service-name} |
JDBC URL using SCAN |
Database User Name |
ohi_claims_user |
Fixed value, do not change |
Password & Confirm Password |
Password of "ohi_claims_user" |
The schema password as selected during the installation |
-
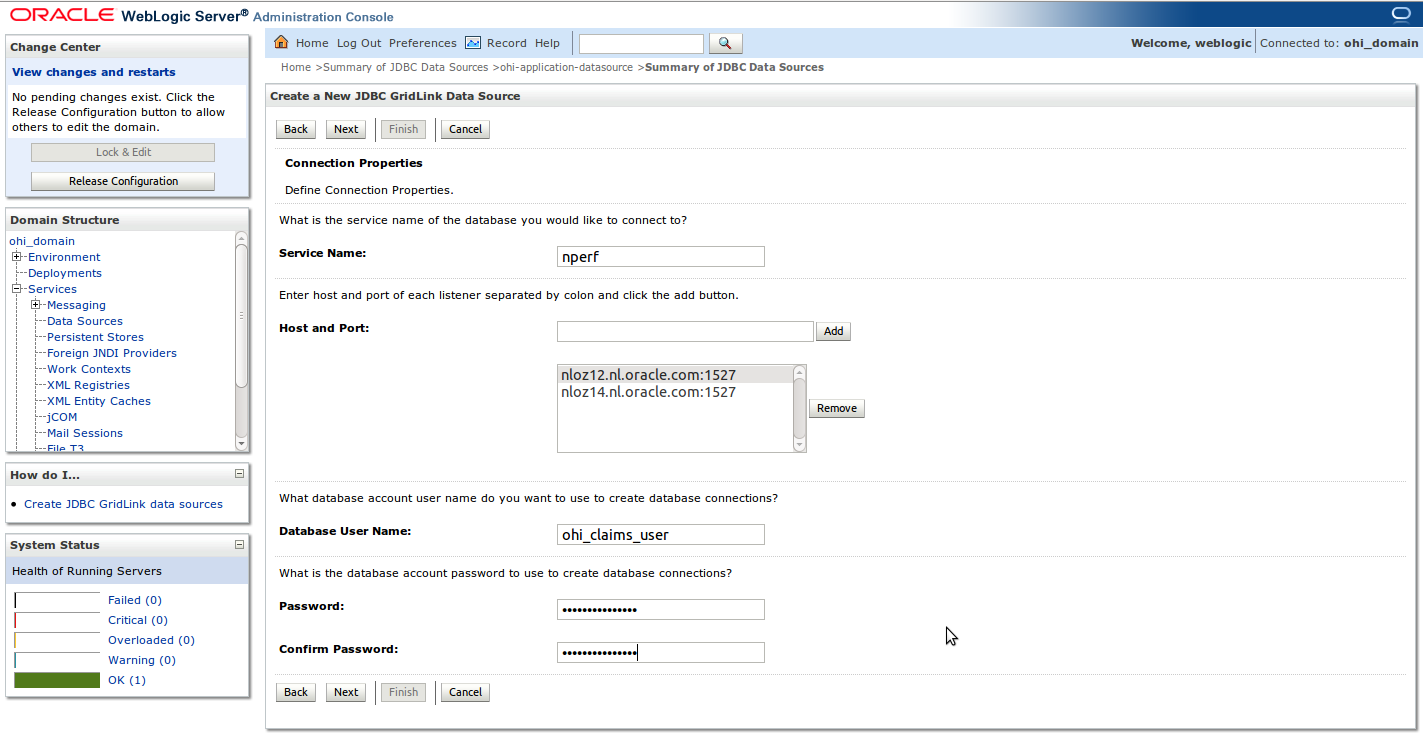
or enter the values of various fields as outlined in the table below if option Enter individual listener information is selected:
| Parameters | Value | Explanation |
|---|---|---|
Service Name |
Oracle RAC service name |
|
Host and Port |
hostname1:port hostname2:port |
Individual RAC node details. The format is <HOSTNAME>:<PORT> |
Database User Name |
ohi_claims_user |
Fixed value, do not change |
Password & Confirm Password |
Password of "ohi_claims_user" |
The schema password as selected during the installation |
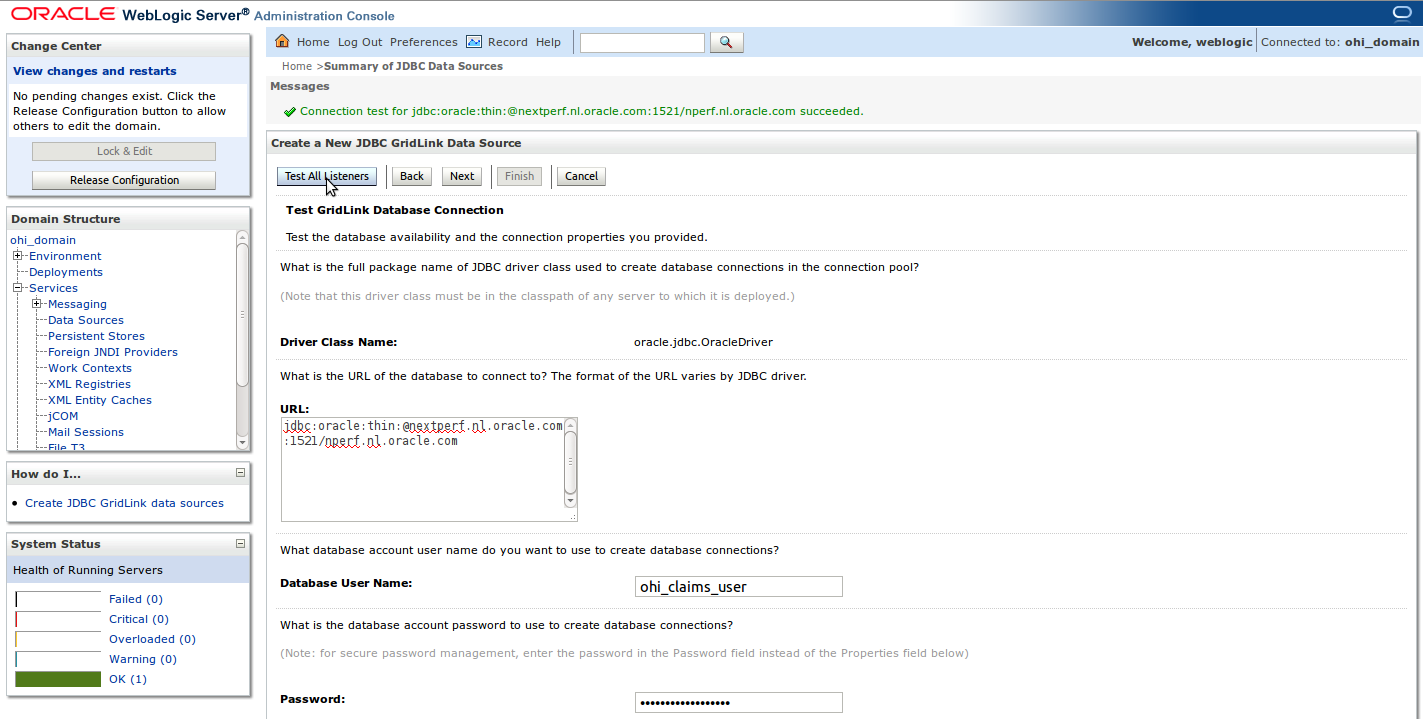
Step 7: In Test GridLink Database Connection page, click on Test All Listeners to see if the connection is successful. Once the test connection succeeds, click on Next button.
Step 8: Enter the details of ONS client configuration as outlined in the table below and click the Next button.
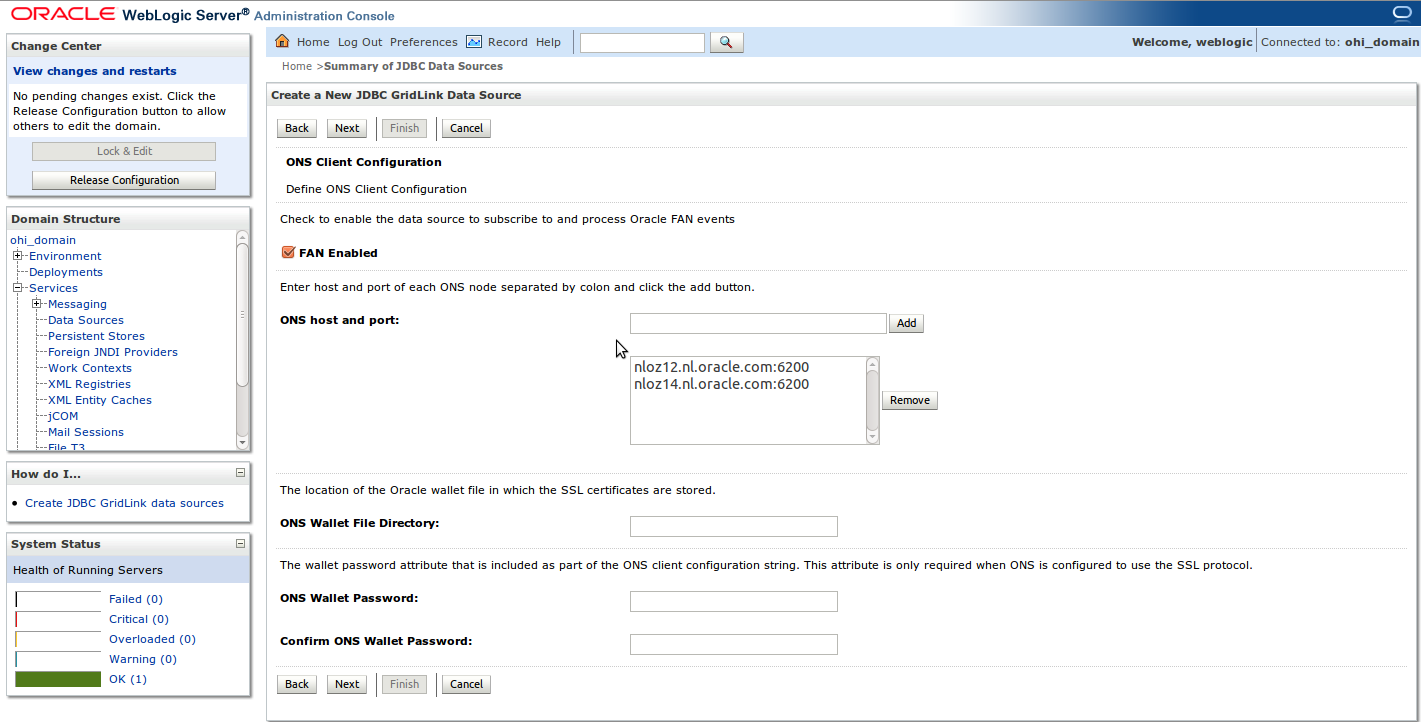
| Parameters | Value | Explanation |
|---|---|---|
Fan Enabled |
Check-box selected |
Enables the data source to subscribe to and process Oracle FAN events. This attribute is only applicable for RAC configurations that publish FAN notification events using the ONS protocol. |
ONS Nodes |
Eg: hostname1:6200,hostname2:6200 |
A comma-separated list of ONS daemon listen addresses and ports to connect to for receiving ONS-based FAN events. |
ONS Wallet File |
Location of ONS Wallet File (including the file name) |
The location of the Oracle wallet file in which the SSL certificates are stored. Only required when the ONS client is configured to communicate with ONS daemons using SSL. |
ONS Wallet Password & Confirm ONS Wallet Password |
The wallet password |
The wallet password attribute that is included as part of the ONS client configuration string. This attribute is only required when ONS is configured to use the SSL protocol. |
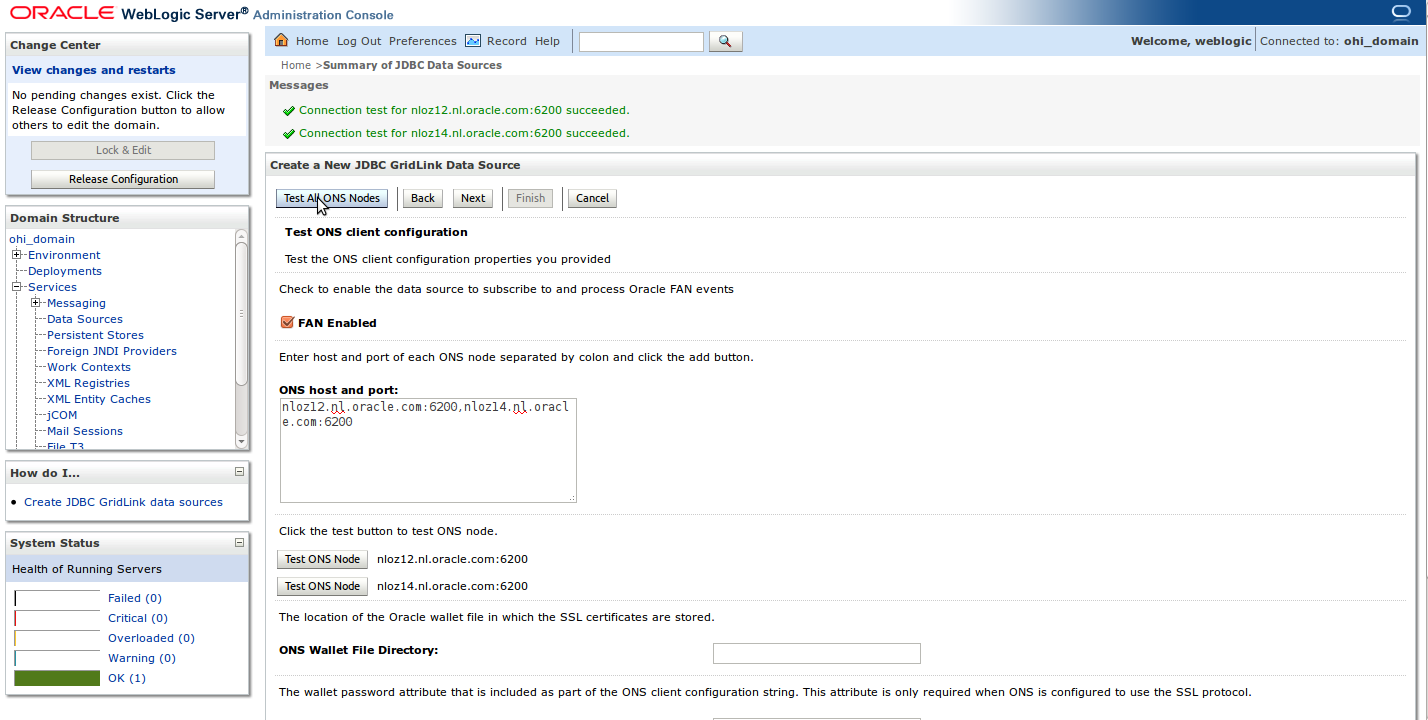
Step 9: Click on Test All ONS Nodes to see if the connection is successful. Once the connection test succeeds, click the Next button.
Step 10: Select the Target(s) in the next page and click the Finish button.
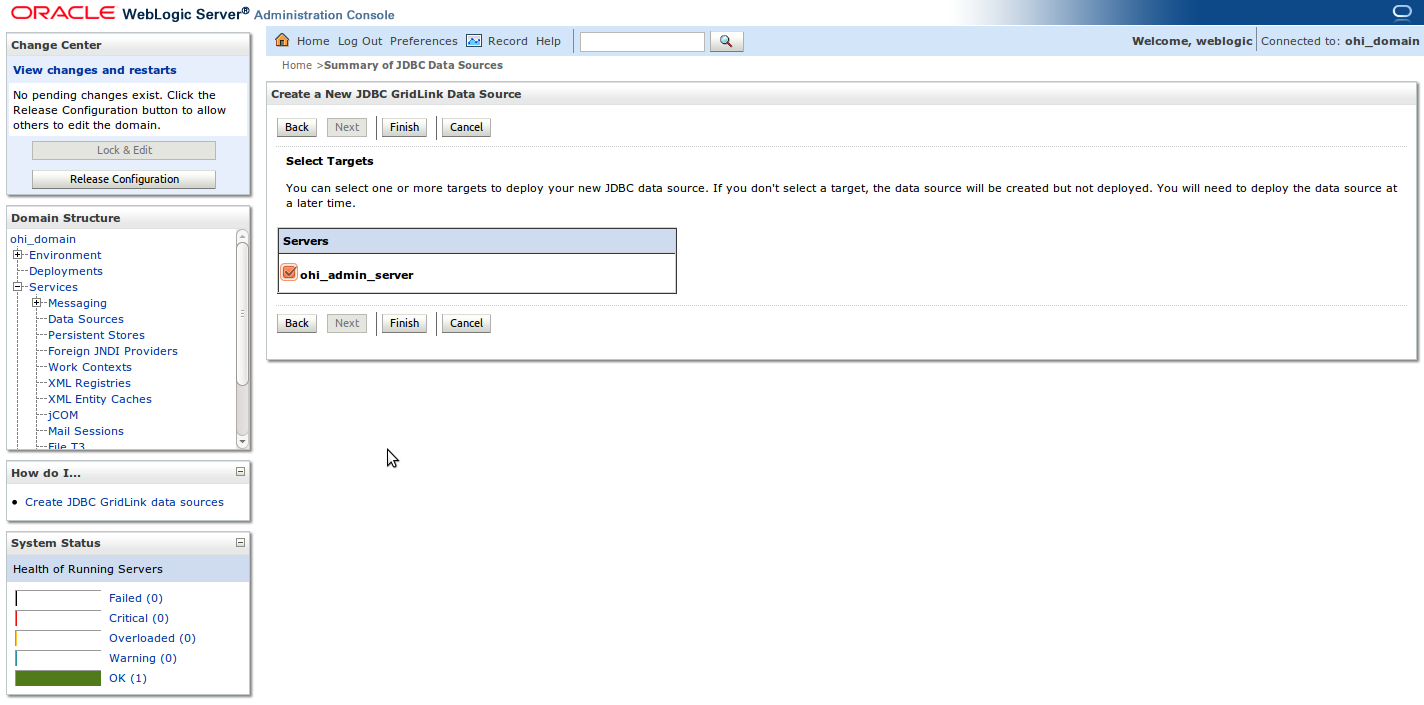
Make sure to specify the managed server as target for the GridLink Data
Setting advanced properties for the Data Source
Whether for a single machine or RAC - the Data Source that has been created needs some additional advanced settings.
-
Select the newly created Data Source
-
Click on the table Connection Pool
-
Expand the *Advanced *node at the bottom of the page to display all properties and set the following:
| Property | Value | ||
|---|---|---|---|
Initial Capacity |
0 |
||
Test Connections On Reserve |
Checked |
||
Test Frequency |
300 |
||
Connection Creation Retry Frequency |
30 |
||
Seconds to Trust an Idle Pool Connection |
10 |
||
Statement Cache Size |
The default value is 10. Increasing this to a higher value results in a better performance. Consult WebLogic documentation for more details on this. |
||
Wrap Data Types |
Unchecked |
||
Init SQL |
When the users are in a different time zone then the database, the session time zone must be set with this statement: SQL ALTER SESSION SET TIME_ZONE = '<time zone>', where <time zone> is the name of an Oracle RDBMS supported time zone.
|
Set the following driver property:
| Property | Value |
|---|---|
oracle.net.CONNECT_TIMEOUT |
10000 |
Installing the UI Customization Library through WebLogic Admin Server Console
To enable the creation of site-level UI Customizations, without having to change Oracle Health Insurance applications itself, an initially empty library called custom.oracle.healthinsurance needs to be installed before the Oracle Health Insurance application can be installed.
Step 1: Login to the WebLogic Admin Server console (for example: ).
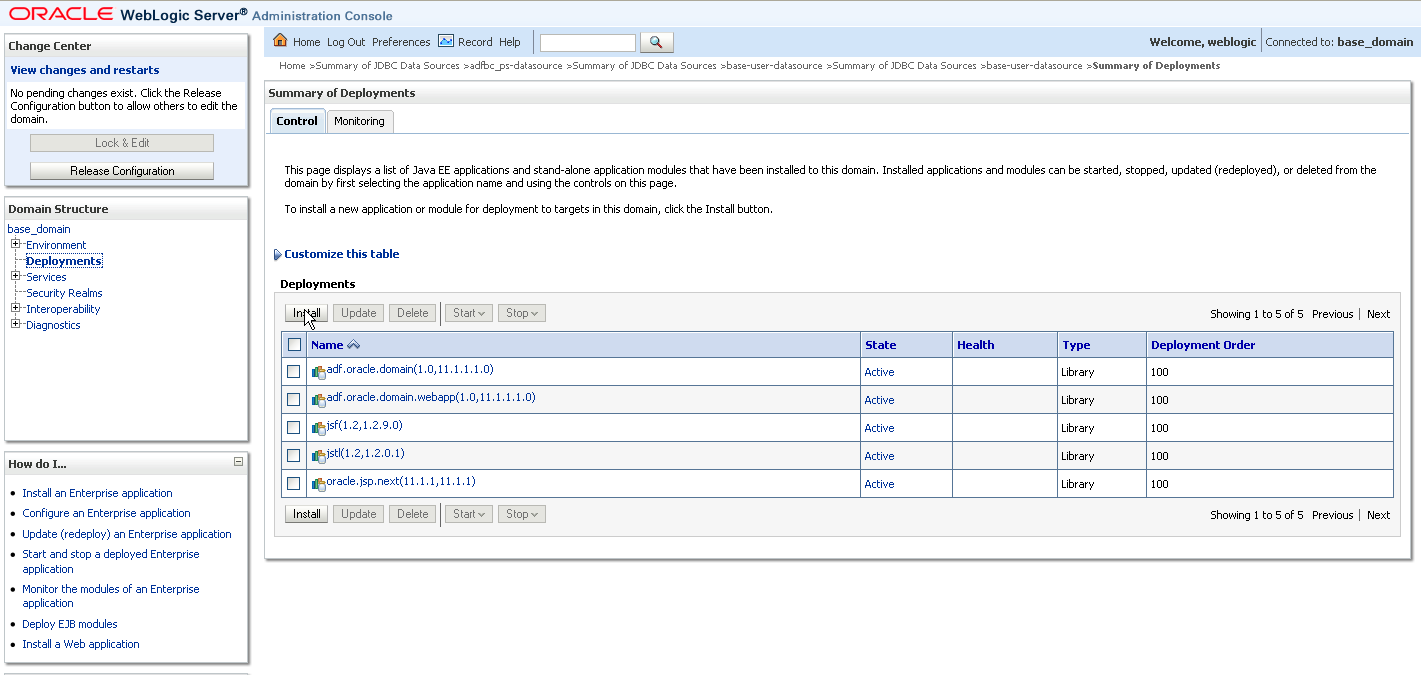
Step 2: *Click the "*Deployment" link and then click on the "Install" button as shown in the following screen shot. If the Install button is disabled, click the Lock & Edit button first (in the upper left section of the page).
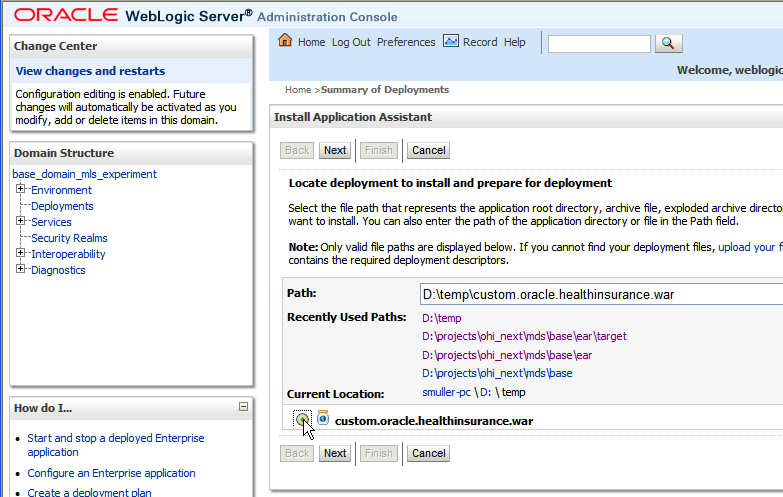
Step 3: Select the path where the library custom.oracle.healthinsurance.*war file is located (<OHI_ROOT>/lib) and click the "Next" button as shown in the following sample screen shot:
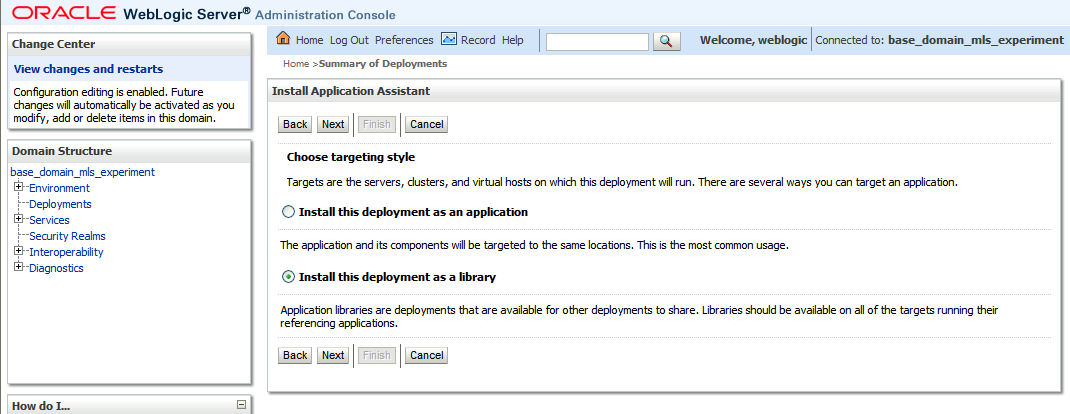
Step 4: Select the option "Install this deployment as a library" and click on "Next" button as shown below:
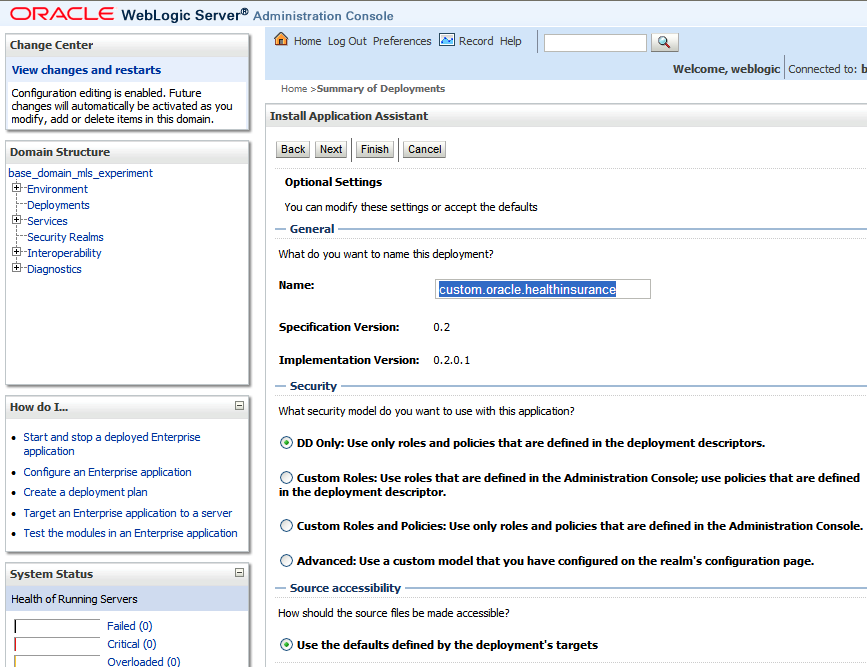
Step 5: Ensure that the General - Name is set to custom.oracle.healthinsurance as shown below. This is the name the Oracle Health Insurance application refers to when loading the library, so this is the name under which it must have been installed. The version numbers may differ from what is shown in the screen shot below. The Oracle Health Insurance Application will automatically load the highest version of all installed libraries with this deployment name. Then click on the "Next" button.
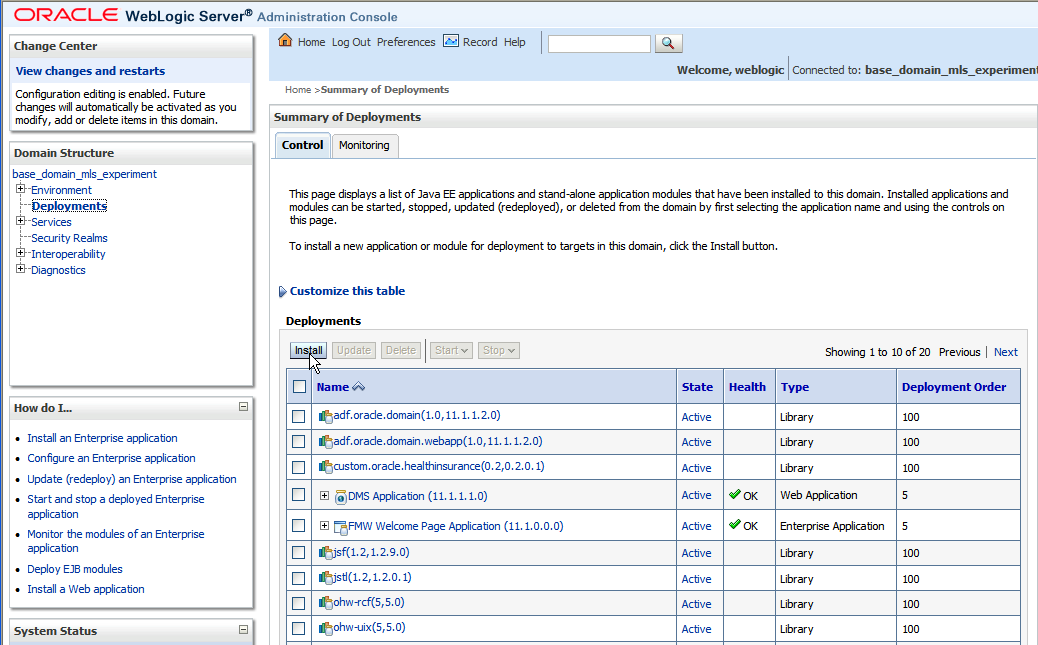
Step 6: Click on "Finish" button. You should see a success message as shown below. The library is now installed. Note: if you had to click Lock & Edit in step 1, you now have to click Activate Changes.

The following section describes the installation of the Oracle Health Insurance application.
Installing The Oracle Health Insurance Application Through WebLogic Admin Server Console
Oracle Health Insurance applications are delivered in a so called Java Enterprise Archive (EAR) which will be installed through the WebLogic Admin Server Console. In order to do that, perform the following steps.
Step 1: Login to the Admin Server console (for example:).
Step 2: Click the "Deployment" link and then click on the "Install" button as shown in the following screen shot:
Step 3: Select the path where the EAR file is located and click the "Next" button as shown in the following screen shot:
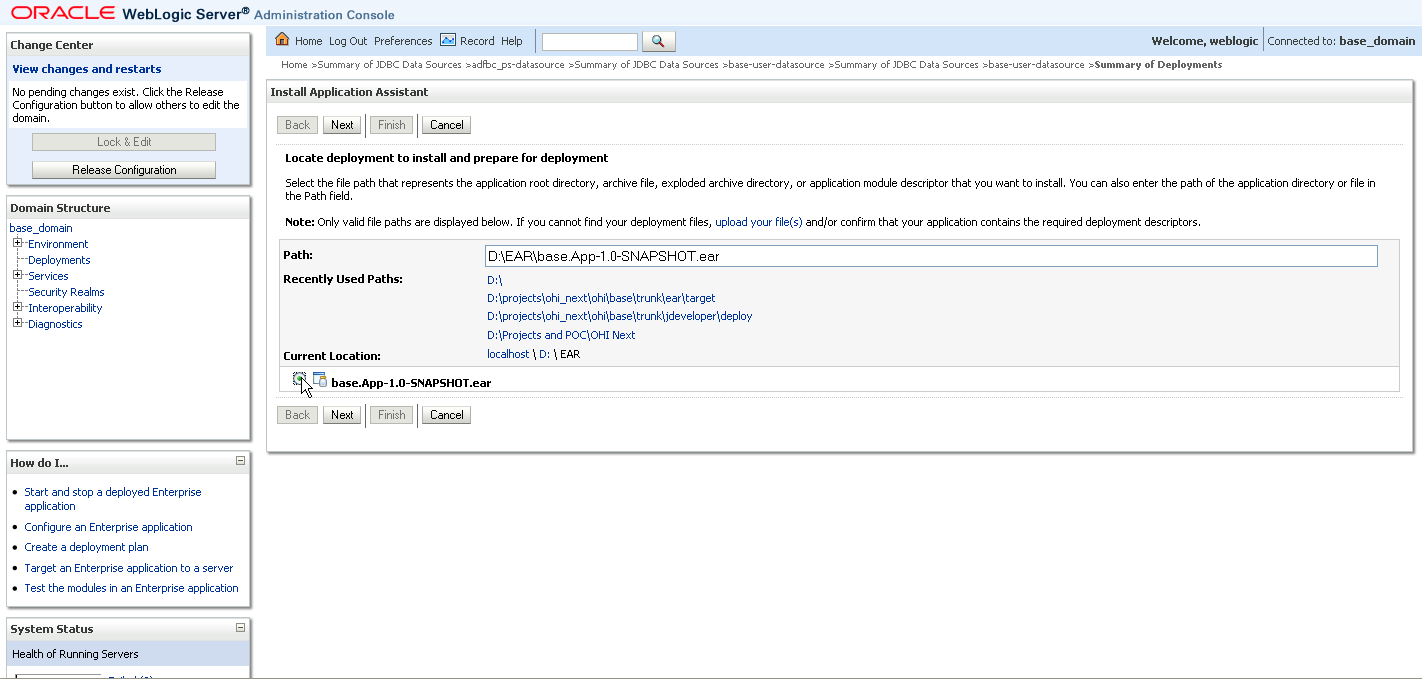
Step 4: Select the option "Install this deployment as an application" and click on "Next" button as shown below:
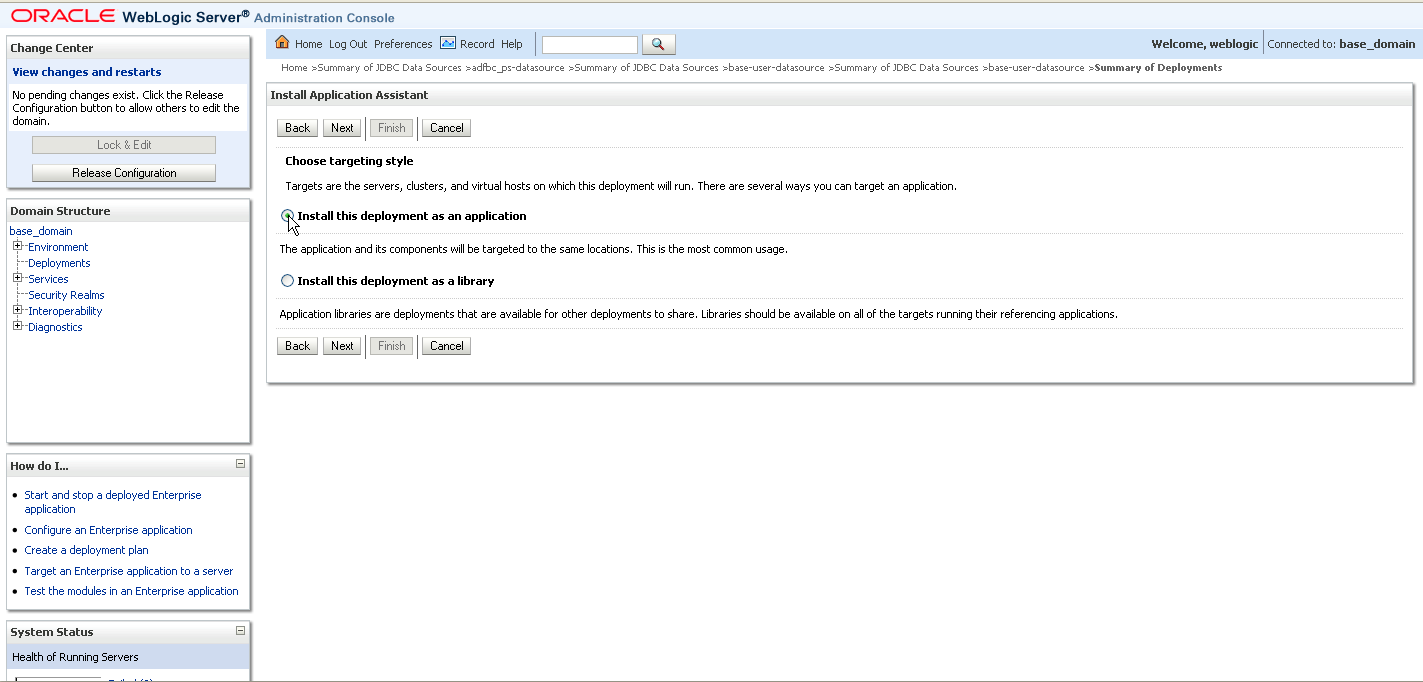
Step 5: Click on "Finish" button. The Oracle Health Insurance application is now installed.
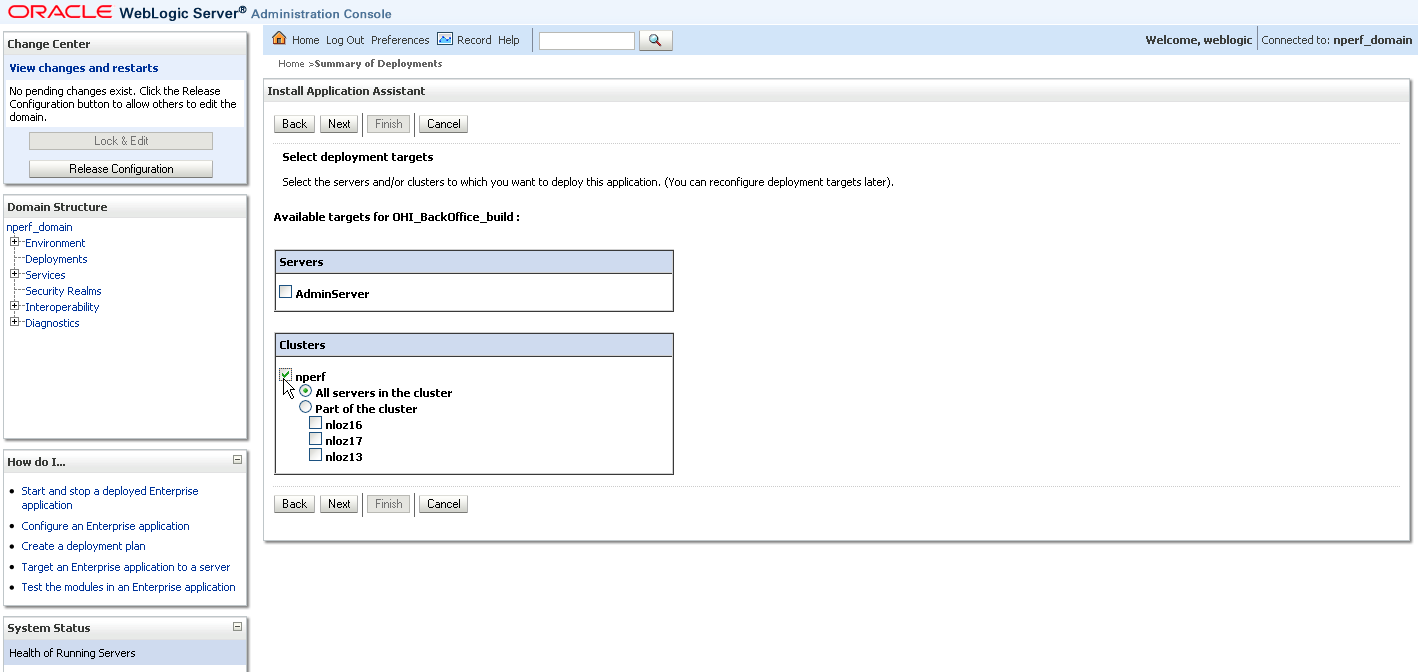
Step 6: If you are deploying the application to cluster, in "Select deployment targets" page, select the Clusters target as shown below:
Changing the Context-Root for UI or Web Services
Oracle Health Insurance applications consists of multiple modules. Each module is shipped with a default context-root. To change the default context-root of an Oracle Health Insurance application web application or an Oracle Health Insurance application web service, deploy the application with a customized deployment plan.
See section Configuring Applications for Production Deployment in the "Weblogic Fusion Middleware Deploying Applications to Oracle WebLogic Server" guide for details.
Changing User Session Timeout
An Oracle Health Insurance application uses WebLogic Server’s default session timeout - which is 3600 seconds(1 hour). For security or resource (memory) usage reasons, one may want to change this to a shorter value. See section Configuring Applications for Production Deployment in the "Weblogic Fusion Middleware Deploying Applications to Oracle WebLogic Server" guide how to do this.
JET UI Installation
JET UI and Web Services should be in the same origin. An origin is defined as a combination of URI scheme, hostname, and port number. If the JET UI is on a different origin than the Web Services, the browser will send a preflight OPTIONS request for each actual GET request. Those OPTIONS requests are uncachable, effectively doubling the time needed to get to the data.
Changes That Require Restart
There are some changes to the system that require a restart for those changes to take effect. Following is the list of such changes:
| Change | Description |
|---|---|
Adding/Removing Insurable Entity Types |
If new insurable entity types are added then the system needs to create and assign dynamic tables for the type which requires a restart. If insurable entity types are removed then these tables need to be removed which also requires a restart. |
Changing default on countries or currencies |
If the default country or the default currency is changed then a restart is required to have the application adapt to these changes. |