Re-verify a subject's data
If a response to a question is updated on a form or visit that is already verified, that form or visit becomes unverified. In order to perform source data verification, you have to re-verify that form or visit.
Consider the following before re-verifying a subject's data:
- If verifying subjects' data is required in your study protocol and data is updated after you've already verified it, then you need to re-verify subjects' data at some point during the study conduct period, to validate the latest information. You can verify questions and forms that are associated with incomplete visits, irrespective of a visit's status in a system (whether it's in progress, incomplete, just started, or completed).
- If a site user removes a completed and verified repeating form instance, that visit and repeating form table become unverified and you must verify the entire repeating form again.
- A visit may have two consecutive Verified and Unverifiedrecords in the Visit History due to changes such as:
- A subject is selected for SDV after the visit has been verified.
- A new dynamic question or form requiring verification is added to the visit, after the visit has been verified.
- A trigger question which does not require verification is answered, which prevents triggering a child form. The response to the trigger question is eventually changed, which triggers a child form with at least on question that requires verification.
Want to see how to perform this task? Watch the video below.
All verified forms and questions appear with the verified icon (![]() ) next to them. The same icon appears next to each subject if all of their data has been verified, as well as in the Answer & Visit History.
) next to them. The same icon appears next to each subject if all of their data has been verified, as well as in the Answer & Visit History.
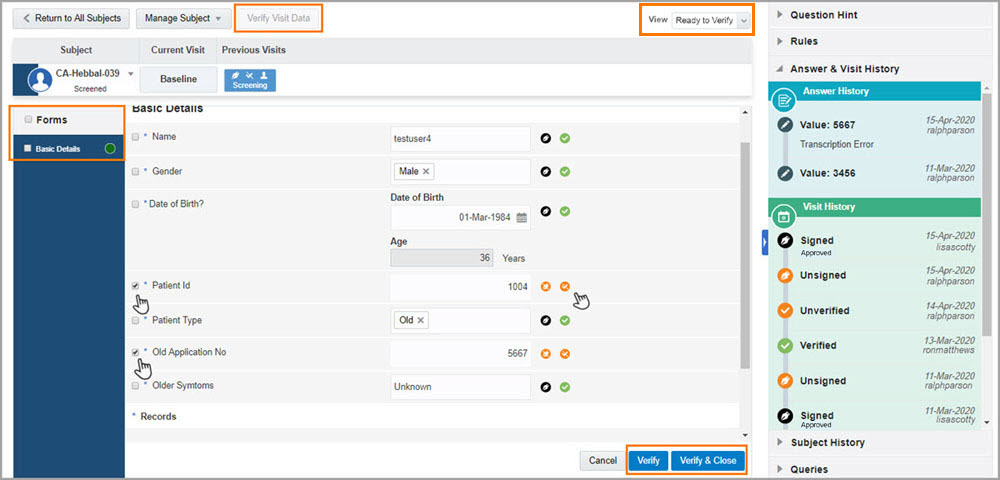
Figure 5-3 How a Clinical Research Associate sees a visit that they need to reverify

Need more help with verifying data?
What does each icon mean for signing, verifying, or freezing data?
Parent topic: Monitor subjects and sites