3 Creating study plans
Create plans in five steps
When creating a study plan, Saved plans display in the account-level Studies Planned list, which users access from the "studies" item in the left navigation panel. By design, only the individual who created a plan may delete that plan. The plan creator will find the Delete option in the plan's Actions menu (![]() ) on the studies list.
) on the studies list.
Study planners can create new plans in two ways:
- Click "plan study" in the left navigation. This method allows the user to specify all plan attributes. Users give the plan a name, and complete all required fields that enforce plan uniqueness. Planners also specify one or more countries to include in the plan, define site characteristics for the sites in each country, and specify relevant dates.
- Copy and modify an existing plan. Study planners who have permission to edit other's plans may copy and modify any plan listed on the "studies" page to create a new plan. The "Copy Plan" option in plan's Actions menu (
 ) provides a quick way for users to create new plans by changing just the relevant attributes (e.g., Planning version, plan description, countries, number of sites, prediction calculation start event, etc.).
The five step process to plan creation is:
- Name: Enter a unique study plan name
- General specs: Specify attributes like Study number, Sponsor, Sponsor protocol number, Therapeutic area, Phase, Planning version, and more
- Countries & Sites: Identify study countries in the study and the number of sites per country
- Dates: Enter starting dates
- Manage milestone probabilities: Understand the likelihood that a predicted date will be met
At the upper left of planning pages, a "go back" link allows users to return to the previous page in the study planning process. For example, when a user opens a study plan from the Studies page and clicks go back, the final planning page (manage milestone probabilities) displays. The user can optionally navigate backward through to the previous planning steps (Countries & Sites and General Specs) to modify the plan as preferred. When the user saves changes to the plan, the studies list displays that user’s name in the “Planned by” column to reflect that user as the individual who most recently made plan changes.
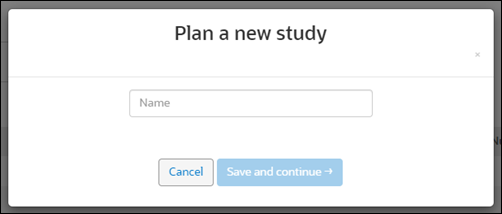
1. Plan name
Users specify a unique plan name in the modal below.
2. General specifications
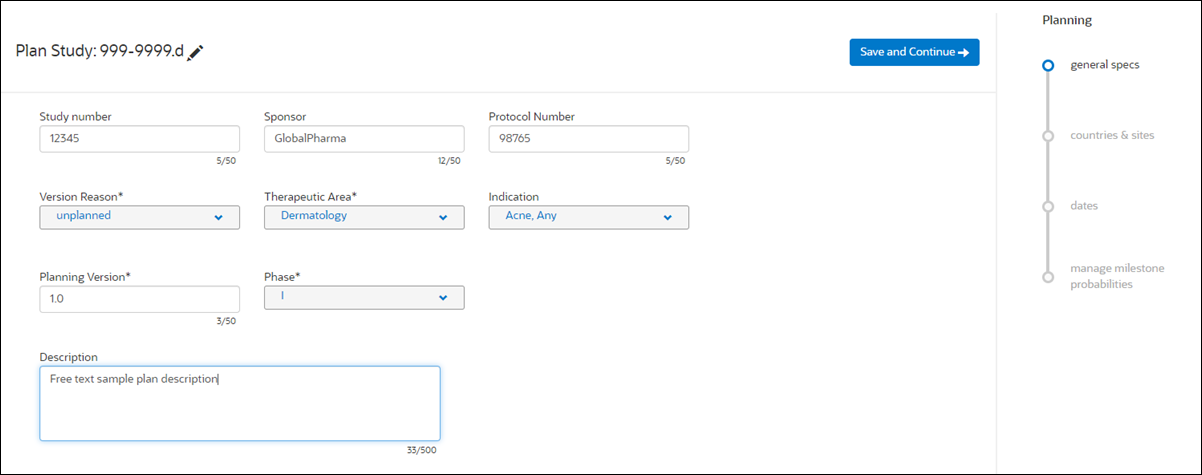
The General specifications step includes multiple fields where planners can enter unique tracking attributes for the plan. Required fields are:
- Version Reason (Proposal, Bid defense, Kick off, Study baseline, or Revised plan)
- Therapeutic Area (searchable list)
- Planning Version (free text up to 50 characters)
- Phase (I, II, III, IV, Other)
The General specifications steps provides other common fields to help users distinguish plans as well. For instance, users can enter the Sponsor name and or Sponsor Protocol Number, as well as a free text plan description of up to 500 characters.
3. Countries & Sites
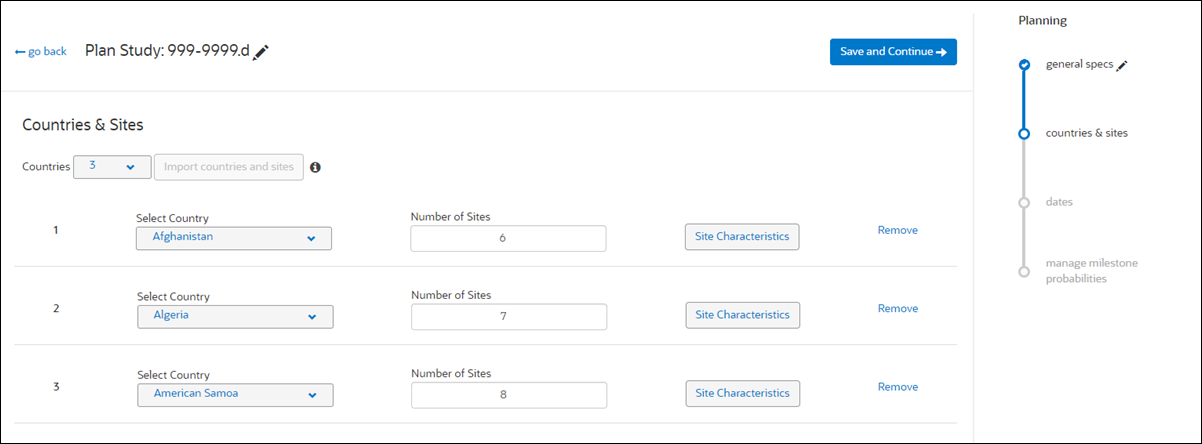
On the Countries & Sites step, users specify the country(ies) included in the plan as well as the number of planned sites per country. Study planners can either manually specify countries and site characteristics or planners can may upload a CSV format file that contains the country and site information instead.
When a planner edits an existing study plan and navigates back to the countries & sites page, Study Planning disables the "Import countries and sites" button until the user deletes the countries currently included in the plan. To help study planners understand this CSV upload behavior, tooltip text states: "Use CSV import to populate the country, site, and site characteristic information. Once you add a country or site, you can no longer use CSV import. Delete all countries to re-enable import button."
To manually complete the Countries & Sites step, study planners specify the number of planned countries, country name, and number of sites planned for each country. Only countries with a saved dependency map may be selected when planning a study. Dependency mapping is available to users who have permission to access the Set Up area of Study Planning. Then users click "Site Characteristics" for each country in the plan to record planned IRB Type and PI Study Experience for sites in each country.
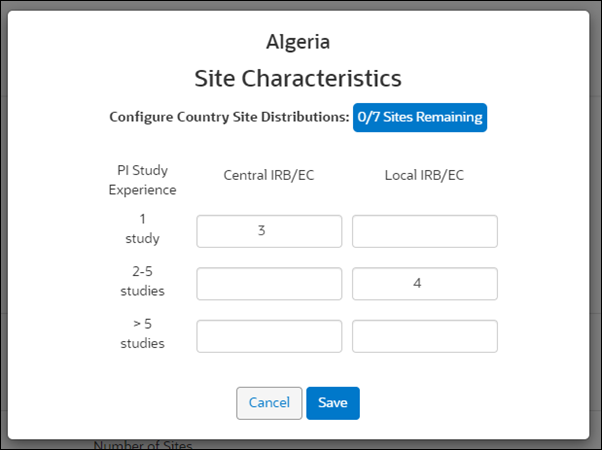
The Site Characteristics modal includes a dynamic countdown based on the number of sites specified in the Countries & Sites planning step. In the example shown below, the country is configured for 6 sites, and the modal displays the number of Sites Remaining (0 sites of 6 total) that still need to be distributed. Study Planning enables the Save button on the modal only when the count of sites remaining for distribution reaches 0. The Site Characteristics fields accept only whole, positive integers of 1-3 digits (i.e., 0-999). If the user enters a total distribution that is greater than the total planned (e.g., user enters values adding up to 30 when the plan is 20 sites), the dynamic count displays a negative number (-10/20 Sites Remaining).
- Study country(ies)
- Number of sites in each country
- IRB Type/PI Study Experience distribution for each site in a country
- Two letter country code
- Central IRB sites low PI experience
- Central IRB sites medium PI experience
- Central IRB sites high PI experience
- Local IRB sites low PI experience
- Local IRB sites medium PI experience
- Local IRB sites high PI experience
By design, if the study planner manually interacts with the Countries & Sites page (e.g., to select one or more countries), the “Import countries and sites” button is inactive. If the user later removes any selected countries, the button is available and the study planner can then upload a CSV file, if preferred.
When necessary, study planners can update study and site characteristics by importing the same CSV file with updated information (e.g., add/remove countries, redistribute PI study experience values, etc.). The subsequent import updates existing data and will not create duplicate data.
4. Enter dates
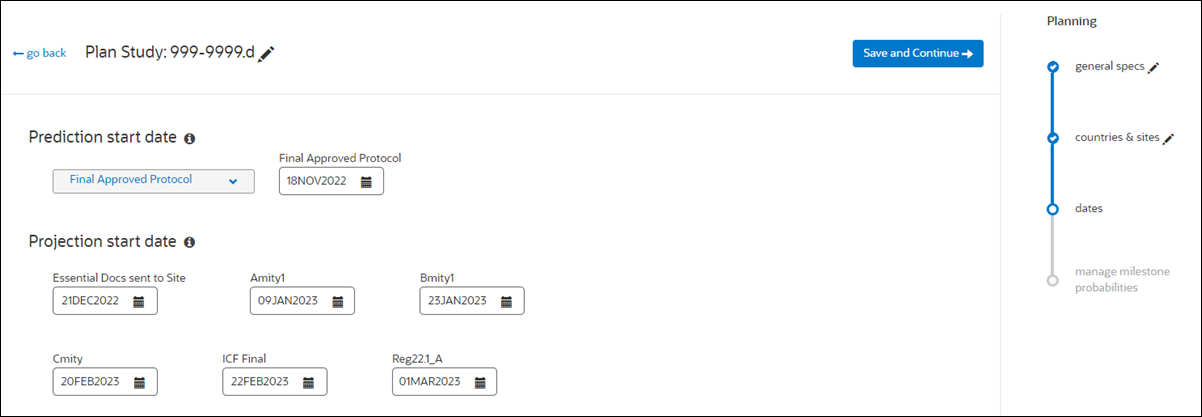
In the final planning step, users specify a prediction starting point and indicate dates for all provided milestones. The "Prediction start date" field allows study planners to specify the starting event when predictions are enabled in the "set up" area. When multiple global milestones have predictions enabled, the Prediction start date field defaults to Final Approved Protocol, and study planners can optionally choose IP release or Essential docs sent to site as the starting event, if preferred.
5. Manage milestone probabilities
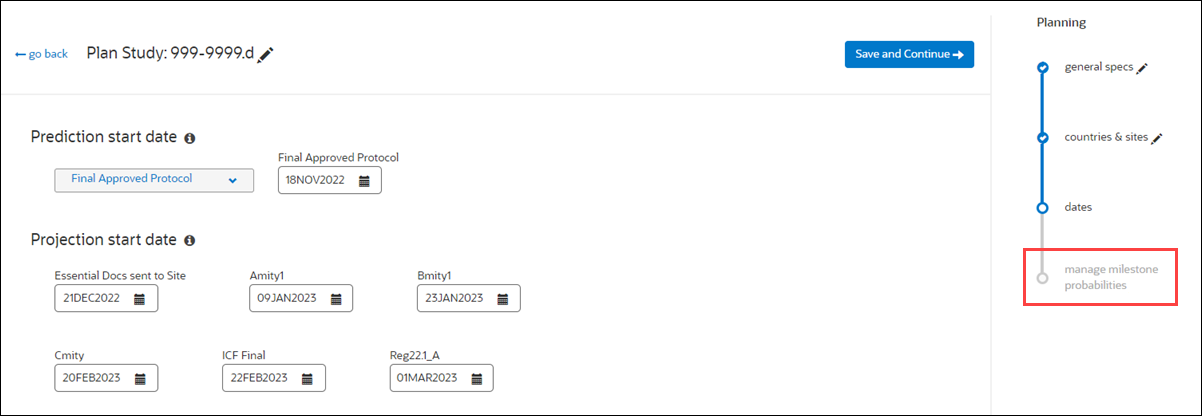
Study planners access the country milestone probabilities dashboard from the planning flow using the “manage milestone probabilities” page. The page follows the planning “dates” page and displays for the first time when the study planner clicks Save and Continue on the "dates" page.
The dashboard allows study planners to evaluate how aggressive or conservative a plan is and helps them quickly evaluate which countries are expected to have the fastest timelines. For example, the IP Release ready prediction returns 25%, 40%, 50%, 60%, and 75% percentiles, and the dashboard can plot these percentages along a country-specific timeline so study planners can evaluate predictions by percentage chance that milestone will be met or delivered faster than the suggested completion date.
Planners can adjust the dashboard’s display to any milestone that has a prediction (i.e., all country milestones associated with Contracts Executed and IP Release ready, including the first site contracted, 25% sites contracted, etc.). Dots plotted along each country row represent the 25%, 40%, 50%, 60%, and 75% percentile milestone prediction dates. When users hover over a dot on a row, tool tip text displays the following information:
- Milestone name
- Country name
- Planned sites (e.g., if there are 20 in a country, and the milestone is 25% sites contracted, then the tool tip displays 5/20
- Probability %: predicted completion date
The View and manage Milestone Probabilities drop-down list provides multiselect control, which allows planners to view the timelines grouped at the country level. When the planner chooses multiple milestones, the label on the drop-down list updates to reflect the total selected.
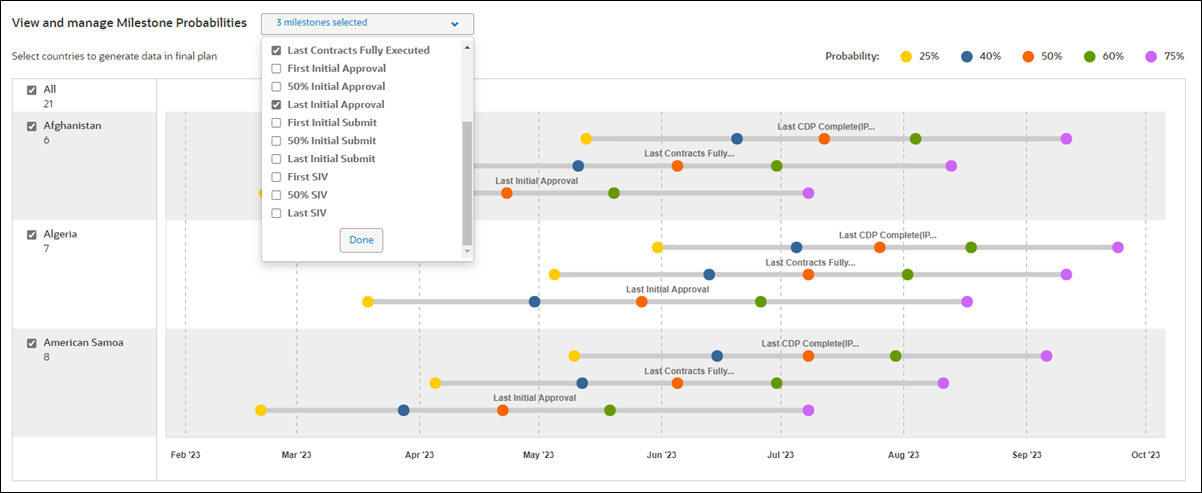
By default, the dashboard includes a row for all countries included on the planning "countries & sites" page. If a study planner prefers to see a subset of the countries in the final plan outcome (i.e., tabular view, cumulative bar chart, and Gantt chart), a "Select Countries" button on the plan outcome page returns the planner to this probabilities dashboard where the planner can then select/deselect countries as preferred.
- Create a study plan
Create a new, unique study plan when you want to specify all plan attributes. - Copy a study plan
Study Planning includes copy plan functionality that allows you to create new plans by changing just a few attributes (e.g., Planning version, countries, sites, etc.) of an existing plan.