Assign Location Access
User setup spans two systems:
- OCI IAM → Create users and assign groups
- Oracle Payment Cloud Service → Assign location and optional account structure access
This page covers assigning location for access. A location represent the physical place where your transactions originate.
When combined with groups, users can:
- View payment transactions from those locations on reports,
- Assign locations to a Business Account,
- Register terminals to payment locations.
Only Payment Administrators can assign locations.
Assign location access
- Go to User Management and click the home icon
 in the bottom right.
 - Click edit
 next to the user you want to assign to a location or sub-location.
 - A panel opens with three tabs:
- Locations
- Groups
- Business Access
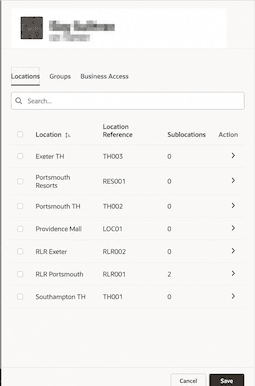
- You will see a list of all locations.
- Select the checkbox next to the locations the users needs access to. This automatically selects all sub-locations under the location, if they exist.
- (Optional) If specific sub-locations access is not needed, Click the > icon to expand a location and deselect sub-locations. Click Back to return to the location list.
- Click Save.
Tip: It is also possible to assign many users to a single location, see Multi-Users Assignment to a Location or Sub-location.
What’s next?
- You’re done! The user can now sign in and use Oracle Payment Cloud Service.
- (Optional) add account structure access for users that need to manage existing Businesses, Business Units and Business Accounts. See Assign Account Structure Access.
Parent topic: Users and Access