5 Verifying Your Private Endpoint from OCI VM
Verifying Access to the Credential Exchange Server
Begin by obtaining an access token using the steps described above. The example below assumes the token is in an environment variable named ACCESS_TOKEN. Next, using cURL, fetch the database credentials as show in the example below. This example assumes you are using Oracle Linux 8.
# Fetch wallet
$ curl --location "https://<base-url>/api/data-pe/v1/fetch-credentials" \
    --header "Authorization: Bearer ${ACCESS_TOKEN}" > response.json
 # Store wallet and schema information
cat response.json | jq -r '.wallets[0]' > wallets.json
cat response.json | jq -r .schemas > schemas.json

# Decode wallet
mkdir -p wallet
cat wallets.json | jq -r '.wallet.README' | base64 -d > wallet/README
cat wallets.json | jq -r '.wallet."cwallet.sso"' | base64 -d > wallet/cwallet.sso
cat wallets.json | jq -r '.wallet."ewallet.p12"' | base64 -d > wallet/ewallet.p12
cat wallets.json | jq -r '.wallet."keystore.jks"' | base64 -d > wallet/keystore.jks
cat wallets.json | jq -r '.wallet."ojdbc.properties"' | base64 -d > wallet/ojdbc.properties
cat wallets.json | jq -r '.wallet."sqlnet.ora"' | base64 -d > wallet/sqlnet.ora
cat wallets.json | jq -r '.wallet."tnsnames.ora"' | base64 -d > wallet/tnsnames.ora
cat wallets.json | jq -r '.wallet."truststore.jks"' | base64 -d > wallet/truststore.jks
Verifying Access to your Database Through the Private Endpoint
Create Private Endpoint
To create a Private Endpoint:
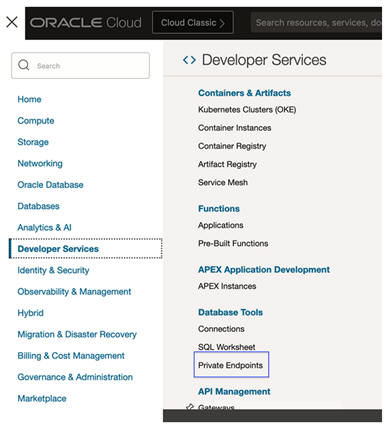
- Log-in to the Cloud Console in your OCI tenancy. Navigate to Developer
Services > Database Tools > Private Endpoints.
Figure 5-1 Private Endpoint
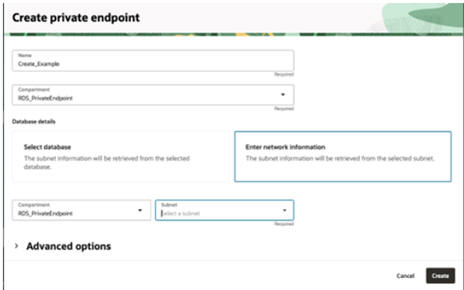
- Click Create Private Endpoint.
- Create the Private Endpoint in the compartment where the Data Private Endpoint was created.
- Select Enter network information.
- Select the compartment in which the private endpoint was created.
- Select the private subnet.
- Click Create.
Figure 5-2 Create Private Endpoint
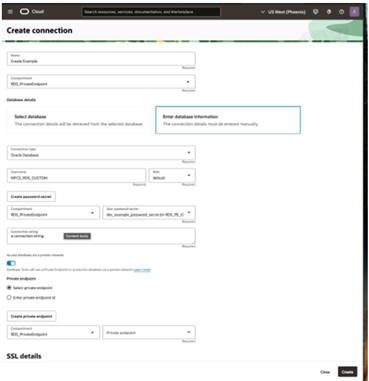
Create Connection
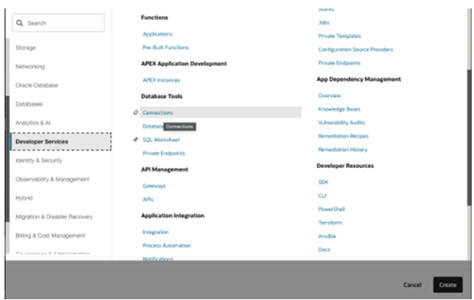
- Log-in to the Cloud Console in your OCI tenancy. Navigate to
Developer Services Database Tools Connections.
Figure 5-3 Create Connection
- Click Create Connection.
- Enter the connection information:
- Connection name: Your ADW Database connection name.
- Compartment: Choose compartment where Data PE is created.
- Choose Enter Database Type and select the Connection Type Oracle Database.
- Username: ADW schema name you want to connect to.
- User password secret: Create a secret that contains the username password. The password is in the schemas.json file extracted from the response.json file.
- Click Create.
Figure 5-4 Click Create
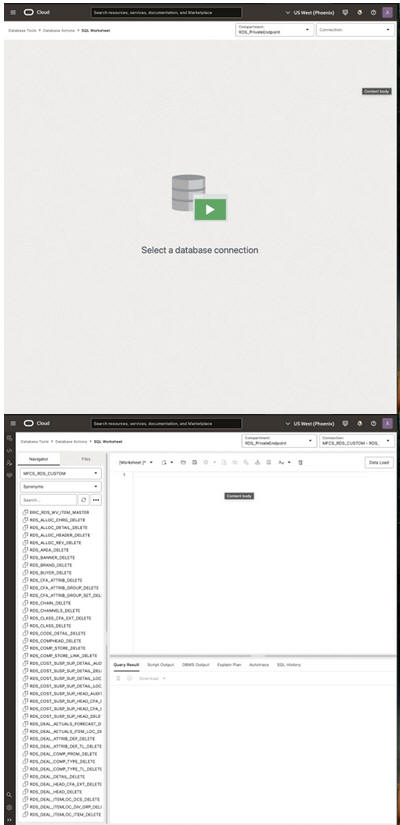
Open SQL Worksheet
- Log-in to the Cloud Console in your OCI tenancy. Navigate to Developer Services Database Tools SQL Worksheet.
- Select the compartment in which your private endpoint was created.
- Select the connection created above.
Figure 5-5 Open SQL Worksheet
