7 Implementation Tools
Review the sections below to learn about the tools and common components used within the Retail Analytics and Planning. Many of these tools are used both for initial implementation and for ongoing maintenance activities, so implementers should be prepared to transfer knowledge of these tools to the customer before completing the project.
Retail Home
One of the first places you will go in a new RAP environment is Retail Home. It serves both as the customer portal for Oracle Retail cloud applications and as a centralized place for certain common configurations, such as Customer Module Management. Module management allows implementers to quickly configure the complex batch schedules and interdependencies of RAP applications using a simplified module-based layout. Optional batch programs, such as those used for Retail Insights or AI Foundation applications, can be turned off from this tool and it synchronizes with the batch scheduler to ensure all related programs are disabled automatically.
For more general information about Retail Home and the other features it provides, review the Retail Home Administration Guide.
Because Customer Modules are a necessary part of configuring and using a RAP environment, see the steps below for how to access this feature.
-
To access Retail Home, access the URL sent to your cloud administrator on first provisioning a new environment. It should look similar to the URL format below.
https://{service}.retail.{region}.ocs.oraclecloud.com/{solution-customer-env}/retailhome -
Navigate to Settings → Application Administration → Customer Modules Management. Confirm the table on this page loads without error and displays multiple rows of results. If an error occurs, contact Oracle Support.

-
You may enable or disable various modules, depending on your implementation plans. For example, if you are not implementing any Retail Insights modules, then the sections for “RCI” and “RMI” can be deactivated.
Note:
Other components within the RI parent module may still be necessary. Detailed module requirements are described in Batch Orchestration
In addition to Customer Modules, you may also use Retail Home’s Resource Bundle Customization (RBC) feature to change translatable strings in the applications to custom values. Use the steps below to verify this feature is available:
-
Navigate to Settings → Application Administration → Application Navigator Setup.
-
Confirm that a row already exists for each application in the platform, including Retail Insights, Retail AI Foundation Cloud Services, and Merchandise Financial Planning.
-
On Retail Insights, select the row and click Edit.
-
If not enabled, change the Platform Service toggle to an enabled state.
-
Check all of the boxes that appear.
-
Enter a valid platform service URL.
If your platform services URL is blank and you do not know the URL, log a Service Request to receive it from Oracle.
-
-
Repeat the steps above for the AI Foundation and MFP modules, if necessary.
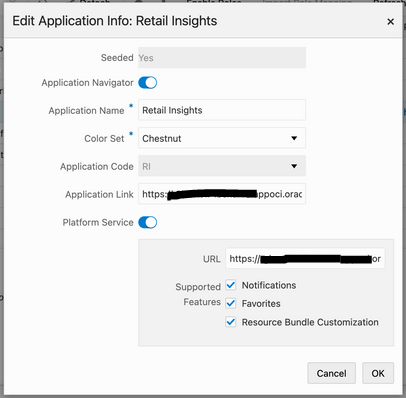
-
Navigate to Settings → Resource Bundles → Resource Text Strings once the navigator and platform service setup is validated.
-
Set the following values in the dropdown menus:
-
Application: Retail Insights
-
Bundle: Retail Insights
-
Language: AMERICAN (en)
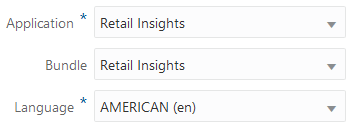
-
-
Click the Search button and wait for results to return.
-
If multiple rows of results are returned, then you have successfully verified the feature is enabled and functioning properly.
-
If you receive an error, contact Oracle Support.
-
If you need additional details on how the RBC feature is used within each application module, refer to the product-specific documentation sets, such as the Retail Insights Administration Guide.
Process Orchestration and Monitoring (POM)
The Process Orchestration and Monitoring (POM) application is a user interface for scheduling, tracking, and managing both nightly as well as intraday batch jobs for applications such as RI, MFP, and AI Foundation. Two important screens from the POM application are Batch Monitoring and Batch Administration. The Batch Monitoring window provides a runtime view of the statuses and dependencies of the different batch cycles running on the current business day. Batch Administration allows you to modify the batch schedules and synchronize them with Retail Home.
For general information about POM and the features it provides, review the POM Implementation Guide and POM User Guides.
POM and Customer Modules Management
A required implementation step for RAP will be to synchronize customer modules from Retail Home to POM to set up your starting batch processes and turn off any processes you are not using. The steps below explain the general process for syncing POM and Retail Home, which are used by Retail Insights and AI Foundation applications to set up the nightly batches. They are also required for the RAP common components used by all the modules.
-
Log in to the Retail Home application as a user with the
RETAIL_HOME_ADMIN(orRETAIL_HOME_ADMIN_PREPROD) user role. -
Navigate to Settings → Application Administration → Customer Modules Management.
-
Configure your batch modules as needed, disabling any components which you do not plan to implement, then click the Save button to complete the setup.
-
Now log in to the POM application URL with a user granted the
BATCH_ADMINISTRATOR_JOBor pre-prod equivalent role. -
Navigate to Tasks → Batch Administration.
-
Click on the tile named RI <Release_#> to view the RI batch jobs, which should be loaded into the table below the tiles.
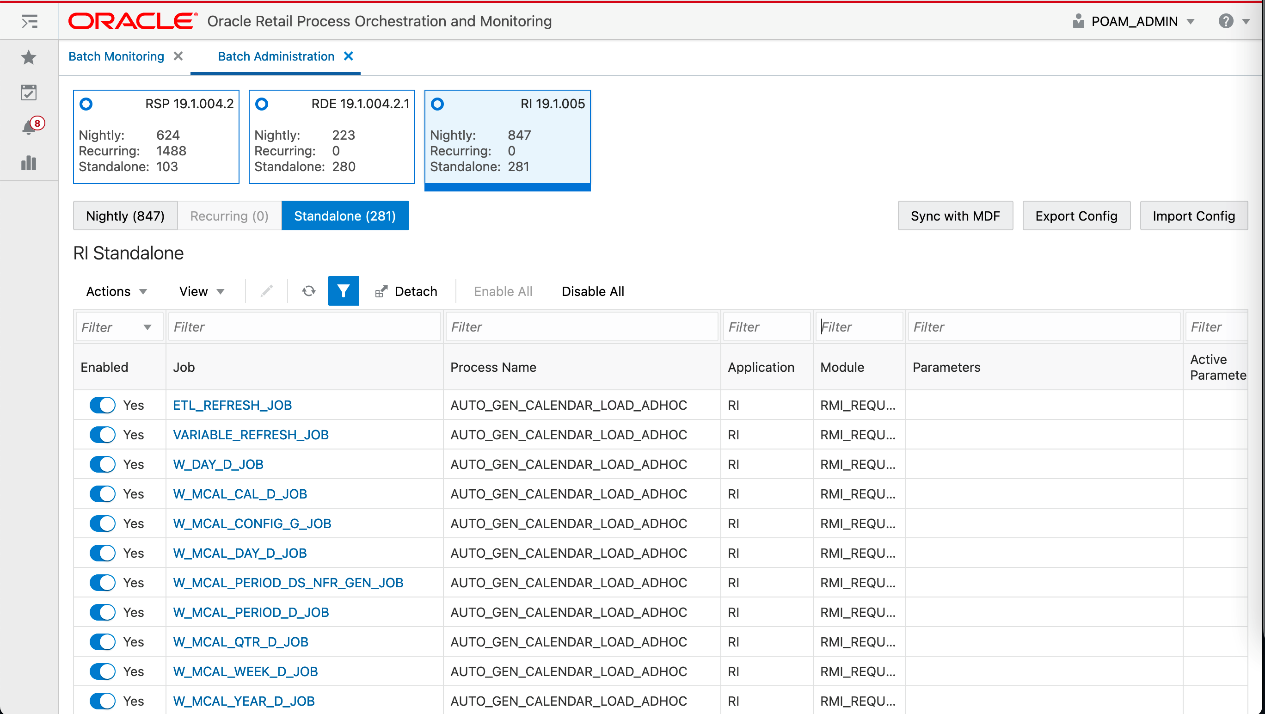
-
Click the Sync with MDF button (above the table) and then click the OK button in the Warning message popup. Once clicked, the Platform Services calls are initiated between Retail Home and POM to sync the module status.
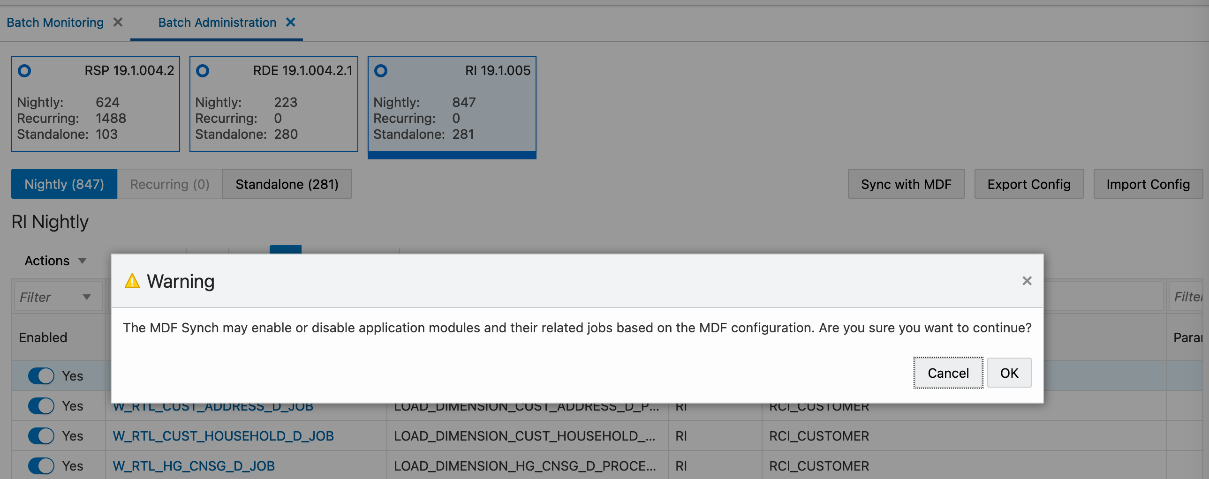
-
While the modules are synchronizing, you will see a message: 'Some features are disabled while a schedule is being synced'. Do not attempt to modify the schedule or make other changes while the sync is in progress.

-
Once the sync is complete, a JSON file with the batch schedule summary is downloaded. This file contains the current and previous status of an application and module in MDF and POM after sync. For example: {"scheduleName":"RI","synced":true,"enabledModules":[{"state":"MATCHED_MODULE","mdfStatus":"ENABLED","prevMdfStatusInPom":"ENABLED","prevStatusInPom":"ENABLED","publishToPom":true,"applicationName":"RI","moduleName":"RMI_SI_ONORDER","matchedModule":true},…
-
Click the Nightly or the Standalone tab above the table and enter a filter for the Module column (based on the modules that were activated or deactivated) and press Enter. The jobs will be enabled or disabled based on the setup in Customer Modules Management.
-
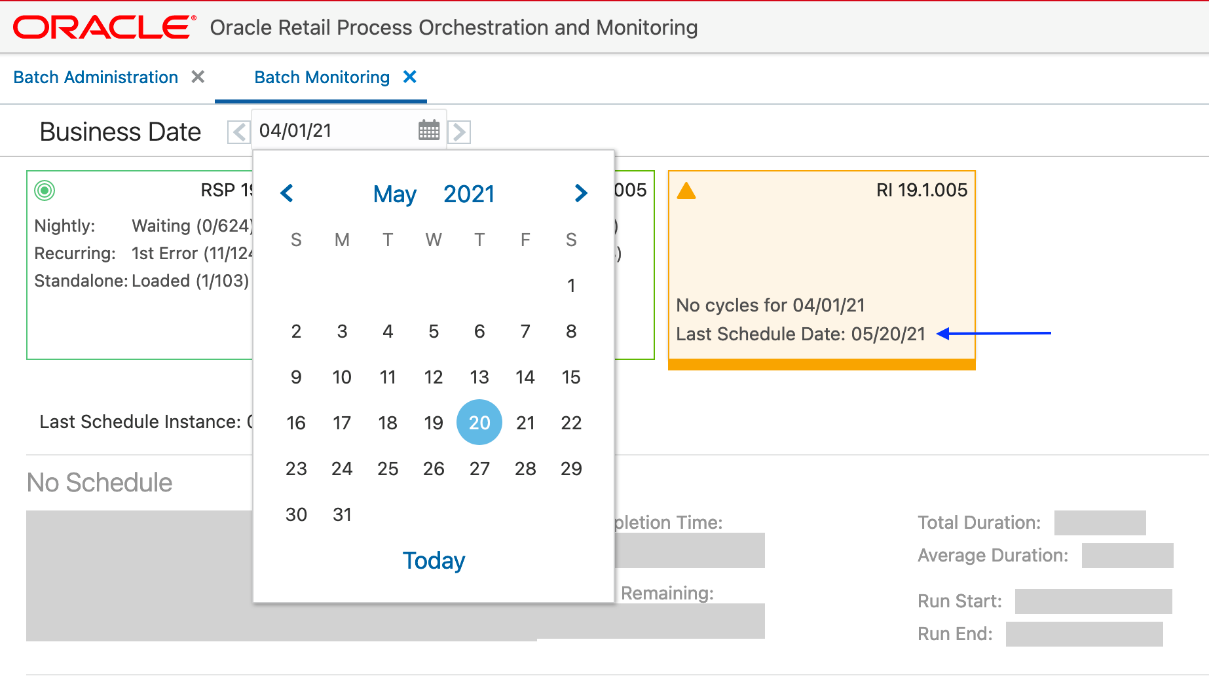
Navigate to Tasks → Batch Monitoring. Click on the same application tile as before. If the batch jobs are not listed, change the Business Date option to the 'Last Schedule Date' shown on the tile.
-
Once the date is changed, the batch jobs are loaded in the table. Click the Restart Schedule button so that module changes are reflected in the new schedule. Click OK on the confirmation pop-up. After a few seconds, a 'Restarted' message is displayed.
-
In the same screen, filter the Job column (for example,'W_HOUSEHOLD') to check the status of jobs. The status is either 'Loaded' or 'Disabled' based on the configuration in the Customer Modules Management screen in Retail Home.
Note:
A specific module in Retail Home may appear under several applications, and jobs within a module may be used by multiple processes in POM. The rule for synchronizing modules is, if a given POM job is enabled in at least one module, it will be enabled in POM (even if it is disabled in some other modules). Only when a job is not needed for any modules will it be disabled.Control & Tactical Center
Retail Insights and AI Foundation modules make use of a centralized configuration interface named the Control & Tactical Center. From here the user can review and override the system configurations for different applications through the Manage System Configurations screen. The table can be filtered by Application and their configured tables. There is also a Description section on the right side that displays the details of the filtered table.

Here are the steps for accessing and using this feature:
-
To access the system configurations, start from the Retail Home URL sent to your cloud administrator on first provisioning a new environment. It should look similar to the URL format below.
https://{service}.retail.{region}.ocs.oraclecloud.com/{solution-customer-env}/retailhome -
Using the Retail Home application menu, locate the link for the Retail AI Foundation Cloud Services. Alternatively, you can directly navigate to the application using a URL similar to the format below.
https://{service}.retail.{region}ocs.oraclecloud.com/{solution-customer-env}/orase/faces/Home -
In the task menu, navigate to Control & Tactical Center → Strategy & Policy Management. A new window opens.
Note:
Make sure your user has theADMINISTRATOR_JOBrole in OCI IAM before logging into the system. -
Click Manage System Configurations in the new application screen.
-
Select an application in the dropdown menu to pick the desired set of configurations. Based on the selection, the Filter and Table options are populated with the configured columns and data. The Description section also displays the details of the selected table.
Specifically for the initial environment setup, you will be working mainly within the Retail Insights group of configuration tables. You will also use the Strategy & Policy Management interface to access the forecasting configurations needed to set up and generate forecasts for Planning applications. It is also used to manage the business policies and rules used by Offer Optimization. Any required configurations in these areas will be covered later in this document.
Data Visualizer
Retail Analytics and Planning implementations largely involve processing large volumes of data through several application modules, so it is important to know how to access the database to review settings, monitor load progress, and validate data tables. Database access is provided through the Oracle Data Visualization (DV) tool, which is included with all Retail Analytics and Planning environments. The URL to access the DV application will be similar to the below URL:
https://{analytics-service-region}/{tenant-id}/dv/?pageid=homeNote:
The best way to write ad hoc SQL against the database is through APEX. However, Data Visualizer can be used to create reusable datasets based on SQL that can be built into reports for longer term usage.The RAP database comprises several areas for the individual application modules, but the majority of objects from RI and
AIF are exposed in DV as a connection to the RAFEDM01 database user. This user has read-only access to the
majority of database objects which are involved in RI and AI Foundation implementations, as well as the tables involved in
publishing data to the Planning modules. Follow the steps below to verify access to this database connection:
-
Log in to the DV application with a user that includes the
DVContentAuthorgroup in OCI IAM (group names vary by cloud service; they will be prefixed with the tenant ID). -
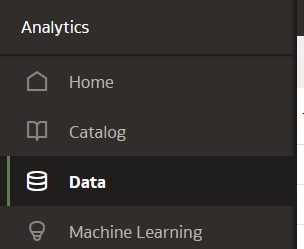
Expand the navigation panel using the Navigator icon in the upper left corner.
-
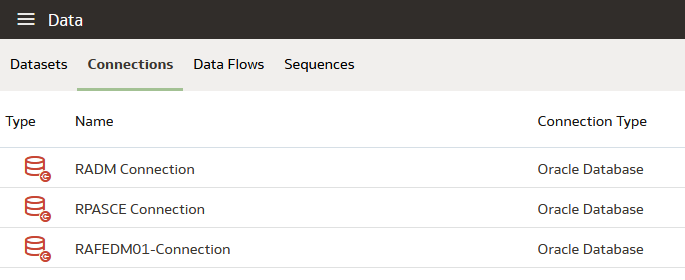
Click Data and, once the screen loads, click Connections. Confirm that you have a connection already available for RAFEDM01-Connection (Retail Analytics Front End Data Mart).
-
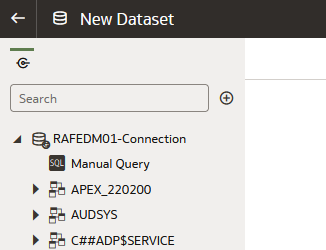
Click the connection. The Add Data Set screen will load using the selected connection. A list of database users are displayed in the left panel.
If any errors are displayed or a password is requested, contact Oracle Support for assistance.
-
Expand the RAFEDM01 user.
-
Select C_ODI_PARAM from the list of database tables and drag-and-drop the table name into the center of the screen.
-
Wait for the table to be analyzed and results to be displayed. Confirm that multiple rows of data are shown in the bottom panel:

-
If you are performing a one-time query that does not need to be repeated or reused, you can stop at this point. You can also add a Manual SQL query using the SQL object at the top of the left panel, to write simple queries on the database. However, if you want to create a reusable dataset, or expose the data for multiple users, proceed to the next steps.
-
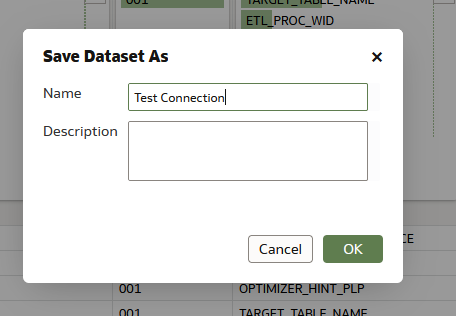
Click the Save icon in the upper right corner of the screen and provide a name for the new dataset:
-
Click the table name (
C_ODI_PARAM) at the bottom of the screen to modify the dataset further for formatting and custom fields (if desired). -
You can format the dataset on this screen for use in DV projects. You may rename the columns, change the datatype between Measure and Attribute, create new columns based on calculated values, and extract values from existing columns (such as getting the month from a date). Refer to Oracle Analytics documentation on Dataset creation for full details. When finished, click Create Workbook in the upper right corner to open a new workbook with it.
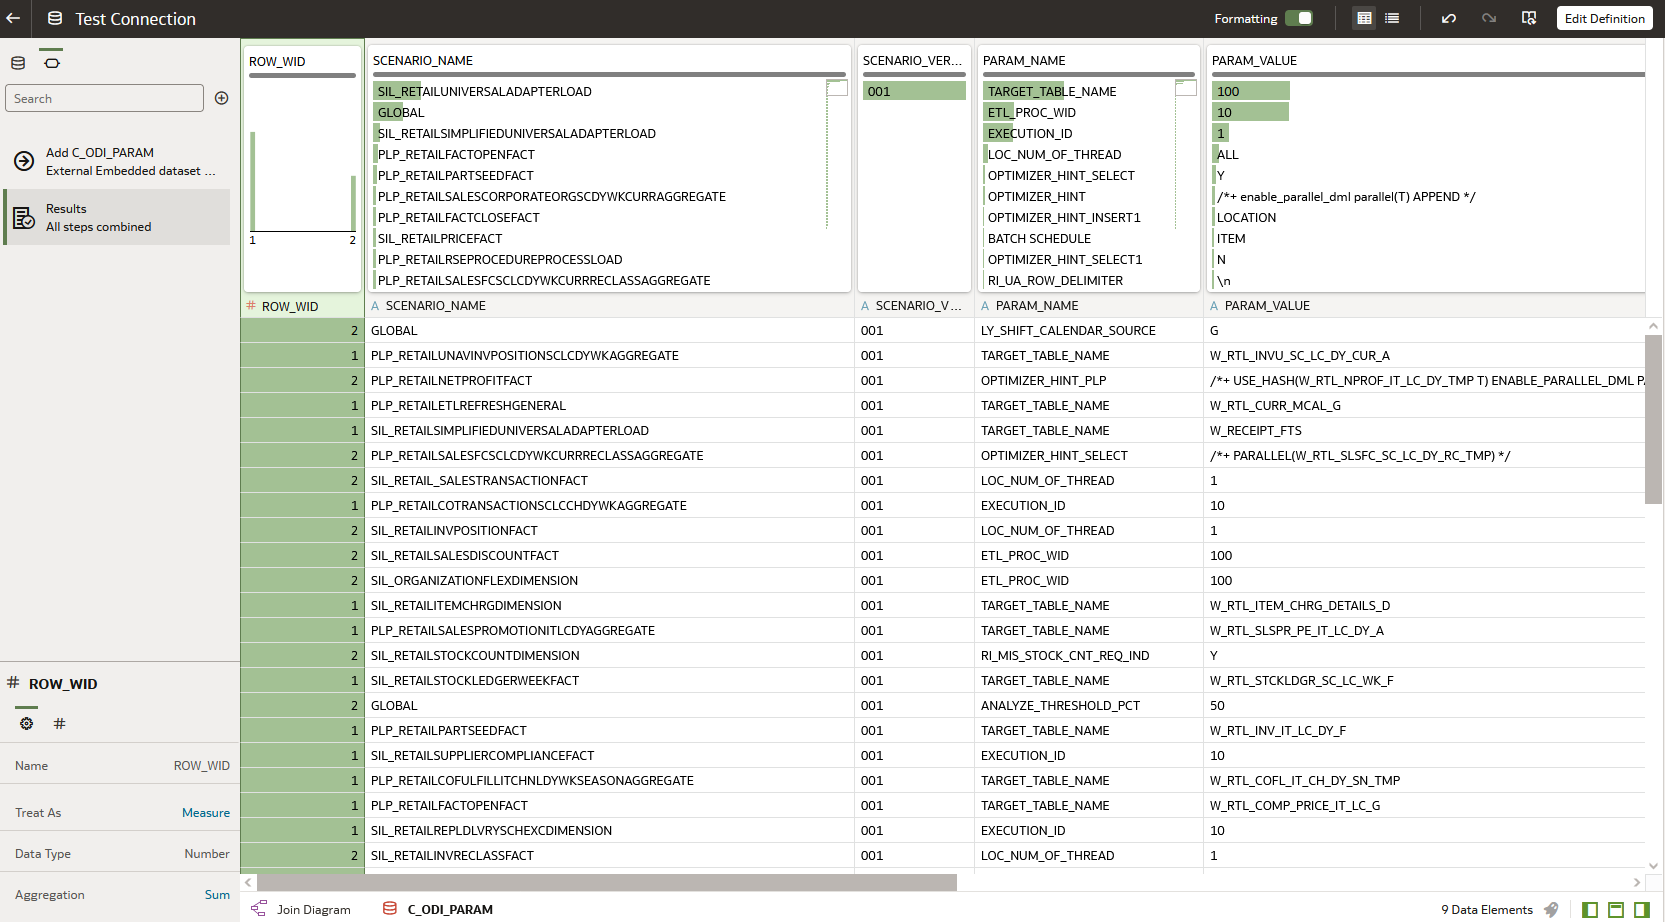
Once you have verified database connectivity, you may continue on to creating more datasets and workbooks as needed. Datasets will be saved for your user and can be reused at later dates without having to re-query the database. Saved datasets can be accessed using the Data screen from the Navigator panel.
File Transfer Services
File Transfer Services (FTS) for the Retail Analytics and Planning cloud services are being made available in this release, replacing SFTP in new environments. They will allow you to manage uploading and downloading files to Oracle Cloud Infrastructure Object Storage, which is an internet-scale, high-performance storage platform that offers reliable and cost-efficient data durability.
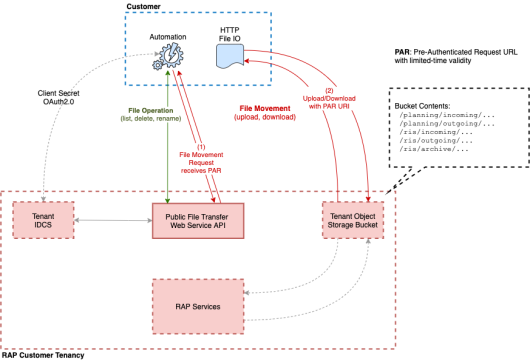
Access to files is through a pre-authenticated request (PAR), which is a URL that requires no further authentication to upload or download files to the cloud. To retrieve a PAR, you must use the appropriate file transfer REST service. These new services will enable you to import files to and export files from Object Storage used by the solutions. The primary role of these services is to ensure that only valid external users can call the service by enforcing authorization policies. Where supported, the files can be compressed (zipped) before upload.
The general flow of activities involving FTS and an external integrating system are as follows for transferring files into our cloud service:
-
The third-party solution calls the service, requesting pre-authentication to upload files from Object Storage, including the incoming prefix and file name. On receiving the PAR, the file is uploaded using the URL included within the response. A PAR has a validity of 10 minutes; an upload can take longer than 10 minutes but after it is returned it must be started within that period.
-
The cloud service batch processing will retrieve the files from Object Storage, after they have passed an anti-virus and malware scan.
-
The batch processing will delete the file from Object Storage to ensure it is not re-processed in the next batch run. The batch processing uncompresses the file and processes the data.
To interact with FTS you must use the REST APIs provided. The table below lists the API end points for different file operations.
| Operation | Method | FTS API Endpoint |
|---|---|---|
|
Ping |
GET |
|
|
List Prefixes |
GET |
|
|
List Files |
GET |
|
|
Move Files |
POST |
|
|
Delete Files |
DELETE |
|
|
Request Upload PAR |
POST |
|
|
Request Download PAR |
POST |
|
The {baseUrl} is the URL for your RAP service that is supplied to you when your service is provisioned,
and can be located from Retail Home as it is also the platform service URL. Refer to the Required Parameters section for additional
parameters you will need to make FTS requests.
Required Parameters
To leverage File Transfer Services, several pieces of information are required. This information is used in API calls and also inserted into automated scripts, such as the test script provided later in this document.
The below parameters are required for uploading data files to object storage.
BASE_URL="https://__YOUR_TENANT_BASE_URL__"
TENANT="__YOUR-TENANT_ID__"
IDCS_URL="https://_YOUR__IDCS__URL__/oauth2/v1/token"
IDCS_CLIENTID="__YOUR_CLIENT_APPID__"
IDCS_CLIENTSECRET="__YOUR_CLIENT_SECRET___"
IDCS_SCOPE="rgbu:rsp:psraf-__YOUR_SCOPE__"
Base URL
The substring before the first ‘/’ in the Application URL is termed as the base URL.
Example URL: https://rap.retail.eu-frankfurt-1.ocs.oraclecloud.com/rgbu-rap- hmcd-stg1-rsp/orase/faces/Home
In the above URL, BASE_URL = https://rap.retail.eu-frankfurt-1.ocs.oraclecloud.com
Tenant
The string after the Base URL and before the Application URL starts would be the Tenant.
Example URL: https://rap.retail.eu-frankfurt-1.ocs.oraclecloud.com/rgbu-rap- hmcd-stg1-rsp/orase/faces/Home
In the above URL, TENANT = rgbu-rap-hmcd-stg1-rsp
OCI IAM URL
Your authentication URL is the one used when you first access any of your cloud services and are redirected to a login screen. You will get the base URL from the login screen and combine it with the necessary path to fetch the authentication token.
Example Base URL: https://oci—iam-a4cbf187f29d4f41bc03fffb657d5513.identity.oraclecloud.com/
Using the above URL, IDCS_URL = https://oci—iam-a4cbf187f29d4f41bc03fffb657d5513.identity.oraclecloud.com/oauth2/v1/token
OCI IAM Scope
The authentication scope is a code associated with the specific environment you are planning to interact with. It has a static prefix based on the application, appended with an environment-specific code and index.
Base format: rgbu:rsp:psraf-<ENV><ENVINDEX>
Where <ENV> is replaced with one of the codes in (PRD, STG) and <ENVINDEX> is set to 1, unless you have multiple staging environments, and then the index can be 2 or greater.
For these applications (that is, RI and AIF) use the rsp code. For other applications, the code is rpas.
To determine this information, look at the URL for your environment, such as:
https://rap.retail.eu-frankfurt-1.ocs.oraclecloud.com/rgbu-rap-hmcd-stg1-rsp/orase/faces/HomeIn the tenant string, you can see the code stg1. This can be added to your scope string (ensuring it is
in uppercase characters only).
IDCS_SCOPE = rgbu:rsp:psraf-STG1
Client ID and Secret
The client ID and secret are authentication keys generated for your specific connection and must be passed with every request.
Retail Home provides an interface to get these values when you login with a user having the PLATFORM_SERVICES_ADMINISTRATOR group.
-
Navigate to the Application Navigator Setup screen.
-
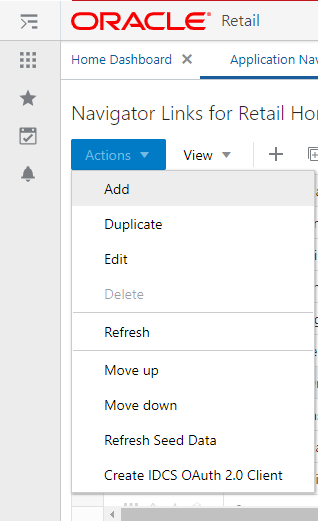
Select a row for the application you will transfer files to. The row must already have a Platform Services URL assigned to it. Use the Actions menu to select the Create IDCS OAuth 2.0 Client action.
-
Enter the requested details in the window. The application name should be unique to the connection you are establishing and cannot be used to generate multiple client ID/secret pairs.
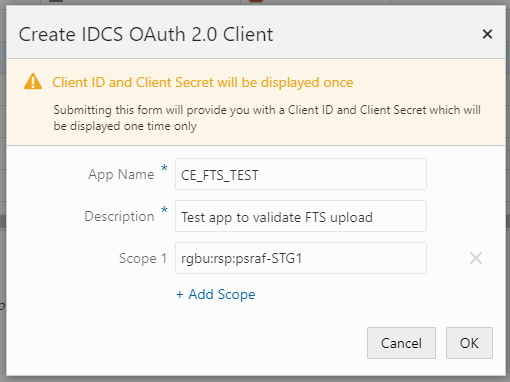
The application name cannot be re-used for multiple requests. It also cannot contain spaces. The scope should be the string previously established in OCI IAM Scope. The description is any value you wish to enter to describe the application name being used.
-
Click OK to submit the form and display a new popup with the client ID and secret for the specified Application Name. Do NOT close the window until you have captured the information and verified it matches what is shown on screen. Once you close the window, you cannot recover the information and you will need to create a new application.
MFP Example
Create the OAuth Client in Retail Home with the following parameters:
-
App Name: MFP_STG1
-
Description: FTS for MFP on STG1
-
Scope 1: rgbu:rpas:psraf-MFPSCS-STG1
This generates an OAuth Client with details like this:
-
Oauth client:
-
App Name: MFP_STG1
-
Client Id: MFP_STG1_APPID
-
Client Secret: 6aae7818-309b-4e7a-874e-f26356a675b1
You will need to capture Client Id and Client Secret. So set the FTS script variables as follows:
BASE_URL="https://rap.retail.eu-frankfurt-1.ocs.oraclecloud.com"
TENANT="rgbu-rap-hmcd-stg1-mfpscs"
IDCS_URL="https://oci—iam-a4cbf187f29d4f41bc03fffb657d5513.identity.oraclecloud.com/oauth2/v1/token"
IDCS_CLIENTID="MFP_STG1_APPID"
IDCS_CLIENTSECRET="6aae7818-309b-4e7a-874e-f26356a675b1"
IDCS_SCOPE="rgbu:rpas:psraf-MFPSCS-STG1"
RDF Example
Create the OAuth Client in Retail Home with the following parameters:
-
App Name: RDF_STG1
-
Description: FTS for RDF on STG1
-
Scope 1: rgbu:rpas:psraf-RDF-STG1
This generates an OAuth Client with details like this:
-
Oauth client:
-
App Name: RDF_STG1
-
Client Id: RDF_STG1_APPID
-
Client Secret: 6aae7818-309b-4e7a-874e-f26356a675b1
You will need to capture Client Id and Client Secret. So set the FTS script variables as follows:
BASE_URL="https://rap.retail.eu-frankfurt-1.ocs.oraclecloud.com"
TENANT="rgbu-rap-hmcd-stg1-rdf"
IDCS_URL="https://oci—iam-a4cbf187f29d4f41bc03fffb657d5513.identity.oraclecloud.com/oauth2/v1/token"
IDCS_CLIENTID="RDF_STG1_APPID"
IDCS_CLIENTSECRET="6aae7818-309b-4e7a-874e-f26356a675b1"
IDCS_SCOPE="rgbu:rpas:psraf-RDF-STG1"
AP Example
Create the OAuth Client in Retail Home with the following parameters:
-
App Name: AP_STG1
-
Description: FTS for AP on STG1
-
Scope 1: rgbu:rpas:psraf-AP-STG1
This generates an OAuth Client with details like this:
-
Oauth client:
-
App Name: AP_STG1
-
Client Id: AP_STG1_APPID
-
Client Secret: 6aae7818-309b-4e7a-874e-f26356a675b1
You will need to capture Client Id and Client Secret. So set the FTS script variables as follows:
BASE_URL="https://rap.retail.eu-frankfurt-1.ocs.oraclecloud.com"
TENANT="rgbu-rap-hmcd-stg1-apcs"
IDCS_URL="https://oci—iam-a4cbf187f29d4f41bc03fffb657d5513.identity.oraclecloud.com/oauth2/v1/token"
IDCS_CLIENTID="AP_STG1_APPID"
IDCS_CLIENTSECRET="6aae7818-309b-4e7a-874e-f26356a675b1"
IDCS_SCOPE="rgbu:rpas:psraf-AP-STG1"
Common HTTP Headers
Each call to FTS should contain the following HTTP headers:
|
|
|
|
|
|
|
|
The {ClientToken} is the access token returned by OCI IAM after requesting client credentials. This is
refreshed periodically to avoid authentication errors.
Retrieving Identity Access Client Token
The access client token is returned from a POST call to the OCI IAM URL, provided at provisioning, along with the following:
| Headers |
|---|
|
|
|
|
|
|
ociAuth is the base64 encoding of your {clientId}:{clientSecret}
| Data (URLEncoded) |
|---|
|
|
|
|
FTS API Specification
An example shell script implementing these API calls can be found in Sample Public File Transfer Script for Planning Apps and Sample Public File Transfer Script for RI and AIF. The sample script will require all of the parameters discussed so far in this chapter to be added to it before it can be used to issue FTS commands. Refer to the table below for a more detailed list of services available in FTS.
Note:
ThebaseUrl in these examples is not the same as the BASE_URL variable passed into
cURL commands. The baseUrl for the API itself is the hostname and tenant, plus the service implementation
path (for example, RetailAppsPlatformServices). The sample scripts provided in the appendix show the full
path used by the API calls.
|
Ping |
Returns the status of the service, and provides an external health-check. |
|
Method |
GET |
|
Endpoint |
|
|
Parameters |
Common headers |
|
Request |
None |
|
Response |
The appStatus code follows HTTP return code standards. |
|
List Prefixes |
Returns a list of the known storage prefixes. These are analogous to directories, and are restricted to predefined choices per service. |
|
Method |
GET |
|
Endpoint |
|
|
Parameters |
Common headers |
|
Request |
None |
|
Response |
A JSON array of strings containing the known prefixes. |
|
List Files |
Returns a list of the file within a given storage prefix. |
|
Method |
GET |
|
Endpoint |
|
|
Parameters |
Common headers |
|
Request |
Query parameters
|
|
Response |
A JSON |
|
Move Files |
Moves one or more files between storage prefixes, while additionally allowing the name to be modified |
|
Method |
GET |
|
Endpoint |
|
|
Parameters |
Common headers |
|
Request |
An array of files containing the current and new storage prefixes and file names, as shown below. |
|
Response |
HTTP 200, request succeeded; HTTP 500, an error was encountered. |
|
Delete Files |
Deletes one more or files |
|
Method |
DELETE |
|
Endpoint |
|
|
Parameters |
Common headers |
|
Request |
A JSON array of files to be deleted. One or more pairs of |
|
Response |
A JSON array of each file deletion attempted and the result. |
|
Request Upload PAR |
Request PAR for uploading one or more files |
|
Method |
POST |
|
Endpoint |
|
|
Parameters |
Common headers |
|
Request |
A JSON array of files to be uploaded. One or more pairs of |
|
Response |
A |
|
Request Download PAR |
Request PARs for downloading one or more files |
|
Method |
POST |
|
Endpoint |
|
|
Parameters |
Common headers |
|
Request |
A JSON array of files to be downloaded. One or more pairs of storagePrefix and filenames can be specified within the array. |
|
Response |
A |
FTS Script Usage
Assuming you have taken the sample script and named it file_transfer.sh on a Unix system, you may use
commands like those below to call the APIs.
Upload Files
For RAP input files (excluding direct-to-RPASCE input files) the input files must be uploaded to the object storage with
a prefix of ris/incoming.
-
Prefix:
ris/incoming -
File Name:
RI_RMS_DATA.zip -
Command:
sh file_transfer.sh uploadfiles ris/incoming RI_RMS_DATA.zip
Download Files
For RAP output files (excluding direct-from-RPASCE output files) the files must be downloaded from the object storage with
a prefix of ris/outgoing.
-
Prefix:
ris/outgoing -
File Name:
cis_custseg_exp.csv -
Command:
sh file_transfer.sh downloadfiles ris/outgoing cis_custseg_exp.csv
Download Archives
For RAP files that are automatically archived as part of the batch process, you have the ability to download these files for a limited number of days before they are erased (based on the file retention policy in your OCI region). Archive files are added to sub-folders so the steps are different from a standard download.
-
POM job logs will show the path to the archive
For example:
incoming-10072022-163233/RAP_DATA.zip -
Create the directory in your local server matching the archive name.
For example:
mkdir incoming-10072022-163233 -
Use the
downloadfilescommand with theris/archiveprefix and the file path as the sub-folder and filename together.For example: sh file_transfer.sh downloadfiles ris/archive incoming-10072022-163233/RAP_DATA.zip
Application Express (APEX)
The Retail Analytics and Planning includes a dedicated instance of Application Express (APEX) that is pre-configured for read-only database access to RAP tables and views. APEX is managed as a part of the Innovation Workbench (IW) module that includes APEX and Data Studio. You can access APEX from a task menu link in the AI Foundation Cloud Services interface, or by navigating directly to the ORDS endpoint like below:
https://{base URL}/{solution-customer-env}/ordsFor example:
https://ocacs.ocs.oc-test.com/nrfy45ka2su3imnq6s/ords/For first time setup of the administrator user account for APEX, refer to the RAP Administration Guide.
After you are logged into APEX, click the SQL Workshop icon or access the SQL Workshop menu to enter the SQL Commands screen. This screen is where you will enter SQL to query the RAP database objects in the RI and AI Foundation schemas.

To see the list of available objects to query, access the Object Browser. All RI and AI Foundation objects are added as synonyms, so select that menu option from the panel on the left.
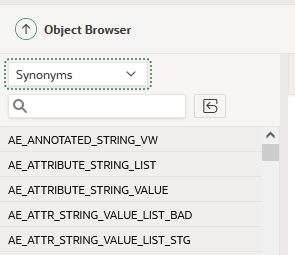
If you do not see any RI tables in the synonym list, then you may need to run a set of ad hoc jobs in POM to expose them. Run the following two programs from the AI Foundation schedule’s standalone job list:
-
RADM_GRANT_ACCESS_TO_IW_ADHOC_JOB
-
RABE_GRANT_ACCESS_TO_IW_ADHOC_JOB
Once the jobs execute successfully, start a new session of APEX and navigate back to the list of Synonyms in the Object Browser screen to confirm the table list is updated.
To see the available columns on these tables, select all columns from the SQL Commands screen and
review the results. If the table does not yet have data, then you can also locate the table definition from Data Visualizer’s
Dataset creation flow by accessing the RAFEDM01 user and locating the table definition within the resulting
list of objects. If neither option is sufficient to get the information you need, contact Oracle Support for further assistance.
Postman
For automated API calls, Postman is the preferred way to interact with POM in order to call ad hoc processes and perform data load activities. The steps below explain how to configure Postman for first-time use with POM.
Note:
POM versions earlier than v21 allow Basic Authentication, while v21+ requires OAuth 2.0 as detailed below.-
As a pre-requisite, retrieve the Client ID and Client Secret from Retail Home’s ‘Create IDCS OAuth 2.0 Client’. Refer to the Retail Home Administration Guide for complete details on retrieving the Client ID and Client Secret info if you have not done it before.
-
In the Postman application, click New->HTTP Request.
-
Set Request Type as
POSTand set the Request URL (Example for RI schedule):https://<Region-LB>/<POM-Subnamespace>/ProcessServices/services/private/executionEngine/schedules/RI/executionFor example:
https://home.retail.us-region-1.ocs.oc-test.com/rgbu-common-rap-prod-pom/ProcessServices/services/private/executionEngine/schedules/RI/execution -
Perform the following steps before sending the POST request to retrieve your authentication token:
-
Authorization Tab:
Type: OAuth 2.0
Add authorization data to: Request Headers
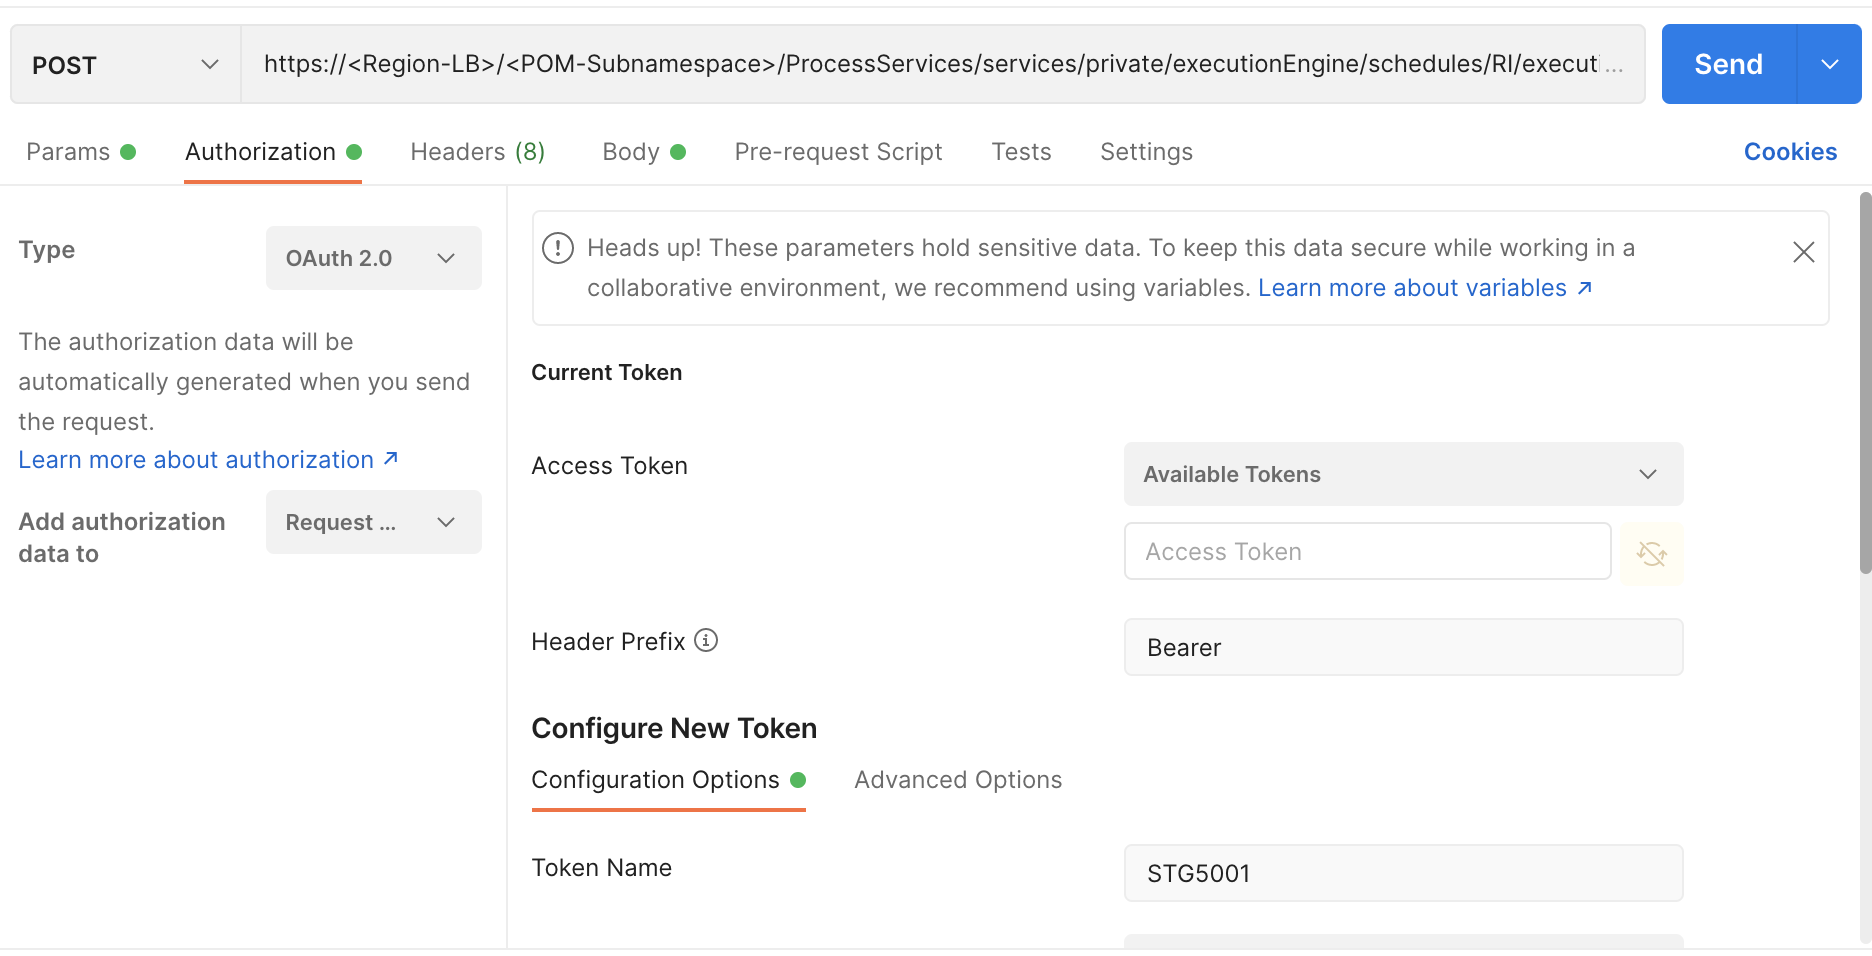
-
Configure the New Token:
-
Token Name: PROD5555
-
Grant Type: Client Credentials
-
Access Token URL:
https://<Customer-OCI_IAM>/oauth2/v1/tokenFor example:
https://oci—iam-fe5f77f8a44.identity.c9dev.oc9dev.com/oauth2/v1/token -
Client ID: A unique “API Key” generated when registering your application in the Identity Cloud Services admin console.
-
Client Secret: A private key similar to a password that is generated when registering your application in the Identity Cloud Services admin console.
-
Scope:
rgbu:pom:services-administrator-<Env-INDEX>For example:
rgbu:pom:services-administrator-PROD5555 -
Client Authentication: Send as Basic Auth header
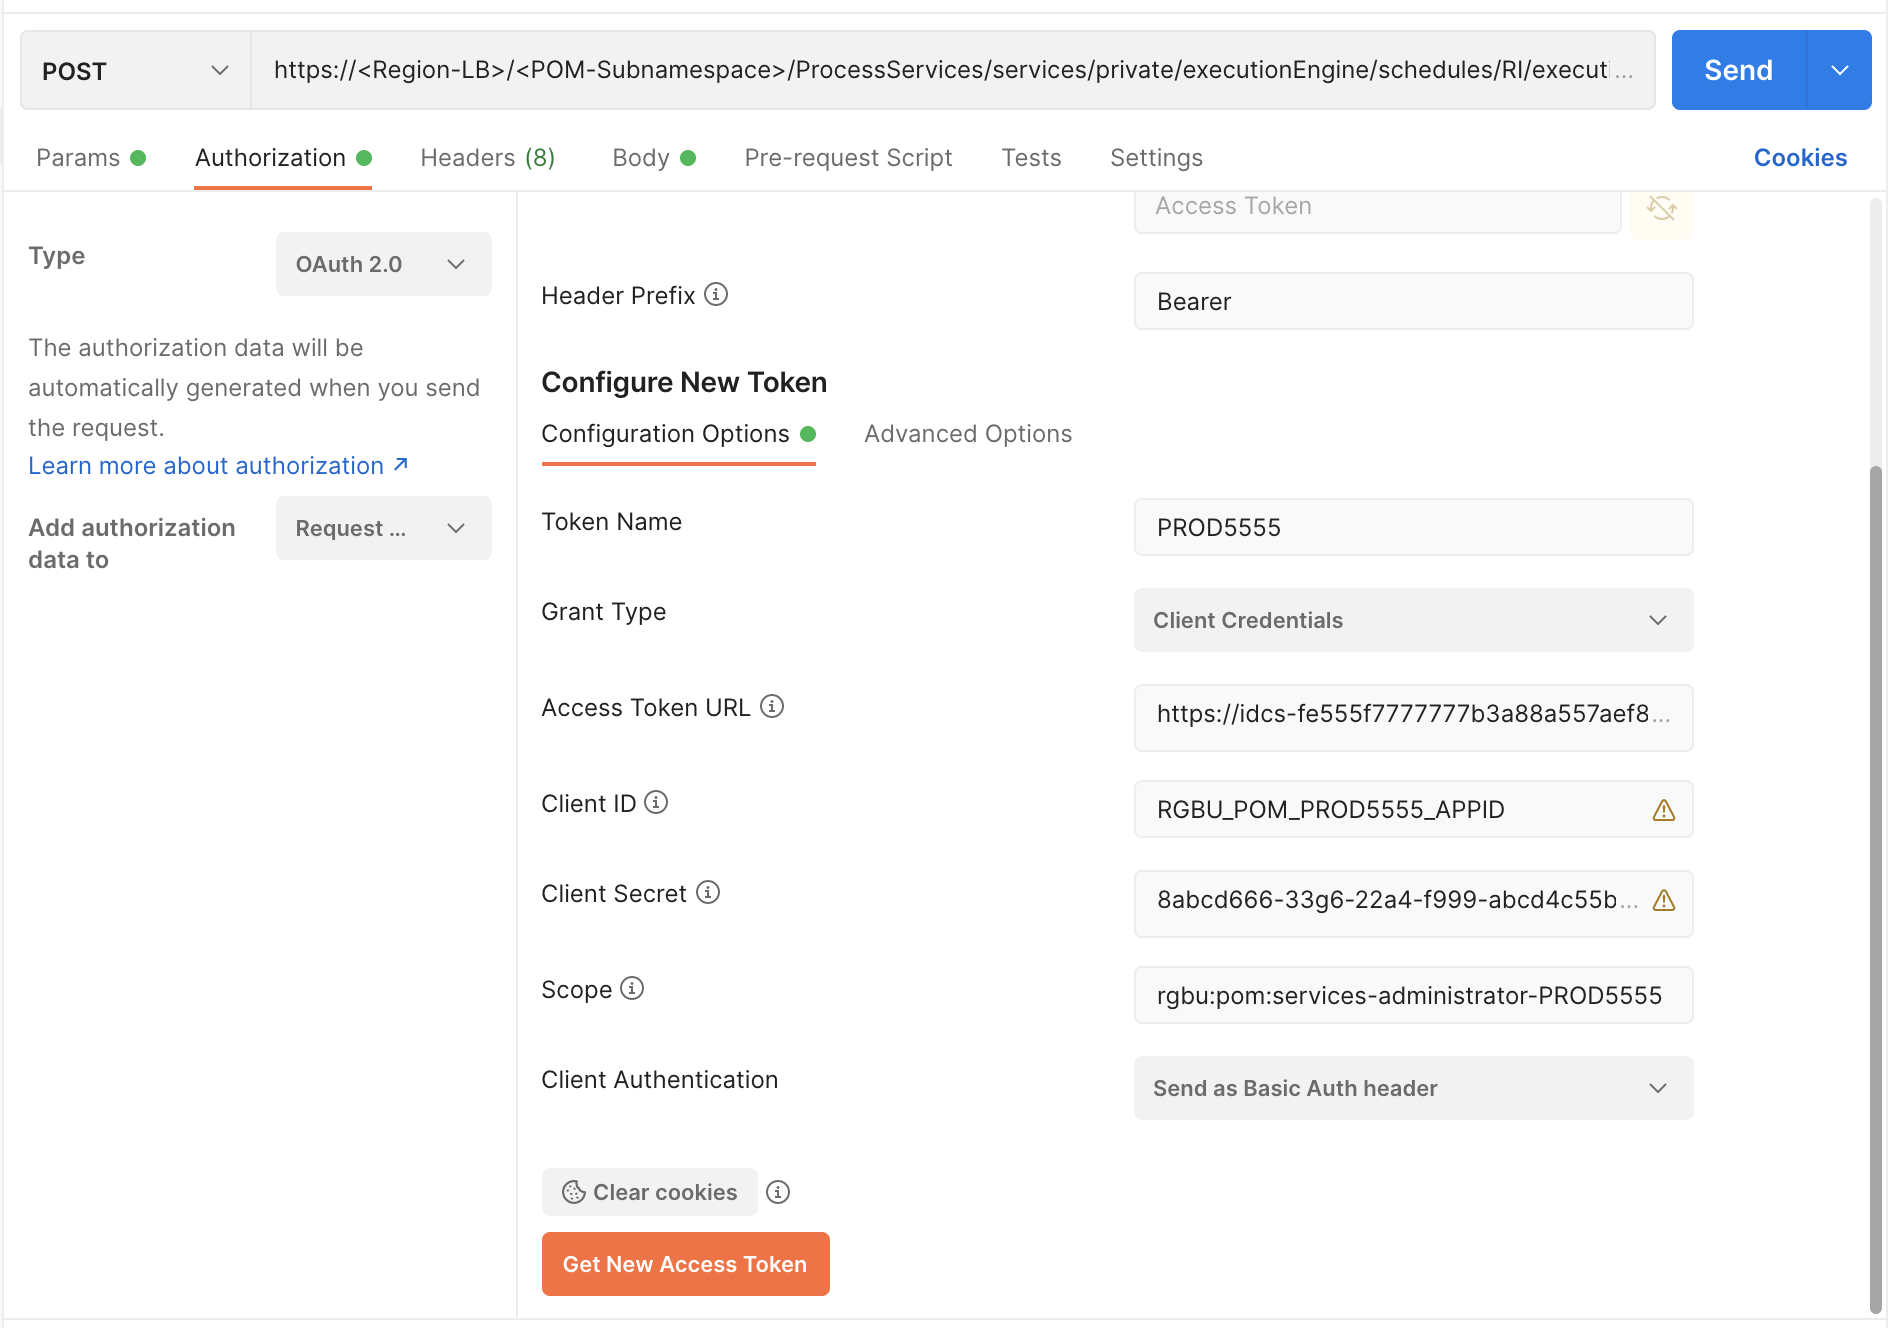
-
-
Click the Get New Access Token button.
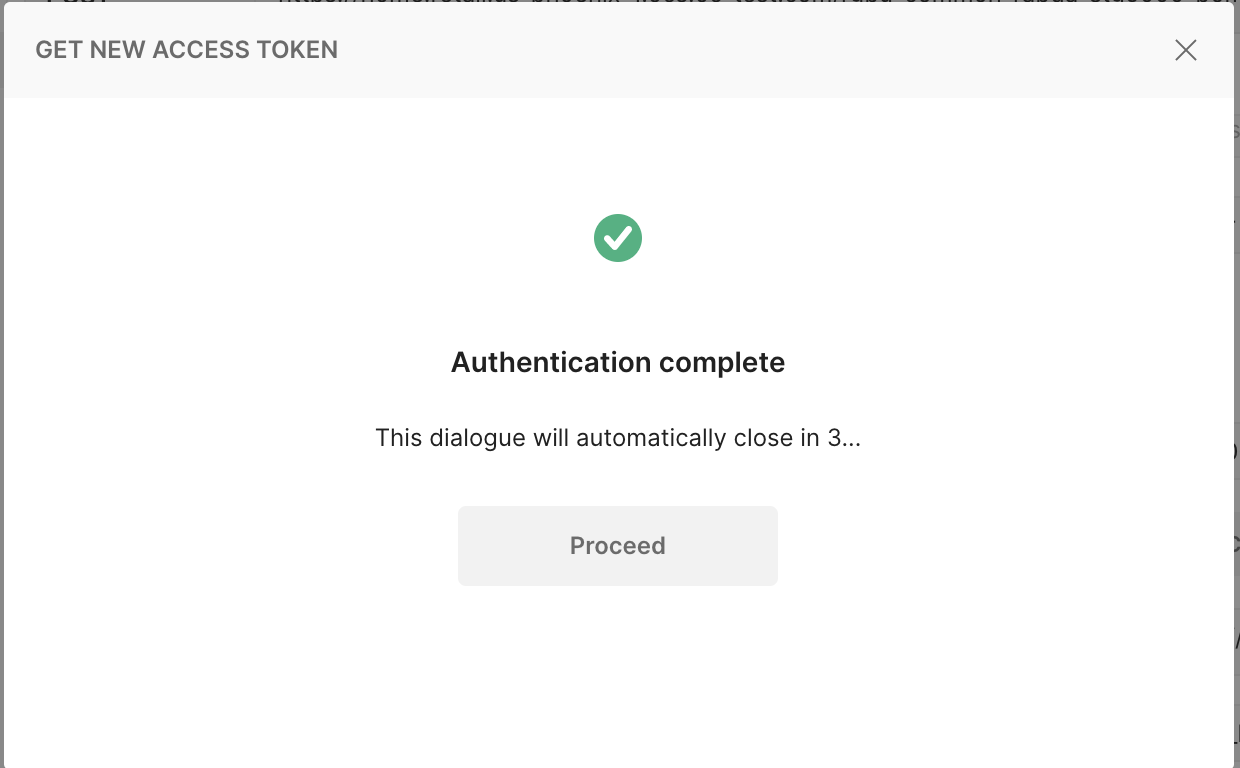
-
-
The Access Token is displayed in the MANAGE ACCESS TOKENS pop-up window. Click the Use Token button.
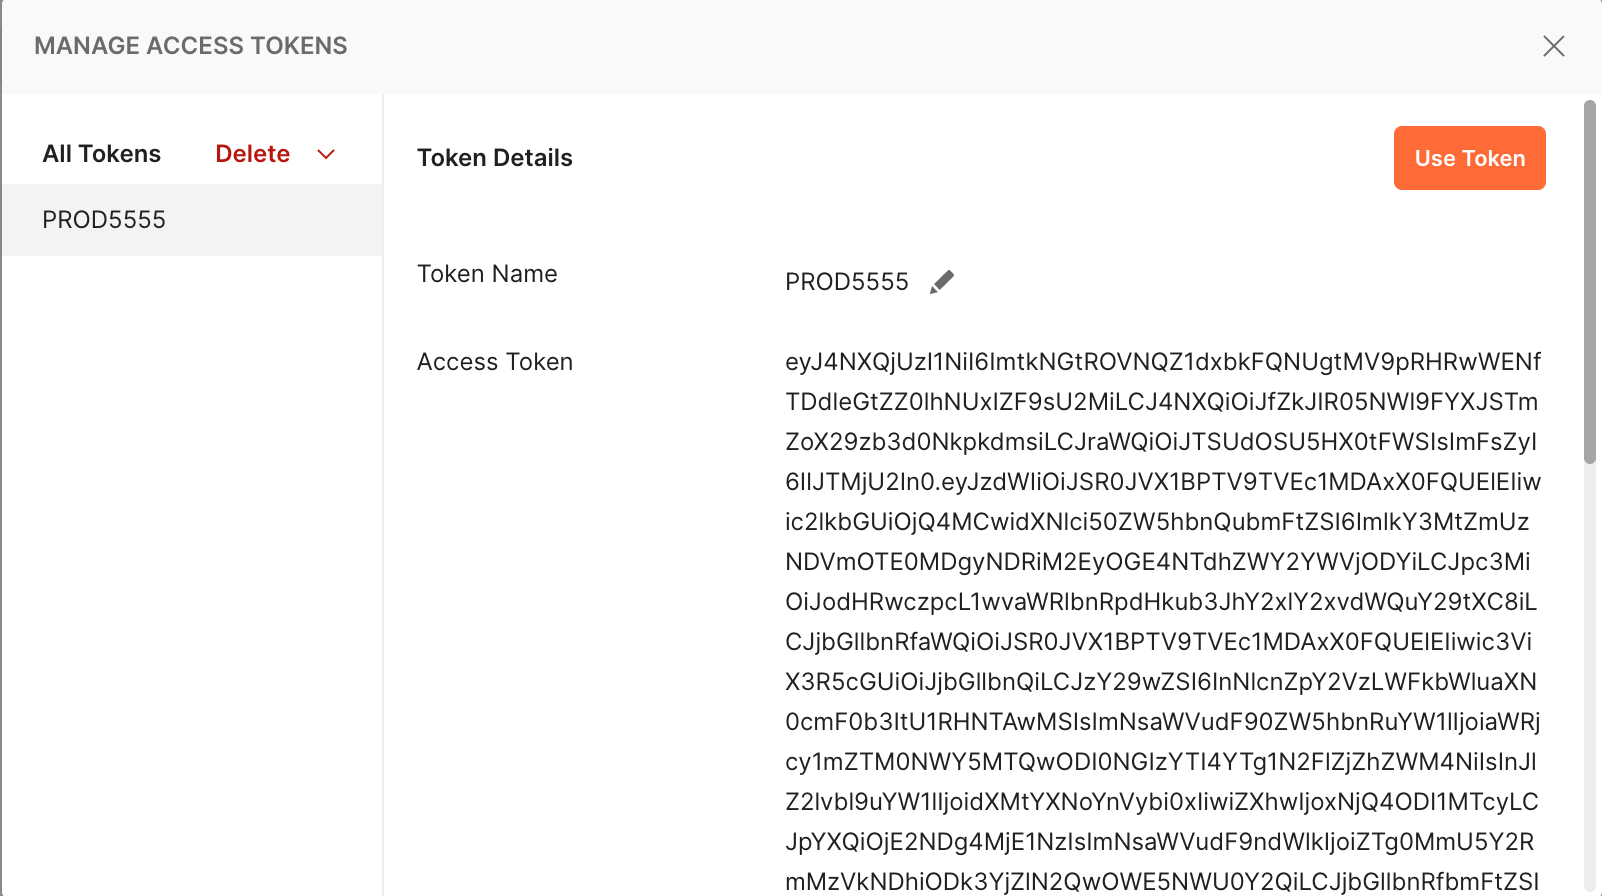
-
The generated token is populated in the Access Token section.
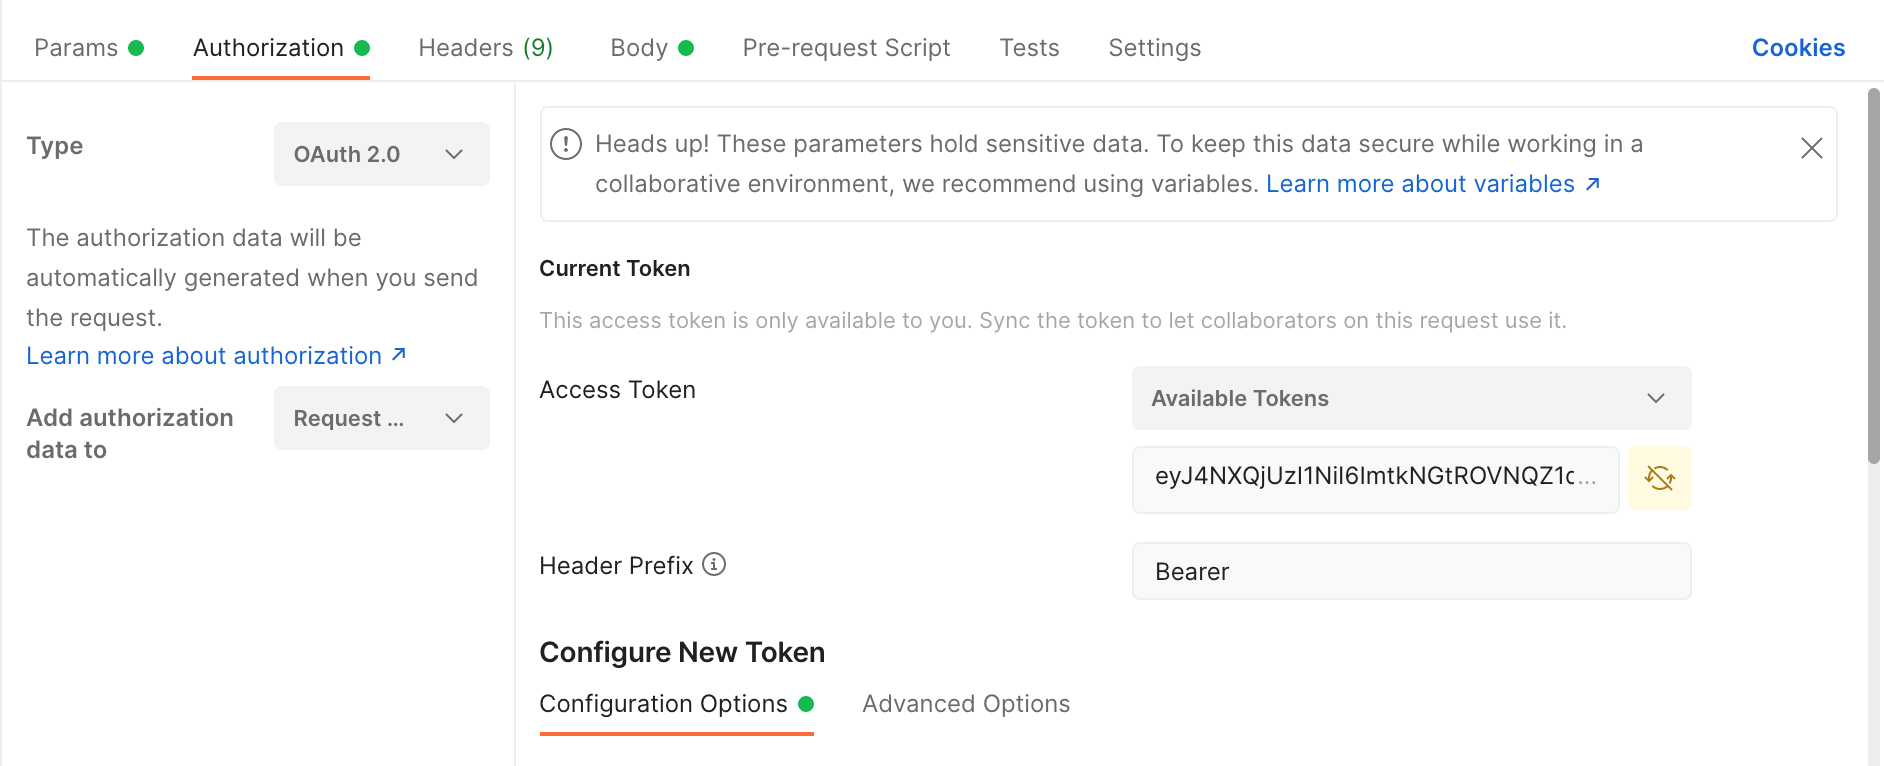
-
In the Parameters, provide a key of
skipVersionwith a value of true.
-
Click the Body tab to enter the JSON for running POM batches.
-
Select the raw radio button and JSON file type.
-
Enter the JSON XML and click the Send button in the Body tab.
-
If the returned Status is "200 OK" and
'executionEngineInfo': “STARTED”is in the response body, then the batch started as expected. -
If the status is not 200 and either of 401 (authorization error) or 500 (incorrect body content) or 404 (server down) and so on, then perform error resolution as needed.
Example request and response for the
HIST_ZIP_FILE_LOAD_ADHOCprocess: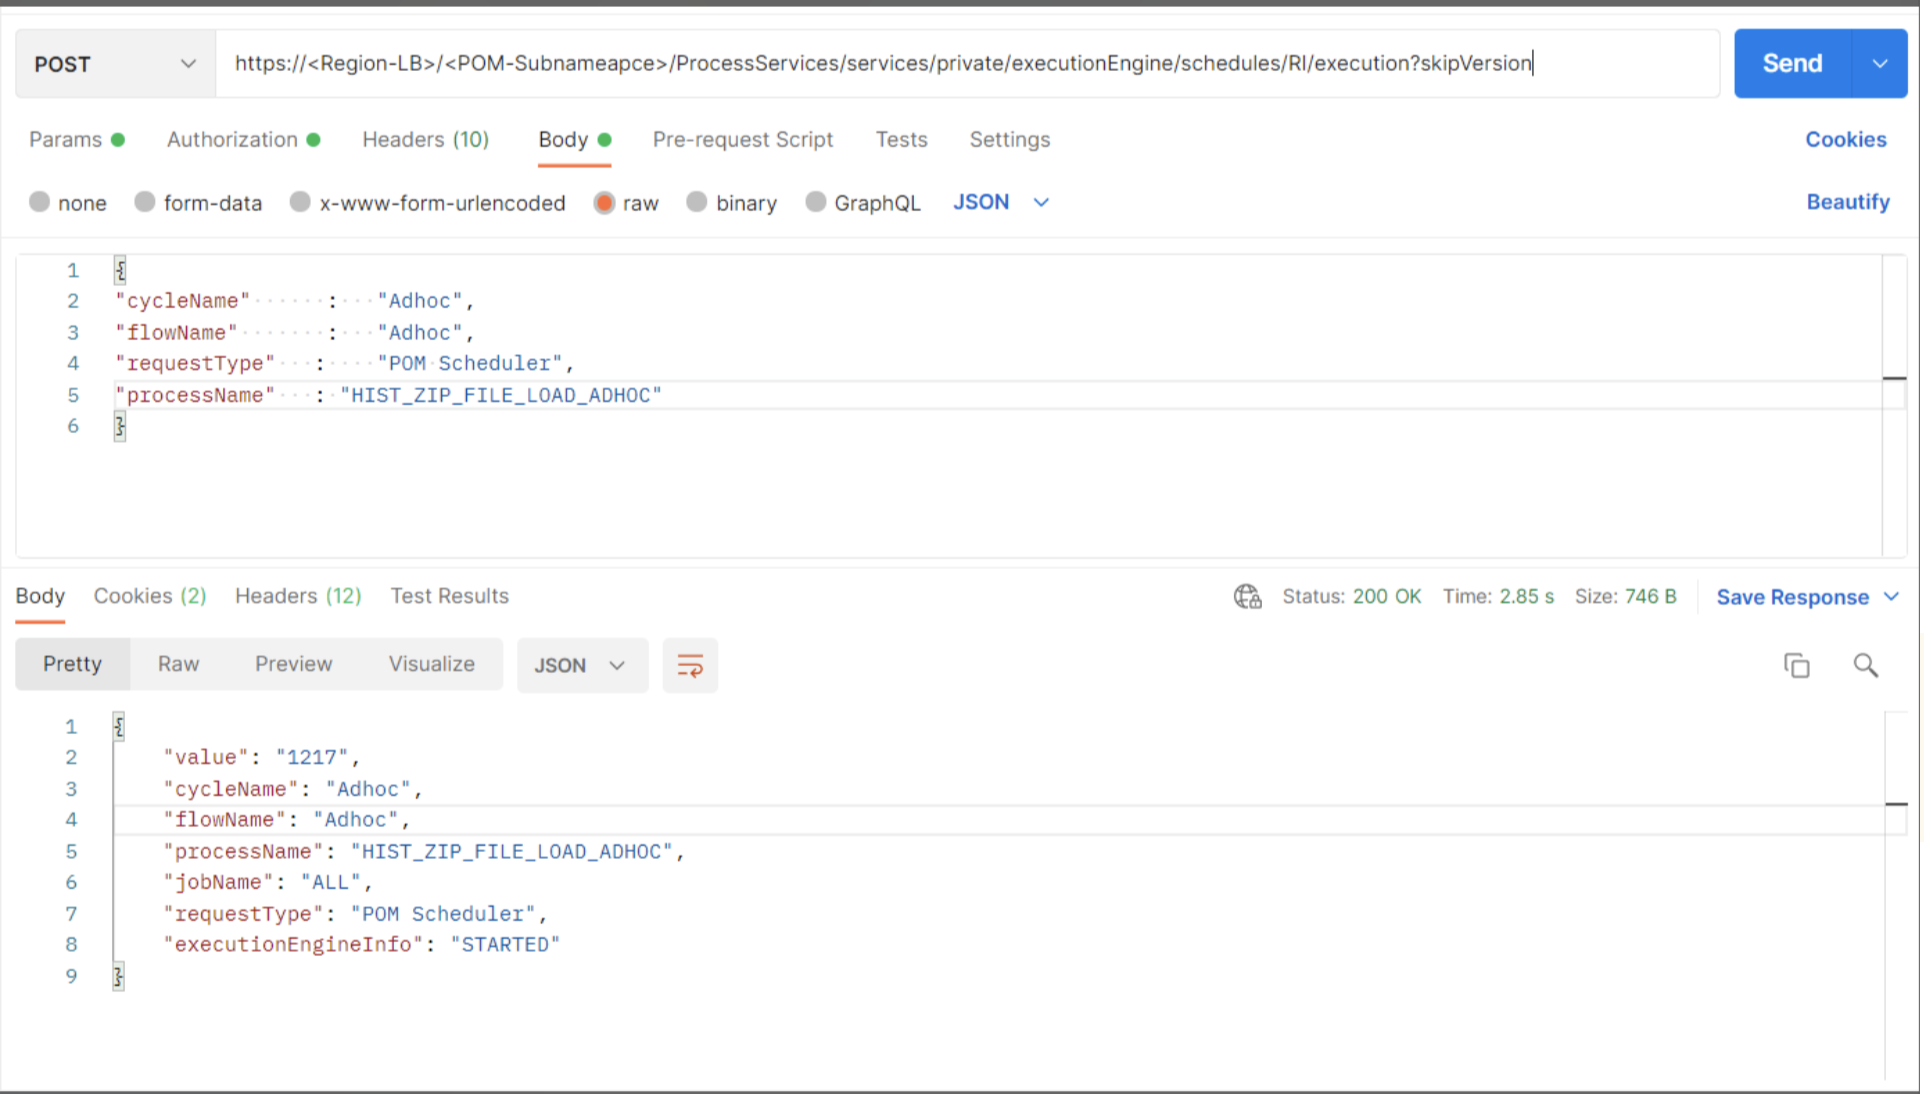
Additional examples of Postman Body JSON XML are listed below.
Nightly Batch
{
"cycleName"    :  "Nightly",
"flowName"     :  "Nightly",
"requestType"  :  "POM Scheduler"
}
With One Process – Applicable for Nightly and Ad Hoc
{
"cycleName"     :  "Nightly",
"flowName"      :  "Nightly",
"requestType"   :  "POM Scheduler",
"processName"   :  "LOAD_AGGREGATION_BCOST_IT_DY_A_PROCESS"
}
With Dynamic Parameters – Applicable for Nightly and Ad Hoc
{ "cycleName" : "Adhoc", "flowName" : "Adhoc", "requestType" : "POM Scheduler", "processName" : "HIST_INVRTV_LOAD_ADHOC", "requestParameters" : "jobParams.HIST_LOAD_INVRTV_DAY_JOB=2020-09-09 2021-09-09" } -