1 Introduction
Oracle Retail Brand Compliance Management Cloud Service is an application designed to meet all aspects of sourcing, developing, and protecting retailer brands. The application provides solutions for product development, compliance, quality, and traceability. It is designed specifically for retail, food service, and manufacturing businesses to develop and protect their brands, manage their suppliers, and ensure full end-to-end product lifecycle management.
Oracle Retail Brand Compliance Management Cloud Service is composed of the following modules:
-
Library enables the issue, receipt, and acceptance of policies, guidelines, and key working documents.
-
Product supports the development of products and production specifications.
-
Project supports the development of project briefs, plans, and workflow management.
-
Supplier enables the identification, selection, and approval of suppliers.
-
Reports - reporting tool for reporting across the system, using standard templates and custom reports.
Note:
Technologist is the default name for that Retailer role across the entire application. Each portal may configure an alternative to suit their business, if required.
Synchronize Workflow
Workflow-enabled records can occasionally result in their displayed status not matching their actual progression in the workflow, typically from the failure of the background job that progresses the status.
A Synchronise Workflow option is available in the Actions menu of records that are subject to a workflow process, providing a means of performing a manual refresh, thus allowing the record to continue to be used while the root cause of the synchronization issue is investigated. This option is intended for use by Oracle when investigating workflow related issues, so by default it is hidden from all users except those with the Oracle Authorized Administrator authority profile, however its use is controllable by the Permissions spreadsheet. The option appears when the record is opened in read mode. When selected, a dialog box is presented for confirmation of the action.
Admin Functions
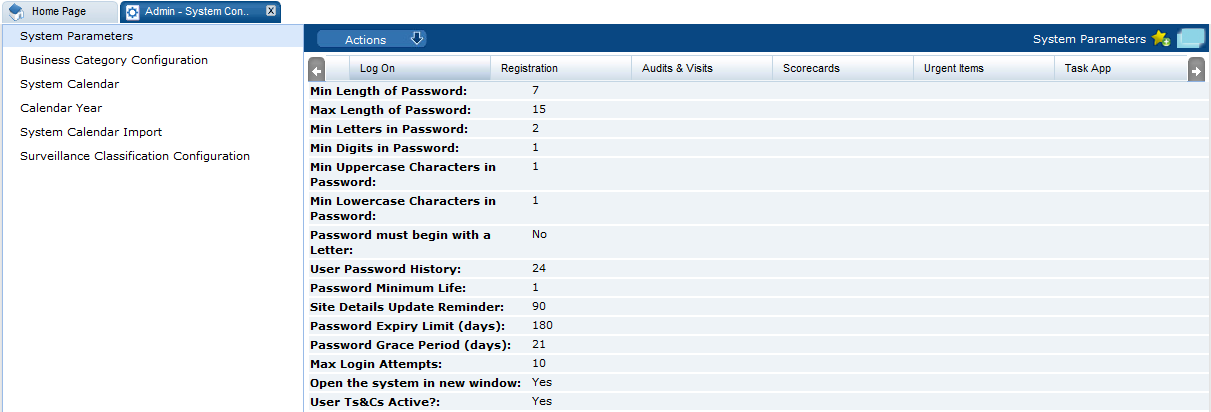
To access the Admin functions, select the Admin option from Company. The Admin - System Control tab opens. The available options are shown in the left pane. For an example, see Figure 1-1.
Access to the Admin functions is controlled by Authority Profiles. A user may not have access to all the Admin functions described in this guide.
System Parameters
System parameters are used to manage the functionality of features and modules. To access the system parameters, select the System Control option from the Admin drop-down list. Select System Parameters from the left pane. The System Parameters page appears. Each subtab shows the system parameters available to maintain a specific feature or module. Figure 1-1 shows an example of the System Parameters page for the Log On subtab.
In each of the following chapters, a System Parameters section is included if system parameters are available for that feature or module. A table shows the specific system parameters, listed by subtab, used for that feature or module.
Figure 1-1 System Parameters Page
Calendar
To access the system calendar options, select the System Control option from the Admin drop-down list. The following options are available in the left pane:
System Calendar
The System Calendar defines the retailer's financial year, period, and week for a given date:
-
The Financial Year is the key of the calendar record. It must be unique.
-
Each week is given a number, starting from 1, and start and end dates.
The first week's start date is the given start date. The subsequent week's start dates are allocated based on the day the week starts. The end date is the day before the next week's start date, other than the last week which ends on the given end date.
-
The number of weeks is divided by the given number of periods to get the number of weeks in each period. This is used to set each period's start and end dates accordingly. The first and last periods may have irregular start or end dates, respectively, depending on the given data range. If the number of weeks is not exactly divisible by the number of periods, the result is rounded and the final period adjusted accordingly.
-
Period is the key for each entry within the calendar record. It must be unique, that is, there can only be a single period 1, period 2, and so on.
-
Each period's quarter number is based on the Q2, Q3, and Q4 week numbers. Q1 starts on week 1. Each period has a period number, period start and end dates, quarter number, and a list of weeks, each with a week number and start and end dates.
Figure 1-2 System Calendar Page

To edit the System Calendar, select a row and then select the Edit action. The row opens in edit mode. For an example of this page, see Figure 1-3.
To add a new entry:
-
Select the New action. The New System Calendar tab opens.
Figure 1-3 New System Calendar Page

-
In the Details section:
-
Financial Year: Select the financial year from the drop-down list. This field is mandatory.
-
Week Begins On: Select the first day of the week from the drop-down list.
-
Q2 Commences on Week, Q3 Commences on Week, and Q4 Commences on Week: Each field defines the start of a quarter. For each quarter, enter the number of the week in the year on which that quarter starts.
-
-
In the Periods page: set the period number and select the start and end dates for each period.

The list of weeks of each period shows the week start and end dates and the week number within the period and year. This record is read-only.

-
In the Unavailable Dates subtab, dates to be treated as non-working days can be added to the calendar. For example, a holiday such as New Year's Day could be added. For each unavailable date:
-
Name: Enter the name in the default language. This field is mandatory. Enter any translations.
-
Date: Enter a date or click the icon to select a date.
-
Comments: Enter any comments.
-
-
Select the Save action.
Calendar Year
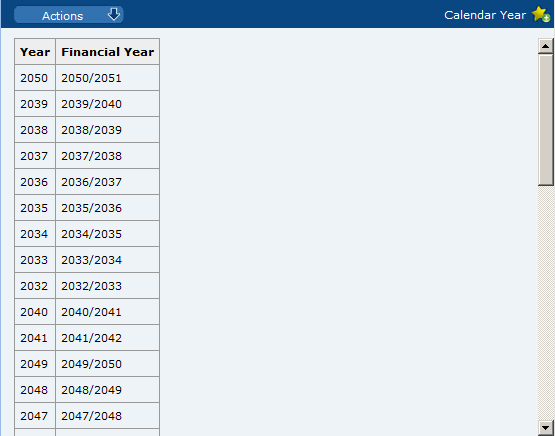
The Calendar Year page lists the years available for selection when creating a new System Calendar. The years are maintained as a simple keyword list.
To edit the list, select the Edit action. The list opens in edit mode. You can edit any of the entries.
To add a new entry, click Add. An entry is added to the list. Enter the year and financial year. To reposition an entry in the list, select the entry and then click Move Up or Move Down.
Figure 1-4 Calendar Year Page
System Calendar Import
An import facility is provided to load the system calendar from a CSV file.
Figure 1-5 System Calendar Import Page
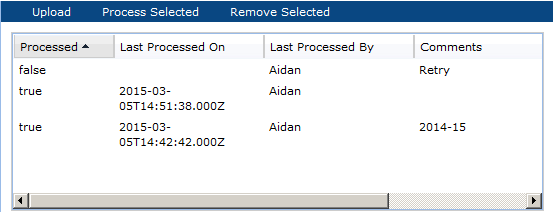
The following actions are available on this page:
-
Upload: The user is prompted, with the standard file selector, to attach a file to be processed. When a CSV file has been uploaded, it has false in the Processed column.
-
Process Selected: Select the file to be processed. If the selected file validation is successful, the contents are added as system calendar entries. When a CSV file has been processed, it has true in the Processed column.
-
Remove Selected: Select the file to be deleted. The user is prompted to confirm the deletion. The System Calendar is not affected in any way by the deletion; only the list entry is removed from the import area.
Previously imported and processed versions are retained until selected for deletion.
System Text
The configuration of the portal's languages, and system text (field labels, menu options, error messages, and so on, and the associated help text and translations) is accessible to administrators with the Power Administrator and Oracle Authorized User authority profiles.
To access the system text options, select the System Control option from the Admin drop-down list. The following options are available in the left pane:
Languages
Retailer users with the Oracle Authorized Administrator authority profile have access to the Languages option.
To activate, deactivate, or amend the description of a supported system language:
-
Select the Languages option in the left hand pane. The Languages page opens.
Figure 1-6 Languages Page

-
Select Edit and then either select or deselect one of the available languages.
-
Select Save & Exit.
System Text
Selecting this option presents a list view containing the portal's system text files.
The core default system text cannot be changed, however custom overrides can be set up to replace the system text within the portal. This can be used to apply custom terminology, guidance help text, and alternative translations.
Figure 1-7 System Text Page
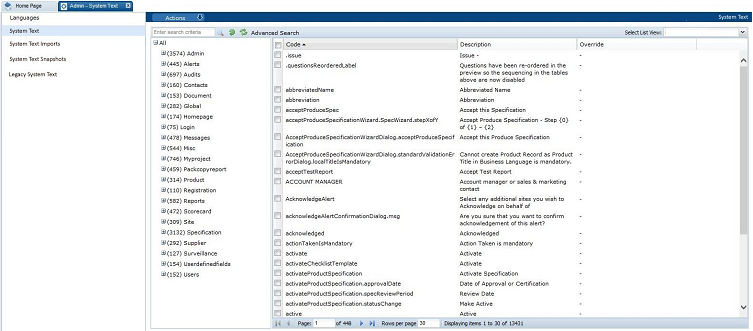
To edit the System Text, select a row and then select the Edit action. The row opens in edit mode. For an example of this page, see Figure 1-8.
To add a new entry:
-
Select the New action. The New System Text tab appears.
Note:
The actions to add and delete System Text items will usually only be used when new Custom Fields are being added to the portal.
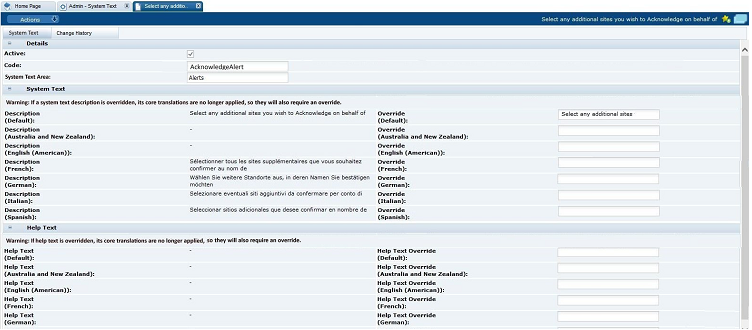
Figure 1-8 System Text Details Page
-
In the Details section, set the following values:
-
Active - check the box to activate this item.
-
Code - enter an identity code for the item.
-
System Text Area - the area of the system that this item relates to.
The System Text and Help Text sections are arranged with the core default text on the left hand side, which cannot be edited, and the custom overrides on the right. If the override is left blank, the core default text will be used. The fields are repeated for each of the portal's supported languages. If an override is subsequently removed, the system will revert to using the core system text.
Note:
If the core default language system text description or help text has an override applied, the associated core translation value is no longer applied as it is assumed the translation is no longer valid. An override translation must be created where translations are required.
-
-
In the System Text section, set the following values:
-
Description - the core default system text.
-
Override - the custom text to override the core default value.
-
-
In the Help Text section, set the following values:
-
Help Text - the core default help text.
-
Help Text Override - the custom help text to override the core default value.
-
-
Select the Save action.
-
Select the Reload System Text action from the System Text page to apply the changes to the portal.
System Text Imports
The System Text page includes the option to import system text changes as an alternative to manually editing the individual system text item. Used in conjunction with the System Text Export option, the import allows exported files of system text to be edited offline with a text editor prior to being imported back in through a single action.
Selecting this option presents a list view showing previous imports.
Figure 1-9 System Text Imports Page

To view the details of a previous import, select a row and then select the View action. The row opens in read mode. For an example of the content this page, see Figure 1-13.
To perform a new import:
-
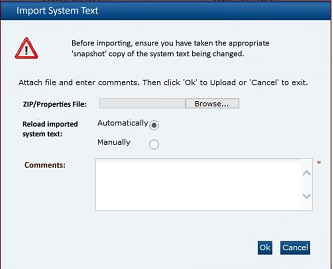
Select the Import System Text action. The Import System Text dialog box appears.
Figure 1-10 Import System Text Dialog Box
-
Click Browse to select an individual text file (or a ZIP file containing multiple text files) to import.
-
Choose to either automatically apply the system text to the application on completion of the import, or to manually apply it through the Reload System Text action. The manual option will typically be used where a series of system text changes are being imported and are to then be applied simultaneously.
-
Enter a comment to describe the changes being imported. This is a mandatory field.
-
Click Ok.
Note:
The import file must be a text file with the extension
.translation.Any special characters must be UTF-8 encoded.The file may contain blank rows or comments (rows that start with #); they will simply be ignored by the import process.
For further details of the file layout, see System Text Exports.
-
-
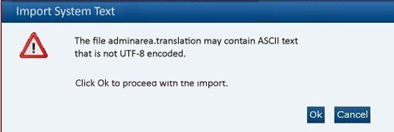
If the "\u" ASCII character escape sequence prefix is encountered in the file, indicating the presence of special characters that have not been UTF-8 encoded, the following message is displayed with the option to continue or cancel:
Figure 1-11 Import System Text Warning Dialog Box
-
To continue the import, click Ok. To return to the System Text page, click Cancel.
-
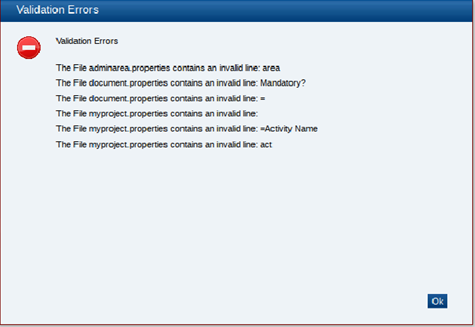
If errors are encountered the following dialog box appears:
Figure 1-12 Import System Text Errors Dialog Box
If no errors are encountered the system text is imported and a row is added to the System Text Import page.
-
To view the details of the import, select the row in the System Text Import page and then select the View action. The row opens in read mode.
Figure 1-13 System Text Import Details Page

-
In the Details section (all fields are read-only):
-
Version - this is automatically incremented for each import.
-
Created By - the name of the person who submitted the import.
-
Created On - the date and time of the import.
-
Comments - the comments that were entered when the import was run.
A copy of the imported file is automatically stored in the Attachments section.
-
-
If the option was selected to manually apply the changes, click the Reload System Text action when ready for the text to be applied to the portal.
System text records cannot be deleted.
System Text Exports
The System Text page includes the option to download system text files to your PC for offline editing prior to importing the changes back into the portal.
To perform an export:
-
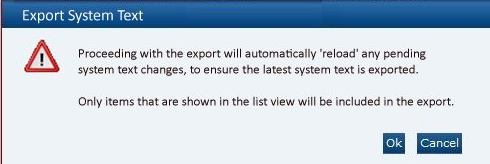
Select the Export System Text action. The Export System Text dialog box appears, explaining that the Reload System Text action will automatically run as part of the export to ensure any outstanding updates are first applied.
Figure 1-14 Export System Text Dialog Box
Note:
The export is based on the contents of the System Text page. Filter the list view using the quick or advanced search to contain the required system text items to be included. If no languages are selected, the export file will be empty.
-
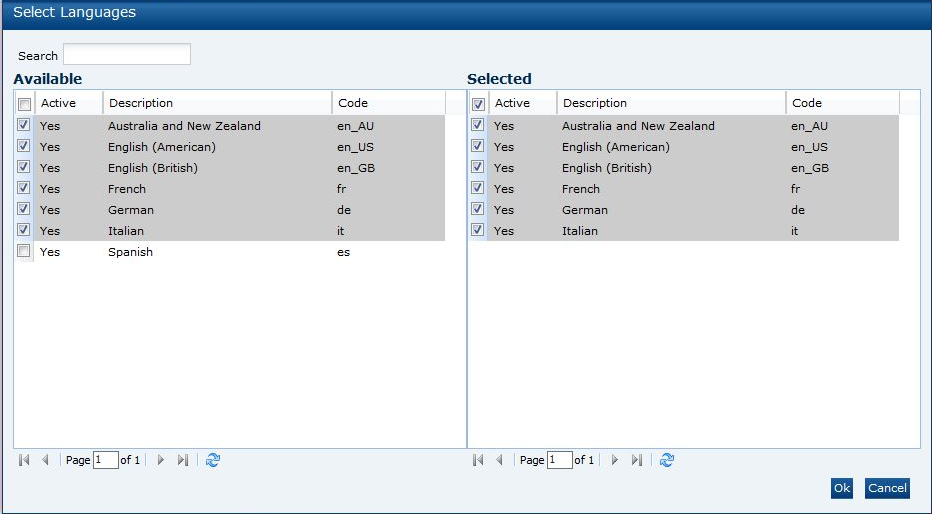
Click Ok. The System Text Export Languages dialog box appears, with all the active languages selected.
Figure 1-15 System Text Export Select Languages Dialog Box
-
Select the required languages to be included in the export and click Ok. A ZIP file is created containing the individual translation text files for the selected system text items and languages.
-
To save to a local location from which to open the text file, select Save or Save As.
The file is a text file with the .translation extension which can be opened and edited using any UTF-8 compliant text editor, such as Microsoft WordPad.
The file contains the current text value/description as it appears within the system. If a custom override has been set, that will be the value; otherwise the value will be the core default value. If a value is removed/ blanked and reloaded, the system will revert to showing the core default value. Each item is prefixed with its unique identity code, for example, the Oracle Login page contains a login field and a page title; if the system text of these items are "Log In" and "Oracle UK Login" respectively, they would appear in the file as:
oracle.loginPage.login=Log In
oracle.loginPage.loginPageTitle=Oracle UK Login
The file names are based on the system text area, with the language code appended, separated by underscore (for example, Audits_de.translation).
System Text Snapshots
The System Text page includes the option to take a copy of system text files prior to changes being made. This is similar to the export option, and if necessary, the snapshot files can be imported back into the system in order to regress changes back to a prior state.
Selecting this option presents a list view showing previous snapshots.
Figure 1-16 System Text Snapshots Page

To view the details of a previous snapshot, select a row and then select the View action. The row opens in read mode. For an example of this page, see Figure 1-19.
To create a new snapshot:
-
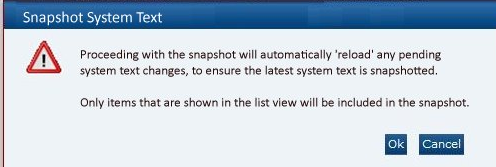
Select the Snapshot System Text action. The Snapshot System Text dialog box appears, explaining that the Reload System Text action will automatically run as part of the snapshot to ensure any outstanding updates are first applied.
Figure 1-17 Snapshot System Text Dialog Box
Note:
The snapshot is based on the contents of the System Text page. Filter the list view using the quick or advanced search to contain the required system text items to be included.
-
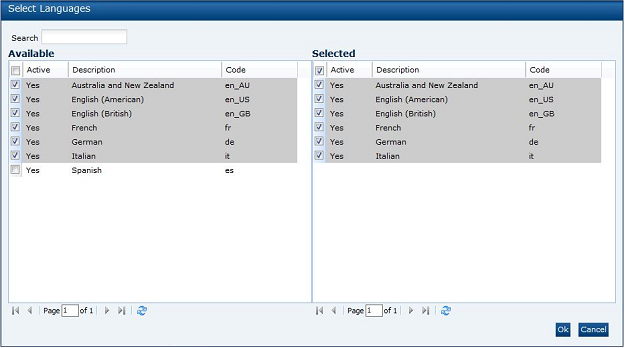
Click Ok. The System Text Snapshot Languages dialog box appears, with all the active languages selected.
Figure 1-18 System Text Snapshot Select Languages Dialog Box
-
Select the required languages to be included in the snapshot and click Ok. A ZIP file is created containing the individual translation text files for the selected system text items and languages and a row is added to the System Text Snapshots page.
-
To edit the details of the import, select the row in the System Text Snapshots page and then select the Edit action. The row opens in edit mode.
Figure 1-19 System Text Snapshot Details Page

-
In the Details section (all fields except Comments are read-only):
-
Version - this is automatically incremented for each snapshot.
-
Created By - the name of the person who submitted the snapshot.
-
Created On - the date and time of the snapshot.
-
Comments - this is the only editable field.
The snapshot ZIP file is automatically stored in the Attachments section.
-
To delete a System Text Snapshot, select a row and then select the Edit action. The row opens in edit mode. Select the Delete action.
Legacy System Text
Selecting this option presents a list of the system text spreadsheets that were used in a prior version of the portal which used spreadsheets to manage the system text; although now redundant, the spreadsheets are retained for reference purposes.
To view a legacy system text spreadsheet:
-
Select the row in the list view and click Download Selected.
Figure 1-20 Legacy System Text Page

-
To save to a local location from which to open the spreadsheet, select Save or Save As.
To delete a legacy system text spreadsheet, select a row and click Remove Selected.