3 User Information
You can manage your user profile and preferences from the Home page. Changes made to user information take effect immediately.
The following topics are covered in this chapter:
Changing your Email Address
Your user details are maintained in your Brand Compliance user account, other than your password and email address, which are maintained in your IDCS or OCI IAM profile.
Note:
Brand Compliance and IDCS or OCI IAM use different formats for storing names: Brand Compliance has a single name field; IDCS or OCI IAM has three separate fields. Therefore, there is no synchronization of the name fields.
When your IDCS or OCI IAM profile is created, the First Name field is populated with the full name from Brand Compliance; the Middle Name and Last Name fields are set to blank or a dash. You can subsequently change these in IDCS or OCI IAM, without affecting the name in Brand Compliance.
The Login Id cannot be changed; it provides the unique link between the Brand Compliance user account and the IDCS or OCI IAM user profile.
To change your email address using IDCS, see Changing your Email Address using IDCS.
To change your email address using OCI IAM, see Changing your Email Address using OCI IAM.
Changing your Email Address using IDCS
To change your email address:
-
Open your IDCS profile.
-
Click the icon showing your initials, in the top right hand corner, to open the IDCS profile menu.
-
Click My Profile and select the Email Options tab to open the Emails page.
Figure 3-1 IDCS Emails Page

-
The page contains your primary email address and an optional alternative recovery email address. Click Change for the primary email address.
-
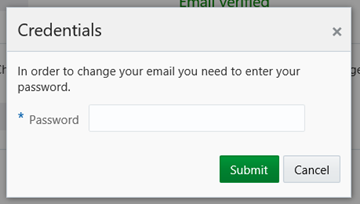
Enter your password in the Credentials dialog box, and click Submit.
Figure 3-2 IDCS Credentials Dialog Box
-
Enter the new email address and click Save & Verify.
-
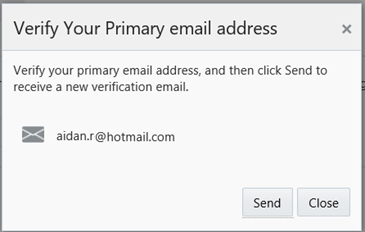
Click Send on the Verify Email Address dialog box. You will receive a Please verify your email address email.
Figure 3-3 IDCS Verify Email Address Dialog Box
-
Click Email Verification in the email, and then click the link on the confirmation to proceed to the IDCS Login page.
If you wish to set an alternative recovery email address in the event of your primary email address being unavailable, repeat the above steps for the recovery email address.
When your make changes to your IDCS profile you may receive a Your user profile has been updated email. Click View Changes To My Profile in the email to log in to IDCS and view your profile.
Changing your Email Address using OCI IAM
To change your email address:
-
Click the Profile icon, in the top right hand corner, to open the OCI IAM profile menu.
-
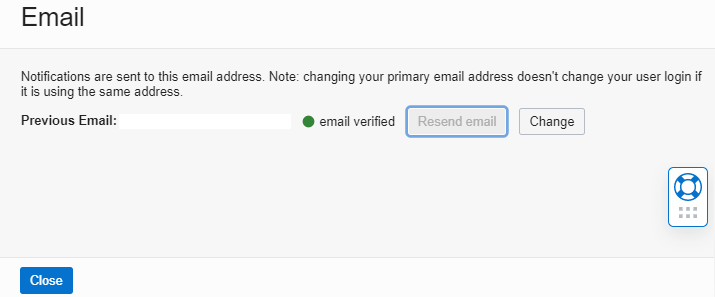
Click My Profile. On the My Profile page, click Select More Actions and then select Edit email from the menu. The Email page is displayed.
Figure 3-4 OCI IAM Email Page
-
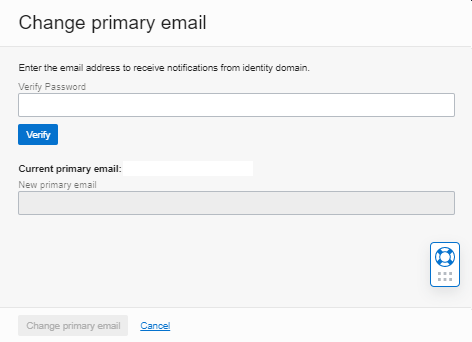
On the Email page, select Change. The Change Primary Email page is displayed.
Figure 3-5 OCI IAM Change Primary Email
-
Enter the password and click Verify.
-
Once the password is verified, enter the New primary email address and select Change primary email.
When your make changes to your OCI IAM profile, you may receive a Your user profile has been updated email. Click View Changes To My Profile in the email to log in to OCI IAM and view your profile.
Editing your Profile
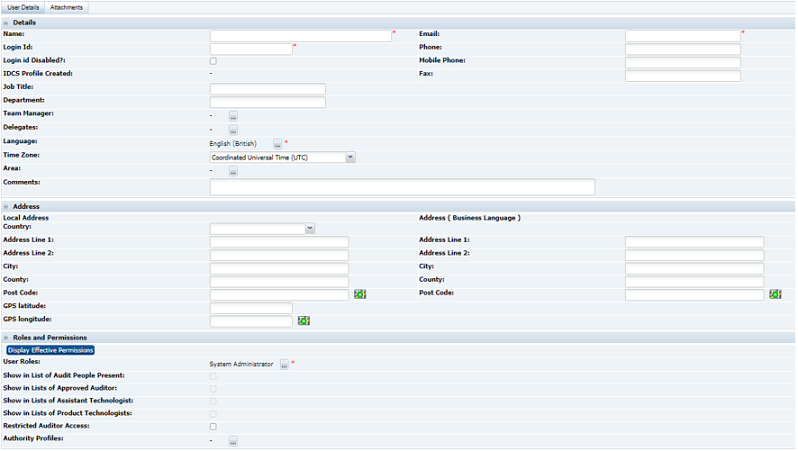
To edit your user profile, select Edit Profile. Your user record opens in edit mode. You can edit any of the fields except for the following:
-
Login Id
-
Logon id Disabled?
-
External Authentication
-
Roles and Permissions fields
The following actions are available on this page:
-
Validate. The values on the page are validated.
-
Save. The user record is saved.
-
Save & Exit. The changes are saved and the tab is closed.
-
Exit. In the Save dialog box, select if you want to save or discard the changes.
Figure 3-6 User Record
Editing your Preferences
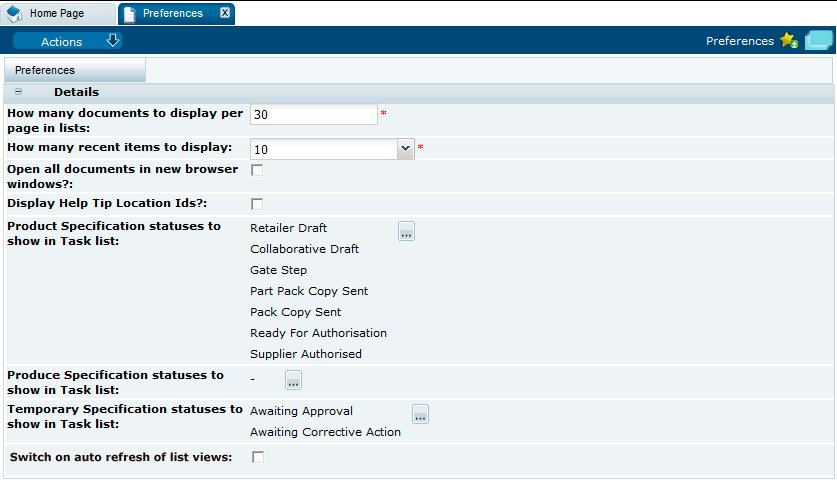
To edit your preferences, select Preferences. The Preferences tab opens. You can edit all of the details on this page.
The following actions are available on this page:
-
Validate. The values on the page are validated.
-
Save. The user record is saved.
-
Save & Exit. The changes are saved and the tab is closed.
-
Exit. In the Save dialog box, select if you want to save or discard the changes.
-
Restore default settings.
-
Restore specification status settings.
Figure 3-7 Preferences Page
Note:
The Switch on auto refresh of list views option will only appear if the feature is enabled for the portal. If used, it potentially improves performance by eliminating the constant rebuilding of lists.
If it is enabled, check the option if you wish to have the contents of list automatically refreshed each time you open the list during the session.
If unchecked, the contents of list views will be automatically refreshed when you initially open the list during the session, but if you switch to another page and return to the list, the contents will only refresh if you use the Refresh action (or close and reopen the list view).