10 Library Administration
Users with the Library Administration authority profile use Library to manage the library structure and publish documents to the user base. Access to documents can be managed based on internal retailer users and external supplier users. The logging and tracking of user readership is also available.
To access Library, select Library on the main navigation bar. The list of published documents that can be accessed by the user is shown. Figure 10-1 shows an example of this page.
Figure 10-1 Library Tab
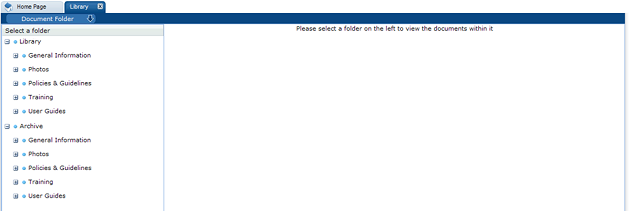
Document Folder Pane
The contents of the document library are presented as a structured hierarchy where documents are organized within a tree of libraries that contain any number of folders and sub-folders.
A user only sees the folders and sub-folders that contain documents to which the user has access. Clicking a folder or sub-folder name displays the list of all documents in the folder or sub-folder and all its sub-folders.
When a user puts focus on the lowest level folder, the number of documents is shown in brackets:

Archive shows the folder and sub-folder structure of archived documents. It is only available to users with the Library Administrator authority profile.
Permissions
Permissions control whether a user has access to the document library. Generally, all users are granted access. Access to individual documents can be granted or refused on a user basis. The Library Reader authority profile provides reader access to the library.
Locating a Document
To display all the documents within and beneath a folder, click the folder name in the Document Folder pane area. Only those documents to which the user has access are shown.
Figure 10-2 Folder Content Display
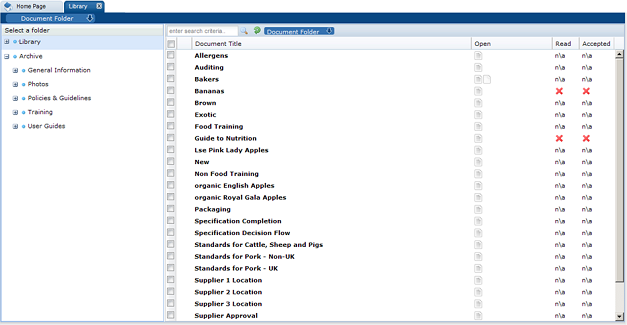
Table 10-1 describes the columns displayed for the selected folder.
Table 10-1 Columns Displayed for a Selected Folder
| Column | Icons | Description |
|---|---|---|
|
First |
Shows the status of the document. |
|
|
|
This document is only visible to internal users, that is, the retailer's users. The document title in the next column is shown in red. |
|
|
|
This document is mandatory. This icon is only shown for supplier users. |
|
|
|
This document has not been published and is therefore only visible to users with the Library Administrator authority profile. |
|
|
Document Title |
The list of document titles is sorted by the icon in the first column. Clicking a document title opens the summary document as a new tab. |
|
|
Open |
Indicates the type of attachments to the document, if any. If there are more than three attachments, an ellipsis is appended to the icon for the third attachment. |
|
|
|
Microsoft Excel spreadsheet |
|
|
|
Microsoft Word document |
|
|
Read |
Indicates if this document has been read by the user. |
|
|
|
User has not read the document. |
|
|
n\a |
Indicates the document has Log Readership set to NO. |
|
|
|
User has marked the document as read. |
|
|
Accepted |
Indicates the acceptance of the document by the user. |
|
|
|
User has not accepted the document. |
|
|
n\a |
Indicates the document has Log Readership set to NO. |
|
|
|
User has accepted the document. |
|
The following actions are available in this pane:
-
Mark as read
-
Mark as accepted
Managing Folders
The actions for managing folders are available to users with the Library Administrator authority profile. A hierarchy of folders can be formed by selecting an existing folder and creating a new folder beneath it.
This section covers the following actions available to manage folders:
Creating a Folder
To create a new folder:
-
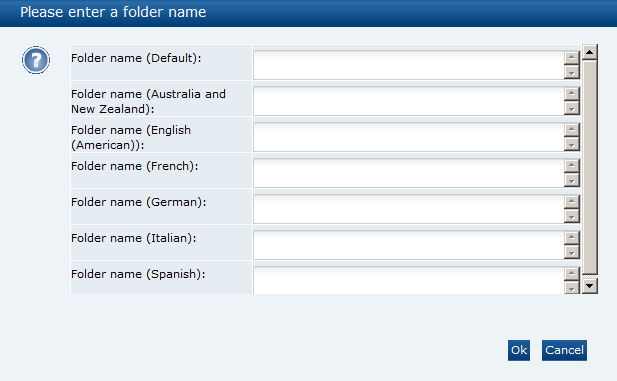
Select a folder in the left pane and select the New Folder action. A dialog box appears for entering the folder names.
Figure 10-3 New Folder Dialog Box
-
Enter a folder name in any of the languages as needed. Select Ok.
If there are no errors, the folder is created in the Archive area.
-
If a folder name is entered for the Default language and that folder name is not unique, the Cannot Save Folder dialog box appears. Select Ok in the dialog box and reenter the folder name for the Default language.
If there are no errors, the folder is created in the Archive area.
Editing a Folder
To edit a folder:
-
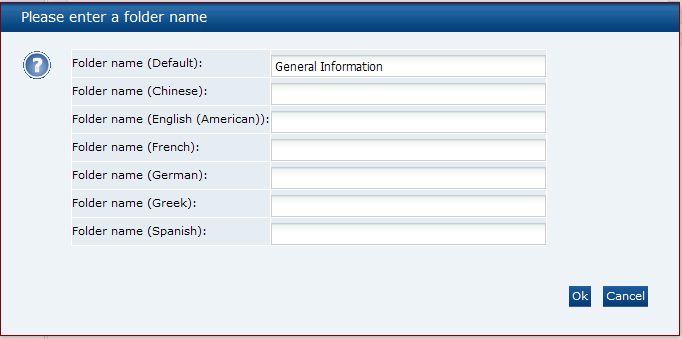
Select a folder in the left pane and select the Edit Folder action. A dialog box appears for changing the folder names.
Figure 10-4 Edit Folder Dialog Box
-
Enter any changes. Select Ok.
If there are no errors, the folder names are updated.
-
If a folder name is not unique, the Cannot Save Folder dialog box appears. Select Ok in the dialog box and reenter the folder name.
If there are no errors, the folder names are updated.
Deleting a Folder
A folder can only be deleted if it does not contain any documents. To delete a folder:
-
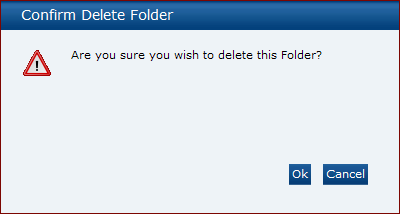
Select the folder in the left pane and select the Delete Folder action. The Confirm Delete Folder dialog box appears.
Figure 10-5 Delete Folder Dialog Box
-
To delete the folder, select Ok.
If there are no errors, the folder is deleted.
-
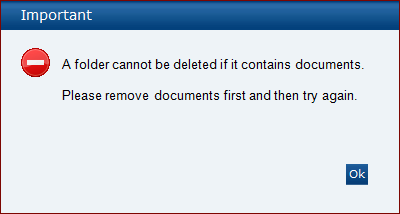
If the folder contains documents, the following dialog box appears. Select Ok in the dialog box. Remove the documents and then try to delete the folder again.
Figure 10-6 Cannot Delete Folder Dialog Box
Managing Archive Folders
The archive area is only visible to Library Administrators. It is shown at the same level, but beneath the root node. For an example, see Figure 10-1.
The folder structure of the Archive area mirrors that of the Library area above it. Documents that have been set as archived are no longer visible to the general user, but remain accessible through this area. If an archived document is then un-archived, it reappears in the Library area within its original file structure.
The Read and Accept document actions are not available from this area. The option to delete a folder in the archive area is only available if the folder contains no documents.
Managing Documents
This section covers the following operations available to manage documents:
Creating a New Document
To create a new document, select a folder in the archive area and select the New Document action. The New Document tab opens.
Figure 10-7 New Document Tab
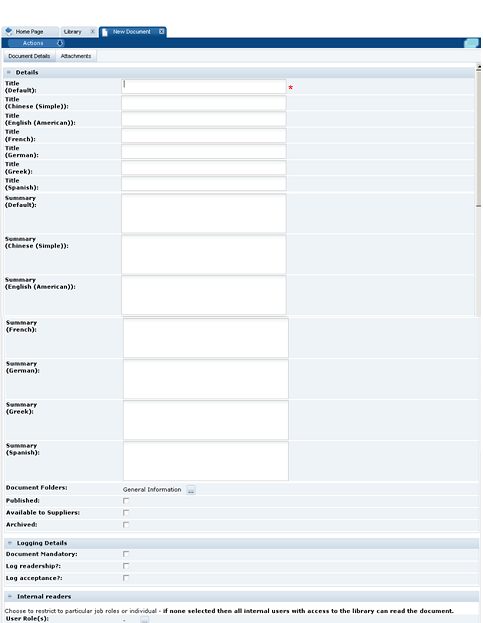
Table 10-2 describes the fields for this tab.
Table 10-2 Fields in the New Document Tab
| Field | Description |
|---|---|
|
Title |
The completion of the Title in the default language is mandatory in order to save the document. The document title can be added for the other supported languages so that users logged in with an alternative language can see documents in their own language. |
|
Document Folders |
This shows where this document is to appear and is used to assign the document to one or more folders within the library. |
|
Published |
This controls if the document can be seen by non-administration users. |
|
Available to Suppliers |
This controls if the document can be seen by supplier (External) users. This field is only available to users with the Library Administrator profile authority. For more information, see Available to Suppliers Field. |
|
Archived |
This is used to archive the document when required. If this is checked, the document moves to the archive area and vice versa. |
|
Logging Details |
If Document Mandatory is checked:
If Document Mandatory is not checked:
To log that users are to read this document, check Log Readership. To log that users are to accept this document, check Log Acceptance. Documents are only shown as mandatory for external users. Documents can be set as mandatory for specific external users by assigning contact roles. This field is only available to users with the Library Administrator profile authority. |
|
Internal Readers |
This controls if all internal readers can see and read this document. This field is only available to users with the Library Administrator profile authority. For more information, see Internal Readers Field. |
Available to Suppliers Field
If this field is checked, the following field becomes available:
Figure 10-8 External Readers Field

The Sites field is used to target the visibility of the document to specific sites. This is done using the Select Sites dialog box.
Figure 10-9 Select Sites Dialog Box
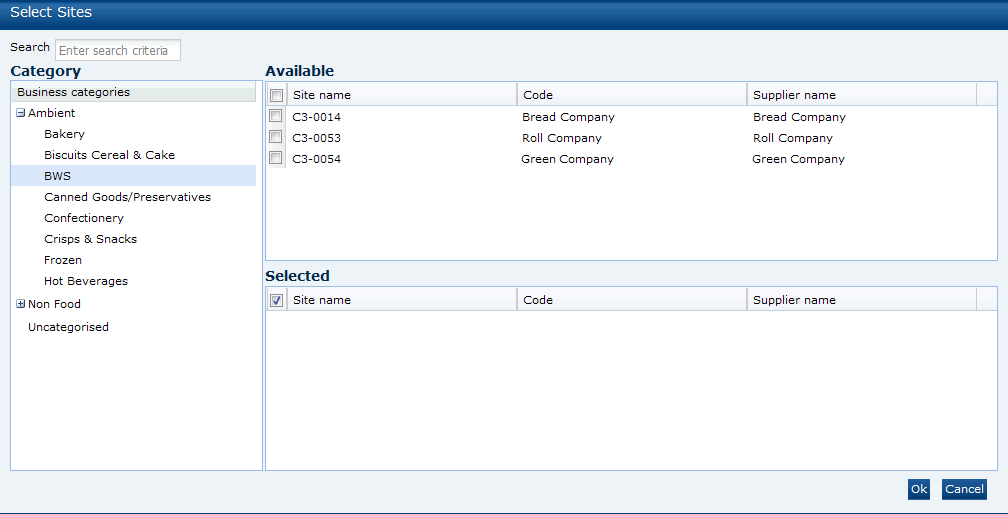
Any sites that have not been assigned a Business Category can be found by selecting Uncategorised shown at the bottom of the Category pane. Sites can be identified using the business categories shown in that pane. If there are no sites selected, all sites have visibility to the document.
Internal Readers Field
Internal readers can be assigned based on user roles or users.
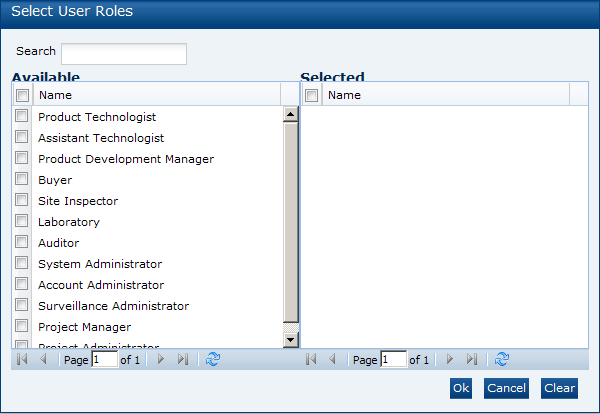
User Roles can be specified if the document is targeted to users with a particular user role. If none are selected, all internal users are able to read and see the document. The Select User Roles dialog box is used.
Figure 10-10 Select User Roles Dialog Box
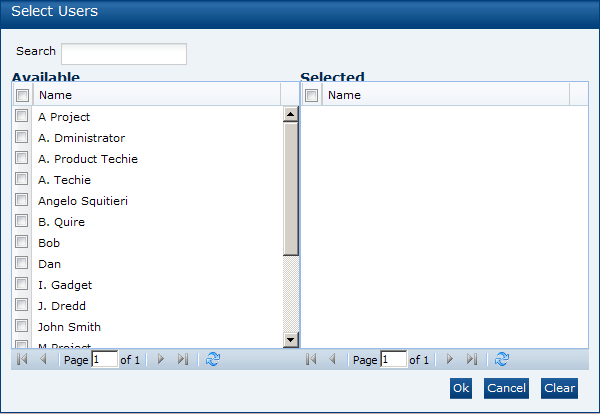
Users can be specified if the document is targeted to specific internal users. If none are selected, all internal users are able to read and see the document. The Select Users dialog box is used.
Figure 10-11 Select Users Dialog Box
Copying a Document
To create a copy of a document in the selected folder, select the Copy action. The Copy Document dialog box appears. Select Ok. A copy of the document is created:
-
The whole record is copied, except attachments and readership logs.
-
The words, Copy of, are added to the document title.
-
The copied document appears in the same folder.
Deleting a Document
A document can be deleted if it does not contain any readership log details, other than the record of which users have opened it, or has been archived. To delete a document, select the Delete action. The Delete Document dialog box appears. Select Ok. The document is deleted:
-
The document is physically deleted.
-
If there are no more documents left in the folder, the folder is no longer visible within the main library for non-Library Administrator users.
Archiving a Document
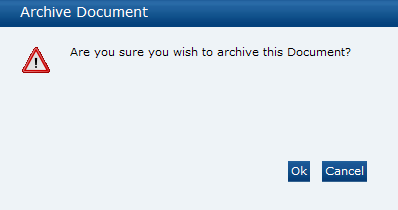
To archive a document, select the Archive action. The Archive Document dialog box appears.
Figure 10-13 Archive Document Dialog Box
Select Ok. The document is archived:
-
The document is no longer be visible in the main library.
-
The document is visible in the same folder location within the archive area.
-
If there are no more documents left in the folder, the folder is no longer visible within the main library for non-Library Administrator users.
Translating Folders and Documents
The Document Administrator has the ability to create translations for folders and documents in the document library to the supported languages.
Translating Folders
The folder title and subject fields can be translated. Translations can be added when creating or editing a folder. For more information, see Creating a Folderand Editing a Folder.
Translations for folders and documents can also be entered directly when the record is being edited.
Translating Documents
Users with the Library Administrator authority profile can add translations for documents. To add a translation to a document:
-
Open the document in Read mode. Select the Translate action. The Select Language dialog box appears.
Figure 10-14 Select Language Dialog Box

-
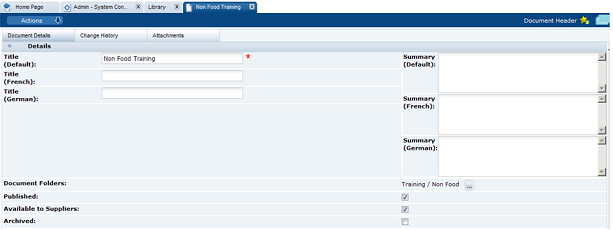
Select the languages from the drop-down list and select Ok. The document details appear. The file is open in Edit mode. The fields for Title and Summary appear for each selected language.
Figure 10-15 Document Details for Translation
-
Enter the translations for the Title and Summary fields. Select Ok when completed.
Viewing Translations
The View Translations action is used to see all the translations for a document. This action is available to all users.
To see the available translations for a document, open the document in Read mode and select the View Translation action. The translation details appear.
Figure 10-16 View Translations
System Parameters
To maintain the parameters used to support Library, select the System Control option and then System Parameters.
Table 10-3 shows the specific system parameters, by subtab on the System Parameters page, used to support Library.
Table 10-3 System Parameters to Support Library
| Subtab | Parameter | Description |
|---|---|---|
|
Urgent Items |
No Days Before Read By Date |
Used to populated the UIM with items that are near to the expiration date that have not yet been read by the user. |
|
Urgent Items |
Show Documents |
If set to Yes, document items are shown in the UIM. If set to No, document items are not shown. |
