Users
You have the ability to view, search and edit a list of users, so that you can update user details.
Searching for Users
To search for a user do the following:
-
Click Tasks.
-
Click Admin
-
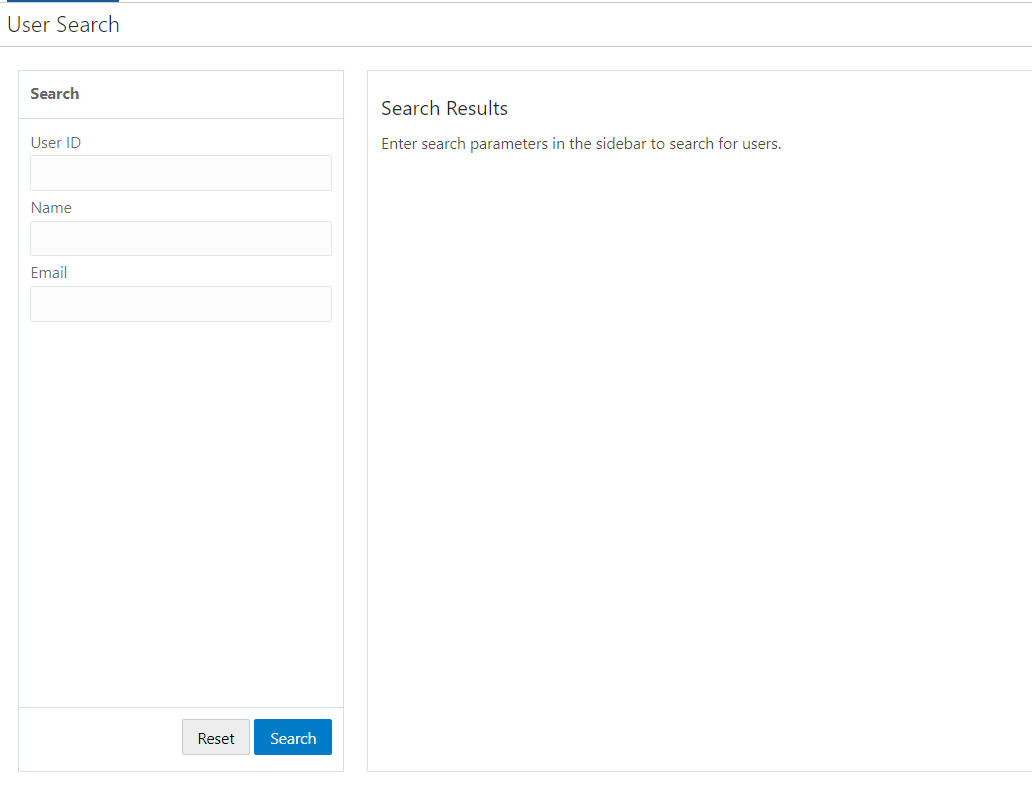
Click User. The User Search window displays.
Figure 13-93 User Search
-
Enter the USER ID, Name, or Email of the user.
-
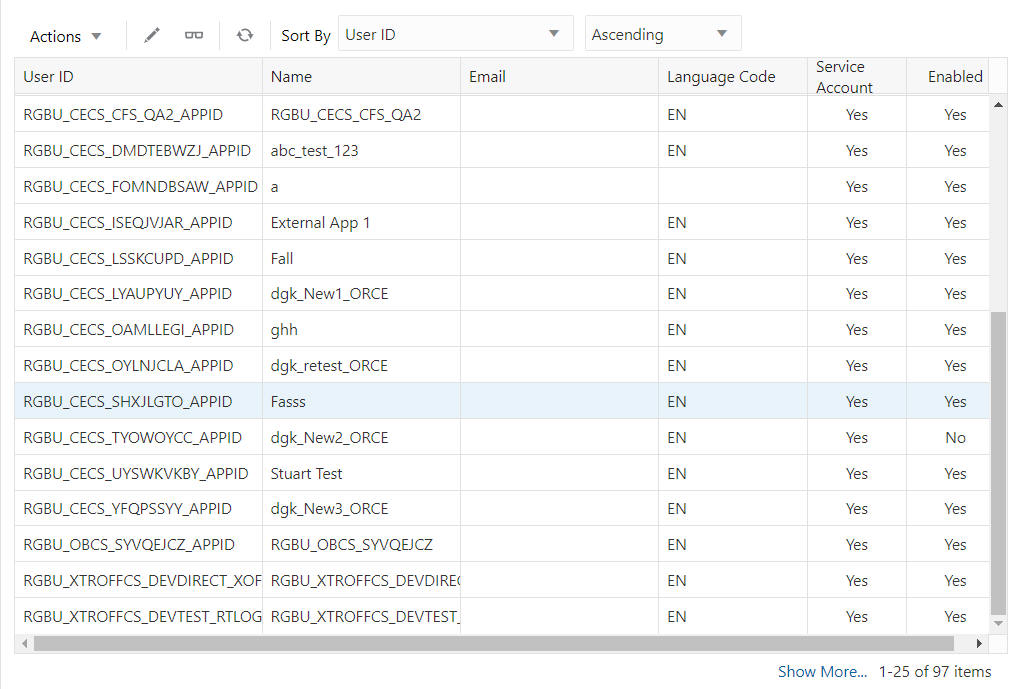
Click Search. The list of users matching the search criteria displays.
Figure 13-94 Search Results
Viewing a User
To view a User, do the following:
-
Highlight the row of the User you want to view.
-
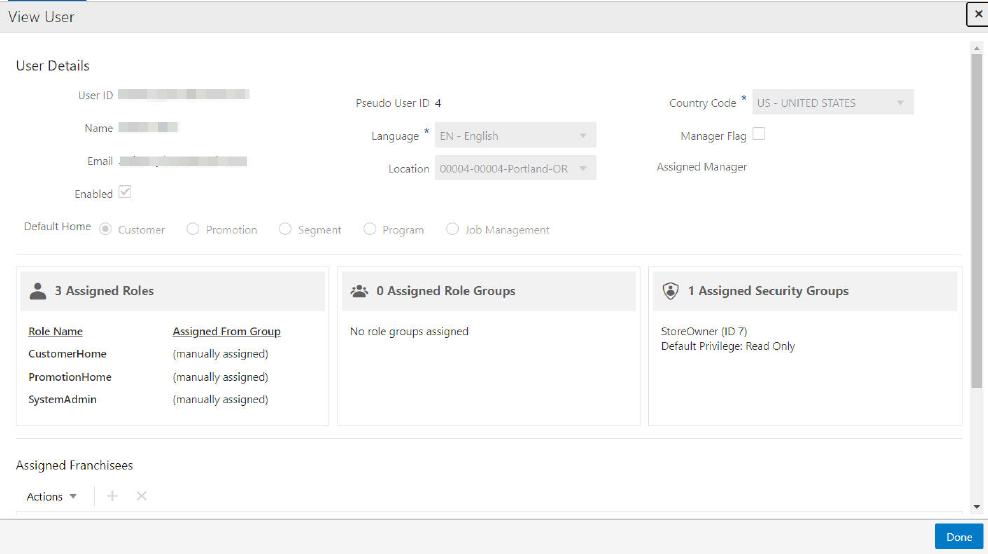
Click the Actions menu or the View icon to open the View Franchisee window.
Figure 13-95 View User
-
View the details of the User and click Done to close the window.
Editing Users
To edit a User do the following:
-
Highlight the row of the User.
-
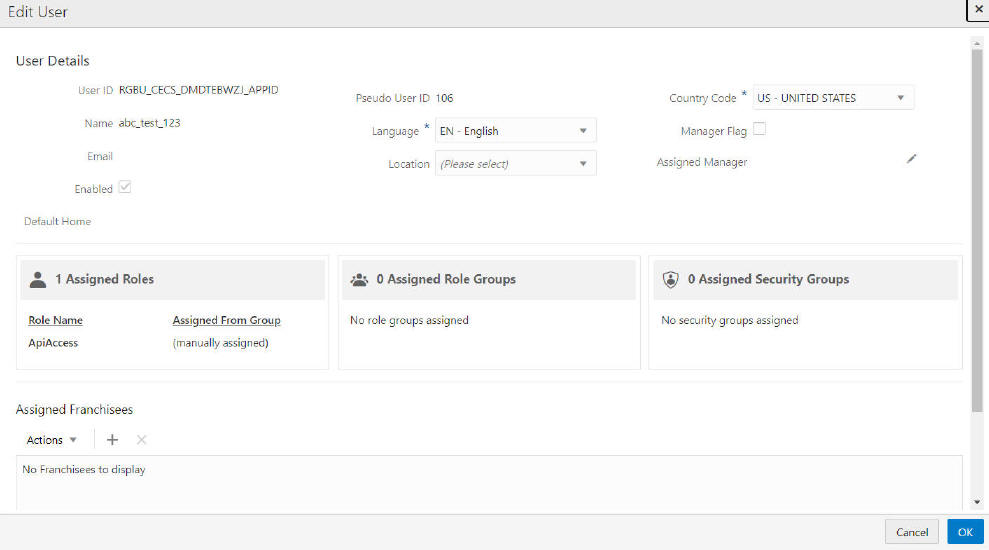
Click the Actions menu and select Edit, or click the Edit (Pencil) icon. The Edit User window displays.
Figure 13-96 Edit User
-
The User Details editable regions for each user will vary based on privileges. Typically you can edit the Language, Country Code, Assigned Manager, and Default Home Page.
Assign a Manager
-
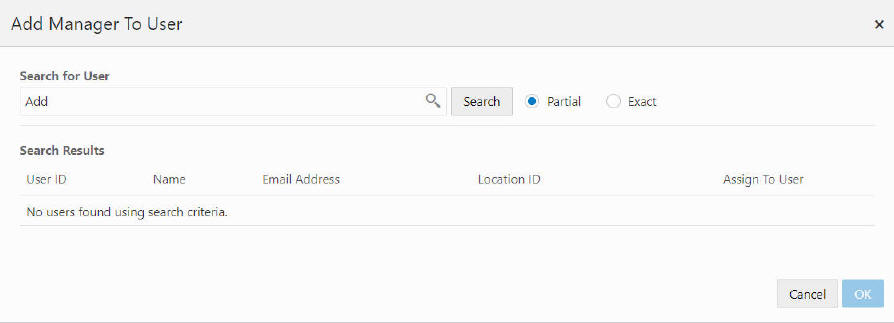
Click the Assigned Manager Pencil icon. The Add Manager to User window displays.
Figure 13-97 Add Manager To User
-
In the Search for User field, enter the User ID, Name, or Email Address of the user you want to search for.
-
Select Partial, if you want to results that match part of what you enter, or select Exact if you only want results that are an exact match.
-
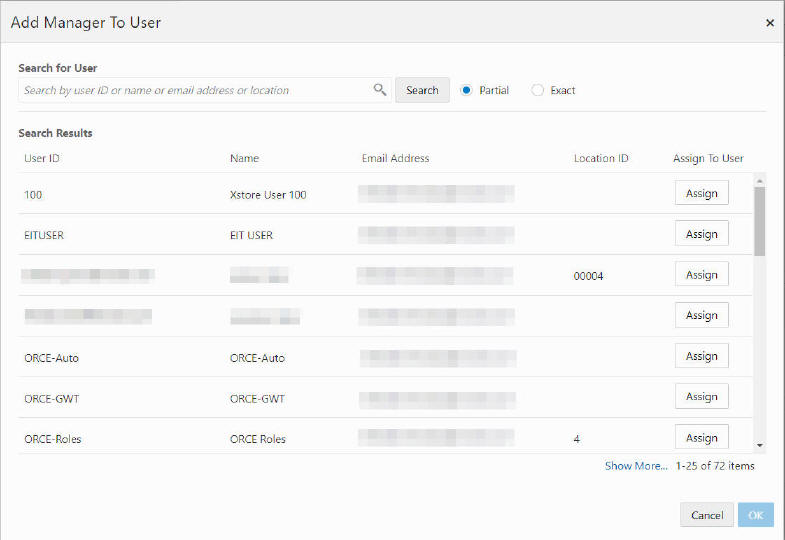
Click Search. A list of users matching the search text is displayed in the Search Results grid.
Figure 13-98 Search Results Grid
Note:
The results display in batches of 25 records. When more than 25 records are available, click Show More... to view more results.
-
For each user you wish to assign, click Assign.
-
For each user you wish to unassign, click Unassign.
-
Click OK to accept the changes, or Cancel to close the window without saving.
Assigned Franchisees
-
You can assign Franchisees to the User.
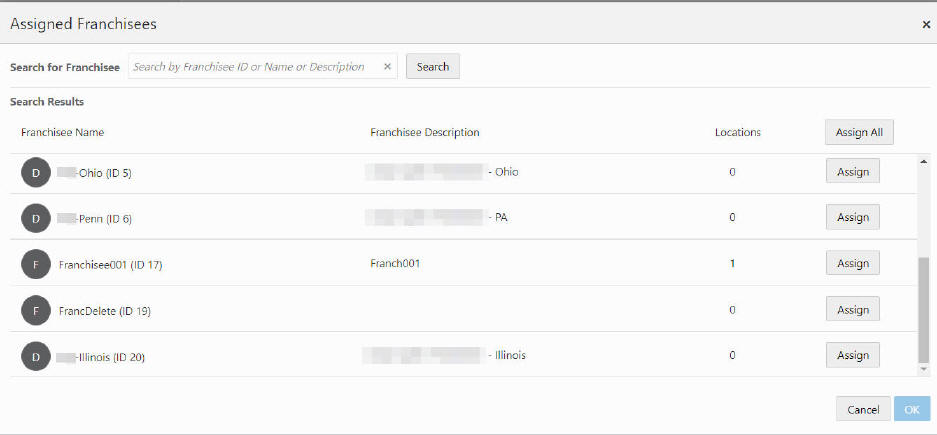
Click the Add (+) icon, or choose Add from the Actions menu. The Assigned Franchisees window displays.
Figure 13-99 Assigned Franchisees

-
Enter any or part of a Franchisee ID, Name, or Description.
-
Click Search. The Search Results list appears.
Figure 13-100 Search Results
-
For each Franchisee you wish to assign, click Assign.
-
For each user you wish to unassign, click Unassign.
-
Click Assign All to assign all of the Franchisees that appear in the search results.
-
Click OK to accept the changes, or Cancel to close the window without saving.
-
To delete a previously assigned Franchisee, highlight the row of the Franchisee and click the X icon, or click the Action menu and click Delete.
-
After all edits are finished click OK save the changes, or click Cancel to close the window without saving.