Prerequisites
In order to implement any meaningful customizations, you will need to meet the prerequisites listed below. Furthermore, the examples in this chapter can be replicated in your RDS environment. Replicating the examples will both help you understand the development context and provide assurance that the prerequisites have been met prior to starting implementation.
-
A Retail Home instance. Contact your RDS System Administrator for details – Oracle Support does not provide this information.
-
An IDCS Authorization Server host. Contact your RDS System Administrator for details – Oracle Support does not provide this information.
-
An Oracle Cloud account. Contact your RDS System Administrator for details on setting up your Oracle Cloud account.
-
A working knowledge of Oracle Retail Home.
-
A working knowledge of the Oracle Cloud Console (on the web search for Using the Oracle Cloud Console for the latest documentation).
-
Access to an APEX workspace within an RDS tenant (see user management above).
-
Access to a suitable Object Storage service.
-
Access to a suitable object storage bucket. RDS does not automatically come with a customer accessible object storage bucket. Provisioning an object storage bucket for use with RDS is a customer responsibility. Bear in mind, FTS, when available, will not be able to produce usable writable PARs for DBMS_CLOUD.EXPORT_DATA (EXPORT_DATA is expecting a prefix or bucket URI, not an object URI). Readable PARs generated by FTS for importing data into RDS, however, are usable with DBMS_CLOUD.COPY_DATA.
Accessing the APEX UI
You will need a Retail Home endpoint URL to perform the steps described below.
APEX is a browser-based application. You access APEX by navigating to the Retail Home Application Navigator and tapping RDS APEX/ORDS (RDS APEX/ORDS is included in the Application Navigator by default).
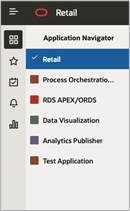
It is the responsibility of RDS workspace admin to create development user accounts for each user requiring access to one or more APEX workspaces. for you so that you will be . See the APEX User Management section above for additional details.
Before proceeding:
-
Verify access to Retail Home
-
Verify access to the relevant APEX workspaces.
Obtaining ORDS Service Credentials
ORDS services use OAUTH 2 for authentication. All services are authenticated. What this means in practice is that a short-lived token is used for authentication. That token is generated using a well-known service, which authenticates using basic auth. The basic auth credentials (i.e., client id and client secret) are obtained from Retail Home.
-
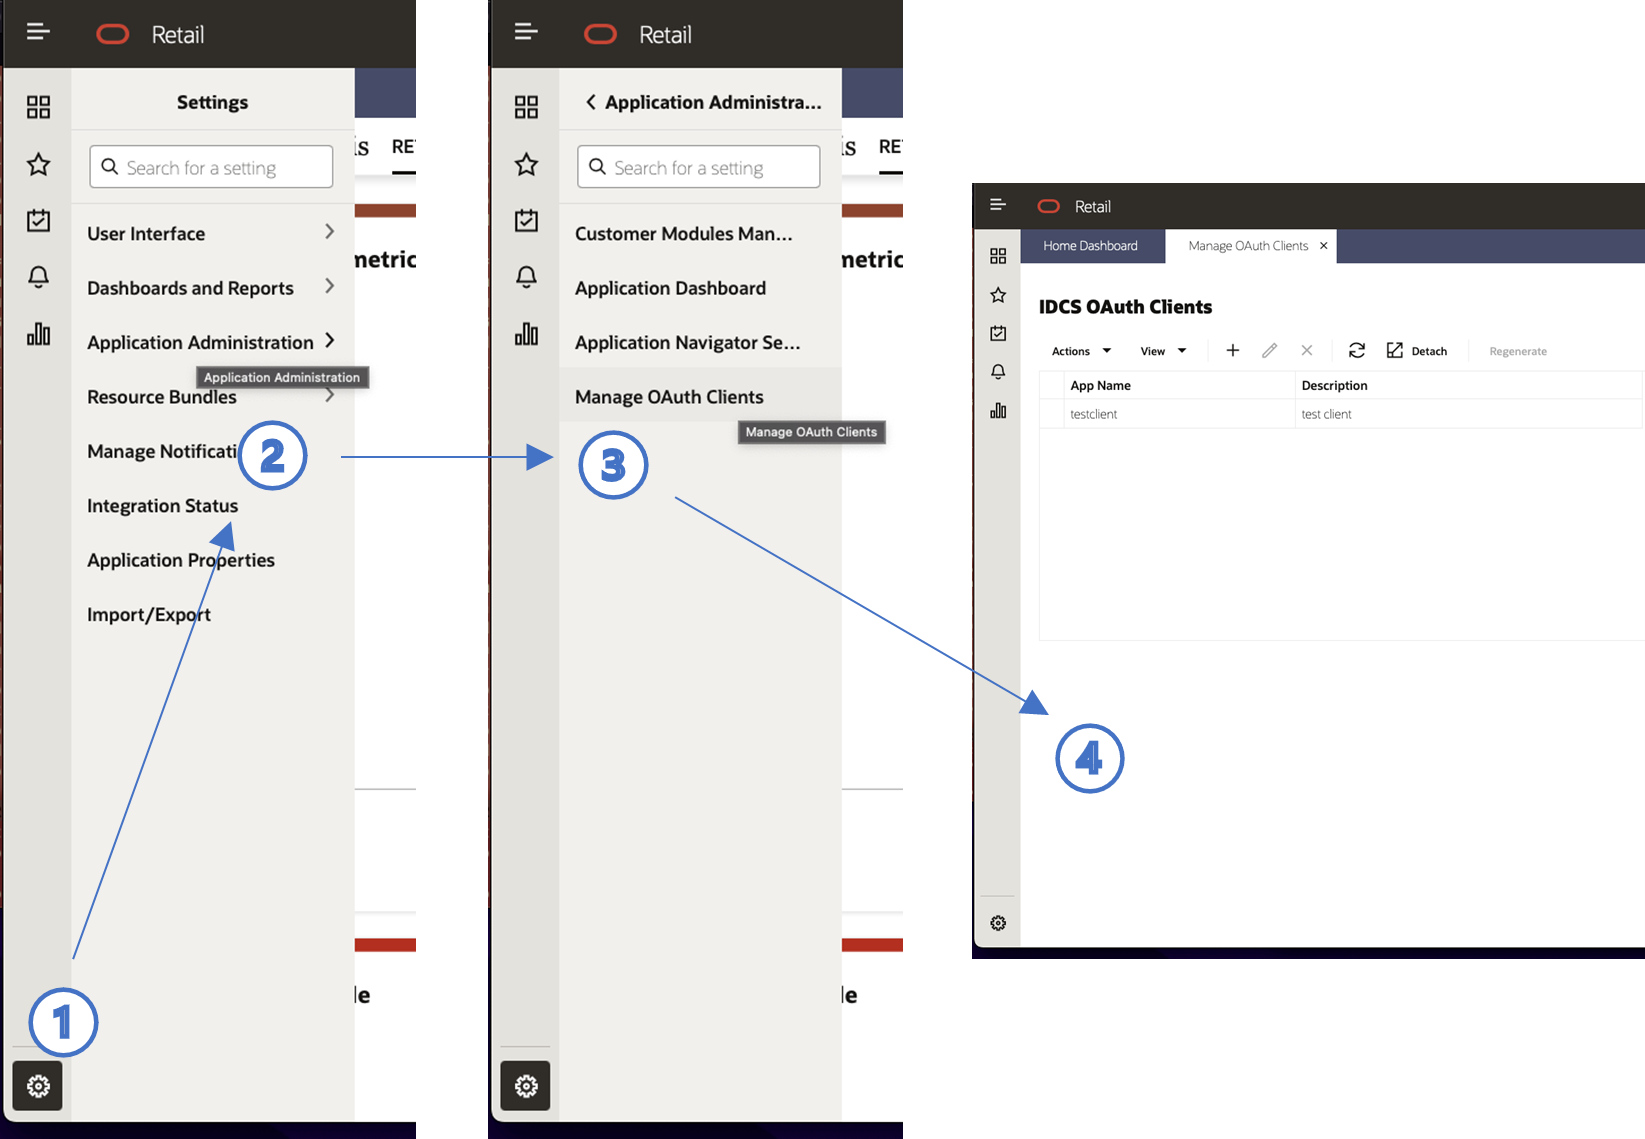
In Retail Home, navigate to Manage OAUTH Clients page by tapping settings (1), then tapping the Application Administration menu item (2), and lastly tapping the Manage OAUTH Clients menu item to arrive at the Manage OAUTH Clients page (4).
-
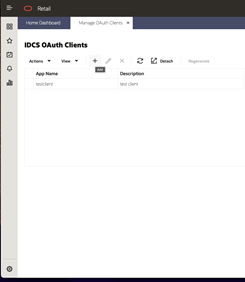
Tap the + button.
-
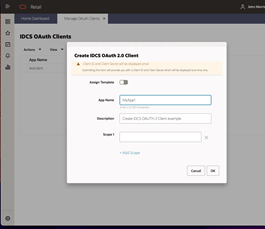
A popup dialog will appear. Provide an App Name and Description. Leave Scope blank. Tap OK.
-
A new dialog window will appear with a Display Name, Client ID, and Client Secret. Retain this information. It will not be displayed again. Tap Done when the information has been copied. Note that new credentials can be created at any time and that production, stage, and development will have different credentials.
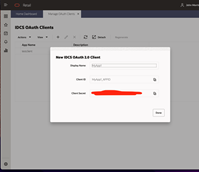
Consult Retail Home Application Administration Guide for additional details on managing OAUTH clients.
Before proceeding:
-
Verify that a client id and secret can be created in Retail Home.
-
Retain the client id and secret for future use.
Obtaining a Pre-Authenticated Request (PAR) URL
If you do not anticipate using Object Storage for integration, you can skip this section. You will need to use the Oracle Cloud Console to perform the steps below.
A pre-authenticated request, or PAR, provide a way to let users access a bucket or object without having their own credentials. Users continue to have access to the bucket or object for as long as the creator of the request has permissions to access those resources.
When you create a pre-authenticated request, a unique URL is generated. Anyone you provide with this URL can access the Object Storage resources identified by the pre-authenticated request. See Using Pre-Authenticated Requests in the Oracle Cloud Infrastructure Documentation for additional details.
The steps to create a writable PAR for specific object are as follows:
-
Login to you Oracle Cloud account
-
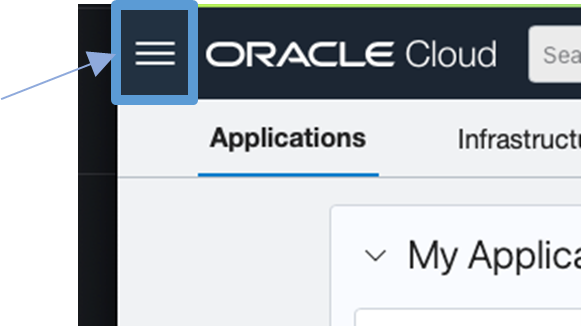
Open the navigation menu in the upper left to work with services and resources. Services and resources are organized by functional group.
-
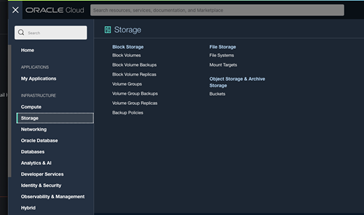
Open the navigation menu and click Storage.
-
Then click Buckets.
-
Select the appropriate compartment in the compartment select box. The object storage buckets in the compartment will be listed.
-
Select the appropriate bucket from the list.
-
In the Resources section, click Pre-Authenticated Request.
-
Specify the Name, select a Pre-Authenticated Request Target, select the Access Type, and the Expiration date.
-
Click Create Pre-Authenticated Request.
-
Copy the pre-authenticated request URL for your records.
Alternatively, one can create a PAR using from a shell using OCI os. Before proceeding verify your understanding and verify that you can create PAR.
Constructing an Object Storage Object URL
If you do not anticipate using Object Storage for integration, you can skip this section. You will need to use the Oracle Cloud Console to perform the steps below.
Unlike a PAR, an Object Storage object URL requires the schema user to have their own credentials. Like a PAR, the URL will provide a way for users to identify and access a bucket with a known name. In order to construct a URL, you will need to know:
-
the region identifier for your object storage instance
-
the namespace in which your object storage is located
-
the name of the bucket that you will be using
To obtain the region identifier:
-
Login to the Oracle Cloud Console
-
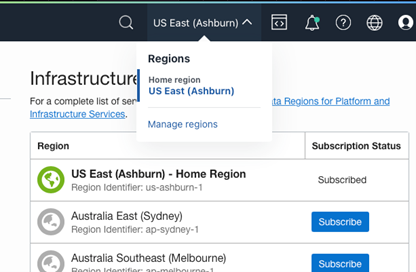
In the middle right portion of the tool bar at the top of the console page, you will find the name of the region in which your Object Storage instance is located (you can change regions from here as well, if need be), e.g., US East (Ashburn). Tap the region to reveal the region menu.
-
In the region menu, there is a Manage regions menu item. Tap it.
-
A list of regions will be displayed. For each region displayed there is a region identifier. Note the region identifier for your region. See the figure below:
Once you have the region identifier, you can construct a base URI for your object store instance, which has the following form:
https://objectstorage.<region-identifier>.oraclecloud.comFor example, the host for a URI for US East (Ashburn) region is:
https://objectstorage.us-ashburn-1.oraclecloud.comNext find the namespace for your bucket at the top of the General section in the Bucket Information. Lastly, find the name of the bucket at the top of the bucket page.
The complete URL is:
https://<host>/n/<namespace>/b/<bucket>/o/<object-prefix>Note that the object prefix is a base name when exporting from ADW. The final object name will have a multi-part identifier (e.g., which is "1", if it is not a multipart export), timestamp suffix, a format extension (e.g., ".json") and, if compression was used, a compression extension (e.g., ".gz"). For example, an object name as listed in the bucket might look like the following:
ie_export_test_1_20221108T225927023493Z.json.gzBefore proceeding verify your understanding and verify that you can create ab object storage object UIL.
Obtaining Object Storage Credentials
You will need to use the Oracle Cloud Console to perform the steps below.
In order to read from or write to object storage one will need the necessary credentials. Refer to Required Keys and OCIDs for details on obtaining credential information for object storage. The easiest way to obtain the needed credentials is as follows:
-
Navigate to one’s My Profile page in the Oracle Cloud (i.e., tap the profile button/image in the upper right corner and select My Profile from the drop down).
-
Next tap the API Keys link in the Resources section on the lower left of the screen.
-
Finally tap the Add API Key button and follow the instructions. Part of the process is downloading one’s private key. The downloaded key is in PEM format. The key will need to be reformatted as a single long string without the leading and trailing dashes when using the credential in create credential script. There should be no new lines in the key.
These instructions will make more sense once one goes through the Add API Key process.