Adding an Application Navigator Entry
The Add icon ![]() on
the table toolbar allows users to add a new Application Navigator entry in Retail Home.
on
the table toolbar allows users to add a new Application Navigator entry in Retail Home.
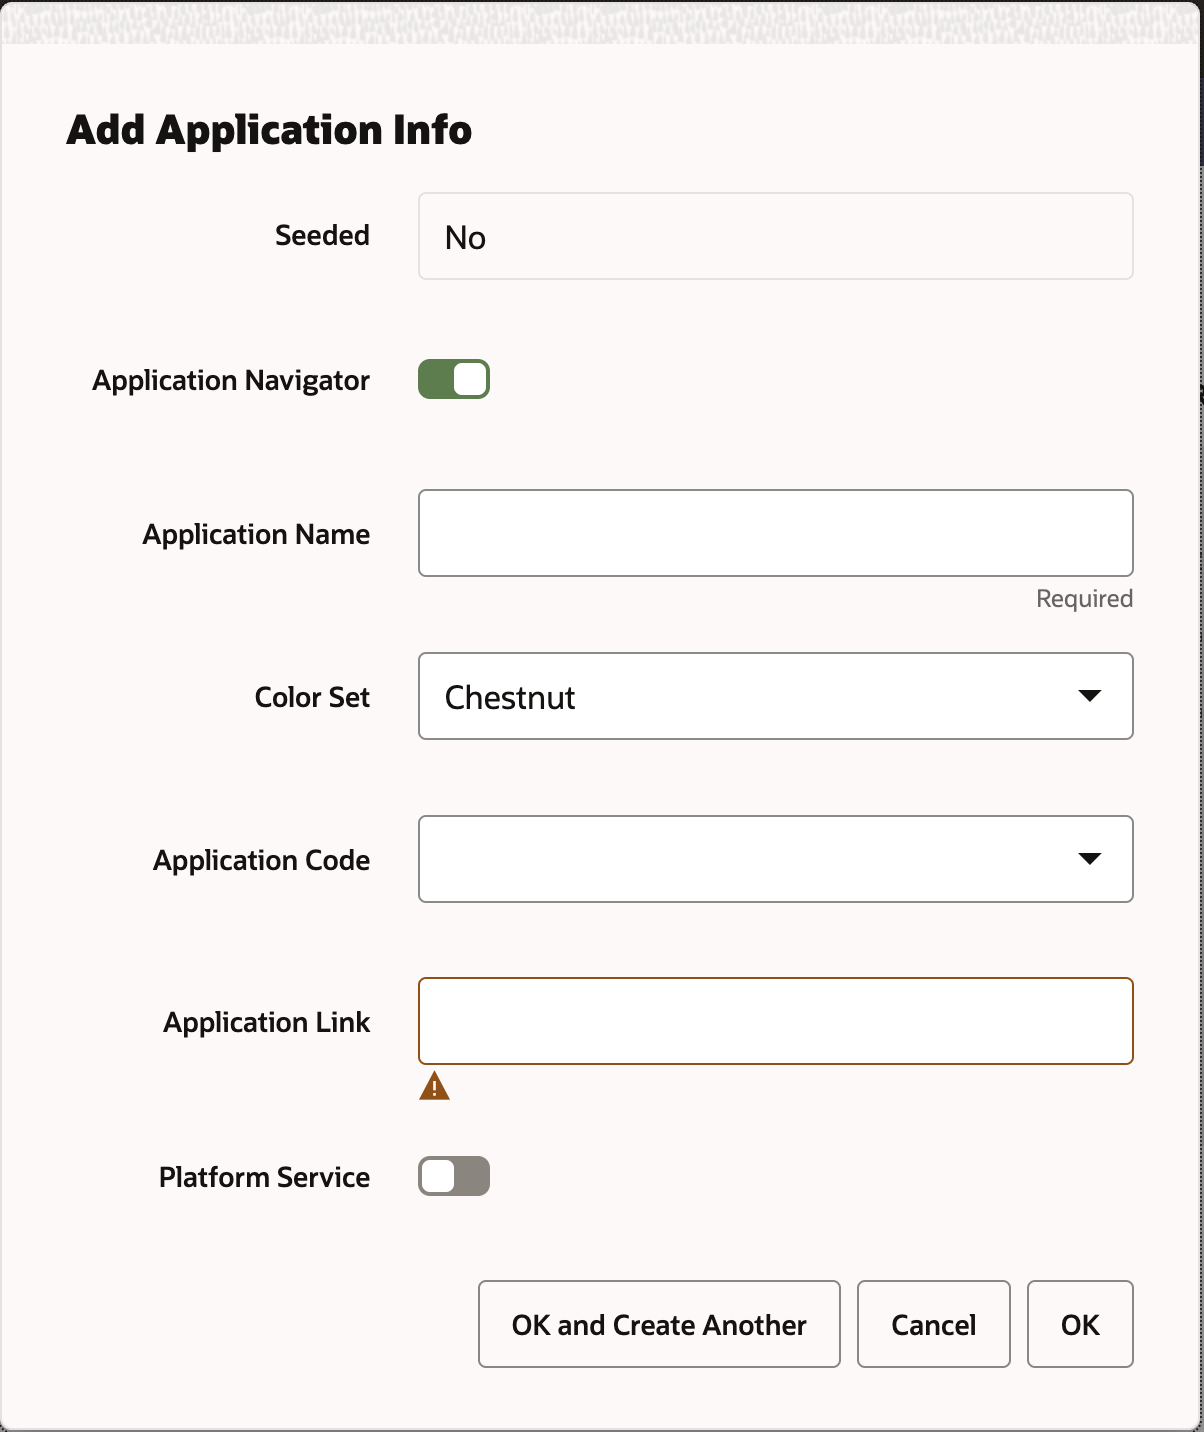
To add an application navigator entry, users enter the following information in the "Add Application Info" dialog:
-
Seeded - Shows whether the application is a seeded application or not.
-
Application Navigator Switch - Controls whether the application will be displayed in the Retail Home Application Navigator menu.
-
Application Name - A unique name for the application that will be displayed in the Application Navigator menus and in the Retail Home Dashboard Tile header.
-
Color Set - The color scheme used to display this application in the Retail Home Application Navigator menu and for the background of the Retail Home Dashboard Tile.
-
Application Code - The unique code associated with a Retail Application. This is required to support features such as Favorites, Notifications and Resource Bundle Customization.
-
Application Link - The URL used to launch the application from Application Navigator menus or from the header of a dashboard tile.
-
Platform Service Switch - Controls the display of options under platform services (URL & sup-ported features).
-
Platform Service URL - The URL used to access Platform ReST Services. This is required to support features such as Favorites, Notifications and Resource Bundle Customization.
-
Platform Service Supported Features - Check boxes to determine whether Notifications, Favorites & Resource Bundle Customization is available for the application.
Figure 2-6 Add Application Info Dialog
