Designer Tab Guide
This tab contains all the CRUD operations to be performed by user on tables in the database schema. The user can select the desired database schema available in the database schema dropdown. It has two sections:
-
Table Definition
-
Query Builder
Make sure the user has sufficient permissions before performing any action in the designer tab.
Table Definition
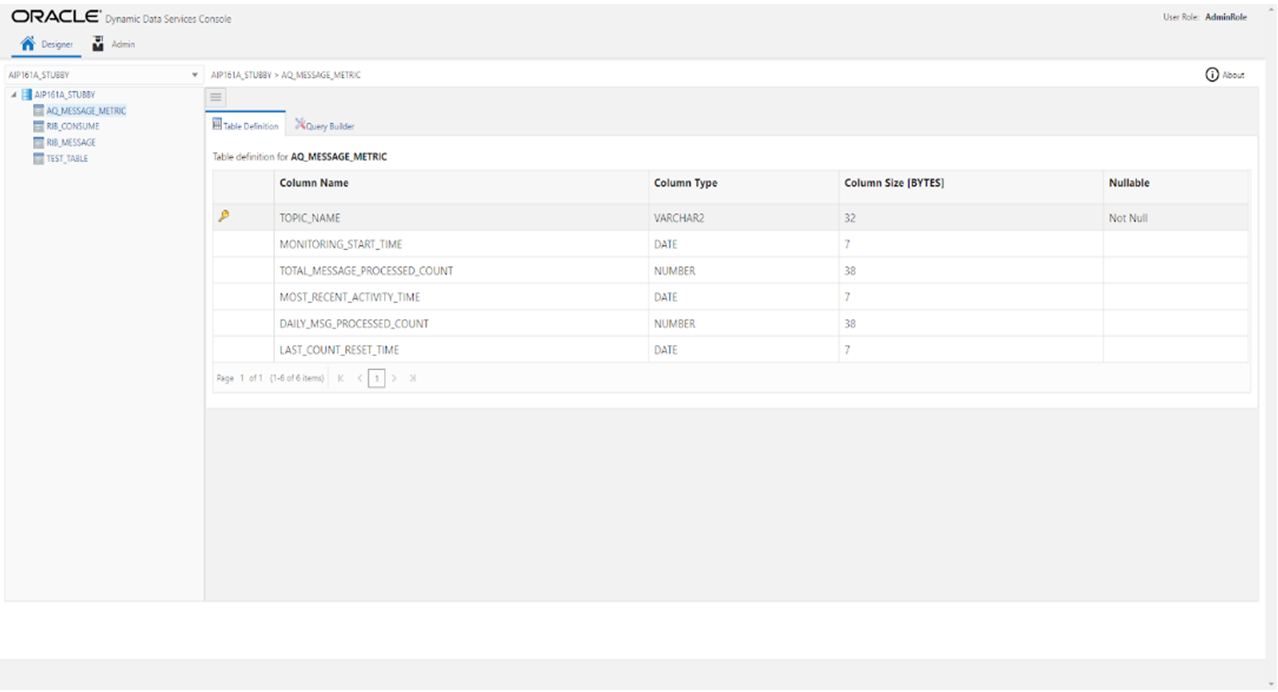
This tab allows the user to see the basic definition of the Database table in a simplified format presented in a tabular form.
To view a table's definition, select the required table from the list of tables from the left pane of the screen. Clicking on the table name will load the definition on the display screen under the Table Definition tab.
Query Builder
This tab holds the functionality for data manipulation. Functions include Querying records to creation, modification and deletion of records.
Data Selection
To Query records from a table:
-
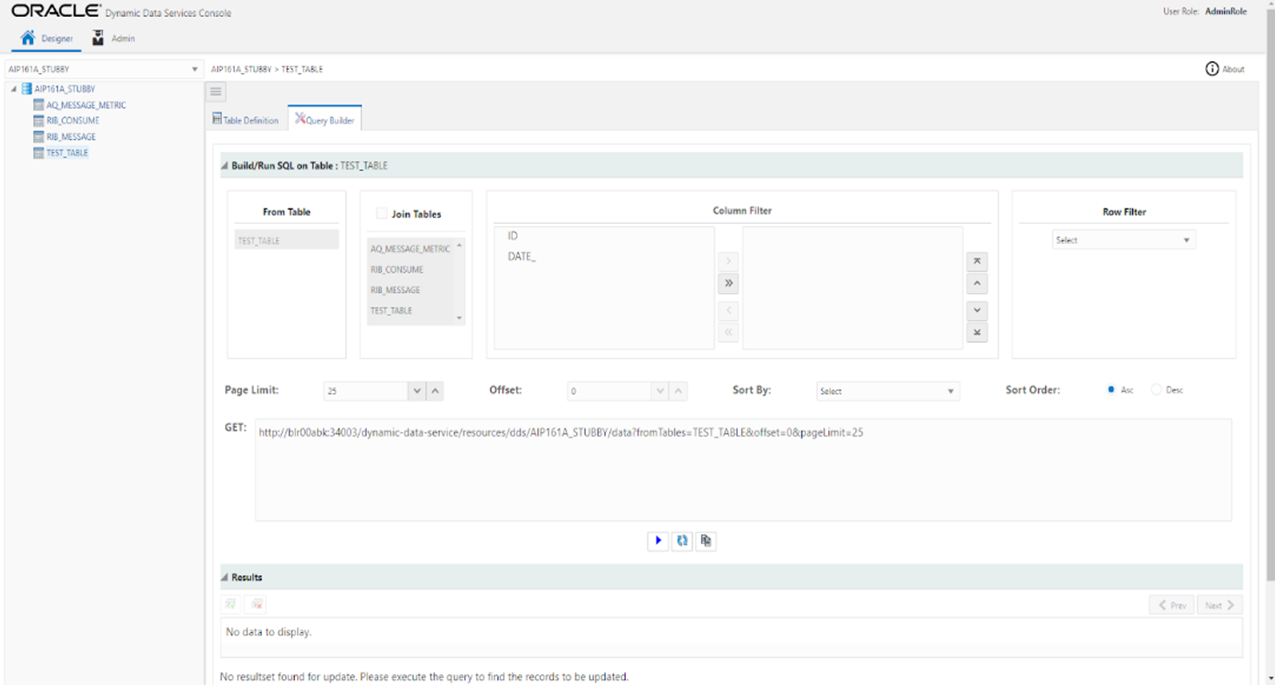
Select the table from the list of tables on the left pane of the screen.
-
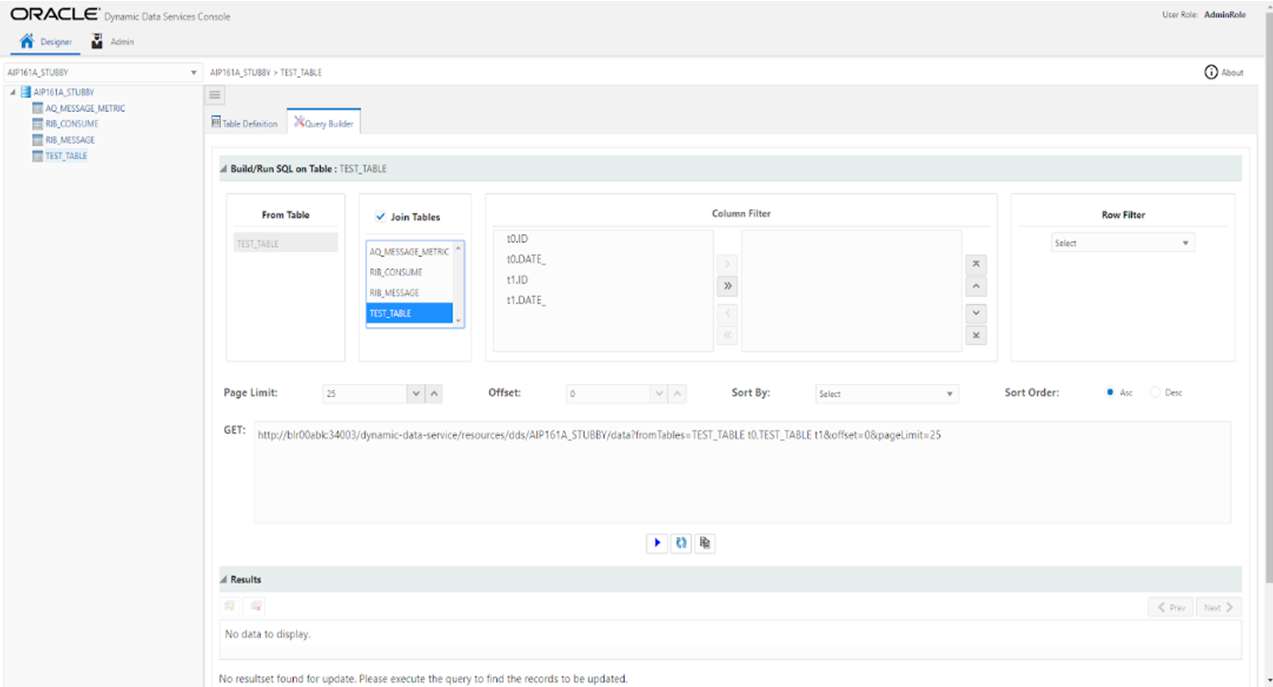
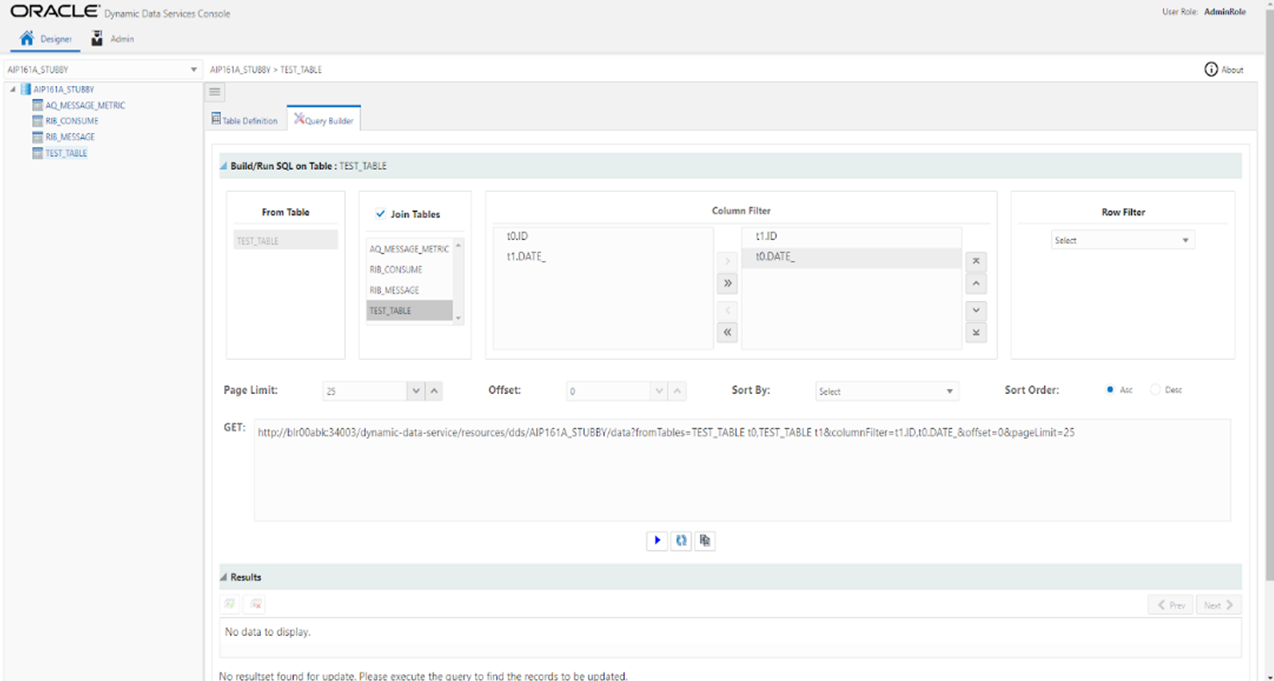
Enable join if the join operation is necessary.
-
Select the table to which the join is to be done, select the same table as selected in (1) to do a self-join.
-
Select the columns which are to be displayed in the column filter. Only the column names on the right side of the box will be displayed. If all columns are to be displayed, do not move any columns to the right box.
-
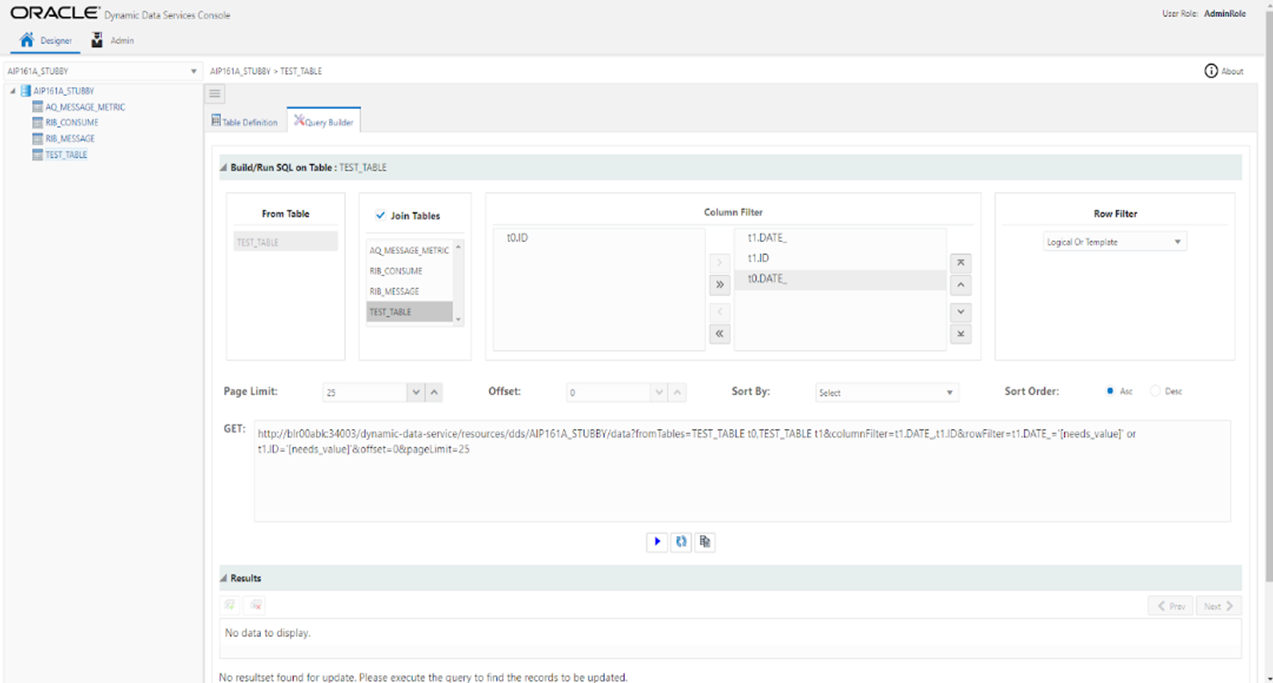
Select the row filter.
Note:
The row filter is applied only to the first two columns in the table, so reorder the columns such that the ones that have to be used as row filter are in the two positions.
-
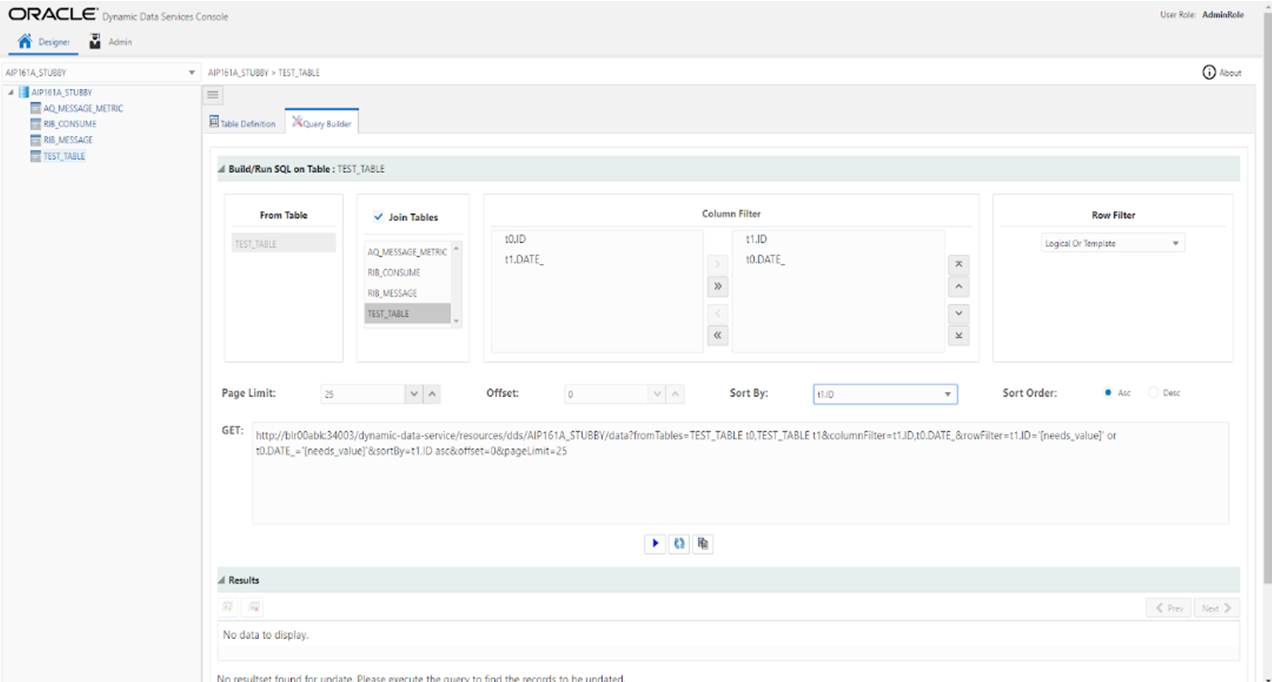
Set the page limit, this is the number of records that are to be displayed on one page, the remaining records will be paginated and displayed upon request.
-
The Sort by drop down list works if there are columns selected for a column filter. Select the desired column, and then select the sort order, ascending or descending.
-
Click on the run button
 to get the Query results using the settings configured earlier.
-
The reset button
 sets the settings back to default.
-
The copy query button
 is used to copy the GET query generated in the "GET" box. Click on the button and the link is copied. Paste the link in a browser and press enter/return to execute the query.
Data Insertion
To insert the data in the table:
-
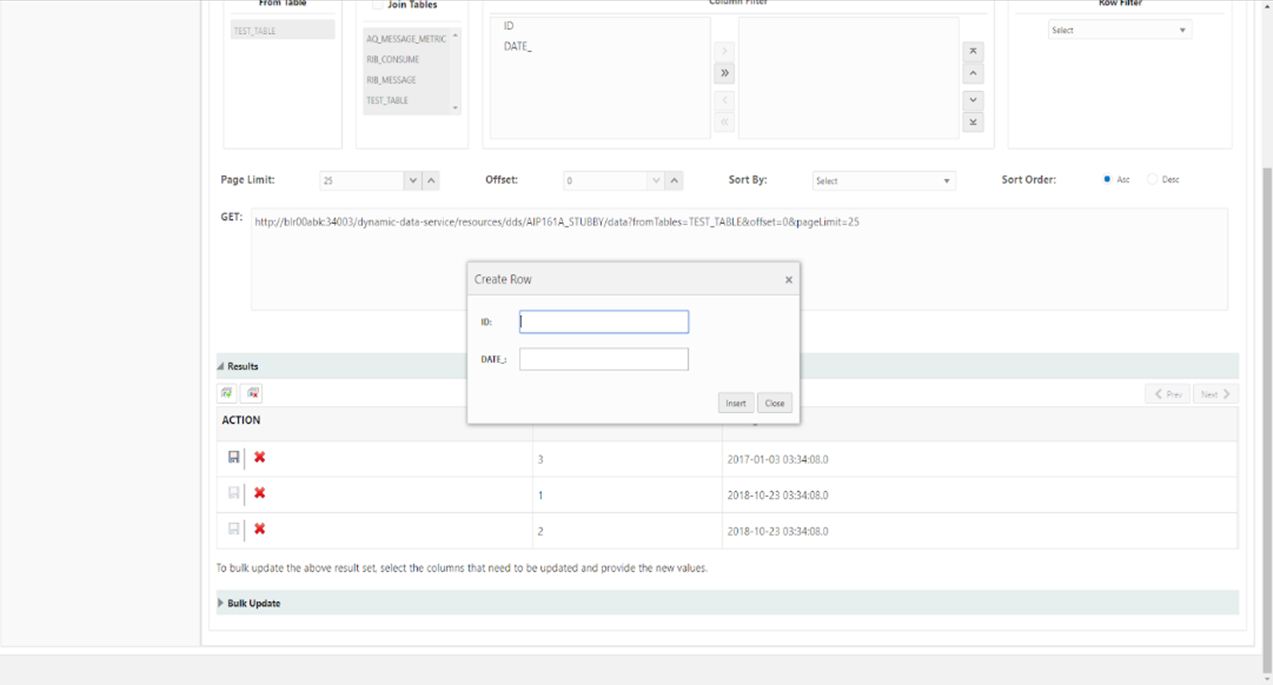
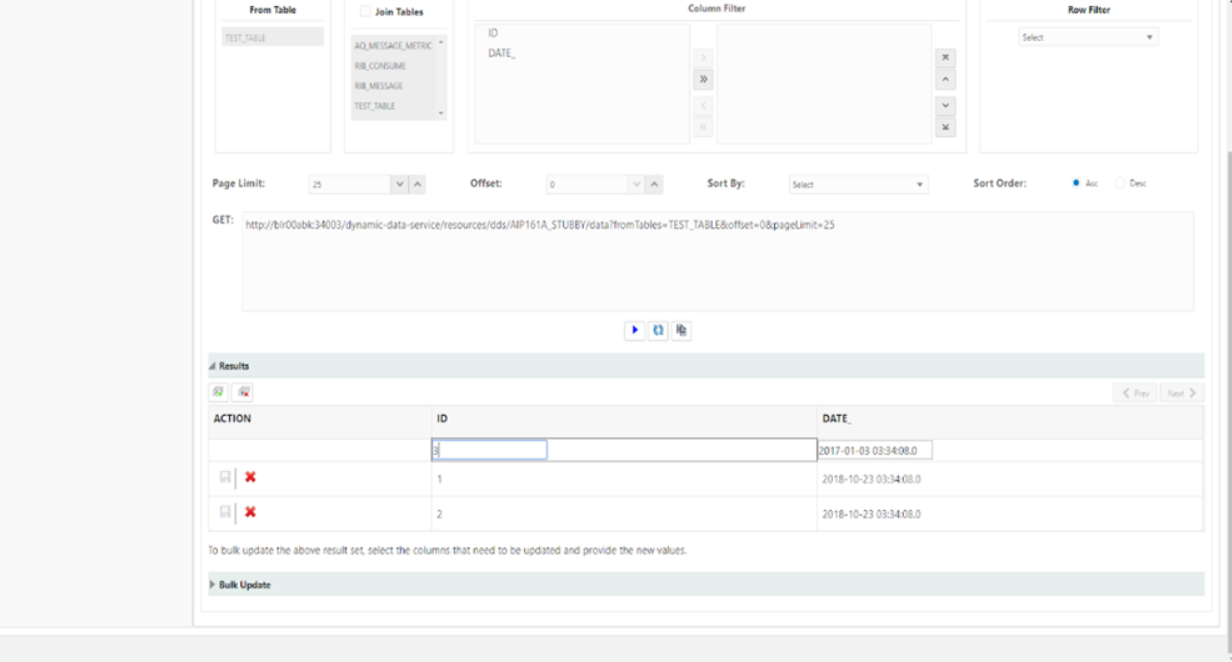
The query results from the GET call are displayed here in an editable tabulated format.
-
To insert a record click on the insert record button
 .
.
-
In the pop-up, enter the data. Make sure to enter all values for not null columns.
-
Click Insert.
-
The record will be successfully inserted after validation.
Data Modification
To modify existing data, select the data from desired table.
-
Double click on the record to be modified
-
Edit the contents
-
Press escape on the keyboard to exit edit mode and click on the save button
 to save the changes.
-
Message - Record updated successfully will be displayed after validation
Bulk Updations of Data
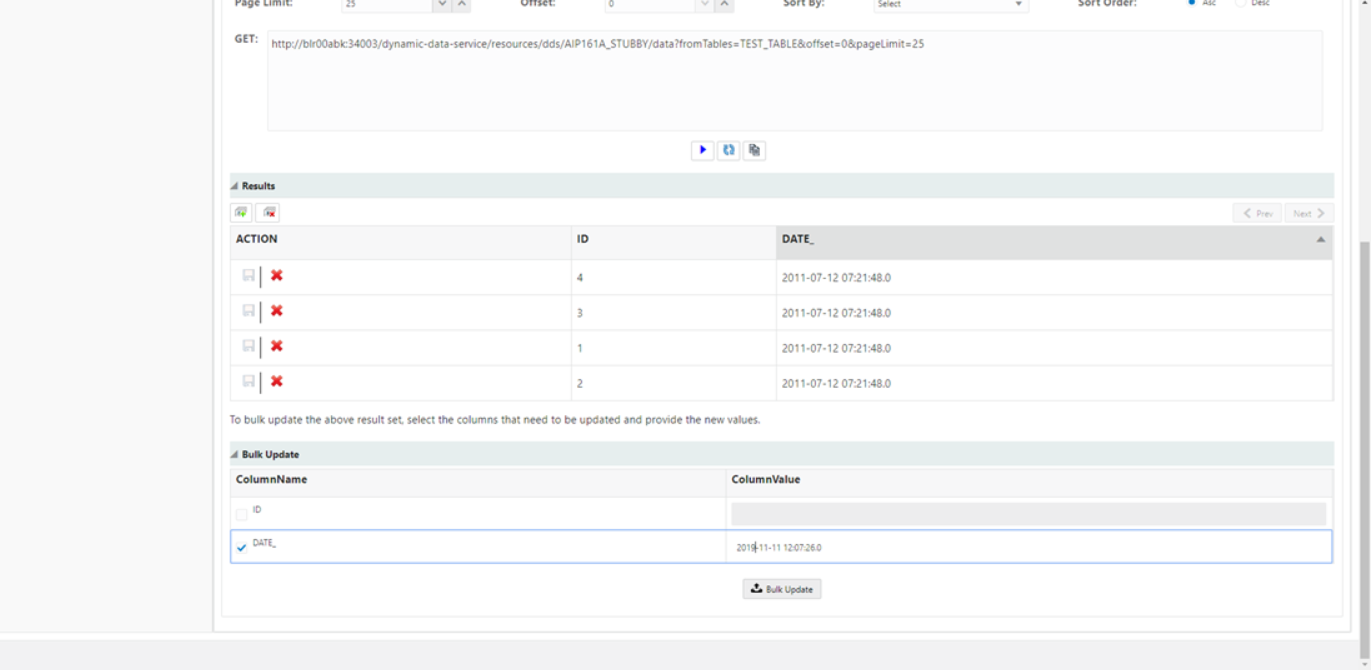
The option is available to update bulk records on selected data. To bulk update column(s):
-
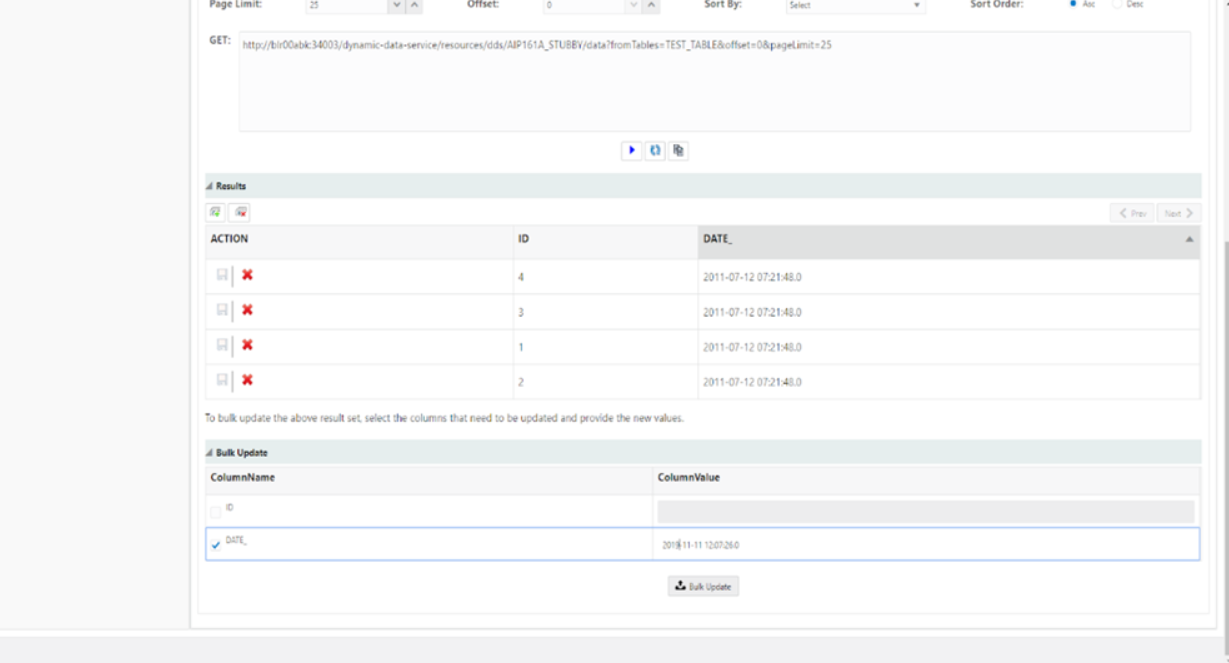
In the bulk update collapsible pane one or more columns for all records in the queried table can be updated with a single value, if the column is not unique.
-
Select the checkbox of the required column to enable edit mode.
-
Enter the data as necessary.
-
Click the Bulk Update option
 to update the selected columns for all the records in the table.
-
Records will be updated after successful validation of data.
Data Deletion
This option is available to perform individual and bulk deletions of records.
Individual Delete - To delete a single record, click the delete button ![]() on the corresponding record.
on the corresponding record.
Bulk Delete -To delete all records, click the delete all button ![]() and confirm once the confirmation dialog pops up.
and confirm once the confirmation dialog pops up.
The number of records deleted message will be displayed upon successful deletion of records.
