2 Navigation and Help
This chapter describes the navigation steps in the Oracle Retail Integration Bus Hospital Administration or RIB Hospital Administration (RIHA) application.
Log in to RIHA
This procedure explains how to log in to the application.
-
Enter the application URL: in the address bar of the browser.
Note:
Using Mozilla Firefox Web browser is recommended.
-
In the User Name field, enter the user name configured at the time of installation of the application.
-
In the Password field, enter the password.
-
Click Login. The application home page appears.
Search for a Hospital Record
This procedure explains how to search for a hospital record in RIHA.
Basic Search
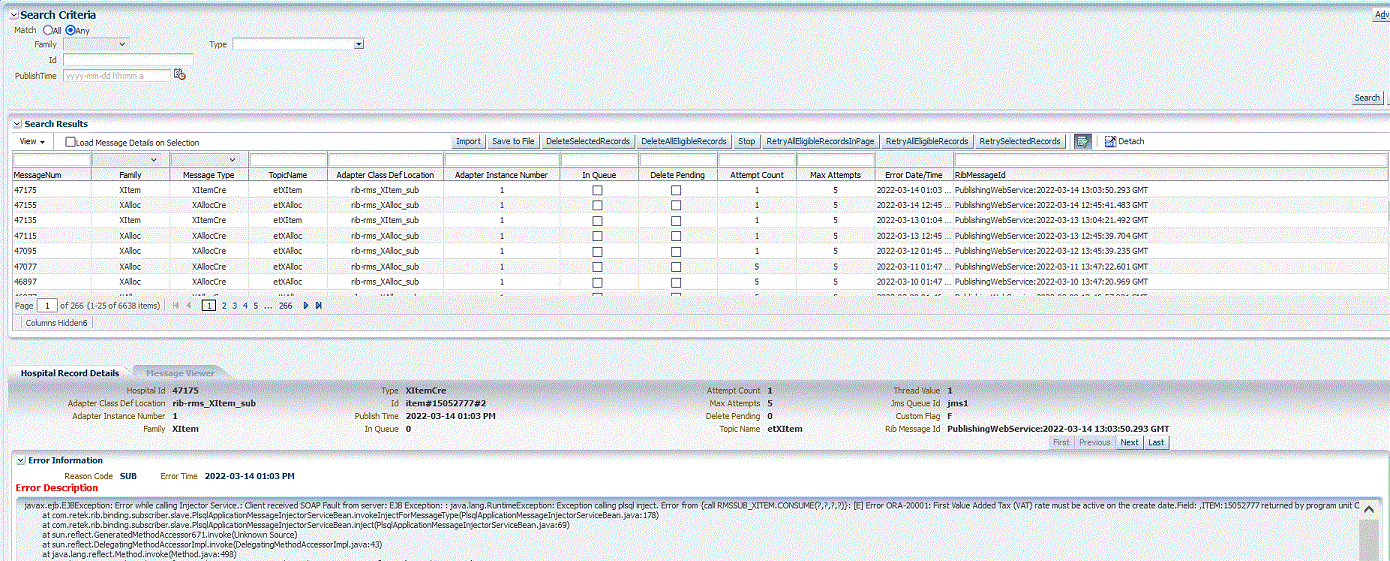
By default, the basic search option is enabled. Basic search is done using the Equal to operator against the given search values.
Click Reset to clear the data from search fields.
To perform a Basic Search:
-
Log in to the application.

-
In the Search Criteria section, enter or select the criteria to limit your search in one or more of the following fields:
-
Family
-
ID
-
Publish Time
-
Message Type
Note:
Select All to match all fields in the search. Select Any to matchany field in the search criteria.
-
-
Click Search. The hospital records that match the search criteria are populated in the search results table.

Advanced Search
By default, the basic search option is selected in the application. In the search panel, click Advanced to switch to advanced search option. Advanced search allows you to add more search fields to the search criteria. Click Add Fields to add more fields.
In the advanced search, the operators of each search field can be changed to other available options.
Click Basic to switch back to the basic search option.
Click Reset to clear the data from search fields.
To perform an Advanced Search:
-
Log in to the application.
-
Click Advanced in the search panel.

-
Click Add Fields. Additional fields are listed. Select the required fields to add to the search criteria.
-
Click the red cross mark icon besides the field to remove the field from the search criteria.
-
- Enter values in the respective fields and click Search. The hospital records that match the search criteria are populated in the search results table.
Delete a Message
This procedure explains how to mark a message for deletion from the RIB Hospital.
-
Log in to the application.
-
Search for hospital records.
-
Select a row that represents a hospital record.
-
Click Delete. A confirmation dialog box appears.

-
The message is deleted when the hospital retry adapters and/or process checks for messages to be deleted from the RIB Hospital.
Bulk deletion of records from error hospital tables can be done using the following options:
-
RetrySelectedRecords - This deletes records that are selected using the multi-select option.
-
RetryAllEligibleRecords - This deletes all the eligible records in error hospital irrespective of search result.
Note:
A message that is in queue (as indicated when the check box in the In Queue column is selected) cannot be deleted.
-
Stop a Message
This procedure explains how to stop a retry adapter and/or a process from attempting to retry a message.
-
Log in to the application.
-
Search for a message.
-
Select a row that represents a hospital record.
-
Click Stop. The retry adapter and/or a process does not attempt to reprocess the message until you select the message for Retry.
Note:
A message that is in queue (as indicated when the check box in the In Queue column is selected) cannot be stopped.
Retry a Message
This procedure explains how to retry a message after you have stopped the retry adapter and/or process from re-processing it.
-
Log in to the application.
-
Search for a message.
-
Select a row that represents a hospital record.
-
Click one of the following buttons:
-
RetryAllEligibleRecordsInPage - This option will retry all the eligible records in current page which is being displayed. (See note below for delete criteria)
-
RetryAllEligibleRecords - This option will retry all the eligible records in error hospital irrespective of search result.
-
RetrySelectedRecords - This will retry records that are selected using the multi-select option.
Note:
A message that is in queue (as indicated by the check box in the In Queue column is selected) or pending deletion (as indicated by the check box in the Delete Pending column is selected) cannot be retried.
-
View and Edit a Message
This procedure explains how to view a message.
-
Log in to the application.
-
Search for hospital records.
-
Click the Load Message Details on Selection check box located in the search results table.
-
Select a row to view the payload of hospital records.
-
Click the Message Viewer tab. The message viewer displays the payload in text mode.

-
You can edit the message shown and click Save to save the message.
Save a Message Locally
This procedure explains how to save a message locally.
-
Search for a message and select a row.
-
Click Save To File. The message is saved to a RibMessage.xml, a text file named by default.
Import a New Hospital Record to Hospital Tables
This procedure explains how to retrieve a message from a local location.
-
Click Import
-
Search for a message and select a row.
-
A popup browser opens with an option to browse for a hospital entry to be
-
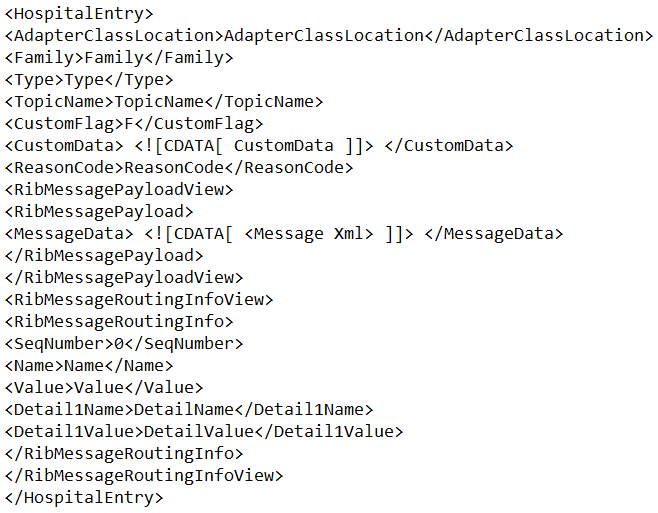
The message must be in the following specified format:
Update an Existing Hospital Record
This procedure explains how to update an existing hospital record location.
-
Search for a message and select a row (see View and Edit a Message).
-
Save the hospital entry locally (See Save a Message Locally).
-
Edit the hospital entry file.
-
Do not edit or remove any of the <MessageNum> attributes.
-
-
Click Import.

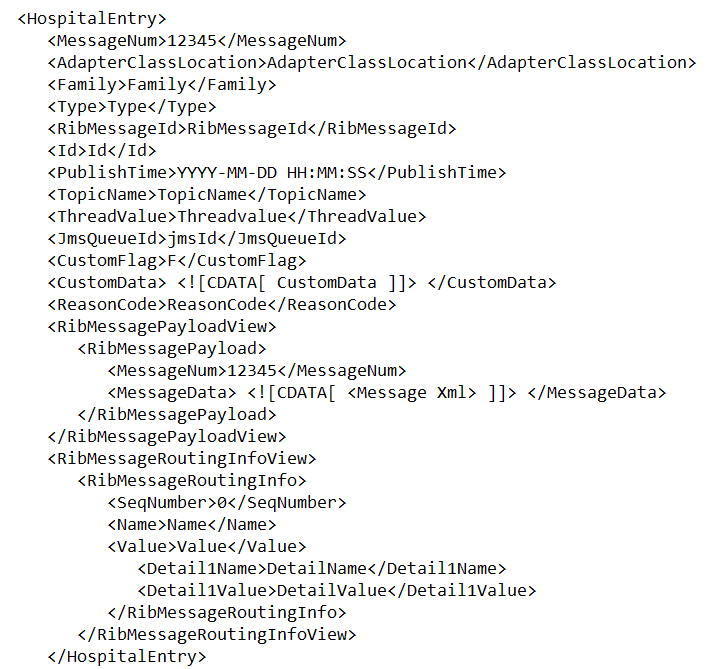
The message must be in the same format in which it was saved.
Format the hospital entry to be updated.
View Hospital Record Details
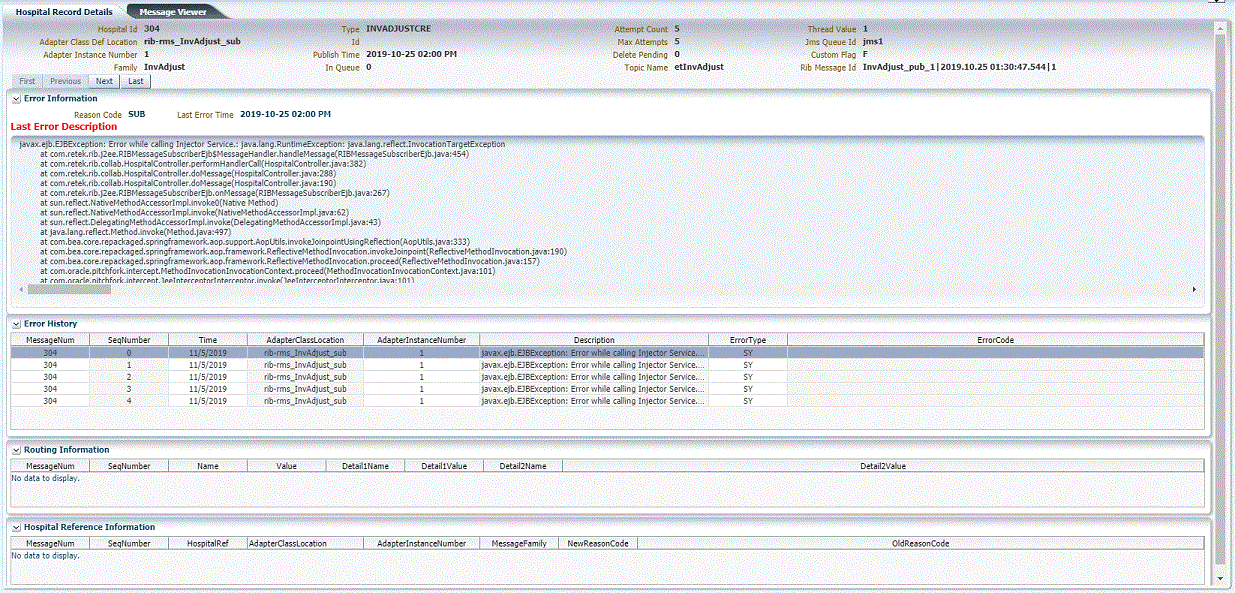
This procedure explains how to see detailed information about a hospital record.
-
Search for a message (see "View and Edit a Message").
-
Select a row that represents a hospital record.
-
By default, the Hospital Records Detail tab is active and displays the selected row’s hospital record details.
-
The size of the pane can be adjusted by using the arrow mark located in the right side of the pane.
-
View the Error History of a Message
This procedure explains how to view a message's error history.

-
Search for a message (see "View and Edit a Message").
-
Select a row that represents a hospital record.
-
By default the Hospital Records Details tab is active and displays hospital record details for the selected row.
-
Click on the arrow located near the error history. This will expand the pane and display errors associated with each of the possible retry attempts.
-
View the Hospital Reference Information of a Message
Note:
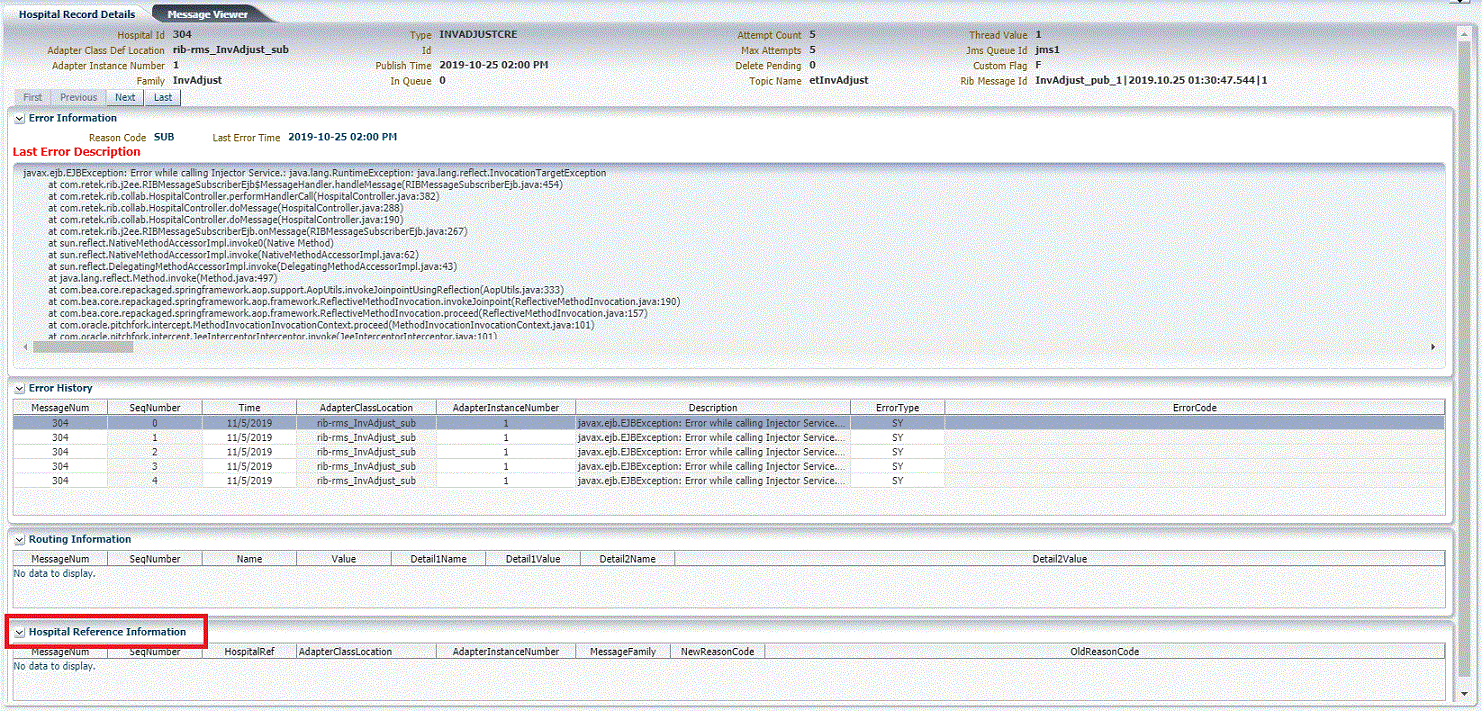
This pane contains data that applies only to retailers who have access to the custom code.This pane displays records that are already in the RIB_MESSAGE table but are prevented from being retried until another record has been successfully retried. Once the other record has been successfully retried, the Reason Code in the RIB_MESSAGE table for the record being referenced in the Hospital Reference column is set to the new Reason Code to make it available for retry. View the hospital record details for a message (See View Hospital Record Details).
-
Search for a message (See “View and Edit a Message”).
-
Select a row that represents a hospital record.
-
By default the Hospital Records Details tab is active and displays hospital record details of the selected row.
-
Click on the arrow located near the hospital reference information. This will expand the pane and display associated reference information.
-
View the Routing Information of a Message
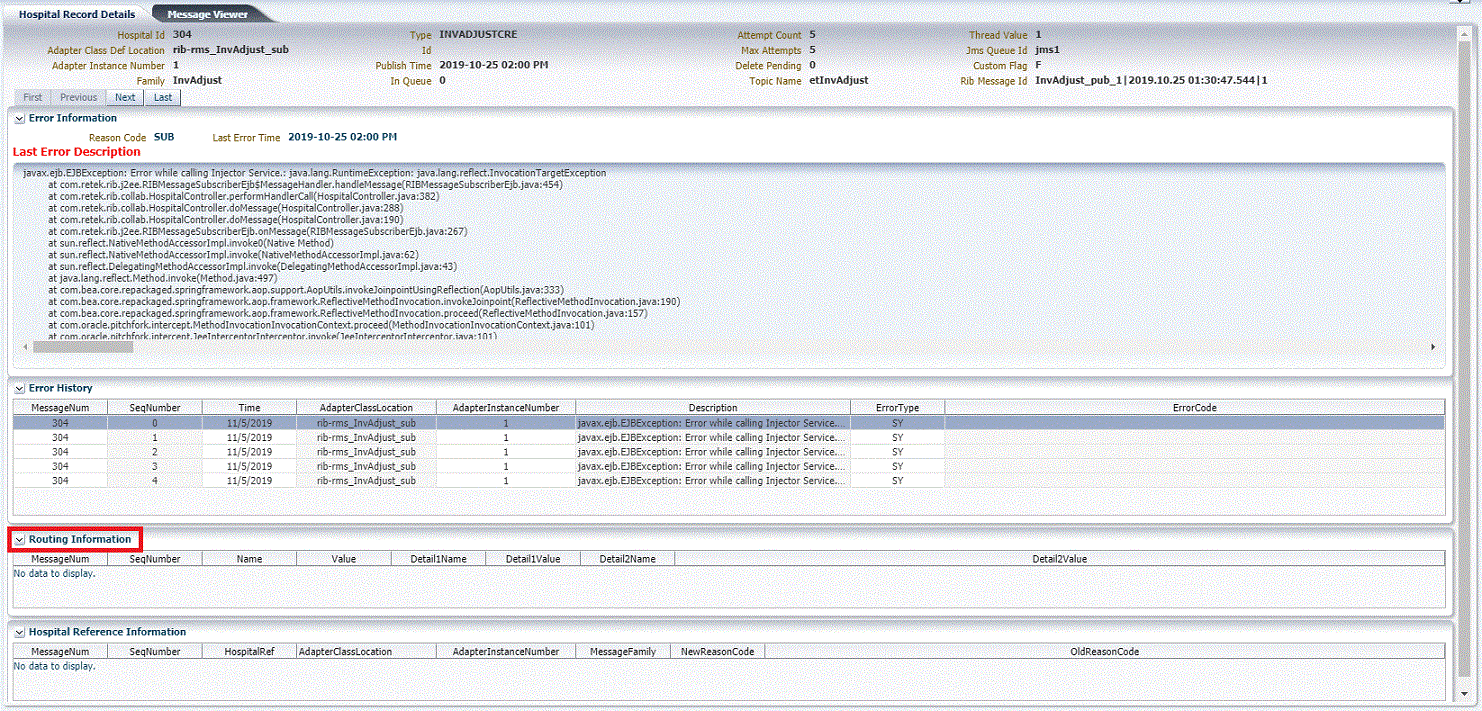
This procedure explains how to view a message's routing information.
-
Search for a message (See “View and Edit a Message”).
-
Select a row that represents a hospital record.
-
By default the Hospital Records Details tab is active and displays hospital record details of the selected row.
-
Click on the arrow located near the routing information. This will expand the pane and display associated reference information.
-
Enable / Disable Email Notification
Email Notification feature allows users to configure and receive email alerts for the hospital error counts effortlessly. With the ability to specify recipients using comma-separated email addresses, set maximum threshold values for failed messages, and customize email retry intervals in minutes, users can ensure timely and precise notifications tailored to their needs. It's important to note that any configuration changes will take effect with a delay of, at maximum, 10 minutes from the time of saving, ensuring smooth integration and allows users to adjust settings as necessary. These enhancements equip users with the tools to stay informed, responsive, and proactive in managing their systems, ultimately enhancing efficiency and reliability.
| List of configurations | Default values of each configuration | Input Description |
|---|---|---|
|
Enable Notification |
No |
Enable/Disable Functionality |
|
Email recipients |
no_reply@oracle.com |
Email ID or list of comma separated Email IDs to which the email needs to be delivered to. |
|
Retry Interval |
60 |
Max error records count targeted for notification. Notification will be triggered after the Error Hospital count exceeds this value. |
|
Threshold value |
10000 |
Email Retry interval in minutes. Example: If the value is set to 20, the recipients will receive notification email every 20 minutes, if the above threshold exceeds. |
Important:
This Alerting feature is a self-service tool that allows retailers to customize the frequency of alerts and set error count thresholds according to their specific requirements. Oracle Retail Cloud Operations monitors the same metrics but uses a standard frequency and threshold, which may differ from the customer-defined settings.Note:
The user will receive a single aggregated email capturing the error record status of all 'Notification-Enabled' RIB applications at scheduled frequency.| Aggregation calculation for sending the email | ||||||||||||||
|---|---|---|---|---|---|---|---|---|---|---|---|---|---|---|
|
Emails are generated only when at least one of the RIB applications exceeds its threshold value. Frequency calculation: Since an aggregated email is sent, it will be sent at the minimal Retry-Interval value from the set of retry intervals. Email Recipient calculation: Aggregated list of all the configured recipients. Notification must be enabled separately for each RIB application. This is not a universal setting for all RIB applications at once. Example:
|
Enable RIHA Email Notification
-
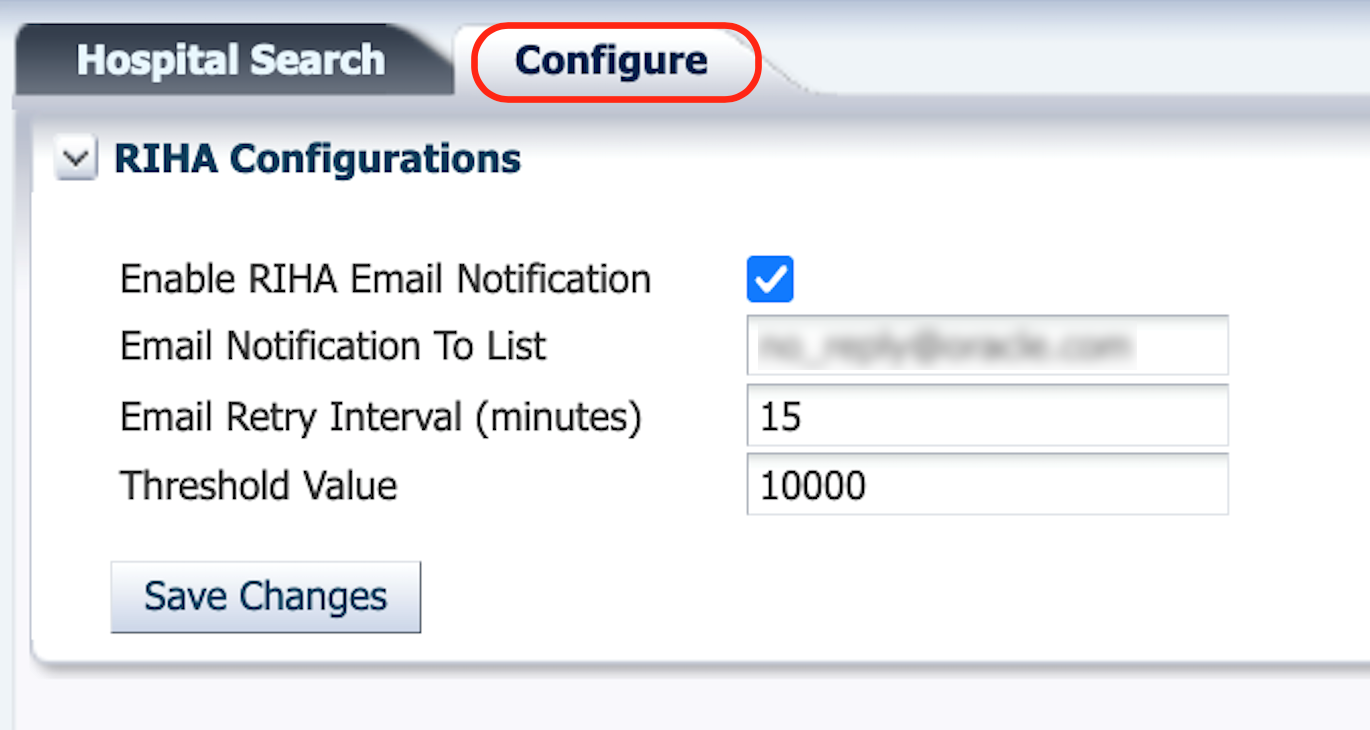
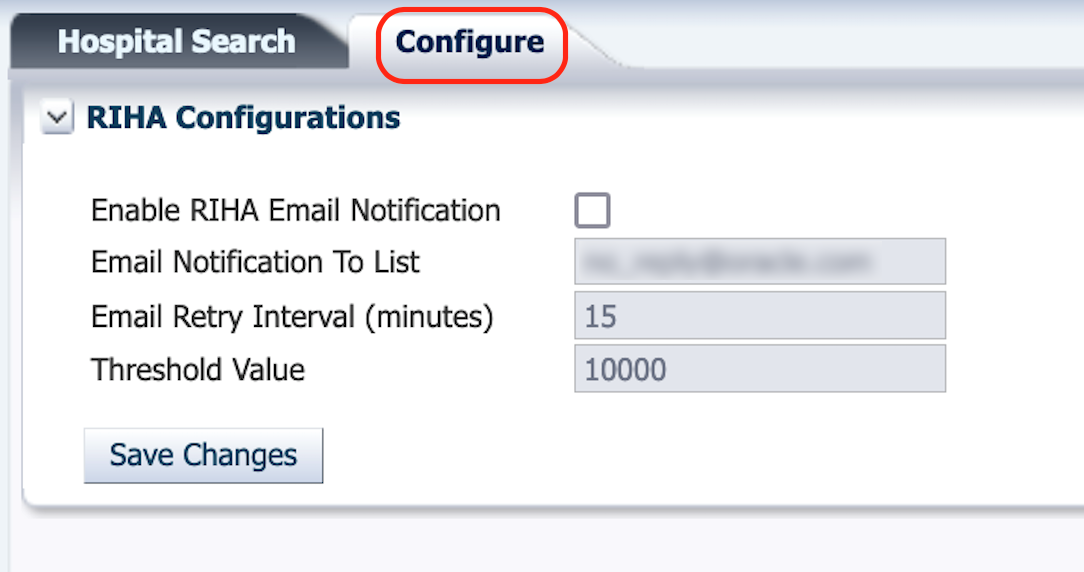
Log into RIHA and go to the Configure Tab.
-
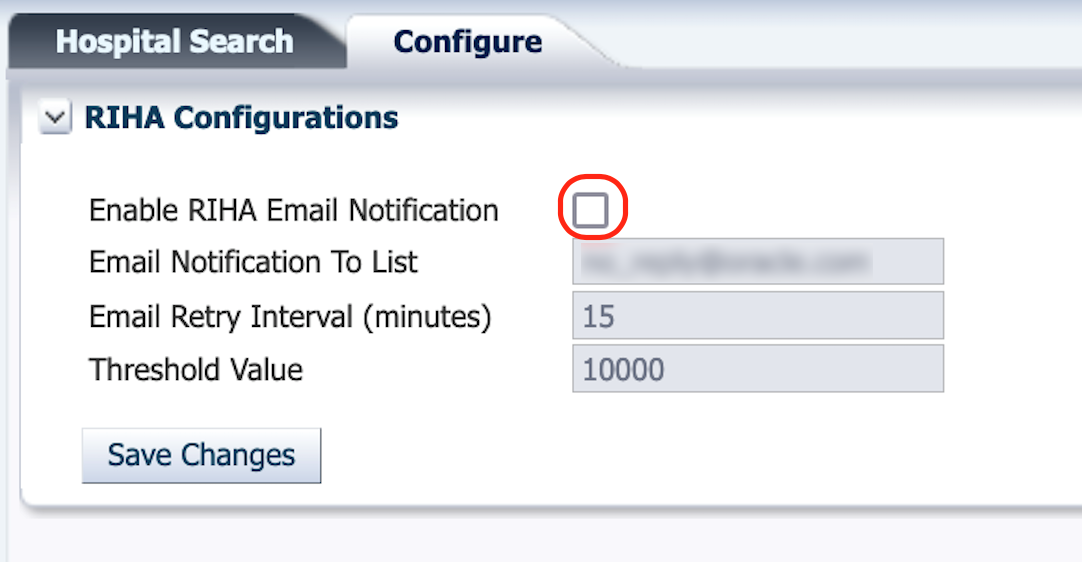
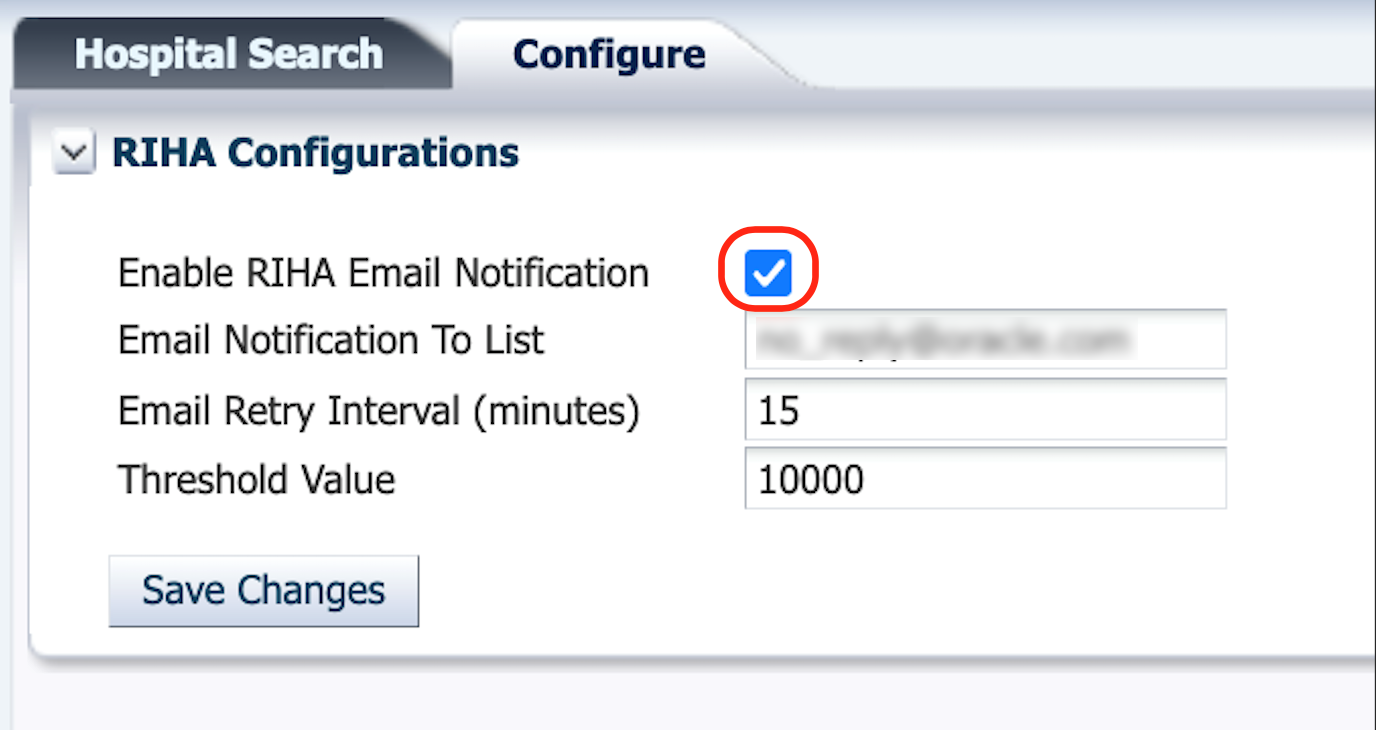
Click the Enable RIHA Email Notification Checkbox and update the required fields:
-
Email Notification to List: Email ID or list of email IDs to which the email needs to be delivered to (Use comma-separated email IDs).
-
Threshold Value: Max threshold value of failed messages.
-
Email Retry Interval (minutes): Email Retry interval in minutes.
Note:
Configuration changes will take effect within a maximum of 10 minutes after saving the changes.
-
-
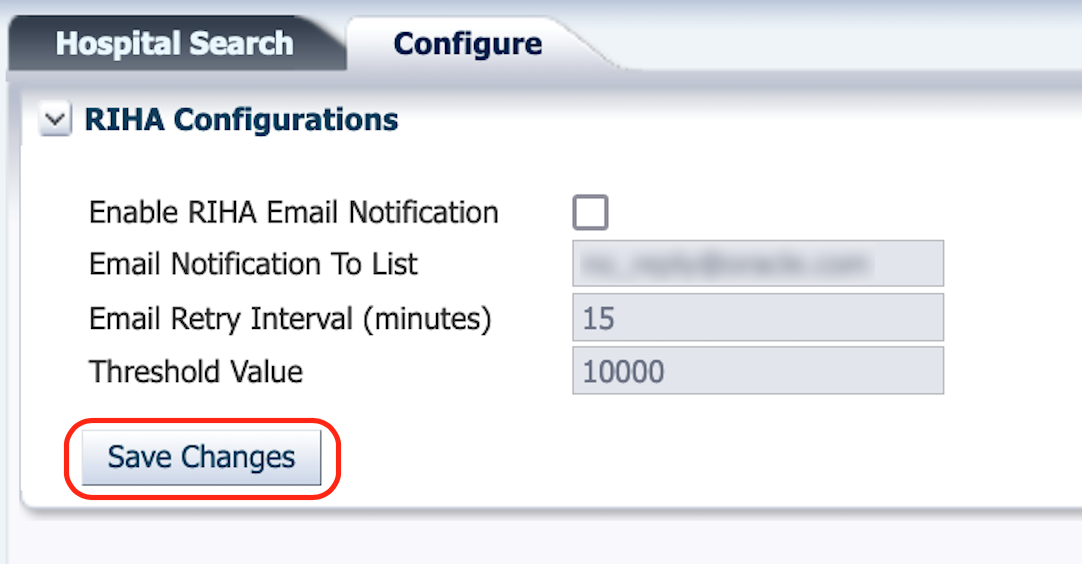
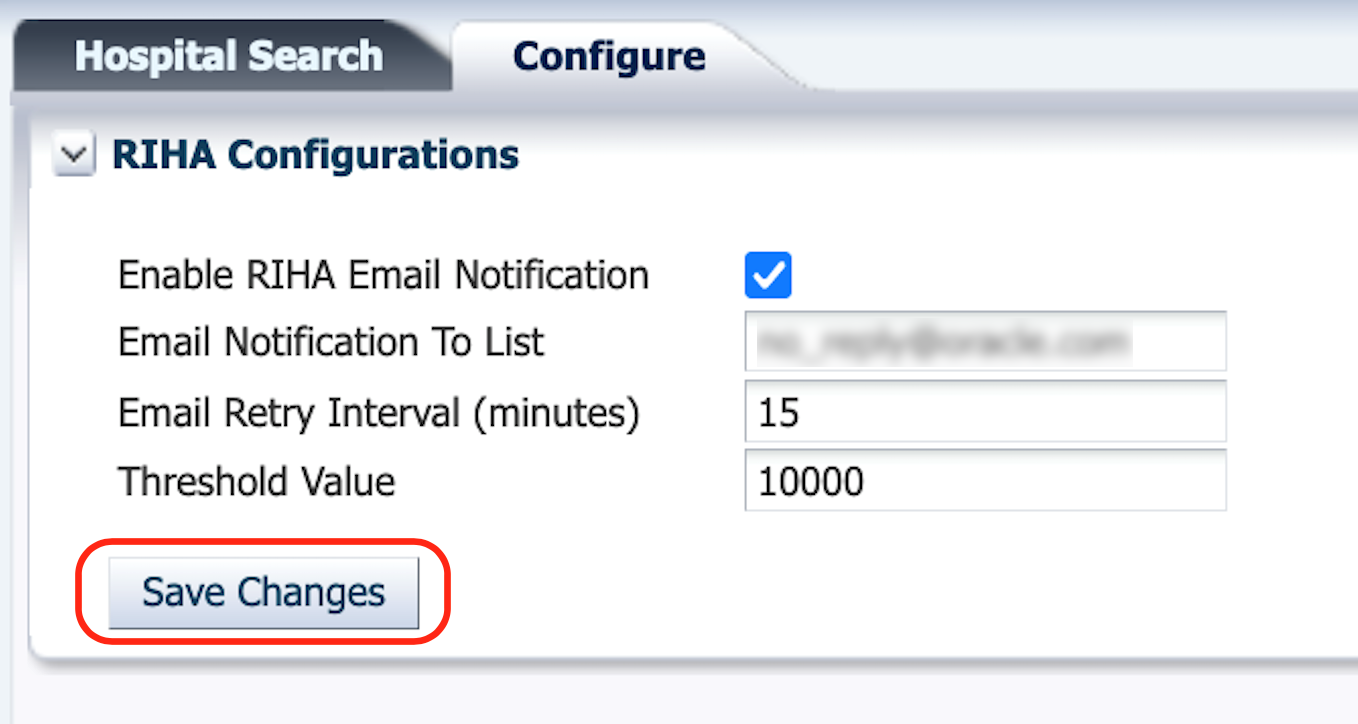
Click the Save button to save the changes.
Sample Email
-
Email Subject line: The subject line mentions the alert is generated from which subnamespace/customer environment.
For example: “Oracle Retail RIB exceeded the set error threshold and needs attention.
[<SubNamespace>/rics-tools-riha-ms-pod-0/RIHA] -
Email Content:
-
Section 1: This section needs attention from the email recipient. Action mandatory.
Includes a list of all the RIB applications whose Error Hospital Record count has exceeded the threshold.
In this example, the Error Hospital record count for both rib-rms and rib-sim have exceeded the configured threshold.
Note:
The thresholds can be different for each application. However, it is advisable to have a generic setting. -
Section 2: This section provides information about the current error hospital count for RIB applications, even though threshold has not been exceeded. No action needed.
-
Section 3: This section is just an FYI section to let the user know that email alerts are not configured for certain applications.
If email notification is not enabled, users will not receive the alerts even if the threshold is met.
-

