9 Configuration Utilities
The utilities in this chapter are standalone utilities that can be run externally, or they can be launched from the Utilities menu of the Configuration Tools. The utilities provided include the Configuration Converter and the Function Library Manager, which are described in detail.
Configuration Converter
The Configuration Converter is a standalone utility that converts a configuration that was originally created and saved in a prior release of the Configuration Tools. Only configurations created in a prior major release need to be converted. Configurations saved in previous versions of the same major release, but in different minor releases, do not need to be converted.
Note:
The functionality for converting a configuration is provided directly through the Configuration Tools. See the section, Open an Existing Project from an Older Version of the Configuration Tools.
Launching the Configuration Converter
The Configuration Converter can be accessed in three ways:
-
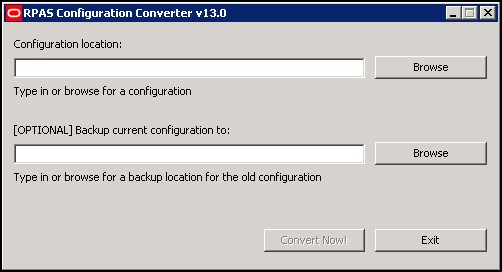
From the Utilities menu in the Configuration Tools, select Configuration Converter. The Figure 9-1 opens.
Figure 9-1 RPAS Configuration Converter Window
Description of "Figure 9-1 RPAS Configuration Converter Window" -
From the Windows Start menu, select Oracle, then RPASCE, then Utilities, and then select Configuration Converter. The Figure 9-1 opens. If this shortcut does not appear, refer to the Starter Kit Guide for the version of the Starter Kit you have installed for information about creating it.
-
Go to a command prompt. Run the
RpasConverter.exefile in the \utilities directory where the Configuration Tools were installed and run the following command:RpasConverter -c C:\PathToConfig\Config\Config.xml [OPTIONS]The following options can be used from the command line:
Table 9-1 Command Line Options
Option Description -b BackupDir
Use this argument to create a backup of the original configuration in BackupDir location specified.
-g
Use this argument to open the Figure 9-1
-h
Use this argument to display usage information.
Converting a Configuration
Complete the following steps to Convert a Configuration
-
In Configuration location field, enter path and configuration file name to be converted. This is the file in the configuration's directory that has the configuration name with an
.xmlextension. Click Browse to navigate and select the appropriate file. Make sure to provide the file extension in the Configuration location field.C:\Configs\MyConfig\MyConfig.xml
-
Optional: In the Backup current configuration to field, enter a directory where a copy of the original configuration will be stored. You may also click Browse to navigate and select a directory.
Note:
The directory entered must not already contain a directory whose name is the name of the original configuration. For example, to put a backup of a configuration named
MyConfigin a directoryC:\Backups," "C:\Backups\MyConfigmust not exist. -
Using the Convert to version list, select the version to convert to. This should always be the current version of the Configuration Tools unless there is a good reason to convert to some older version.
-
Click Convert Now.
-
If the conversion was successful, it may now be opened in the Configuration Tools. If there was an error while converting, an error message will be displayed, and the original configuration will remain untouched.
Note:
Refer to the Starter Kit Guide for the version of the Starter Kit you have installed for more information on the application installation and upgrade process.
Function Library Manager
The RPASCE calculation engine is designed to be extensible with support for custom functions or procedures that can be used in normal expressions. For validation purposes, the Configuration Tools are only aware of the standard RPASCE functions and procedures, so they will generate an error for any expressions that use custom functions or procedures. The Function Library Manager is used to provide validation for custom functions or procedures within the Configuration Tools. The custom functions or procedures must exist in the /applib directory of the RPASCE_HOME directory. If necessary, this utility can also be used to remove custom function libraries from being validated. There is no validation for the existence of the function libraries in RPASCE_HOME/applib directory. When a function library is removed using the Function Library Manager, it is removed only from the list of external libraries used for validation, and the contents of RPASCE_HOME/applib directory are left intact. The function libraries mentioned in this list are loaded by the Configuration Tools and will be used to perform rule validation.
Speak to an Oracle Retail Services representative for additional information about custom functions and procedures.
Launching the Function Library Manager
Perform the following steps to Launch the Function Library Manager
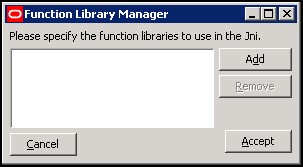
Navigate: From the Utilities menu in Configuration Tools, select the Function Library Manager, or run the Function Library Manager.bat file from the utilities directory where the Configuration Tools is installed. The Figure 9-2 opens.
Figure 9-2 Function Library Manager Window
Description of "Figure 9-2 Function Library Manager Window"
Adding a Function Library to Be Validated in the Configuration Tools
Perform the following steps to add a function library to the Configuration Tools:
-
Launch the Function Library Manager.
-
Click Add. The Figure 9-3 opens.
-
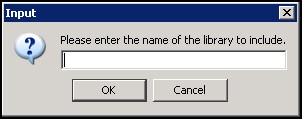
Enter the name of the library you want recognized.
Note:
Enter the name without the
*.dllor*.soextension. -
Click OK.
-
Click Accept to save any changes and close the window.
Removing a Function Library from Being Validated in the Configuration Tools
Complete the following steps to Remove a Function Library from Being Validated in the Configuration Tools
-
Launch the Function Library Manager.
-
Select the Function Library you want to remove from the validation process.
-
Click Remove. The Function Library is removed from the list.
-
Click Accept to save any changes and close the window.
Report Generator
The Report Generator is a utility that may be used to extract information about a configuration for external use. The information is generated in a structured text document that is much easier to manipulate than the XML format of the configuration files that are saved and loaded by the workbench. Many of the reports correspond to files generated as a part of the installation process.
Available Reports
The following reports can be created using the Report Generator:
-
Measure Extractor – This report generates a text file that lists the measure content of a solution.
-
Data Interface Report – This report generates a text file that lists the properties of all the measures in the project that have been added to the Data Interface Tool.
-
Measure Description Translation – This report generates a translation file lik the file generated as part of the installation process. It allows the extraction of measure descriptions for a project without the need to build the PDS first.
-
Measure Label Translation – This report generates a translation file lik the file generated as part of the installation process. It allows the extraction of measure labels for a project without the need to build the PDS first.
-
Measure Patch Report – This report examines a previous version of a configuration to determine which measure properties have changed between the two versions. It is used to determine which measures will be added, removed, or updated during a patch installation.
-
Rule Extractor – This report generates a text file that lists the rule content of a solution.
-
Rule Group Label Translation – This report generates a translation file that is similar to the file generated as part of the installation process. It allows the extraction of rule group labels for a project without the need to build the PDS first.
-
Workbook Extractor – This report generates a text file that lists the workbook content of a solution.
-
Workbook Group Label Translation – This report generates a translation file that is similar to the file generated as part of the installation process. It allows the extraction of workbook group labels for a project without the need to build the application first.
-
Workbook Label Translation – This report generates a translation file that is like the file generated as part of the installation process. It allows the extraction of workbook labels for a project without the need to build the PDS first.
-
Messages Translation – This report generates a translation file that is like the file generated as part of the installation process. It allows the extraction of messages issued by the RPASCE Client for a project without the need to build the PDS first.
-
Dimension Label Translation – This report generates a translation file that is like the file generated as part of the installation process. It allows the extraction of dimension labels for a project without the need to build the PDS first.
-
Hierarchy Label Translation – This report generates a translation file that is like the file generated as part of the installation process. It allows the extraction of hierarchy labels for a project without the need to build the PDS first.
-
Hierarchy.xml Report– This report generates the hierarchy.xml resource file used by RPASCE during the PDS creation and the dimension patching processes.
-
Taskflow Description – This report generates the taskflow.xml document used by the RPASCE Client like the file generated as part of the installation process. It allows the creation of the xml file without the need to build or patch the PDS first.
-
Taskflow Resources – This report generates the Resource Bundle used by the RPASCE Client like the file generated as part of the installation process. It allows the creation of the resources bundle without the need to build or patch the PDS first.
Generate a Report
Complete the following steps to generate a report.
-
Select the project that requires the report.
-
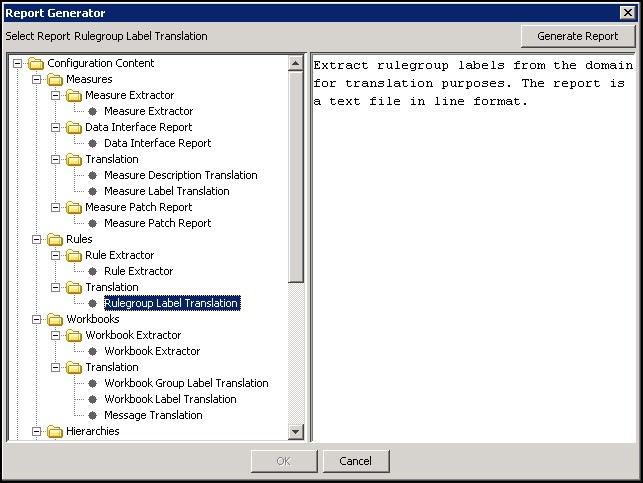
Select Generate Reports from the Utilities menu. The Figure 9-4 opens.
-
Select the desired report from the list in the left pane of the Generator window. The right pane displays a short description of the currently selected report.
-
Select Generate Report to begin the report generation process.
-
Depending upon the report in question, there may be some options to specify in further windows. These options commonly include the location where the generated file is to be stored or the selection of a single solution from the project.
-
Once all options have been specified, click OK to generate the report. The button is unavailable until all options have been specified.
Modularity Tool
The GA application configuration is intended to offer solution to solve business problems of most retailers. However, every retailer has their own requirements for the application based on their own business process, org structures, workflows, etc. A trimmed-down, specifically customized version suits better for the retailer’s need. The Modularity Tool is a utility to provide such flexibility. Using this tool, implementers can quickly pick and choose from a preset list of function modules and apply the modularity to the base GA configuration.
The application must provide its own list of function modules. The application starter kit needs to be pre-packaged to include the “modules” content. The module content must exist in the “modules” directory of $RIDE_HOME/resources directory. If the application does not support modularity, then its starter kit doesn’t include the “modules” content.
Launching the Modularity Tool
Complete the following to launch the Modularity Tool.
- Start the Configuration Tools workbench.
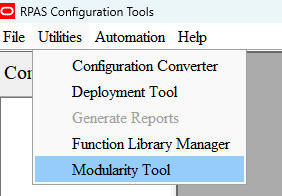
- From the Utilities menu in Configuration Tools, select Modularity Tool menu item.
Figure 9-5 Modularity Tool Menu Item
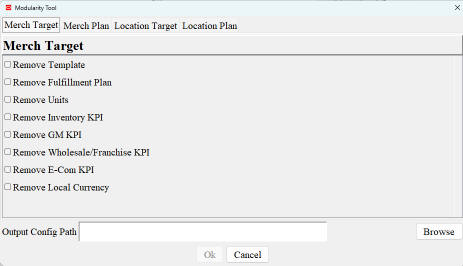
- You see the Modularity Tool dialog box. Note that users do not
need to first open the base configuration in ConfigTools before using
the Modularity Tool. If no modules content is available, the Modularity
Tool submenu is grayed out and disabled.
Figure 9-6 Modularity Tools Dialog Box
Select and Apply Modularity
- Click each Function Module tab, (for example, Merch Target) and select extensions within that tab.
- Click the Browse button and select a directory where the
applied output configuration is stored. Users can also directly enter
the full path within the Output Config Path blank field. Tools
will create the directory if it does not exist.
Figure 9-7 Specify Full Path to Parent Directory
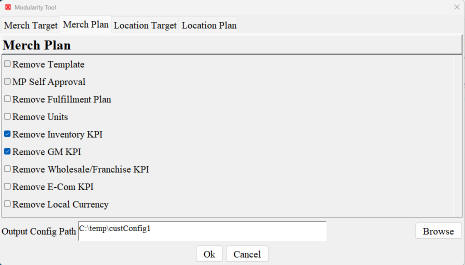
- Click OK. You can review the output log in the console where the ConfigTools starts for details.
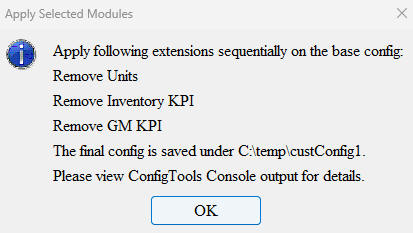
- The Finish dialog box displays with the summary of modules
applied.
Figure 9-8 Finish Dialog Box
Summary of Modules Content
The Modularity Tool is only enabled when the modules directory and its corresponding content exist under the $RIDE_HOME/resources directory.
The control file, module.xml, the application’s module json files, and the .ga_config directory must exist under the modules directory
Figure 9-9 Modules Directory Under $RIDE_HOME/resources
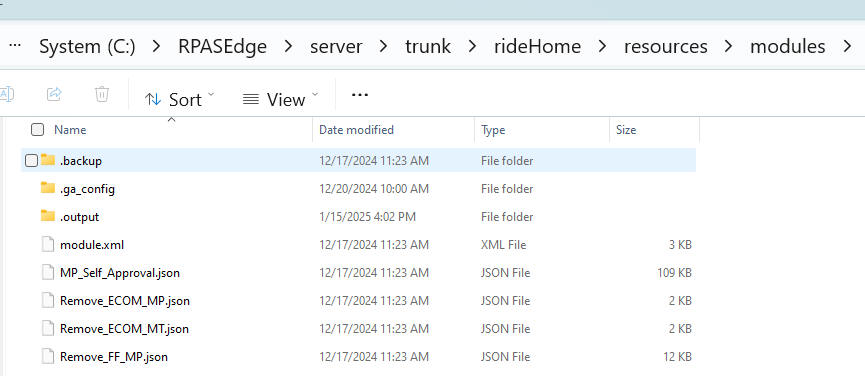
The module json file contains content such as unrealizing certain measures, modifying certain rules or expressions, adding rule/rule groups etc. Each json file is usually called as an extension or a module. The .ga_config directory contains the base GA application configuration. For details, please refer each application’s documentation.
The module.xml File
The module layout within the Modularity Tool dialog box is controlled by the module.xml included in the application starter kit.
<?xml version="1.0" encoding="UTF-8"?>
< module name="MFPCS" version="25.1.101.0" providerName="MFPCS">
<solution name="MFPRCS">
       <function name="MerchTarget" label="Merch Target" displayOrder="1">
              <ext id="Remove_MT" label="Remove Template" execSeq="100" displayOrder="1" />
              <ext id="Remove_FF_MT" label="Remove Fulfillment Plan" execSeq="105" displayOrder="2" />
              <ext id="Remove_Units_MT" label="Remove Units" execSeq="110" displayOrder="3" />
              <ext id="Remove_Inv_MT" label="Remove Inventory KPI" execSeq="115" displayOrder="4" />
              <ext id="Remove_GM_MT" label="Remove GM KPI" execSeq="120" displayOrder="5" />
              <ext id="Remove_WF_MT" label="Remove Wholesale/Franchise KPI" execSeq="125" displayOrder="6" />
              <ext id="Remove_ECOM_MT" label="Remove E-Com KPI" execSeq="130" displayOrder="7" />
              <ext id="Remove_LC_MT" label="Remove Local Currency" execSeq="135" displayOrder="8" />
        </function>
        <function name="MerchPlan" label="Merch Plan" displayOrder="2">
              <ext id="Remove_MP" label="Remove Template" execSeq="200" displayOrder="1" />
              <ext id="MP_Self_Approval" label="MP Self Approval" execSeq="205" displayOrder="2" />
              <ext id="Remove_FF_MP" label="Remove Fulfillment Plan" execSeq="210" displayOrder="3" />
              <ext id="Remove_Units_MP" label="Remove Units" execSeq="215" displayOrder="4" />
              <ext id="Remove_Inv_MP" label="Remove Inventory KPI" execSeq="220" displayOrder="5" />
              <ext id="Remove_GM_MP" label="Remove GM KPI" execSeq="225" displayOrder="6" />
              <ext id="Remove_WF_MP" label="Remove Wholesale/Franchise KPI" execSeq="230" displayOrder="7" />
              <ext id="Remove_ECOM_MP" label="Remove E-Com KPI" execSeq="235" displayOrder="8" />
              <ext id="Remove_LC_MP" label="Remove Local Currency" execSeq="240" displayOrder="9" />
         </Function>
         <function name="LocTarget" label="Location Target" displayOrder="3">
              <ext id="Remove_LT" label="Remove Template" execSeq="300" displayOrder="1" />
              <ext id="Remove_Units_LT" label="Remove Units" execSeq="305" displayOrder="2" />
              <ext id="Remove_LC_LT" label="Remove Local Currency" execSeq="310" displayOrder="3" />
         </function>
         <function name="LocPlan" label="Location Plan" displayOrder="4">
              <ext id="Remove_LP" label="Remove Template" execSeq="400" displayOrder="1" />
              <ext id="Remove_Units_LP" label="Remove Units" execSeq="405" displayOrder="2" />
              <ext id="Remove_Inv_LP" label="Remove Inventory KPI" execSeq="410" displayOrder="3" />
              <ext id="Remove_GM_LP" label="Remove GM KPI" execSeq="415" displayOrder="4" />
              <ext id="Remove_WF_LP" label="Remove Wholesale/Franchise KPI" execSeq="420" displayOrder="5" />
              <ext id="Remove_LC_LP" label="Remove Local Currency" execSeq="425" displayOrder="6" />
          </function>
</solution>
</module>
| Element Name | Attribute | Comments |
|---|---|---|
| module |
One module.xml can only contain one module element. |
|
| name | The name of the application. Case insensitive. | |
| version | The version of this module.xml file. | |
| providerName | The provider name of this module.xml. Optional. | |
| solution | Specify the solution where the modularity is applied. Currently, the Modularity Tool only supports one solution. | |
| name | The name of the solution. | |
| function | Specify the function module tab within the Modularity Tool dialog box. Each tab contains multiple extensions. One function element can contain multiple ext elements. | |
| name | The tab name. | |
| label | The tab label. | |
| displayOrder | Integer. The display of tabs is sorted by displayOrder in ascending order. | |
| ext | Corresponds to one extension json file. | |
| id | The name of the extension json file without “.json”. Must match the exact json file name on disk. | |
| label |
The label of the extension. |
|
| execSeq | The execution ordering when applying this extension: the lower the number, the earlier it is applied. | |
| displayOrder | Integer. The display of extensions within each tab is sorted by displayOrder in ascending order. |
-
In the Merch Target Tab, the user selected the extension Remove Units (execSeq="110")
-
In the Merch Plan Tab, the user selected the extensions Remove Inventory KPI (execSeq="220") and "Remove GM KPI (execSeq="225")
-
The execution order is ordered by execSeq in ascending order.
-
Modularity Tool applied these three extensions in the order of Remove Units, Remove Inventory KPI, and Remove GM KPI.
Note: It is recommended that implementers open the output config in the ConfigTools workbench, click the impacted Tools components, such as measures, workbooks, rules, and so on, to inspect the configuration. Pay attention to the Tasklist Pane at the bottom of the ConfigTools. Since the errors and warnings in the Tasklist Pane may come from original configuration, delete them first before inspection.
