Complete Job Inspection
If given permission, users can complete jobs:
- Navigate to the job to complete: Choose Quality Control from the Menu and then choose Search the Job. Click the job to enter the Manage Job screen.
-
Validate that all the checks were completed with all the necessary data.
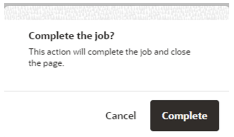
Click Complete in the Manage Job screen. A dialog box is displayed to confirm the action.

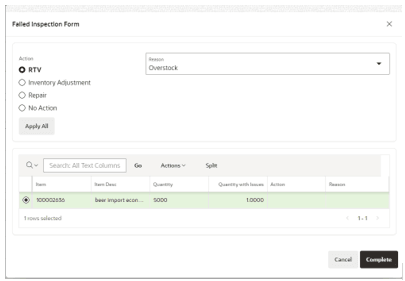
- If the Overall Checks or the Item Checks are completed with issues, the failed inspection form is displayed to the user.
Note:
If the Overall Checks are completed with issues, the failed inspection form displays all the items of the job. Otherwise, it shows only the items with a status of completed with issues.
If an item has been released prior to the job completion, the already released item is not displayed again.

- An action and the reason can be selected in the header and applied to all Items by clicking Apply All. It will apply the Action selected and Reason to all lines in the table.
- If items have different reasons for the failure, the user has the option to directly edit in the grid:
- Quantity with issues
Note:
By default, the previously inserted values are used, but the user is able to edit the value in this screen.
Setting the quantity with issues equals 0 need to have the action set to No Action.
- Action
- Reason
- Quantity with issues
- If necessary, the user can also split the item by selecting the required item and clicking Split. This allows the user to perform multiple actions for a single item.
- The user can click Cancel to close the failed inspection form without making changes. The user is redirected again to the Manage Job screen.
- The user can click Complete to finish the job and execute the actions.
Note:
All items must have the action and the reason added.- If the action is RTV:
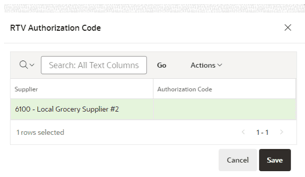
- If the Supplier requires an authentication code, an additional dialog box is displayed for the necessary Authorization Code. After user confirmation, it generates the RTV in MFCS.

- If the Supplier does not allow RTVs, an error message is displayed to the user so that they may select a different action.

- If the action is RTV, the based on is Ad-Hoc, and the supplier was not chosen during the job, the RTV is created against the primary supplier of the item.
- If the Supplier requires an authentication code, an additional dialog box is displayed for the necessary Authorization Code. After user confirmation, it generates the RTV in MFCS.
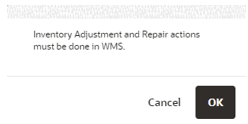
- If the action is Inventory Adjustment, a message is displayed that the user needs to complete the actions in Warehouse Management System (WMS).

- If the action is Repair, a message is displayed that the user needs to complete the actions in WMS.
- If the action is No Action, the job is completed without requiring any other action from the user.

- If the action is RTV: