Cancelling Scheduled Reports
Users with the Advanced Reporting Administrator authority profile have the ability to cancel any reporting job through the Manage Schedule Reports page.
To cancel a scheduled report:
-
Choose the reporting job to be cancelled.
-
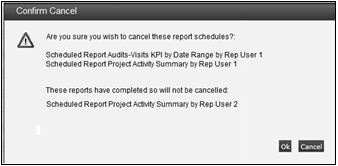
Select the Cancel action. The Confirm Cancel dialog box appears.
Figure 3-19 Confirm Cancel Scheduled Report

If multiple schedules have been selected, the confirmation prompt lists those that have been selected. If any cannot be cancelled because they have since completed, they are listed beneath.
-
To continue the cancellation, click Ok. To return to the Manage Schedules Report page, click Cancel.
When a report schedule job is cancelled, the job is terminated, or is removed from the scheduler if it has yet to run. The History page of the Report Schedule record will show the status as having been cancelled, and a notification email (the template is REPORT_CANCELLED) is sent to the user who scheduled the report.
Individual users who submit the report can cancel it through the Schedules page of the Report Schedule record. For details, see Scheduling Reports.
Note:
To prevent a recurring report from being automatically scheduled again, delete or edit its Report Schedule record.
Note:
Status shows the status of the batch job. Sub Status shows the status of the report generation, within the batch job.
In the event of an unexpected error during report generation, Status may show the batch job as completed, but with Sub Status showing as a failure.
A failure in either Status or Sub Status indicates the report has not run successfully.