2 Customer Functions
The process of a sale on the SCO is in two parts - the customer needs to scan their items, and secondly to pay for them. Loyalty members can swipe their loyalty card or enter their email or phone number to associate the transaction. Depending on configuration, the number of carrier bags used, and round up for charity may be prompted for. From the home screen the customer language may be changed.
The section describes the following topics that a customer can perform:
Assistance
Assistance can be called at the start of a transaction or at any time during a transaction.
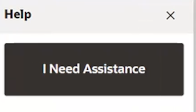
 to bring up access to the assistance button. You
can then select I Need Assistance button and wait for an associate.
Figure 2-1 Assistance Button from Home Screen
At any time in the transaction if help is needed, select Assistance and wait for an associate.
Figure 2-2 Assistance Button During Transaction

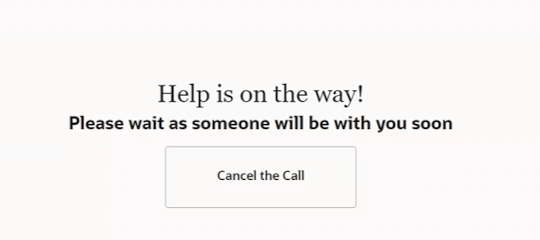
If the help is no longer required, select Cancel the Call to cancel the alert.
Figure 2-3 Associate Alerted
Occasionally a customer issue needs resolving at the register during a sale. This may be to verify the sale of age restricted items, change price to match a competitor, to cancel an item or sale, or to suspend a transaction. Please see Associate Functions for more information.
Basic Sale
To perform a self checkout sale:
-
From the home screen, scan the first item, or scan loyalty card, or select Start to begin the sale.
Figure 2-4 Customer View of Shopping Cart Before Item Scanned

If the store has a loyalty program, the customer can scan their loyalty or customer card to begin their transaction. After scanning the loyalty or customer card, a loyalty symbol displays to the left of the shopping cart and the loyalty button removed from view.
Note:
If a previous customer has started a sale but has walked away and left the SCO with maybe a loyalty card scanned, select Start Over to begin a transaction.
-
With a fixed or handheld scanner a customer can scan items to add to their shopping cart.
Figure 2-5 SCO Item Added

The item is added to the shopping cart. Details of the item added such as, description, unit price, quantity, discounts, and total price are displayed in the view port.
-
Repeat scanning items to add more items to the shopping cart.
If a second item is scanned, a second line is shown. Each item scanned results in a new line showing in the view port with the newest item shown on top.
-
Scan any coupons. The discount is recorded, and the transaction total amount is updated if there are applicable items on the cart or when the applicable items are added to the cart.
Please see Coupons for more information. -
When all items have been scanned and loyalty and coupons recorded, select Finish and Pay to start the tendering process.
Retailers can configure bags to be purchased at the SCO. The customer can select the number of bags they will purchase or they can enter a custom number of bags they will purchase.
Figure 2-6 Bags Used Prompt

The cost of each bag is displayed on the prompt. A preset list of number of bags is presented for the customer to select from or a customer can select the button labeled Enter Custom Amount where they can enter a number value if they need.
-
If prompted, select whether to donate and round up for charity.
This will round up their total purchase to the next whole dollar by donating the amount which would always be less than one dollar. The donation could be from .01 to .99 cents - whatever amount is needed to make the next whole number.
Figure 2-7 Round up for Charity Prompt

If Yes, the donation is shown and the transaction total updated.
-
SCO displays the tender selection screen. Select the tender type to pay with. The SCO will accept Credit cards, Debit cards, EFTLink Gift cards, and Digital wallets as Tender types.
See Tendering for more information. -
The SCO displays a message to follow the prompts on the pin pad.
-
The payment terminal (PED) displays the transaction amount due and instructs the customer to insert or tap their payment card.
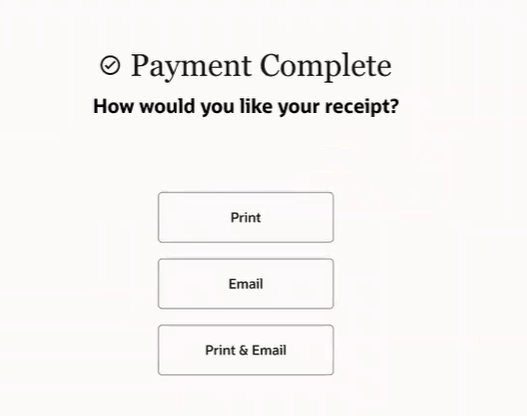
The receipt delivery method is requested — print , email, or both, and the customer is prompted to take their printed receipt if that option was selected.
Figure 2-8 Receipt Required?
Note:
The self checkout store only supports traditional register receipts as a print format.
If email is selected, the customer is prompted to enter their email address and to select Send Receipt.
Figure 2-9 Email Address Prompt

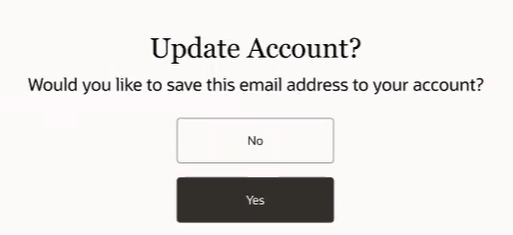
If the email address is different to that what is on file, the customer may be prompted to save the email address to their customer record for future use. The customer's email address will pre populate with this new email address at their next shop.
Figure 2-10 Update Account
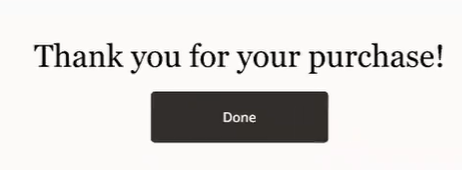
The transaction is cleared from the screen and the SCO is ready for the next transaction.
Figure 2-11 Thank You Message
Change Language
To accommodate self checkout in areas with multiple languages, the system language in the SCO home screen can be changed to another pre-set language by selecting the appropriate language. Up to nine languages may be shown on the SCO screen as buttons.
On the home screen select  to bring up access to the assistance button and
a list of languages. Select a language.
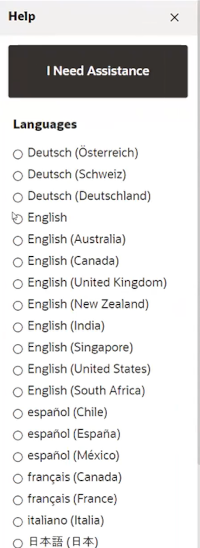
The next screen/ the shopping cart screen will be in the new language. The language chosen by the customer remains throughout the rest of the sales transaction. If an associate needs to login, the language will default to the language of the associate.
Alternate Methods to Add Items
If items cannot be scanned in because there is no barcode on the item, or the barcode is damaged, the identification of the item can be added by an alternative method:
Once the item has been added, continue the sale (see Step 3 above), or complete the sale by selecting Finish and Pay.
Lookup Item
To find items that do not have a barcode, such as bakery items, for example, croissants, or self service hot drinks:
-
Select the Magnifier icon.
Figure 2-12 Find Items

-
Enter SKU or item ID and select Process.
Figure 2-13 Item Lookup Result

Note:
Product images are supported.
Figure 2-14 Item Lookup Result — No Product Image

-
Select an image icon to add the item to your shopping cart.
Remove Last Item
If an item has been double scanned or the customer has changed their mind after scanning the item, and if configured, the customer can remove just the last item from their shopping cart.
To remove the last item from the transaction before payment:
-
Select Remove Last Item.
Figure 2-15 Remove Last Item

The item is removed from the transaction and the last item has been removed message is displayed.
Figure 2-16 Last Item Removed Message

If you select Remove Last Item again, the following message is shown:
Figure 2-17 Remove More Items

-
Continue scanning items or select Finish and Pay.
Coupons
After scanning items the customer can scan coupons that they may have and apply them to their transaction. A coupon can be scanned directly and applied to the transaction without hitting the Coupons button and can also be scanned/entered before the item has been scanned.
A message is shown to acknowledge the coupon has been scanned.
Figure 2-18 Coupon Scanned Message

-
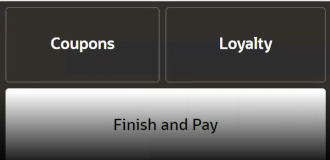
Alternatively, a customer can select Coupons from the transaction screen to start the process.
Figure 2-19 Coupons Button
 SCO displays a message to the customer to enter or scan their coupons.At the scan of a successful coupon a message will display "Your coupon has been scanned."
Figure 2-20 Enter or Scan your Coupon Prompt

Note:
It does not mean that the coupon has been applied.
Figure 2-21 Successful Coupon Scan

-
Continue scanning coupons as required. You can scan coupons prior to scanning the product.
Also, a coupon can only be used once in the promotion.
Figure 2-22 Coupon Validation

-
After the customer has scanned all their coupons, they will need to select Back.
-
The system returns to the transaction screen with the coupon discounts displayed in the line items. The price of the item is reduced in the transaction list by valid coupon(s).
Figure 2-23 Coupons Applied

-
Continue to tendering.
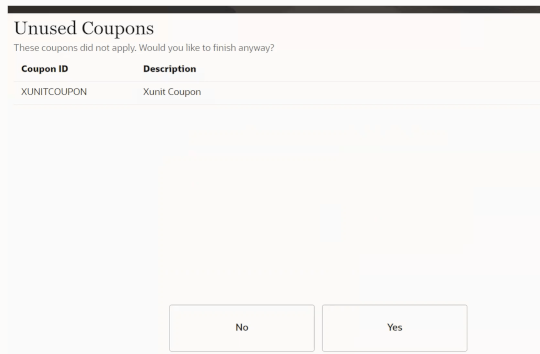
Any unused coupons are displayed before the end of a transaction to give the customer a chance to use the coupon.
Figure 2-24 Unused Coupons
Loyalty
If your store has a loyalty program, the customer can scan their loyalty or customer card to begin their transaction. The loyalty card can also be scanned when the customer is in the shopping cart.
Alternatively, a customer can select Loyalty from the transaction screen to scan or lookup their loyalty information.
Figure 2-25 Loyalty Button

A customer can enter their email or phone number linked to their loyalty card to request association to the transaction.
Figure 2-26 Loyalty Lookup
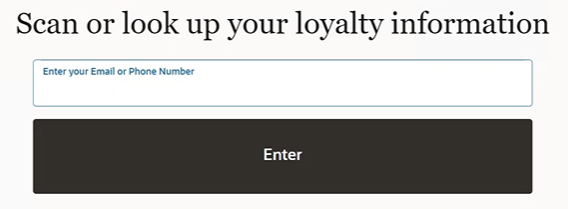
After scanning the loyalty or customer card, or entering the details from the lookup, the transaction screen shows the customer's name. Once a customer has attached their loyalty to the transaction the Loyalty button is removed from display on the SCO screen.
Serial Number Items
In SCO, either the customer is required to enter a serial number when prompted or an associate is required to enter the serial number prior to the customer tendering. If the SCO is configured such that the customer can enter a product serial number:
Figure 2-27 Enter Product Serial Number Prompt
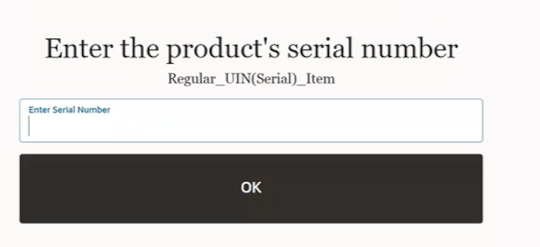
Scan the serial number and select OK. The serial number is shown on the list of items in the shopping cart.
Figure 2-28 Serial Number Item

Tendering
-
When all items have been scanned and loyalty and coupons recorded, select Finish and Pay to start the tendering process.
-
SCO displays the tender selection screen. Select the tender type to pay with. The SCO will accept Credit cards, Debit cards, EFTLink Gift cards, and Digital wallets as Tender types.
Figure 2-29 Tender Type

-
The SCO displays a message to follow the prompts on the pin pad.
Figure 2-30 Pin Pad Prompt

-
The payment terminal (PED) displays the transaction amount due and instructs the customer to insert or tap their payment card.
Upon successful payment, Xstore displays the Receipt options (Print, Email, and Print and Email).
If a customer payment card is declined for any reason, such as invalid PIN, card expired, insufficient funds on card, and so on, the following options are available:
-
Back to Basket
-
Try Another Card
-
Request Assistance
If the system is offline, the following message is shown.
Figure 2-31 Payment Declined

Select Get Assistance to alert the associate.