28 Manage Till Options
Till options and maintenance functions are primarily related to the movement of money into and out of a till (a cash drawer). Till options include Paid In and Paid Out, No Sale, Post Void, Foreign Currency Maint., Tender Exchange, and Change Float. Several other till maintenance options deal with the control and auditing of funds in the till. They include Cash Pickup, Cash Transfer, Till Audit, and Mid-Day Deposit. Finally, the Lock Register option provides physical security for the till.
Note:
Because Xstore Point of Service is highly configurable, menu options in this guide are not identified by a function key number (F2, F3, and so on.). Instead, the name on the button is used throughout the procedures and processes. Many Till Options are controlled by user security and may not be available to all associates.
Open the Till Options Menu
The Till Options menu can be opened from two locations in Xstore Point of Service:
Register Login Screen
To open the Till Options menu from the Register Login Screen:
-
Click Till in the Register Login screen.
Figure 28-1 Register Login

-
Do one of the following, depending upon the configuration of your system:
-
Enter your password and press Enter.
The Back Office Main Menu opens.
Figure 28-2 Till Main Menu
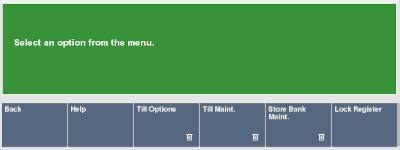
-
Click Till Options.
The Till Options menu opens.
Figure 28-3 Till Options Menu Buttons

Open the Till Maintenance Menu
To open the Till Options menu from the Register Login Screen:
-
Click Till in the Register Login screen.
-
Do one of the following, depending upon the configuration of your system:
-
Enter your password and press Enter.
The Back Office Main Menu opens (Figure 28-2).
-
Click Till Maint.
The Till Maintenance menu opens.
Figure 28-4 Till Maintenance Menu Buttons

Paid In and Paid Out Transactions
A paid in transaction allows you to move funds into a till from non-sale sources. A paid out transaction moves funds out of a till for non-refund purposes. The system's configuration controls which associates are allowed to move funds in or out of the till. It also specifies the list of valid reasons that an associate can select when performing a paid in or paid out transaction. In addition, the system's configuration controls whether receipts are produced by these two transaction types.
Paid Out
To perform a paid-out transaction:
-
Click Paid Out.
-
If necessary, scan the cash drawer to use for the paid out transaction.
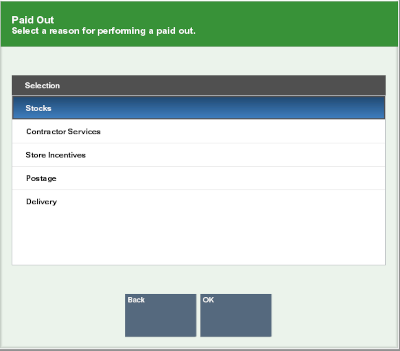
A reason code selection window opens.
-
Select the reason for the paid out transaction:
Figure 28-5 Paid Out Reason Codes
-
Click the reason.
-
Use the up and down arrows to highlight the reason, the press the Spacebar.
-
-
Click OK.
-
Enter more information about the reason for the paid out transaction.
-
Click OK.
-
Enter the amount of the paid out, then press Enter.
Note:
If you exceed your store's maximum amount allowed for a paid out transactions a notification window opens. Click OK to close the prompt and reenter a new paid out amount.
The cash drawer opens.
-
Remove the entered amount of the paid out from the cash drawer, then close the cash drawer.
The paid out transaction is complete.
Paid In
To perform a paid-in transaction:
-
Click Paid In.
-
If necessary, scan the cash drawer to use for the paid in transaction.
Xstore Point of Service prompts for a paid in tracking number.
Figure 28-6 Paid Out Receipt Barcode Prompt

-
Do one of the following:
-
Enter a tracking number for a previous paid-out transaction from which you are returning funds:
-
Scan the paid-out transaction receipt barcode and press Enter.
-
Enter tracking number for the paid-out transaction and press Enter.
-
-
Press Enter to skip entering a tracking number.
A reason code selection window opens.
-
-
Select the reason for the paid in transaction:
-
Click the reason.
-
Use the up and down arrows to highlight the reason, the press the Spacebar.
-
-
Click OK.
-
Enter more information about the reason for the paid in transaction.
-
Click OK.
-
Enter the amount of the paid in, then press Enter.
The cash drawer opens.
-
Put the paid-in money in the cash drawer, then close the cash drawer.
The paid in transaction is complete.
Tender Exchange
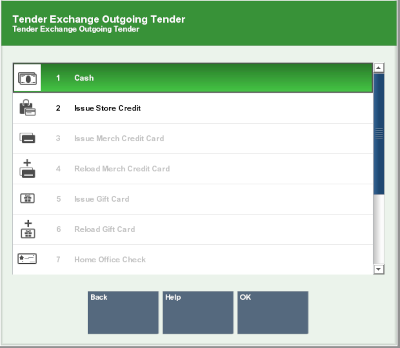
The Tender Exchange function permits an associate to exchange one form of tender for another. The types of tenders that may be exchanged and the threshold exchange amounts are determined by your store policy.
To perform a Tender Exchange:
-
Click Tender Exchange.
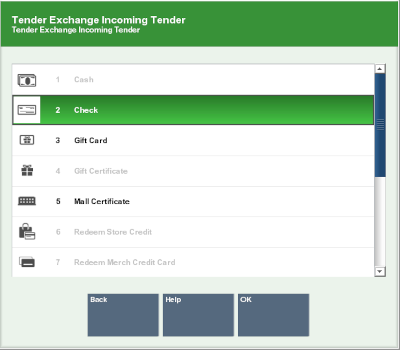
A Tender Exchange Incoming Tender window opens.
Figure 28-7 Tender Exchange Incoming Tender
-
Select the incoming tender type from the tender exchange list:
-
Click the tender.
-
Use the up and down arrow keys to highlight the correct tender, then press the Spacebar.
-
-
Click OK.
-
If a check tender was selected in Step 3, enter information about the check:
-
Enter the check MICR number, then press Enter.
-
Enter the check number, then press Enter.
-
Enter the state or province that issued the ID being used to verify the customer's identity, then press Enter.
-
Enter the ID number, then press Enter.
-
Enter the birthdate on the ID, then press Enter.
-
-
Enter the amount of the incoming tender.
-
If necessary, select whether to add another incoming tender to the exchange:
-
Select the outgoing tender:
-
Click the tender.
-
Use the up and down arrow keys to highlight the correct tender, then press the Spacebar.
-
-
Click OK.
Xstore Point of Service prompts for the amount of the outgoing tender.
Note:
The default value is equal to the maximum amount that can be redeemed in the selected tender.
-
If necessary, change the amount to return to the customer.
-
Press Enter.
-
If necessary, scan the cash drawer with which to perform the tender exchange.
-
Indicate whether the tender exchange is complete:
-
Click Yes to complete the transaction.
Receipts will print.
-
Click No and a Tender Exchange Incoming Tender window opens. Return to Step 3.
-
Change Float
The Float is the total value of cash counted and removed from the till, but not included in the bank deposit. This cash remains in circulation to be used the next time the till is opened. This option can be used whenever you need to change the amount withheld from the bank deposit and can be adjusted per till. For example, you may want to change the float amount during the holiday shopping season to plan for increased sale activity.
To change the float:
-
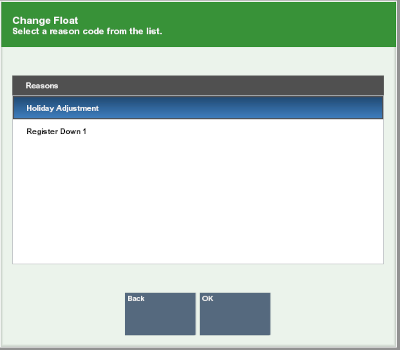
Click Change Float.
Figure 28-9 Change Float Reason Code List
-
Select the reason for changing the float:
-
Click the reason.
-
Use the up and down arrows to highlight the reason, the press the Spacebar.
-
-
Click OK.
-
Enter more information about the reason for the float change transaction.
-
Click OK.
-
If you are prompted for a currency, select the currency:
-
Click the currency.
-
Use the up and down arrows to highlight the currency, the press the Spacebar.
-
-
Click OK.
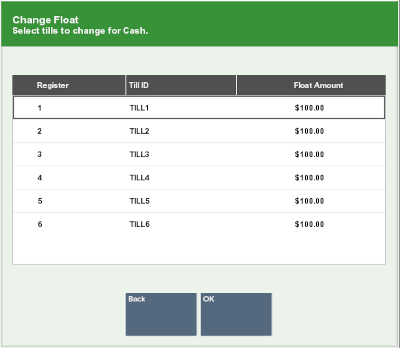
Xstore Point of Service prompts for the tills.
Figure 28-10 Change Float Till Selection
-
Select the tills:
-
Click the tills.
-
Use the up and down arrows to highlight the tills, the press the Spacebar.
-
-
Click OK.
Xstore Point of Service prompts for the new float amount for the selected tills.
Figure 28-11 Change Float Amount

-
Enter the new float amount, then press Enter.
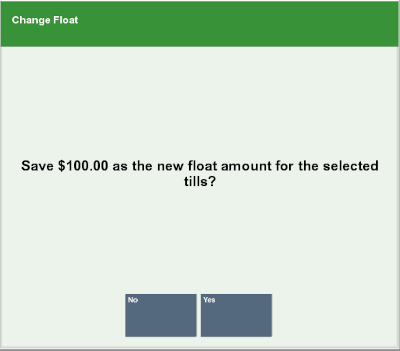
A confirmation prompt opens.
Figure 28-12 Change Float New Amount
-
Click Yes.
The float is changed, and the change float process completes.
Cash Pickup
Cash Pickup is a till feature that allows an associate to take cash from a till so that the amount does not exceed a specified threshold amount. The system may be configured to prompt for an associate to make a cash pickup when the amount in the till is greater than the threshold amount.
Note:
Your system's configuration may specify the maximum amount that should be kept in a till. If that amount is exceeded after completing the tendering process for a transaction, the system may display a prompt indicating that a cash pickup should be made. However, you do not have to wait for this prompt to make a cash pickup. After you have assigned a customer to a transaction or added items to a sale, you cannot perform a cash pickup.
To perform a cash pickup:
-
Click Cash Pickup.
-
Scan the cash drawer.
-
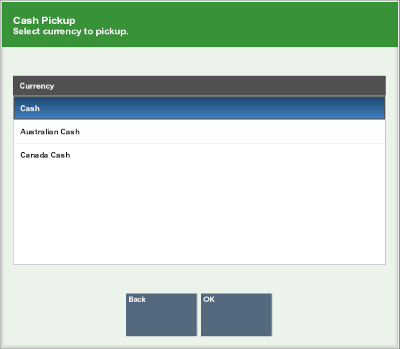
Select the currency:
-
Click the currency.
-
Use the up and down arrows to highlight the currency, then press the Spacebar.
-
-
Click OK.
-
Enter the amount of the cash pickup then press Enter.
Figure 28-14 Cash Pickup Amount

Note:
Your system's configuration may specify the minimum amount that should be kept in a till. If you try to remove an amount that results in the till amount going below this level, the system displays a prompt indicating the amount that must remain in the till after a pickup. Click OK to return to the Cash Pickup amount prompt. Your system may be configured to count the Cash Pickup currency.
The cash drawer opens.
-
Remove the entered amount from the cash drawer.
-
Close the cash drawer.
The cash pickup is complete.
Cash Transfer (From Store Safe To Till)
To perform a Cash Transfer from the store safe to a till:
-
Click Cash Transfer.
-
Scan the cash drawer.
-
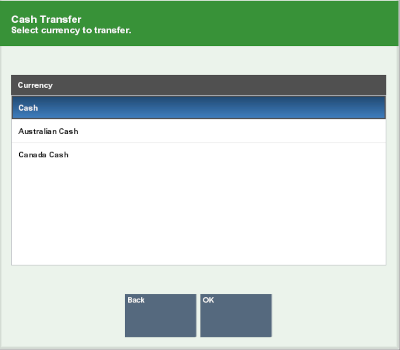
Select the currency:
-
Click the currency.
-
Use the up and down arrows to highlight the currency, then press the Spacebar.
-
-
Click OK.
-
Enter the amount of the cash transfer then press Enter.
Figure 28-16 Cash Transfer Amount Prompt

Note:
Your system may be configured to count the Cash Transfer currency.
The cash transfer is complete.
Mid-Day Deposit
A Mid-Day Deposit allows you to place funds into the store safe during a working session. This activity is not necessarily restricted to a specific time and may be performed as often as necessary.
To perform a mid-day deposit:
-
Click Mid-Day Deposit.
-
Scan the cash drawer.
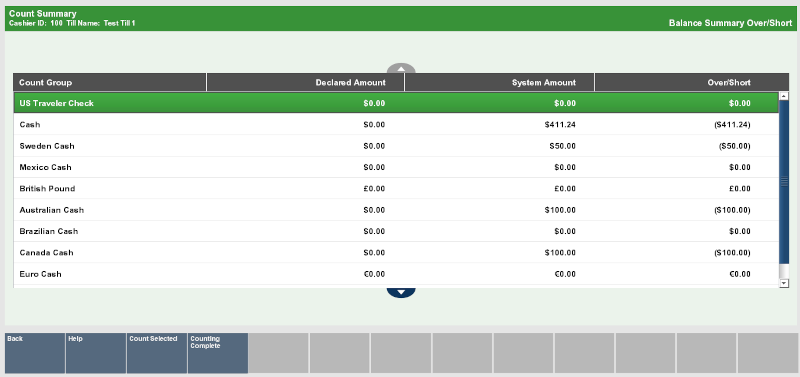
Figure 28-17 Mid-Day Deposit Count Summary Screen
-
If necessary, count the cash tender amounts you are depositing:
-
Click the cash tender to count.
-
Click Count Selected.
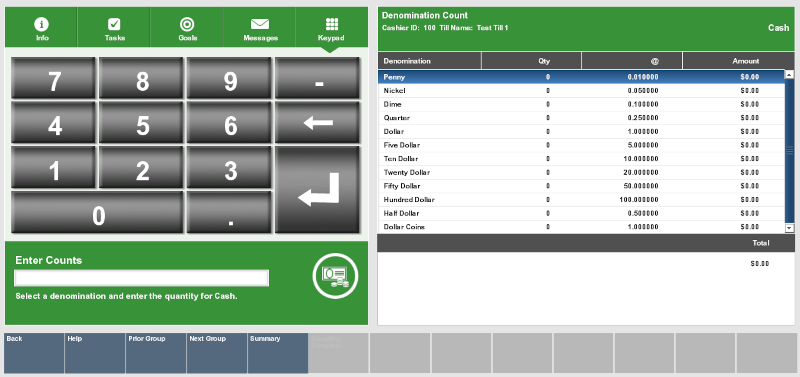
A list of currency denominations opens.
Figure 28-18 Denomination Count
-
Count a denomination currency.
-
Click the denomination in the View Port.
-
Enter the count of the currency denomination in the Focus Bar and press Enter.
-
Click Summary.
Xstore Point of Service returns to the tender list
-
-
If necessary, count the credit card tender:
-
Click to select Credit Card.
-
Click Count Selected.
Xstore Point of Service prompts for the credit card tender count.
-
Enter the number of credit card tender counts and press Enter.
Xstore Point of Service prompts for the amount of credit card tenders.
-
Enter the total amount of all credit card tenders and press Enter.
-
Click Summary.
Xstore Point of Service returns to the tender list.
-
-
If necessary, count the check tender:
-
Click to select Check.
-
Click Count Selected.
Xstore Point of Service prompts for a check serial number.
-
Enter the serial number for the check and press Enter.
Xstore Point of Service prompts for the amount of the check.
-
Enter the amount of the check and press Enter.
-
Click Summary.
Xstore Point of Service returns to the tender list.
-
-
If necessary, count the other tenders:
-
Click Counting Complete when the deposit count is complete.
A deposit receipt prints.
-
Close the cash drawer.
The mid-day deposit is complete.
Till Audit
A Till Audit provides the capability to select a tender type, record its total current value, and see if that value balances with the amount that the system shows for the same tender. The system calculates and displays any difference (over/short) between the two amounts.
A till audit may be performed any time after the Beginning Count and before the Ending Count. The till does not need to be removed after the audit is completed.
To perform a till audit:
-
Click Till Audit.
-
Scan the cash drawer.
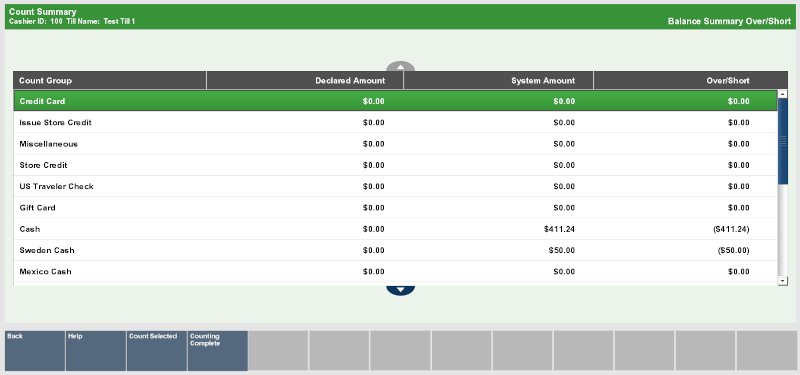
Figure 28-19 Till Audit Count Summary Screen
-
Count the cash tender amounts you are auditing:
-
Click the cash tender to count.
-
Click Count Selected.
A list of currency denominations opens.
-
Count a denomination currency.
-
Click the denomination in the View Port.
-
Enter the count of the currency denomination in the Focus Bar and press Enter.
-
Click Summary.
Xstore Point of Service returns to the tender list
-
-
If necessary, count the credit card tender:
-
Click to select Credit Card.
-
Click Count Selected.
Xstore Point of Service prompts for the credit card tender count.
-
Enter the number of credit card tender counts and press Enter.
Xstore Point of Service prompts for the amount of credit card tenders.
-
Enter the total amount of all credit card tenders and press Enter.
-
Click Summary.
Xstore Point of Service returns to the tender list.
-
-
If necessary, count the check tender:
-
Click to select Check.
-
Click Count Selected.
Xstore Point of Service prompts for a check serial number.
-
Enter the serial number for the check and press Enter.
Xstore Point of Service prompts for the amount of the check.
-
Enter the amount of the check and press Enter.
-
Click Summary.
Xstore Point of Service returns to the tender list.
-
-
If necessary, count the other tenders:
-
Click Counting Complete when the till audit is complete.
A till audit receipt prints.
-
Close the cash drawer.
The till audit is complete.
Till Accountability Mode Functions
Some till options are available only if your system uses till accountability, in which responsibility for a till is assigned to a specific cashier. This also allows Xstore Point of Service to support more than one cash drawer on a single register. Till assignment is done through the Back Office Menu. Refer to the Oracle Retail Xstore Point of Service Classic Manager's Guide for more information about all the functions available in Till Accountability mode.
Attach a Till to a Register
This is an automatic function that occurs only in the till accountability mode of operation. When a cashier who has been assigned to a specific till logs in to the system, a prompt displays indicating that you must have a till attached.
To attach a till to a register:
-
Log In to Oracle Retail Xstore Point of Service.
A confirmation prompts asks whether a till must be attached to the register.
-
Click Yes.
-
Count the cash tender amounts:
-
Click the cash tender to count.
-
Click Count Selected.
A list of currency denominations opens.
-
Count a denomination currency.
-
Click the denomination in the View Port.
-
Enter the count of the currency denomination in the Focus Bar and press Enter.
-
Click Summary.
Xstore Point of Service returns to the tender list
-
-
Click Counting Complete when all currencies have been counted.
-
If the starting cash amount matches, the system prompts to confirm the amount for all cash currencies you entered and opens the register after you acknowledge the system amount. Continue with Step 6.
-
If the currency amounts do not match, the system displays a prompt to either recount the till or to accept the difference. Continue with Step 5.
-
-
Select whether to continue attaching the till:
-
Click Yes to attach the till to the register.
-
Click No to return to Step 3 and perform the count again.
-
-
Click Yes.
The till is attached to the register.
Open a Till
If your system is configured to use network-enabled cash drawers, you must open a till to begin using a cash drawer.
To open a till:
-
Click Attach Cash Drawer Till.
A list of tills opens.
-
Select the till to open:
-
Click the till.
-
Use the up and down arrow keys to highlight the till.
-
-
Click OK.
Xstore Point of Service prompts you to scan a cash drawer.
-
Scan the cash drawer to which the till will be attached.
A confirmation prompt opens.
-
Click Yes.
The cash drawer opens.
-
Insert the till into the cash drawer.
-
Close the cash drawer.
-
Click OK in the notification prompt.
The till is open.
Remove a Till from a Register
Removing a till is performed only in the till accountability mode of operation in which a till is assigned to a specific cashier. When a cashier who has been assigned to a specific till logs out of the register, the system may prompt to remove the till.
This option allows a cashier to physically remove a till from a register so that it can be temporarily stored or reconciled at a different register. When a till is removed, reconciliation is not required. Another till may be attached to the register immediately.
-
Click Remove Till or Remove Cash Drawer Till.
Note:
The name of the option depends upon the configuration of your system.
-
Select the cash drawer:
-
Click the cash drawer.
-
Use the up and down arrows to highlight the cash drawer, then press the Spacebar.
-
-
Click OK.
Xstore Point of Service asks whether to remove the till. Continue with Step 6.
-
Scan the cash drawer.
Xstore Point of Service asks whether to remove the till.
-
Click Yes.
The cash drawer opens.
-
Remove the till.
-
Click OK after you remove the till.
-
Close the cash drawer.
The till removal process is complete.
Perform a Close Count
The Close Count function provides the capability to declare final amounts for all the tender groups when a till is closed at any time. The system displays the values for each group in the System Amount column and any overages or shortages are indicated in the Over/Short column on the Close Count screen (if your system is configured to display them). If any of the tender groups are not in balance when an attempt is made to close a till, the system displays a warning message indicating which groups are out of balance. You may decide to accept the differences or to correct them before final closing.
To perform a close count:
-
Click Count Till.
The Count Summary screen displays, and the cash drawer opens.
-
Count the cash tenders:
-
Click the cash tender to count.
-
Click Count Selected.
A list of currency denominations opens.
-
Count a denomination currency.
-
Click the denomination in the View Port.
-
Enter the count of the currency denomination in the Focus Bar and press Enter.
-
Click Summary.
Xstore Point of Service returns to the tender list
-
-
If necessary, count the credit card tender:
-
Click to select Credit Card.
-
Click Count Selected.
Xstore Point of Service prompts for the credit card tender count.
-
Enter the number of credit card tender counts and press Enter.
Xstore Point of Service prompts for the amount of credit card tenders.
-
Enter the total amount of all credit card tenders and press Enter.
-
Click Summary.
Xstore Point of Service returns to the tender list.
-
-
If necessary, count the check tender:
-
Click to select Check.
-
Click Count Selected.
Xstore Point of Service prompts for a check serial number.
-
Enter the serial number for the check and press Enter.
Xstore Point of Service prompts for the amount of the check.
-
Enter the amount of the check and press Enter.
-
Click Summary.
Xstore Point of Service returns to the tender list.
-
-
If necessary, count the other tenders:
-
Click Counting Complete when all counts are completed.
Note:
Check the Over/Short column to see if your till is balanced with the system values for each tender type.
-
If the cash amount matches, the system prompts to confirm the amount for all cash currencies you entered and closes the register after you acknowledge the system amount. Continue with Step 8.
-
If the currency amounts do not match, the system displays a prompt to either recount the till or to accept the difference. Continue with Step 9.
-
-
Click Yes.
The count is complete, and the till can be removed from the register. See Remove a Till from a Register.
-
Do one of the following:
-
Click Yes to complete the count.
The till can be removed from the register. See Remove a Till from a Register
-
Click No to return to the count screen. Perform Steps 3, 4, 5, or 6 as necessary.
-
Reconcile a Till
Depending upon the configuration of your system, till reconciliation may be performed separately from the close process.
To perform a till reconciliation:
-
Click Reconcile Register.
A list of registers opens.
-
Select the register to count:
-
Click the register.
-
Use the up and down arrows to highlight the register, then press the Spacebar.
-
-
Click OK.
A confirmation prompt opens.
-
Click Yes.
-
Count the cash tenders:
-
Click the cash tender to count.
-
Click Count Selected.
A list of currency denominations opens.
-
Count a denomination currency.
-
Click the denomination in the View Port.
-
Enter the count of the currency denomination in the Focus Bar and press Enter.
-
Click Summary.
Xstore Point of Service returns to the tender list
-
-
If necessary, count the credit card tender:
-
Click to select Credit Card.
-
Click Count Selected.
Xstore Point of Service prompts for the credit card tender count.
-
Enter the number of credit card tender counts and press Enter.
Xstore Point of Service prompts for the amount of credit card tenders.
-
Enter the total amount of all credit card tenders and press Enter.
-
Click Summary.
Xstore Point of Service returns to the tender list.
-
-
If necessary, count the check tender:
-
Click to select Check.
-
Click Count Selected.
Xstore Point of Service prompts for a check serial number.
-
Enter the serial number for the check and press Enter.
Xstore Point of Service prompts for the amount of the check.
-
Enter the amount of the check and press Enter.
-
Click Summary.
Xstore Point of Service returns to the tender list.
-
-
If necessary, count the other tenders:
-
Click Counting Complete when all counts are completed.
Note:
Check the Over/Short column to see if your till is balanced with the system values for each tender type.
-
If the cash amount matches, the system prompts to confirm the amount for all cash currencies you entered and closes the register after you acknowledge the system amount. Continue with Step 11.
-
If the currency amounts do not match, the system displays a prompt to either recount the till or to accept the difference. Continue with Step 12.
-
-
Click Yes.
Continue with Step 13.
-
Do one of the following:
-
If necessary, select the deposit amount:
-
Click Accept Deposit to accept the suggested amount.
The register closes. Close receipts may print. Continue with Step 15.
-
Click Change Deposit to enter a new deposit amount.
Xstore Point of Service prompts for a new deposit amount. Continue with Step 14.
-
Click Deposit Calculator to calculate a new deposit amount.
Xstore Point of Service displays a denomination count screen that can be used as a calculator (see Step 6). Enter the count for each denomination. A running total at the bottom of the screen is updated as you count the cash amount to be deposited.
-
-
Enter the new deposit amount and press Enter.
-
Close the cash drawer.
The close is complete.
Foreign Currency Maintenance
If permitted by your store's policy, you can edit the currency exchange rate for the foreign currencies that are accepted as tenders for sale transactions. Since some currency rates fluctuate frequently, this feature allows you to edit the exchange rate as often as necessary.
Note:
Your system's configuration may make Foreign Currency Maintenance available from a different location than described below.
To perform foreign currency maintenance:
-
Click Foreign Currency Maint.
-
Log In to Oracle Retail Xstore Point of Service if necessary.
-
Select the currency to change:
-
Click the currency.
-
Use the up and down arrows to highlight the tender, then press the Spacebar.
-
-
Click OK.
A Currency Exchange window opens, showing information about the currency.
-
Enter the new exchange rate:
-
New Exchange Rate - The new exchange rate for the currency.
-
Print as Inverted - Allows the use of 1/n value of the exchange rate in the receipts.
-
Comments - Additional information about the reason for the change to the exchange rate.
-
-
Click Save New Rate.
A confirmation prompt opens.
-
Click Yes.
Foreign currency transactions use the new exchange rate.
