38 Local Order Maintenance
A Local Order uses inventory from the local store inventory only, that is from stock in the store/on hand.
After a Local Order Maintenance account has been created via Extended Transactions menu on the Sale screen, an associate can search for a Local Order, view a Local Order, pick/reserve the order, add and view comments.
Note:
Refer to Creating a New Local Order for information about setting up these orders at the POS.
Local Inventory Orders as an account type, has been added to the current report, Customer Account Activity Report.
Figure 38-1 Customer Account Activity Report
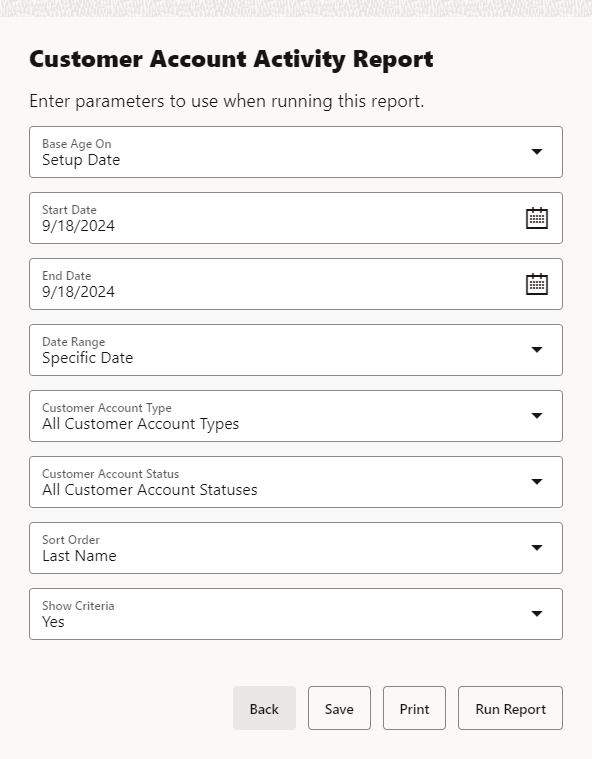
Run the Customer Account Activity Report and filter on Local Orders in the Customer Account Type drop-down to get a report on the store's Local Orders. In the Customer Account Status field you can further filter to see all Local Orders that have not been paid by the tender type, Pay By Link.
Note:
Refer to the Oracle Retail Xstore Point of Service Reports Guide for information about this report.
This chapter covers the following topics:
Accessing Local Order Maintenance
-
From Global Navigation, select Extended Transactions.
-
Select Local Order Maintenance from the Customer menu. See Figure 22-3.
-
Oracle Retail Xstore POS displays the Local Inventory Order Search form, prompting for search criteria.
Figure 38-2 Local Order Search Form
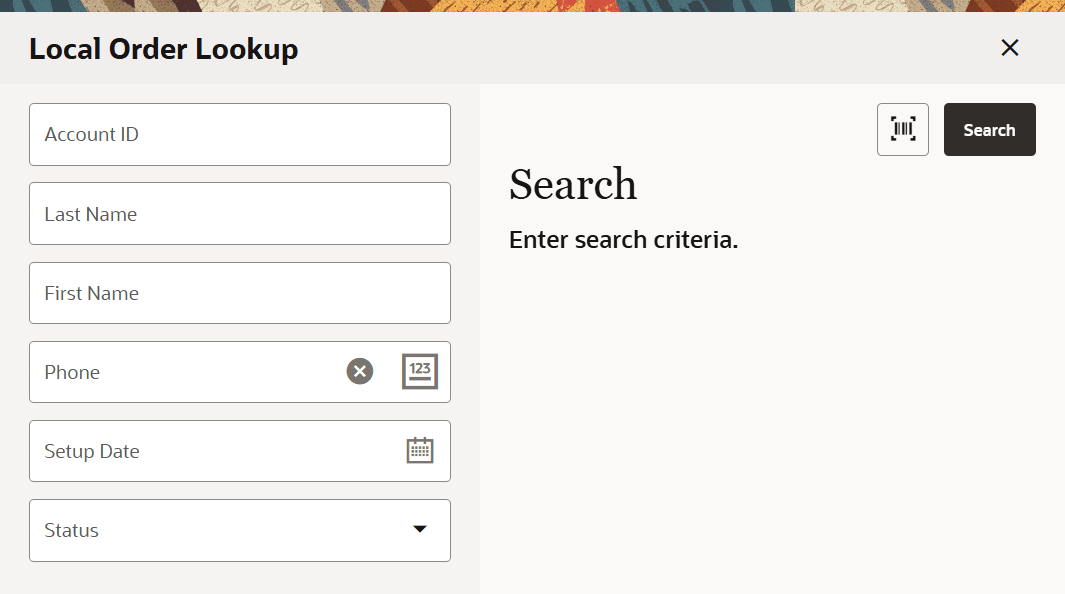
Enter the criteria you want to use for finding an order record and select Process.
-
If you enter a Local Inventory Order ID, Oracle Retail Xstore POS displays that Local Inventory Order record if the ID exists and if it is unique.
-
Your search criteria may result in multiple records being found. Your system may also be set up to display the accounts list even when only one record is found. You must select the record you want from the list.
Figure 38-3 Local Inventory Order Search List

-
Oracle Retail Xstore POS displays the Local Inventory Order screen for the selected record.
Local Order Maintenance
Figure 38-4 Local Order Maintenance Screen
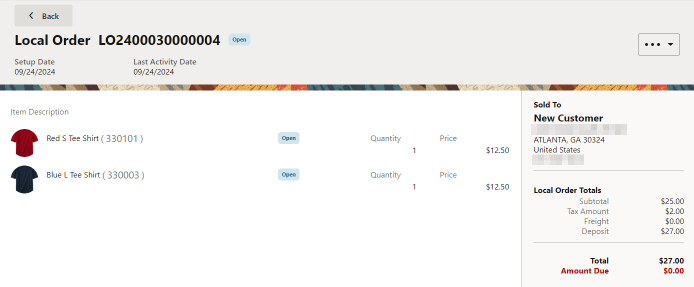
The Local Order Maintenance screen displays the following information:
-
Left Panel
-
A picture of the item (if available).
-
Item Description: The item description.
-
Item ID: The item identifier.
-
Status: The status of the item (Open, Received, Picked Up, Cancelled).
-
Quantity: The item quantity.
-
Price: The extended price for the item (Price times Quantity).
-
-
Right Panel
-
Sold To.
-
Sold To: The purchasing customer's name and address information.
-
Company: The purchasing customer's company, if applicable.
-
Address: The purchasing customer's address.
-
Phone: The purchasing customer's telephone number(s).
-
-
Local Order Totals
-
Subtotal - The order subtotal (the shipping fee amount is not included in the subtotal).
-
Tax Amount - The tax on the order.
-
Freight - The freight cost associated with the order.
-
Deposit - The amount of deposit, if any.
-
Total - The total for the order (the shipping fee amount is included in the total).
-
Amount Due - The amount due for the order.
-
-
Each area contains specific information about the customer's order account.
-
Header: Order Information: Shows the Header information for the Local Inventory account.
-
Right Panel: Shows the customer and item information for the Local Inventory account.
-
Add//View Comments: Enter or view any comments associated with the Local Order account.
Header: Order Information
Figure 38-5 Local Order Header Area

The header shows the activity information for the account and contains the following information:
-
Account ID: The local order identifier.
- 6
-
Status - The current order status : New, Ready for Pickup, Open, Awaiting Payment, Void, and Closed.
-
Setup Date: The date the order was made.
-
Last Activity Date: Date of the most-recent activity on the account
-
Overflow Menu Options include:
Right Panel
The right panel, as shown above, contains the following information:
Right Panel: Customer Information
The customer information area displays:
-
Sold To: The purchasing customer's name and address information.
-
Company: The purchasing customer's company, if applicable.
-
Address: The purchasing customer's address.
-
Phone: The purchasing customer's telephone number(s).
Right Panel: Order Totals
The order totals information displays:
-
Subtotal: The order subtotal (the shipping fee amount is not included in the subtotal).
-
Tax Amount: The tax on the order.
-
Total: The total for the order (the shipping fee amount is included in the total).
-
Balance Due: The amount due for the order.
Local Order Activity History
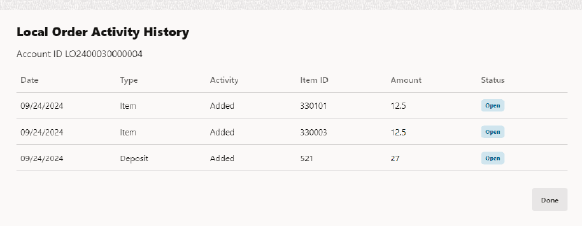
Figure 38-6 Local Order Activity History
-
Date: The date the action took place..
-
Type: The type of line item ( item, fee, or credit) that the activity is being performed on.
-
Activity: The action performed on the activity.
-
Item ID: The item identifier.
-
Status: The status of the item (Open, Received, Picked Up, Cancelled).
-
A: The extended price for the item (Price times Quantity).
Cancel an Order
To cancel a Local order:
-
Open a Local Order, see Create a Local Order..
-
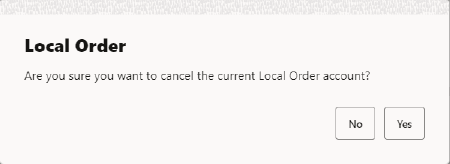
Indicate whether to cancel the Local Order:
Figure 38-7 Cancel Order
-
Select Yes to cancel the Local Order.
The Local Order is canceled and the refund amount is applied to the transaction.
-
Select No to return to the Local Order without canceling it.
-
-
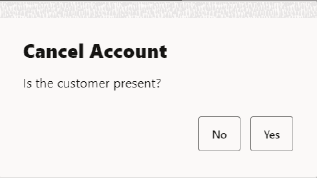
A confirmation prompt opens.
Figure 38-8 Customer Present Cancel Layaway
-
Select Yes if the customer is present.
-
Select No if the customer is not present.
-
-
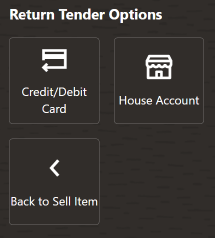
Select Refund. A list or return tender types are shown.
Figure 38-9 Local Order Return Tender Types for Customer Present
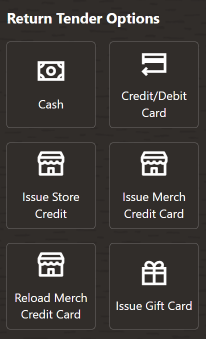
Figure 38-10 Local Order Return Tender Types for Customer Not Present
-
Select a return tender type. The system returns to Sale mode where you can complete the cancel process and process a refund.
Add/View Comments
Note:
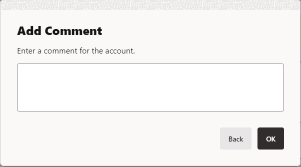
Multiple comments may be entered for a Local Order.To add a comment to a Local Order
-
Select the Overflow Menu and then select Add Comment.
Figure 38-11 Add Comment: Local Orders
-
Enter the comment.
-
Select OK to save the comment, or select Back to close without saving.
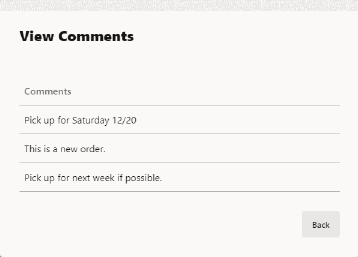
To view comments for a Local Order:
-
Select the Overflow Menu and then select View Comments.
Figure 38-12 View Comments: Local Orders
-
Select Back to close the comments.
Pick/Reserve Local Inventory Order Items
-
Find the Local Inventory Order. See Accessing Local Inventory Order Maintenance.
-
If prompted, enter search criteria to find the Local Inventory Order.
-
If a customer has been associated with the transaction, Xstore POS returns a list of Local Inventory Orders for the customer.
-
-
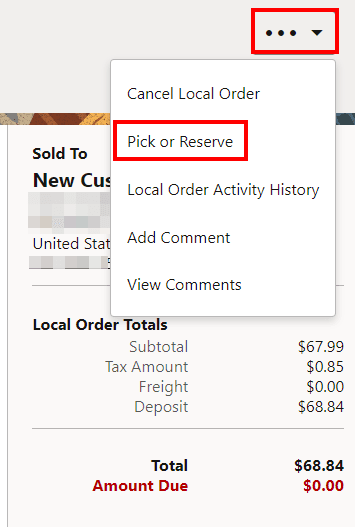
Select a Local Inventory Order from the list. Only paid for open orders can be selected for picking.
Figure 38-13 Local Inventory Order Pick/Reserve Option
-
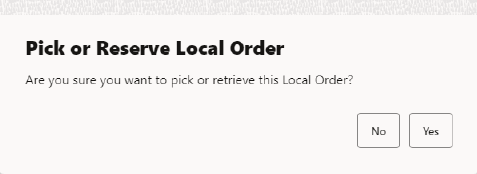
At the Local Inventory Order screen, select Pick /Reserve to fulfill the order.
Figure 38-14 Local Inventory Order Pick Prompt
-
If prompted, select Yes to pick up all the items.
Note:
This prompt only displays when there are multiple Local Inventory Order items.
-
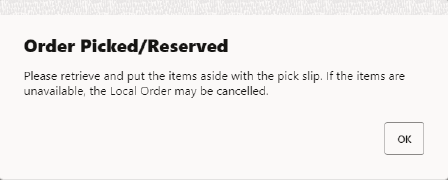
When the Scan Item Configuration is enabled, you are prompted to scan items at pick up to ensure they are the correct items being picked. The items are set to Ready for Pickup status after scanning.
If Xstore POS is not configured to scan items at the pick/reserve process, a pick slip with the items on it will print from the receipt printer. The items/order is marked as Ready for Pickup.
Figure 38-15 Local Inventory Order Picked
-
Select OK.